Inazuma Map Guide
✉ Send your thoughts in our Genshin 6.4 Patch Survey!
★ Exclusive: Dive back in time with the Meta History
◆ Hot: Version 6.4, 6.4 Codes, Linnea, Version 6.5
◆ Builds: Varka, Flins, Skirk, Escoffier
◆ Events: Travelers' Tales, Sightseeing With Friends
◆ Endgame: Spiral Abyss (March 2026)
Inazuma is the Electro nation that was released in Genshin Impact Version 2.0. Learn about how to get to Inazuma, the region's map areas, puzzles, quests and regional features in this Inazuma map guide!
List of Contents
How to Get to Inazuma
Complete Chapter 2: Prologue
To get to Inazuma, you need to reach Adventure Rank 30 or above, and complete the Chapter 2: Prologue, which unlocks after the final Liyue Archon Quests. The Chapter 2: Act 1 Archon Quest will take you to the new Inazuma Region then!
You Cannot use Ice Bridge or Waveriders
Prior to completing the Chapter 2 Archon Quests, players are not able to create ice bridges or use waveriders to get to Inazuma from other regions.
Inazuma's Map and Locations
Full Map of Inazuma
| ・Click on the arrow in the upper left corner to access our sidebar to check all other pins and even search for individual pins. ・Pins checked off the map will reflect in the list below. We encourage users to sign up and log in to save your progress with the map. |
| Location Guides | |
|---|---|
 Electroculus Electroculus |
 Shrine of Depths Shrine of Depths |
Inazuma Location Guides
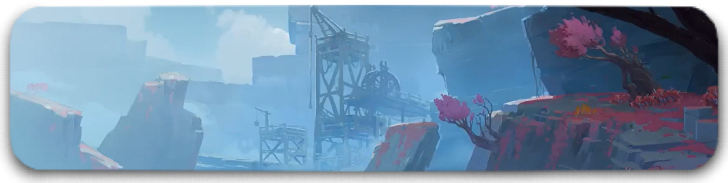
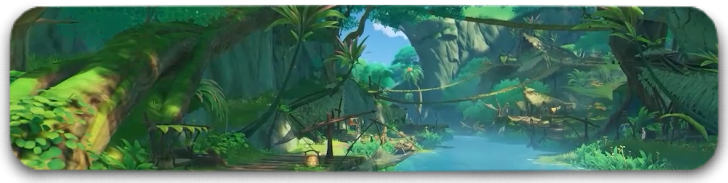
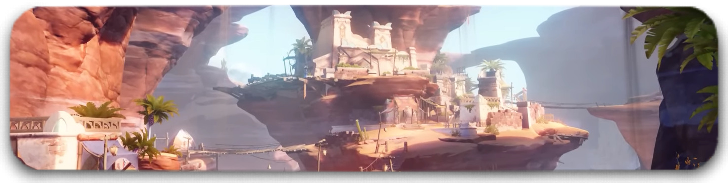
There are a total of 6 different islands in Inazuma for players to explore! Which includes the new Version 2.2 area, Tsurumi Island.
| Inazuma Area Guides | |
|---|---|
| Narukami Island | Kannazuka |
| Yashiori Island | Seirai Island |
| Tsurumi Island | Watatsumi Island |
Inazuma's Domains
Material and Artifact Domains
| Domain | Domain Drops |
|---|---|
| Court of Flowing Sand | |
| Violet Court | |
| Momiji-Dyed Court | |
| Slumbering Court | |
| Tenshukaku | |
| End of the Oneiric Euthymia |
One-Time Puzzle Domains
| List of Domain Guides | ||
|---|---|---|
 The Empty Boat of A Thousand Gates The Empty Boat of A Thousand Gates |
 Shakkei Pavilion Shakkei Pavilion |
|
 Formation Estate Formation Estate |
 Palace in a Pool Palace in a Pool |
|
 Moshiri Kara Moshiri Kara |
||
Inazuma's Regional Features
All Inazuma Features
| Click to jump to a section! | ||
|---|---|---|
| Sakura Tree | Electrogranum | Balethunder |
| Thunder Sphere | Thunder Barrier | Electro Seelie |
| Stone Piles | Phase Gates | Tsurumi Fog |
The Sacred Sakura Tree

The Sacred Sakura Tree is located on top of the Grand Narukami Shrine. If you increase the Sacred Sakura's Favor Level, you will be rewarded with valuable items and stronger Electrograna!
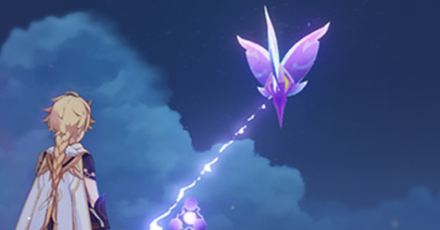
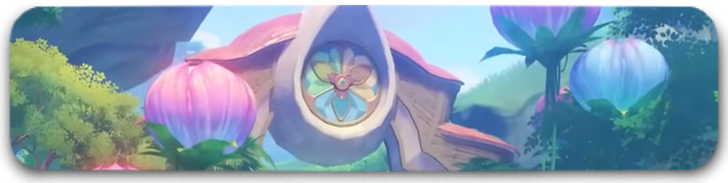
Electrogranum Spirits

Electrograna are spirits used to solve Inazuma puzzles and pass through barriers! Upon summoning an Electrogranum, they only accompany you for a set period of time. Learn how to summon and how to use Electrograna in our guide:
The Balethunder Status Effect

Balethunder is a status effect in some areas of Inazuma. Avoid taking damage from Balethunder with Electrograna and Thunderwood!
Thunder Spheres
How to use the Thunder Sphere
Use an Electrogranum or be inflicted with the Electro Element to move swiftly towards Thunder Spheres. This feature is great for exploring Inazuma, and can appear Inazuma time trials!
Thunder Barriers

Thunder Barriers are Electro domes found in Inazuma. You can only pass through Thunder Barriers with Electrograna stronger than the Barrier's level!
| Thunder Barrier Levels | ||
|---|---|---|
 Level 1 Level 1 |
 Level 2 Level 2 |
 Level 3 Level 3 |
Inazuma's Electro Seelie

They're faster than other Seelie!
Electro Seelie is Inazuma's Seelie variant. They're faster than other Seelie in Mondstadt and Liyue, so keep an eye on them!
Breakable Electro Stone Pile

A new type of breakable stone piles can be found in Inazuma. Unlike other stone piles, these rocks will be infused with the Electro element.
How to Break Electro Stone Piles
Only some Elemental Reactions can effectively destroy the Electro Stone Piles. With the exception of Electro and Hydro, you can use any element to break the Electro Stone Piles.
Phase Gates

You can find Phase Gates that can help you travel faster around Watatsumi and Seirai Island.
Tsurumi Island Fog

Tsurumi Island is surrounded by fog and mist when you first arrive. Staying in the fog for more than 10 seconds will turn your screen foggy and teleport you back to a waypoint!
How to Move Through the Fog and Mist
| Features for Tsurumi Island's Fog | |
|---|---|
 Specific Paths |
 Stormstones |
Use Specific Paths and Stormstones to light up Tsurumi Island areas and avoid getting lost in the fog.
Clear the Mist & Fog on Tsurumi Island
Inazuma Puzzles and Devices
All Inazuma Puzzles
| Click to jump to a section! | ||
|---|---|---|
| Electro Stones | Electro Probes | Electro Cubes |
| Yashiori Island | Bake-Danuki | Pressure Plates |
| Electric Lamps | Watatsumi Pillars | Thunderbird |
Electro Stone Puzzles
| Electro Mechanism Stones | ||
|---|---|---|
 Discharge Discharge |
 Relay Relay |
 Cumulation Cumulation |
To solve Electro Stone Puzzles, you have to activate the Discharge Stone and let the current run through Relay Stones and onto the Cumulation Stone. For a full walkthrough, take a look at our guide!
Lightning Strike Probe

The Lightning Strike Probe points in the direction of an Electro source. If you manage to match it with the direction indicate on its base, you'll likely get rewards!
View Lightning Strike Probe Guide
Cube Pattern Puzzles

To solve Cube Pattern puzzles, you have to attack Cubes until their symbols change to match the correct patterns! Learn more about the puzzle and its locations here:
Yashiori Island Puzzles
| Yashiori Puzzle Devices | |
|---|---|
 Sacred Stone Mound |
 Thunderbearer Mirror |
To solve this Yashiori Island Puzzle, you have to hit the Sacred Stone Mound to fire a bolt at the Thunderbearer Mirror. You'll even have to adjust the Sacred Stone Mounds in some situations! Learn all puzzle info and locations here:
View Yashiori Island Puzzle Guide
Bake-Danuki Puzzles

Bake-Danuki are adorable creatures that can shapeshift into other objects! The Bake-Danuki and its mysteries may have rewards for us in store! Read more about the Bake-Danuki here:
Pressure Plate Puzzles

Throughout Seirai Island, you can find these Pressure Plate puzzles that reward you with Treasure Chests and access to locked areas upon completion.
How to Solve All Pressure Plate Puzzles
Electric Lamp Puzzles

Throughout Watatsumi Island, you can find Electric Lamps that you can light up with an Electrogranum. Light up all the Electric Lamps in a certain area to reveal a Treasure Chest and get rewards!
Mysterious Watatsumi Island Pillars

These Mysterious Pillars are scattered all over Watatsumi Island. Interact with the pillars to change the state of nearby objects or reveal something hidden in the surrounding area!
Tsurumi Island Thunderbird
| Thunderbird | |
|---|---|
 Thunderbird Statue |
 Thunderbird Wall |
The Thunderbird Statues and Walls can be found around Tsurumi Island. Use the Peculiar Pinion gadget from the Octave of the Maushiro Quest and unlock access to locked areas and treasure!
Inazuma Treasure Chests
Interactive Treasure Chest Map
Remarkable Chests

Remarkable Chests are a type of chests that can only be found on one of Inazuma's islands, the Tsurumi Island. These chests contain Furnishing and Furnishing Set Blueprints, and only a certain number of these chests spawn per day.
Remarkable Chest Location Guide
Items Found in Inazuma
Inazuma's Regional Items
Inazuma's Weapons
| Weapon | How to Get |
|---|---|
|
|
Obtain from the Akitsu Kimodameshi Event in Version 3.3. No longer available |
|
|
Reward from Kaedehara Kazuha's Story Quest, A Strange and Friendless Road. Click here for the walkthrough! |
|
|
Purchased from Inazuma's Fishing Association. |
|
|
Complete Orobashi's Legacy for the Weapon Diagram. Click here for the walkthrough! |
|
|
Collect 3 ''Keys to Some Place'' and open the Tatarasuna Gate for the Weapon Diagram. Click here for the walkthrough! |
|
|
Complete Yougou's Cleansing for the Weapon Diagram. Click here for the walkthrough! |
|
|
Complete The Farmer's Treasure for the Weapon Diagram. Click here for the walkthrough! |
|
|
Obtain the Weapon Diagram from Takashi's Chests with Mysterious Conches. Click here for the walkthrough! |
Inazuma's Quests
All Quest Types in Inazuma
| Click to jump to Quests! | |
|---|---|
| Archon Quests | Story Quests |
| Hangout Events | World Quests |
Archon Quests in Inazuma
| Quest | How to Unlock |
|---|---|
 Ch. 2: Act I Ch. 2: Act I |
• Reach Adventure Rank 30+ • Complete Chapter 2: Prologue |
| Ch. 2: Act II |
• Reach Adventure Rank 30+ • Complete Chapter 2: Act I • Complete Ayaka's Story Quest • Complete Yoimiya's Story Quest |
| Ch. 2: Act III |
• Reach Adventure Rank 30+ • Complete Chapter 2: Act II |
Story Quests in Inazuma
| Quest | How to Unlock |
|---|---|
 Ayaka Quest Ayaka Quest |
• Reach Adventure Rank 30+ • Complete Chapter 2: Act 1 • Complete ''A Flower Blooms in Prison'' |
 Yoimiya Quest Yoimiya Quest |
• Reach Adventure Rank 30+ • Complete Chapter 2: Act 1 • Complete ''A Flower Blooms in Prison'' |
 Raiden Quest 1 Raiden Quest 1 |
• Reach Adventure Rank 30+ • Complete Chapter 2: Act 3 |
| Raiden Quest 2 |
• Reach Adventure Rank 40+ • Complete Raiden's Story Quest Act 1 • Complete Chapter 2: Act 3 |
 Kokomi Quest Kokomi Quest |
• Reach Adventure Rank 30+ • Complete Chapter 2: Act 3 • Complete Raiden's Story Quest Act 1 |
 Itto Quest Itto Quest |
• Reach Adventure Rank 30+ • Complete Chapter 2: Act 3 • Complete Kokomi's Story Quest |
 Yae Miko Quest Yae Miko Quest |
• Reach Adventure Rank 40+ • Complete Chapter 2: Act 3 • Complete Raiden's Story Quest Act 2 |
 Ayato Quest Ayato Quest |
• Reach Adventure Rank 40+ • Complete Chapter 2: Act 3 • Complete Raiden's Story Quest Act 1 • Complete the World Quest Chisato's Letter |
 Kazuha Quest Kazuha Quest |
• Reach Adventure Rank 40+ • Complete Chapter 2: Act 3 • Complete Raiden's Story Quest Act 1 |
Hangout Events in Inazuma
| Quest | How to Unlock |
|---|---|
 Sayu Hangout Sayu Hangout |
• Reach Adventure Rank 30+ • Complete Chapter 2: Act 3 |
 Thoma Hangout Thoma Hangout |
• Reach Adventure Rank 30+ • Complete Chapter 2: Act 3 |
 Gorou Hangout Gorou Hangout |
• Reach Adventure Rank 30+ • Complete Kokomi's Story Quest |
 Shinobu Hangout Shinobu Hangout |
• Reach Adventure Rank 40+ • Complete Arataki Itto's Story Quest • Complete the Interlude Chapter: Act 2 |
 Heizou Hangout Heizou Hangout |
• Reach Adventure Rank 40+ • Complete Arataki Itto's Story Quest • Complete Raiden's Story Quest Act 2 • Complete Chapter 2: Act 3 |
World Quests in Inazuma
All Quest Series
 Cleansing Ritual
 Gourmet Supremos
 Tatara Tales
 Orobashi's Legacy
 Moon-Bathed Deep
 Seirai Stormchasers
 Neko is a Cat
 Through the Mists
One-Time World Quests
Inazuma's Characters
All Characters from Inazuma
| Inazuma Character Guides | ||
|---|---|---|
|
|
|
|
|
|
|
|
|
|
|
|
|
|
|
|
|
|
|
|
|
|
||
Inazuma Achievements
Paimon's Lucky Day! Achievement
| Achievement | Rank | Primogem Reward |
 Paimon's Lucky Day! Paimon's Lucky Day!
|
★ | 5 Primogems |
|---|---|---|---|
| Objective : Draw a "Great Fortune" fortune slip at the Grand Narukami Shrine. | |||
Drawing a Great Fortune
slip in the Grand Narukami Shrine will give you the Paimon's Lucky Day! Achievement, which gives 5 Primogems!
Just My Luck... Achievement
| Achievement | Rank | Primogem Reward |
Just My Luck...
|
★ | 5 Primogems |
|---|---|---|---|
| Objective : Draw a "Great Curse" slip at the Grand Narukami Shrine. | |||
Drawing a Great Curse
slip in the Grand Narukami Shrine will give you the Just My Luck... Achievement, which gives 5 Primogems!
Iwakura Out Achievement
| Achievement | Rank | Primogem Reward |
Iwakura Out
|
★ | 5 Primogems |
|---|---|---|---|
| Objective : Witness the end of the Iwakura Clan. | |||
Defeating all the named Iwakura Clan samurai will give you the Iwakura Out Achievement, which gives 5 Primogems!
Who Let the Dogs Out Achievement
| Achievement | Rank | Primogem Reward |
Who Let the Dogs Out
|
★ | 5 Primogems |
|---|---|---|---|
| Objective : Set Toratarou free. | |||
Setting Toratarou free from his cage in Jinren Island will give you the Who Let the Dogs Out Achievement, which gives 5 Primogems!
Continental Explorer: Land of Surging Thunder Achievements
| Achievement | Rank | Primogem Reward |
Continental Explorer: Land of Surging Thunder (I)
|
★ | 5 Primogems |
|---|---|---|---|
| Objective : Light up the Narukami Island, Kannazuka, and Yashiori Island areas of the Inazuma map. |
Continental Explorer: Land of Surging Thunder (II)
|
★ | 5 Primogems |
| Objective : Light up the Watatsumi Island and Seirai Island areas of the Inazuma map. |
Continental Explorer: Tsurumi Island
|
★ | 5 Primogems |
| Objective : Light up the Tsurumi Island map. | |||
Lighting up major map areas in Inazuma will give you the Continental Explorer: Land of Surging Thunder Achievements, which give 5 Primogems each!
Thunderbolting Across the Land Achievements
| Achievement | Rank | Primogem Reward |
Thunderbolting Across the Land (I)
|
★ | 5 Primogems |
|---|---|---|---|
| Objective : Unlock all Teleport Waypoints in the Narukami Island, Kannazuka, and Yashiori Island areas in Inazuma. |
Thunderbolting Across the Land (II)
|
★ | 5 Primogems |
| Objective : Unlock all Teleport Waypoints in the Watatsumi Island and Seirai Island areas of Inazuma. |
Fog's Edge
|
★ | 5 Primogems |
| Objective : Unlock all Teleport Waypoints in Tsurumi Island. | |||
Unlocking all waypoints in Inazuma will give you the Thunderbolting Across the Land Achievements, which give 5 Primogems each!
Sanctuary Pilgrim: Inazuma Tenryou Achievements
| Achievement | Rank | Primogem Reward |
Sanctuary Pilgrim: Inazuma Tenryou (I)
|
★ | 10 Primogems |
|---|---|---|---|
| Objective : Unlock all Shrines of Depths in the Narukami Island, Kannazuka, and Yashiori Island areas of Inazuma. |
Sanctuary Pilgrim: Inazuma Tenryou (II)
|
★ | 10 Primogems |
| Objective : Unlock all Shrines of Depths in the Watatsumi Island and Seirai Island areas of the map. |
Sanctuary Pilgrim: Tsurumi Island
|
★ | 5 Primogems |
| Objective : Unlock all Shrines of Depths on Tsurumi Island. | |||
Unlocking all Shrines of Depths in Inazuma will give you the Sanctuary Pilgrim: Inazuma Tenryou Achievements, which give 10 Primogems each!
All Inazuma Shrine of Depths Locations
Naku Weed Whacker Achievements
| Achievement | Rank | Primogem Reward |
Naku Weed Whacker (I)
|
★★★ | 5 Primogems |
|---|---|---|---|
| Objective : Follow 10 Electro Seelie on Narukami Island, Kannazuka, and Yashiori Island in Inazuma |
Naku Weed Whacker (II)
|
★★★ | 5 Primogems |
| Objective : Follow 4 Electro Seelie on Watatsumi Island and Seirai Island in Inazuma. |
Flashes in the Night
|
★ | 5 Primogems |
| Objective : Follow 6 Electro Seelie on Tsurumi Island. | |||
Following a certain amount of Electro Seelies and getting them to their Electro Courts will give you the Naku Weed Whacker Achievements, which gives you a proportionate amount of Primogems based on how many you have followed!
Lights Will Guide You Home Achievements
| Achievement | Rank | Primogem Reward |
Lights Will Guide You Home (I)
|
★★★ | 5 Primogems |
|---|---|---|---|
| Objective : Follow 4 Seelie to their Seelie Courts on Narukami Island, Kannazuka, and Yashiori Island in Inazuma. |
Lights Will Guide You Home (II)
|
★ | 5 Primogems |
| Objective : Follow 6 Seelie to their Seelie Courts on Watatsumi Island and Seirai Island in Inazuma. |
Foggy Guidance
|
★ | 5 Primogems |
| Objective : Follow 6 Seelie on Tsurumi Island to their Seelie Courts. | |||
Following a certain amount of Seelies and getting them to their Seelie Courts will give you the Lights Will Guide You Home Achievements, which gives you a proportionate amount of Primogems based on how many you have followed!
Lightning-Riding Treasure Hunter Achievements
| Achievement | Rank | Primogem Reward |
Lightning-Riding Treasure Hunter (I)
|
★★★ | 5 Primogems |
|---|---|---|---|
| Objective : Open 100 chests in Narukami Island, Kannazuka, and Yashiori Island in Inazuma. |
Lightning-Riding Treasure Hunter (II)
|
★★★ | 5 Primogems |
| Objective : Open 40 Chests on Watatsumi Island and Seirai Island in Inazuma. |
Lost Treasure Hunter
|
★ | 10 Primogems |
| Objective : Open 60 chests on Tsurumi Island. | |||
Opening a certain amount of Treasure Chests in Inazuma will give you the Lightning-Riding Treasure Hunter Achievements, which gives you a proportionate amount of Primogems based on how many you have opened!
Lightning-Riding Adventurer Achievements
| Achievement | Rank | Primogem Reward |
Lightning-Riding Adventurer (I)
|
★★★ | 5 Primogems |
|---|---|---|---|
| Objective : Complete 6 Open World mechanism-activated Time Trial Challenges on Narukami Island, Kannazuka, and Yashiori Island in Inazuma. |
Lightning-Riding Adventurer (II)
|
★★★ | 5 Primogems |
| Objective : Complete 6 Open World mechanism-activated Time Trial Challenges on Watatsumi Island and Seirai Island in Inazuma. |
Lost Adventurer
|
★ | 5 Primogems |
| Objective : Complete 4 Open World mechanism-activated Time Trial Challenges on Tsurumi Island. | |||
Completing a certain amount of Open-World Mechanisms (the red challenge mechanisms scattered in maps) in Inazuma will give you the Lightning-Riding Treasure Adventurer Achievements, which gives you a proportionate amount of Primogems based on how many you have completed!
Eternal Thunder Achievement
| Achievement | Rank | Primogem Reward |
Eternal Thunder
|
★ | 20 Primogems |
|---|---|---|---|
| Objective : Upgrade the Statues of The Seven in Inazuma to their maximum level. | |||
Upgrading the Inazuman Statues of the Seven to their maximum level gives you the Eternal Thunder Achievement, which gives you 20 Primogems!
Genshin Impact Related Guides
Map Guides for Teyvat Nations
| List of Region Map Guides | |
|---|---|
 Mondstadt Map Guide Mondstadt Map Guide
|
 Liyue Map Guide Liyue Map Guide |
 Inazuma Map Guide Inazuma Map Guide |
 Sumeru Map Guide Sumeru Map Guide |
 Fontaine Map Guide Fontaine Map Guide |
 Natlan Map Guide Natlan Map Guide |
 Nod-Krai Map Guide Nod-Krai Map Guide |
|
Map Guides for Other Areas
| List of Map Guides | |
|---|---|
 Enkanomiya Enkanomiya |
 Golden Archipelago Golden Archipelago |
 Dragonspine Dragonspine |
 The Chasm The Chasm |
 Sumeru Rainforest Sumeru Rainforest |
 Sumeru Desert Sumeru Desert |
 Veluriyam Mirage Veluriyam Mirage |
 Chenyu Vale Chenyu Vale |
 Simulanka Simulanka |
 Sacred City of Tollan Sacred City of Tollan |
 Easybreeze Holiday Resort Easybreeze Holiday Resort |
|
Oculi Location Guides
| Teyvat Oculus Guides | |||
|---|---|---|---|
 All Oculi All Oculi |
 Anemoculus Anemoculus |
 Geoculus Geoculus |
Electroculus |
 Dendroculus Dendroculus |
 Hydroculus Hydroculus |
 Pyroculus Pyroculus |
 Lunoculus Lunoculus |
Other Oculus Map Guides
| Dendroculus Guides | |
|---|---|
| Rainforest Dendroculus | All Desert Dendroculus |
| Hadramaveth Dendroculus | Girdle of the Sands Dendroculus |
Comment
Author

Inazuma Map Guide


Rankings
Gaming News

![Monster Hunter Stories 3 Review [First Impressions] | Simply Rejuvenating](https://img.game8.co/4438641/2a31b7702bd70e78ec8efd24661dacda.jpeg/show)
![Marathon Cryo Archive Map Teased as [REDACTED] on Selection Screen](https://img.game8.co/4442236/6357203e58172f6de57f1991e7c39b22.png/thumb)
![The Liar Princess and the Blind Prince Review [PC] | Lovely to Look at but Tedious to Play](https://img.game8.co/4442586/8d95f5faf05780f1765ce7e0938bd825.jpeg/thumb)

Popular Games

Genshin Impact Walkthrough & Guides Wiki
Umamusume: Pretty Derby Walkthrough & Guides Wiki
Pokemon Pokopia Walkthrough & Guides Wiki
Honkai: Star Rail Walkthrough & Guides Wiki
Monster Hunter Stories 3: Twisted Reflection Walkthrough & Guides Wiki
Arknights: Endfield Walkthrough & Guides Wiki
Wuthering Waves Walkthrough & Guides Wiki
Zenless Zone Zero Walkthrough & Guides Wiki
Pokemon TCG Pocket (PTCGP) Strategies & Guides Wiki
Monster Hunter Wilds Walkthrough & Guides Wiki


Recommended Games
Diablo 4: Vessel of Hatred Walkthrough & Guides Wiki
Cyberpunk 2077: Ultimate Edition Walkthrough & Guides Wiki
Fire Emblem Heroes (FEH) Walkthrough & Guides Wiki
Yu-Gi-Oh! Master Duel Walkthrough & Guides Wiki
Super Smash Bros. Ultimate Walkthrough & Guides Wiki
Pokemon Brilliant Diamond and Shining Pearl (BDSP) Walkthrough & Guides Wiki
Elden Ring Shadow of the Erdtree Walkthrough & Guides Wiki
Monster Hunter World Walkthrough & Guides Wiki
The Legend of Zelda: Tears of the Kingdom Walkthrough & Guides Wiki
Persona 3 Reload Walkthrough & Guides Wiki


All rights reserved
Copyright© 2012-2024 HoYoverse — COGNOSPHERE. All Rights Reserved.
The copyrights of videos of games used in our content and other intellectual property rights belong to the provider of the game.
The contents we provide on this site were created personally by members of the Game8 editorial department.
We refuse the right to reuse or repost content taken without our permission such as data or images to other sites.