Sucrose Rating and Best Builds
✉ Send your thoughts in our Genshin 6.4 Patch Survey!
★ Exclusive: Dive back in time with the Meta History
◆ Hot: Version 6.4, Luna 5 Codes
◆ Builds: Varka, Flins, Skirk, Escoffier
◆ Events: Travelers' Tales, He Who Caught the Wind
◆ Future: Linnea, Version 6.5 Luna VI

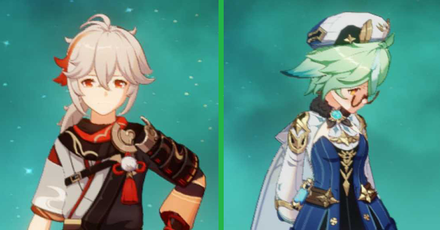
Sucrose is a 4-Star Anemo Catalyst character in Genshin Impact. Learn about Sucrose's build, ascension materials, best weapons, best artifacts, talent priority, skills, teams, and our rating of the character in this build guide!
| Sucrose's Character Guides | |||
|---|---|---|---|
|
|
|
|
|
List of Contents

|
|---|
 under the page title to be notified of more updates!
Sucrose Rating and Info
Character Information
| Sucrose | ||
|---|---|---|
 |
Rating |
|
| Rarity | ||
| Element | ||
| Weapon | ||
| Voice Actors |
Valeria Rodriguez (EN)
Fujita Akane (JP) |
|
Tier List Rankings
| Main DPS | Sub-DPS | Support | Exploration |
|---|---|---|---|
| - |
|
|
|
Character Tier List | Best Characters
Sucrose's Stats
| Stat | Base Value |
|---|---|
| HP | 1991 |
| ATK | 37 |
| DEF | 151 |
| Anemo DMG% | 0% |
| Stat | Max Value |
|---|---|
| HP | 9244 |
| ATK | 170 |
| DEF | 703 |
| Anemo DMG% | 24.0% |
Base Stat Calculations
 | Stats indicated above are obtained from Sucrose's base values. These numbers also exclude the character's equipped weapon, artifacts, talents, or other passive effects that are not innate to the character. |
|---|---|
 | All characters start with 5% CRIT Rate, 50% CRIT DMG, 100% Energy Recharge, 0 Elemental Mastery, 0% Healing Bonus, and 0% Elemental DMG bonus before any additional stats are applied. The table above includes such values. |
 | The Level 20 stats indicated for this character are calculated before their first ascension. |
Sucrose's Ascension and Talent Material Summary
| All Ascension Materials Needed |
|---|
|
|
| All Talent Materials Needed |
|
|
Sucrose's Strengths and Weaknesses
| Strengths | |||
|---|---|---|---|
|
• As a catalyst user, Sucrose is able to apply Anemo with ease, making her an effective on-field driver for Swirl. • Is able to increase the Elemental Mastery of the party through ability usage, making her an extremely formidable support. • Is as effective as her premiere 5-start counterparts if built and played correctly. • C1 gives her more Crowd Control and RES shred opportunities, as well as making her rotations more flexible. |
|||
| Weaknesses | |||
|
• Mechanically intensive to play, requiring the player to understand the fundamentals of her Elemental Infusion to use her effectively. • Long cooldowns with a short duration unless using Sacrificial Fragments or getting her C1 constellation. |
Best Builds for Sucrose
Elemental Mastery Swirl Unit
Sucrose mainly functions as an Elemental Mastery buffer, and the Hexerei buffs for her only serve to further that role.
To that end, she will be building Elemental Mastery stats on her artifacts along with an Elemental Mastery or Energy Recharge weapon to boost her EM stat as far as it can go.
Hexerei Elemental Mastery Buffer
| Best Weapon | |
|---|---|
| Replacement Weapons |
4.
|
| Best Artifacts | |
| Artifact Main Stats | |
| Artifact Sub Stats | Energy Recharge, Elemental Mastery, CRIT Rate, CRIT DMG |
| Sample Teams | Hexerei:
Taser:
Rainbow:
|
This Sucrose build allows you to use Sucrose as an Elemental Mastery Buffer. You want to have Elemental Mastery as much as you have as her buff is reliant on how much she has.
Hexerei Build is relatively the same build.
Sucrose Goal Stat Values
| Stat | Goal Value |
|---|---|
| Elemental Mastery | 800 or above |
| Energy Recharge | 130% ~ 160% |
Most of Sucrose's DMG and utility come from her Elemental Mastery stat, so getting it upwards of 800 is preferred for her swirls to be potent, especially since they will almost always be in effect.
For Burst uptime convenience, Energy Recharge is also one of Sucrose's sought after stats. Getting it to an average of 150% makes for comfortable uptime on her Burst.
Sucrose's Talent Priority
| 1st | 2nd | 3rd |
|---|---|---|
| Elemental Skill | Elemental Burst | Normal Attack |
When building Sucrose's talents, prioritize on leveling up her Elemental Skill as it's her most used talent when she's in your party. Afterwards, level her Elemental Burst as it is the next-in-line Swirl part of her kit.
If you are using Sucrose On-Field as an Anemo driver, leveling her Normal Attacks can be of benefit, but should be saved for last as her Swirls scale with Elemental Mastery regardless.
Best Artifacts for Sucrose
Viridescent Venerer Shredder
Sucrose excels at boosting the team's Elemental Mastery and their DMG while RES shredding opponents, making Viridescent Venerer her best artifact set due to its near-permanent uptime in the hands of Sucrose.
Otherwise, 4-pc. Noblesse Oblige can also suffice if there is already a Viridescent user in the team, or 2-pc. mixes of Viridescent and Noblesse as placeholders.
Best Artifacts Ranked
| Artifact | Artifact Bonuses | |
|---|---|---|
| 1st |
|
2-PC: Anemo DMG Bonus +15% 4-PC: Increases Swirl DMG by 60%. Decreases opponent's Elemental RES to the element infused in the Swirl by 40% for 10s. |
| 2nd |
|
2-PC: Elemental Burst DMG +20%. 4-PC: Using an Elemental Burst increases all party members' ATK by 20% for 12s. This effect cannot stack. |
| 3rd |
|
2-PC: Anemo DMG Bonus +15% |
|
|
2-PC: Energy Recharge +20%. |
Best 4-Star Artifact for Sucrose
| Artifact | Artifact Bonuses |
|---|---|
 Instructor Instructor
|
2-PC: Increases Elemental Mastery by 80. 4-PC: Upon triggering an Elemental Reaction, increases all party members' Elemental Mastery by 120 for 8s. |
List of Artifacts and Set Bonuses
Sucrose Best Weapons
Values EM Weapons
When looking at weapon options for Sucrose, Sunny Morning Sleep-In stands out as its effects particularly aid Sucrose's kit by boosting her Elemental Mastery in multiple ways.
Other weapons like A Thousand Floating Dreams and the 4-star Sacrificial Fragments reach similar effects, with the latter being Sucrose's best 4-star option.
Sucrose Weapons
| Weapon | Weapon Information | |
|---|---|---|
| 1st |
 Sunny Morning Sleep-In Sunny Morning Sleep-In
|
Base ATK: 542 Bonus Stat: Elemental Mastery 265 Skill Effect: Elemental Mastery increases by 120 for 6s after triggering Swirl. Elemental Mastery increases by 96 for 9s after the wielder's Elemental Skill hits an opponent. Elemental Mastery increases by 32 for 30s after the wielder's Elemental Burst hits an opponent. |
| 2nd |
 A Thousand Floating Dreams A Thousand Floating Dreams
|
Base ATK: 542 Bonus Stat: Elemental Mastery 265 Skill Effect: Equipping Character gains buffs based on other party members' elemental type. If their elemental type is the same as the equipping character, Elemental Mastery is increased by 32. If not, the equipping character's elemental DMG Bonus is increased by 10%. Each effect can stack by a maximum of 3. All nearby party members will also gain an additional 40 Elemental Mastery. |
| 3rd |
 Sacrificial Fragments Sacrificial Fragments
|
Base ATK: 454 Bonus Stat: Elemental Mastery 221 Skill Effect: After damaging an opponent with an Elemental Skill, the skill has a 40% chance to end its own CD. Can only occur once every 30s. |
Best Free-to-Play Weapons for Sucrose
| Weapon | Weapon Information |
|---|---|
 Thrilling Tales of Dragon Slayers Thrilling Tales of Dragon Slayers
|
Base ATK: 401 Bonus Stat: HP 35.2% Skill Effect: When switching characters, the new character taking the field has their ATK increased by 24% for 10s. This effect can only occur once every 20s. |
 Mappa Mare Mappa Mare
|
Base ATK: 565 Bonus Stat: Elemental Mastery 110 Skill Effect: Triggering an Elemental reaction grants a 8% Elemental DMG Bonus for 10s. Max 2 stacks. |
All Recommended Weapons for Sucrose
| Recommended Weapons | How to Get |
|---|---|
| Gacha | |
| Gacha | |
| Gacha | |
| Gacha | |
| Gacha | |
| Gacha | |
| Gacha | |
| Battle Pass | |
| Crafted | |
| Gacha | |
| Chests | |
Sucrose Best Team Comp
Flexible Unit
Sucrose can be a flexible character that can be slotted into any teams. She is an excellent Anemo support and grouper, which can be very beneficial to Elemental Reactions.
Notable Teammates
| Character | Explanation |
|---|---|
|
|
Main DPS Flins' benefit a lot from what Sucrose has to offer: EM boost, Grouping, RES Shred with 4pc VV, and can equip TTDS to grant an ATK% buff. |
|
|
Sub-DPS Fischl provides off-field Electro DMG and particle generation. Fischl can quickly apply Electro application on enemies which makes her the premier choice for Taser teams. |
|
|
Sub-DPS Beidou provides AoE offi-field Electro DMG as her Burst bounces from enemies to enemies. Usually paired with Fischl in Taser teams to address her ER Requirement. Do note that Beidou tends to steal Electro-Charged triggers from Sucrose, which can be a DPS loss. |
|
|
Sub-DPS Ineffa's best Anemo Buffer as Sucrose buffs her Lunar-Charged with her EM buffs. Ineffa can replace or paired with Fischl in Taser teams. |
|
|
Sub-DPS Xingiqiu has an incredibly fast hydro application and still offers damage reduction. Just like Fischl, he is a premier choice for Taser teams. |
|
|
Sub-DPS Performs similarly with Xingqiu. However, unlike Xingqiu, she cannot provide defensive utility, which may be a drawback to the team. |
|
|
Sub-DPS Furina provides an immense amount of DMG% buff. However, Furina applies Hydro relatively slow compared to Yelan and Xingqiu which may cause difficulty in triggering reactions. Otherwise, she's an amazing in Sucrose teams. |
|
|
Sub-DPS Provides off-field Pyro DMG and can add Overload and Vaporize teams for Sucrose. In addition, Sucrose can boost Xiangling's reactiong due to her EM buffs. |
Hexerei Teams
| Sub-DPS Support |
Sub-DPS | Sub-DPS | Support |
|---|---|---|---|
|
|
|
|
|
|
|
|
|
|
Hexerei Teams for Sucrose requires another Hexerei member to utilize her buffs. Mona and Fischl are good pairs for her in this kind of teams.
Driver Teams
| Main-DPS (Driver) | Sub-DPS | Sub-DPS | Support |
|---|---|---|---|
|
|
|
|
|
|
|
|
|
|
In this team, Sucrose takes most of the field time enabling swirl and resistance shred while her teammates cause their respective elemental reactions with their abilities.
Unlike her supportive role, this requires Sucrose to have high amounts of Elemental Mastery to remain effective, so be sure to invest a little more into your Sucrose if using her as a Driver.
Vaporize Teams
| Sub-DPS | Main-DPS | Sub-DPS | Support |
|---|---|---|---|
|
|
|
|
|
|
|
|
|
|
Sucrose acts as a grouper and shredder for the team, setting up her Main DPS to be able to deal increased Elemental Reaction damage to opponents.
Flins Lunar-Charged Team
| Sub-DPS | Main-DPS | Sub-DPS | Sub-DPS/Support |
|---|---|---|---|
|
|
|
|
|
Sucrose fits in Flins' as an EM Buffer and RES Shred with 4pc Viridescent Venerer. Additionally, Sucrose can equip TTDS to further buff Flins and provides grouping with her Burst.
Sucrose Best Constellations
| Ampulla |
|---|
 |
Constellation and Effects
| Sucrose's Constellations | |
|---|---|
| C1 |
Clustered Vacuum Field Astable Anemohypostass Creation - 6308 gains 1 additional charge. |
| C2 |
Beth - Unbound Form The duration of Forbidden Creation - Isomer 75 / Type II is increased by 2s. |
| C3 |
Flawless Alchemistress Increases the Level of Astable Anemohypostass Creation - 6308 by 3. |
| C4 |
Alchemania Sucrose will reduce the CD of Astable Anemohypostasis Creation - 6308 by 1-7s for every 7 Normal or Charged Attack hits she scores against opponents. One hit may be counted every 0.1s. |
| C5 |
Caution: Standard Flask Increases the Level of Forbidden Creation - Isomer 75 / Type II by 3. |
| C6 |
Chaotic Entropy If Forbidden Creation - Isomer 75 / Type II triggers an Elemental Absorption, all party members gain a 20% Elemental DMG Bonus for the corresponding absorbed element, and nearby Hexerei characters in the party gain an additional 8.57142% Elemental DMG Bonus for the corresponding absorbed element during its duration. |
Best Constellations Rating and Explanation
| Rating | Constellation Effect / Merits | |
|---|---|---|
| C1 | ★★☆ | • Astable Anemohypostasis Creation - 6308 gains 1 additional charge. |
| C6 | ★★★ | • If Forbidden Creation - Isomer 75 / Type II triggers an Elemental Absorption, all party members gain a 20% Elemental DMG Bonus for the corresponding absorbed element during its duration. |
C1 Great for Recovering Energy
Since Sucrose wants as much Elemental Mastery as she can get, having C1 can help Sucrose regain energy for her Elemental Burst. If you have Sacrificial Fragments, you'll only need to put Energy Recharge on your substats instead!
Sucrose Ascension and Talent Materials
Sucrose Ascension Materials
| Lv.20→Lv.40 | |
|---|---|
| Lv.40→Lv.50 |
|
| Lv.50→Lv.60 |
|
| Lv.60→Lv.70 |
|
| Lv.70→Lv.80 |
|
| Lv.80→Lv.90 |
|
Sucrose Talent Level-Up Materials
| Daily Domain Drops | Enemy Drops | Weekly Boss Drops |
|---|---|---|
| Mon/Thu/Sun |
Whopperflowers |
Lupus Boreas Challenge Reward |
|
|
|
|
|
|
|
Sucrose Talents and How to Use
Boost Elemental Reactions
 Elemental Talents Boost Elemental Reactions |
Sucrose specializes in boosting Elemental reactions with Anemo. Due to her Passive Talent, Mollis Favonius, using Sucrose's Elemental Skill or Burst will buff all other party member's Elemental Mastery by 20% of her own. This allows you to set up bigger, more potent Elemental Reactions with Sucrose!
In addition to this, Sucrose can group most enemies together for easier combat!
Since Sucrose's Elemental Skill uses charges similar to Klee, gaining the Elemental Mastery boost from her passive is not as dependent on the skill cooldown time as it can be triggered with each charge as well as her Elemental Burst.
Recommended Tactic for Switching Characters
| Base Attack Pattern | |
|---|---|
| ① | Attack with the Elemental Skill of your Main DPS. |
| ② | Switch to Sucrose and use her Elemental Skill to increase the party's Elemental Mastery. |
| ③ | Switch to another support character and use their Elemental Skill to induce Elemental Reactions. |
| ④ | Switch back to your Main DPS and use their Elemental Burst. Do it within 8 seconds from ②. |
To fully maximize Sucrose's skills, use a tactic that induces more Elemental Reactions while switching characters. Attack with your Main DPS' Elemental Skill then use Sucrose's Elemental Skill. Switch to a support character to use their Elemental Skill then use your Main DPS' Elemental Burst.
We recommend this tactic for a party that has Pyro, Hydro, Cryo, and Electro characters as members!
Normal Attack
| Normal Attack: Wind Spirit Creation |
|---|
| Performs up to 4 attacks using Wind Spirits, dealing Anemo DMG.
Charge Attack Consumes a certain amount of Stamina and deals AoE Anemo DMG after a short casting time. Plunge Attack: Calling upon the power of her Wind Spirits, Sucrose plunges towards the ground from mid-air, damaging all enemies in her path. Deals AoE Anemo DMG upon impact with the ground. |
| Attribute | Effect (Lvl 1) |
|---|---|
| 1-Hit DMG | 33.5% |
| 2-Hit DMG | 30.6% |
| 3-Hit DMG | 38.4% |
| 4-Hit DMG | 47.9% |
| Charged Attack DMG | 120% |
| Charged Attack Stamina Cost | 50.0 |
| Plunge DMG | 56.8% |
| Low/High Plunge DMG | 114%/142% |
Elemental Skill
| Astable Anemohypostasis Creation - 6308 |
|---|
| Creates a small Wind Spirit that deals Anemo DMG to enemies in an AoE, pulling them towards the location of the Wind Spirit before launching them.
Flavor Text: This is a little embarrassing, but though the elemental lifeforms birthed through this procedure dissipate very rapidly, they are incredibly useful when adventuring. Even failed experiments can have practical applications. |
| Attribute | Effect (Lvl 1) |
|---|---|
| Skill DMG | 211% |
| CD | 15.0s |
Elemental Burst
| Forbidden Creation - Isomer 75 / Type II |
|---|
| Sucrose hurls an unstable concoction that creates a Large Wind Spirit. While it persists, the Large Wind Spirit will continuously pull and launch nearby enemies, dealing AoE Anemo DMG. Elemental Absorption: If the Wind Spirit comes into contact with Hydro/Pyro/Cryo/Electro elements, it will deal additional DMG of that type. Elemental Absorption may only occur once per use. Flavor Text: Sucrose used to give names to her volatile Anemo Hypostases. But their line of heirs quickly grew to surpass Baron Bunny the 893rd. |
| Attribute | Effect (Lvl 1) |
|---|---|
| DoT | 148% |
| Additional Elemental DMG | 44.0% |
| Duration | 6.0s |
| CD | 20.0s |
| Energy Cost | 80 |
Passive Talent 1
| Catalyst Conversion |
|---|
| When Sucrose triggers a Swirl effect, characters in the party with the matching element have their Elemental Mastery increased by 50 for 8s. |
Passive Talent 2
| Mollis Favonius |
|---|
| When Astable Anemohypostasis Creation - 6308 or Forbidden Creation - Isomer 75 / Type II hit an enemy, increases all party members' (excluding Sucrose) Elemental Mastery based on 20% of Sucrose's Elemental Mastery for 8s. |
Sucrose Does Not Buff Kazuha
 |
Sucrose's Passive Talent, Mollis Favonius, grants bonus Elemental Mastery to the rest of the party equal to 20% of Sucrose's Elemental Mastery.
However, according to the June 30, 2021 Developer's Discussion, this buff does not apply to Kazuha, as the only exception. It was explained that this is to avoid infinite stacking of stat bonuses.
Passive Talent 3
| Astable Invention |
|---|
| When Sucrose crafts Character and Weapon Enhancement Materials, she has a 10% chance to obtain double the product. |
Use When Crafting Weapon Enhancement Materials
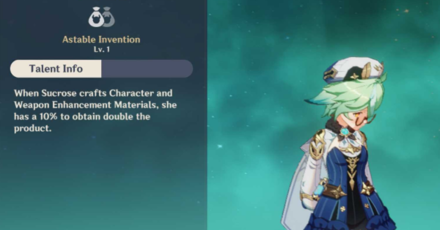 Passive Talent: Astable Invention |
Sucrose's Passive Skill, Astable Invention, grants a 10% chance of doubling the product when crafting Weapon Enhancement Materials.
Sucrose's Hexerei: Secret Rite Buffs
Enhances Support Capability
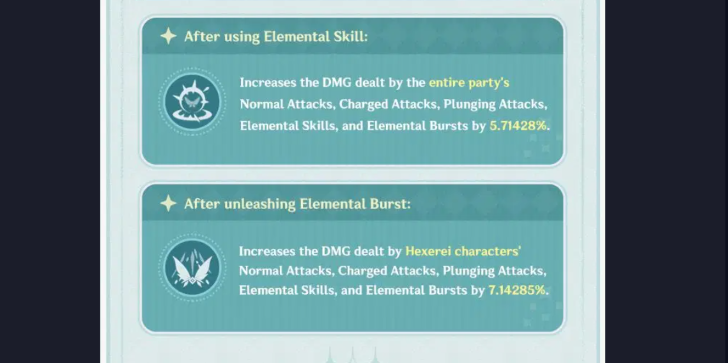
Sucrose buffs her teammates depending on what she uses if she's with another Hexerei member. She gives a damage buff to her entire party's damage if she uses her skill, and more damage to Hexerei members if she uses her Elemental Burst.
Hexerei: Secret Rite Buffs Explained
How to Get Sucrose
Pull from Any Active Banner
| All Current Wish Banners | |
|---|---|
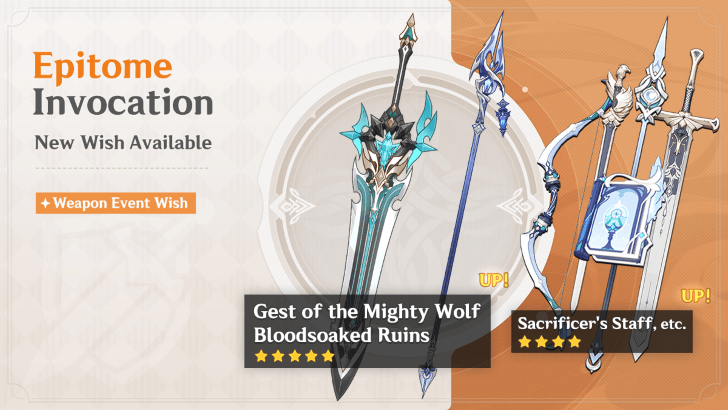 Epitome Invocation Epitome Invocation
|
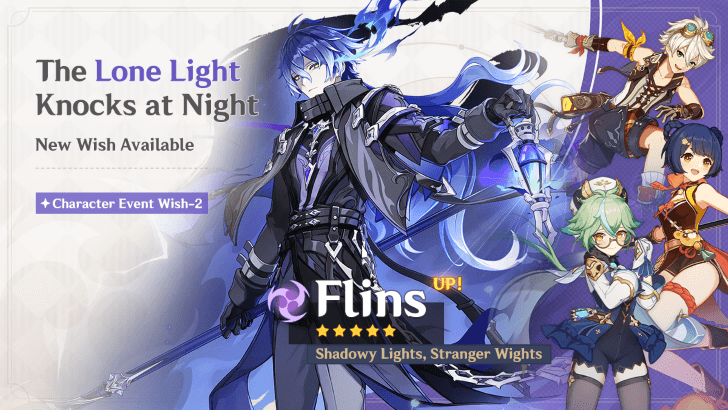 The Lone Light Knocks at Night The Lone Light Knocks at Night
|
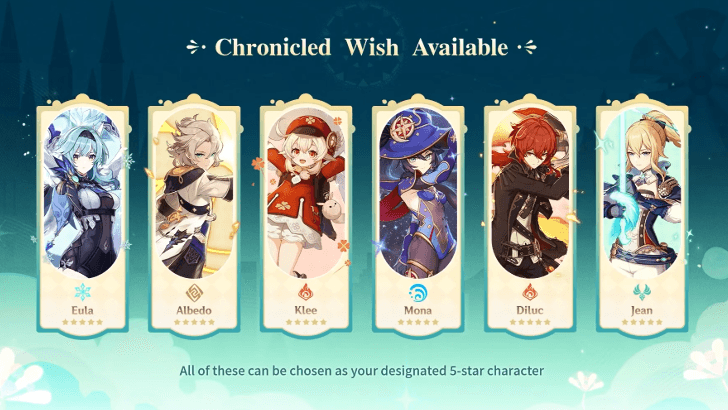 6.4 Chronicled Wish Mondstadt 6.4 Chronicled Wish Mondstadt
|
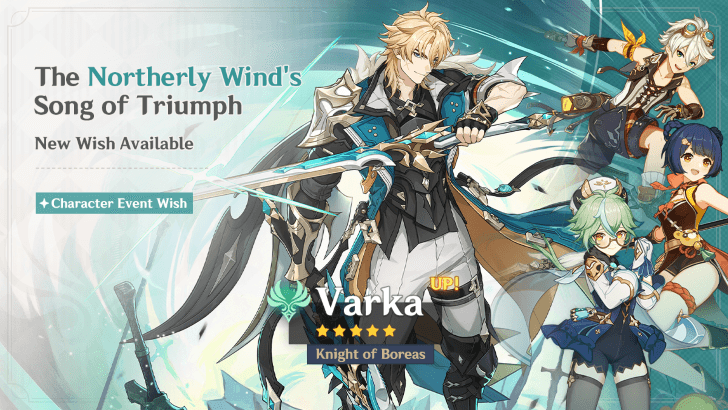 The Northerly Wind's Song of Triumph The Northerly Wind's Song of Triumph
|
 Wanderlust Invocation Wanderlust Invocation
|
|
Sucrose is available at a normal rate on all Wish Banners except Beginner's Wish. This means you can get her from Wanderlust Invocation, Epitome Invocation, and any active character and weapon banners banners.
Pull From the Version 6.4 Phase 1 Banners

Sucrose is available in Varka's debut banner and Flins' rerun banner during Phase 1 of Version 6.4 Luna V, which will run from February 25, 2026 to March 17, 2026. She is running alongside Bennett and Xiangling as their 4-stars!
Version 6.4 - Luna V Release Date
Sucrose's In-Game Information
Sucrose Character Profile
| Nation | |
|---|---|
| Title | Harmless Sweetie |
| Vision | |
| Gender | Female |
| Race | Unconfirmed |
| Height | Medium Girl |
| Faction | Knights of Favonius |
| Constellation | Ampulla |
| Birthday | November 26 |
| Special Dish | Nutritious Meal (V. 593) |
| Story Quest |
|
Sucrose Voicelines
Thoughts About Sucrose
| Character | In-Game Thoughts |
|---|---|
 Albedo Albedo
|
Direction: Sucrose? I think I more or less understand why she is so dedicated to her research in bio-alchemy... Either way, I'm happy to see her succeed more and more in her endeavors.
Habits: Working with Sucrose on alchemy research is quite pleasant, but she has some... stubborn qualities in regards to certain aspects unrelated to research. For example, I have told her numerous times to just call me "Albedo" since we are about the same age, but she insists on addressing me in an excessively formal manner. ...Whatever she prefers, I guess. |
 Eula Eula
|
The alchemist... She once gave me a piece of equipment and told me it would help me infiltrate an Abyss Order camp undetected. In reality, it caused a huge explosion that completely blew my cover and before I knew it I was being accosted by 13 mitachurls... Afterwards, I marched straight back there, intending to make her pay for what she had done, but when I saw how panicked and sheepish she looked, and watched her post her results on the wall with the word "Fail," I couldn't bring myself to go through with it... After all, I didn't get hurt, just a little disheveled... and a little humiliated. |
 Jean Jean
|
Sucrose is also a rare talent in the field of alchemy. Under Albedo's mentorship, she is sure to flourish. I am sure her future will be bright. The only thing is... Ahem, I was momentarily lost in thought. It is nothing. Nothing bad, anyway. |
 Kaeya Kaeya
|
Sucrose may not be much of an extrovert in public, but as they say — it's always the quiet ones... Apparently, her laboratory is home to quite the eclectic range of implements and her experiments are more than just intellectually stimulating... All hearsay, of course. You don't seriously think I would go snooping around a fair lady's private quarters, do you? |
 Klee Klee
|
Sucrose is the best! This one time she asked me if I wanted a Jumpy Dumpty that can run as well as jump. Tee-hee, well duh! Of course I do, I want hundreds of them! I wanna put them on every street, every staircase, and every square in Mondstadt! |
 Lisa Lisa
|
Try not to bother Sucrose if you're at a loose end, you'll only startle the poor girl. She's gifted at interacting with all sorts of exotic creatures — just hopeless when it comes to humans. |
Sucrose's Thoughts About Others
| Character | In-Game Thoughts |
|---|---|
|
Albedo
|
About Albedo Artistry: As his Assistant I learn so much each and every day. What's key is not his existing knowledge, but his talented way of thinking. No matter how complex the task at hand, his way of thinking ensures he gets to the bottom of it, and is able to explain it thoroughly. His methodologies are amazing... to me, it's where alchemy meets art. Talent: Talent? Let's hypothesize that he and I were to perform the same research — I'd spend my whole life playing catch up. But, my studying of bio-alchemy has nothing to do with evading his line of research, we just happen to have different interests and dreams — nothing more. |
 Amber Amber
|
About Amber I'm curious to why her doll is called "Baron Bunny," it clearly has nothing to do with a rabbit at all. Oh, the headband makes it look like it has rabbit ears you say? Hmm... that's heavily reliant on the rabbit stereotype, is it not? Many rabbits' ears are floppy. |
|
Eula
|
About Eula The role of a scout is a hazardous one, and Ms. Eula throws herself into danger all too easily. So, I made a reconnaissance device fore her, so that she wouldn't have to infiltrate enemy camps herself. But Ms. Eula has such an imposing manner, she really puts me on edge, and... I was so nervous that I accidentally left out a few important details while explaining how to use it... As a result, there was an accident... Ah, what should I do... I hope she won't hold a grudge against me... |
 Fischl Fischl
|
About Fischl I take it you're referring to the book series, Flowers for Princess Fischl? Indeed, the world the author came up with is very creative. If only I could go and see it with my own eyes. Oh? you're referring to Fischl herself? I am... doubtful that she could really take me there. |
|
Jean
|
About Jean I don't dare talk to Master Jean that much, because she's so strict. I know she's a good person and all — I know that, I do — but... I still find her scary. I don't tend to bother her, and even when I have to... I ask Albedo to go on my behalf. |
|
Kaeya
|
About Kaeya Oh... I know he likes to joke, and isn't trying to make fun of me, but I often struggle to work out which parts are the truth and which parts are jokes. So whenever he talks to me, the outcome is either one of two things: morbid embarrassment or unbearable awkwardness. |
|
Klee
|
About Klee Jean has put her in solitary confinement so many times, but every time she's let out it's not long before she's back in trouble. 'Sigh' Something tells me she hasn't done much introspection. I told her I'd make her a bouncing, dancing Jumpy Dumpty that is also safe - but to date there are still a lot of problems with the design. |
|
Lisa
|
About Lisa She really seems to know a great deal. She's obviously never seen my research, and yet on so many occasions she's given me advice on what is core to my studies. Just how does she know? Is it observation, or is it ratiocination? |
 Noelle Noelle
|
About Noelle She's a really willing helper, I can't deny that. It's just... she makes me a bit anxious is all. One time, she saw three boxes of materials stacked just outside my laboratory door, and proceeded to move them inside for me. A nice gesture, but the thing is... I'd only just finished putting them outside... |
Genshin Impact Character Guides

All Characters and Voice Actors
List of All Characters
| Characters by Element | |||
|---|---|---|---|
Playable Characters
 Chasca
 Faruzan
 Heizou
 Ifa
Ifa Jahoda
 Kazuha
 Lan Yan
 Lynette
 Mizuki
 Sayu
Sayu Sucrose
 Traveler (Anemo)
 Varka
Varka Venti
Venti Wanderer
 Xianyun
 Xiao
Xiao Aloy
Aloy Ayaka
Ayaka Charlotte
 Chongyun
 Citlali
 Diona
Diona Escoffier
 Freminet
 Ganyu
Ganyu Layla
Layla Mika
Mika Qiqi
Qiqi Rosaria
 Shenhe
 Skirk
Skirk Wriothesley
 Alhaitham
 Baizhu
 Collei
 Emilie
 Kaveh
Kaveh Kinich
 Kirara
 Lauma
Lauma Nahida
 Nefer
Nefer Tighnari
 Traveler (Dendro)
 Yaoyao
 Beidou
 Clorinde
 Cyno
Cyno Dori
Dori Flins
Flins Iansan
 Ineffa
 Keqing
 Ororon
 Raiden
 Razor
Razor Sara
Sara Sethos
 Shinobu
 Traveler (Electro)
 Varesa
 Yae Miko
 Chiori
 Gorou
Gorou Illuga
 Itto
Itto Kachina
 Navia
Navia Ningguang
 Traveler (Geo)
 Xilonen
 Yun Jin
 Zhongli
 Zibai
Zibai Aino
Aino Ayato
Ayato Barbara
 Candace
 Columbina
 Dahlia
 Furina
 Kokomi
 Mona
Mona Mualani
 Neuvillette
 Nilou
Nilou Sigewinne
 Tartaglia
 Traveler (Hydro)
 Xingqiu
 Yelan
Yelan Arlecchino
 Bennett
 Chevreuse
 Dehya
Dehya Diluc
Diluc Durin
Durin Gaming
 Hu Tao
 Lyney
Lyney Mavuika
 Thoma
Thoma Traveler (Pyro)
 Xiangling
 Xinyan
 Yanfei
 Yoimiya
Upcoming Characters
| All Upcoming Characters |
 Alice Alice
|
 Capitano Capitano
|
 Dainsleif Dainsleif
|
 Dottore Dottore
|
|---|---|---|---|
 Linnea Linnea
|
 Lohen Lohen
|
 Nicole Nicole
|
 Pantalone Pantalone
|
 Pierro Pierro
|
 Pulcinella Pulcinella
|
 Rerir Rerir
|
 Sandrone Sandrone
|
 Tsaritsa Tsaritsa
|
|||
Character Lists
| Characters by Rarity | |
|---|---|
| 5-Star Characters | 4-Star Characters |
| Free Characters | |
| Characters by Weapon Used | |
| Sword Users | Claymore Users |
| Polearm Users | Bow Users |
| Catalyst Users | |
| Characters by Role | |
| Main DPS Characters | Sub DPS Characters |
| Support Characters | Healers |
| Shield Characters | Buff Providers |
| Best for Exploration | Local Specialty Passives |
| Double Reward Passives | |
| Characters by Gender | |
| Male Characters | Female Characters |
| Short Male Characters | Short Female Characters |
| Medium Male Characters | Medium Female Characters |
| Tall Male Characters | Tall Female Characters |
| Characters by Height | |
| Short Characters | Medium Characters |
| Tall Characters | |
| Characters by Region | |
| Mondstadt Characters | Liyue Characters |
| Inazuma Characters | Sumeru Characters |
| Fontaine Characters | Natlan Characters |
| Nod-Krai Characters | |
Comment
This Hexerei buff is overrated. 5% increased damage? LMAO.
Author

Sucrose Rating and Best Builds


Rankings
Gaming News


![Monster Hunter Stories 3 Review [First Impressions] | Simply Rejuvenating](https://img.game8.co/4438641/2a31b7702bd70e78ec8efd24661dacda.jpeg/thumb)
Popular Games

Genshin Impact Walkthrough & Guides Wiki
Honkai: Star Rail Walkthrough & Guides Wiki
Umamusume: Pretty Derby Walkthrough & Guides Wiki
Pokemon Pokopia Walkthrough & Guides Wiki
Resident Evil Requiem (RE9) Walkthrough & Guides Wiki
Monster Hunter Wilds Walkthrough & Guides Wiki
Wuthering Waves Walkthrough & Guides Wiki
Arknights: Endfield Walkthrough & Guides Wiki
Pokemon FireRed and LeafGreen (FRLG) Walkthrough & Guides Wiki
Pokemon TCG Pocket (PTCGP) Strategies & Guides Wiki


Recommended Games
Diablo 4: Vessel of Hatred Walkthrough & Guides Wiki
Cyberpunk 2077: Ultimate Edition Walkthrough & Guides Wiki
Fire Emblem Heroes (FEH) Walkthrough & Guides Wiki
Yu-Gi-Oh! Master Duel Walkthrough & Guides Wiki
Super Smash Bros. Ultimate Walkthrough & Guides Wiki
Pokemon Brilliant Diamond and Shining Pearl (BDSP) Walkthrough & Guides Wiki
Elden Ring Shadow of the Erdtree Walkthrough & Guides Wiki
Monster Hunter World Walkthrough & Guides Wiki
The Legend of Zelda: Tears of the Kingdom Walkthrough & Guides Wiki
Persona 3 Reload Walkthrough & Guides Wiki


All rights reserved
Copyright© 2012-2024 HoYoverse — COGNOSPHERE. All Rights Reserved.
The copyrights of videos of games used in our content and other intellectual property rights belong to the provider of the game.
The contents we provide on this site were created personally by members of the Game8 editorial department.
We refuse the right to reuse or repost content taken without our permission such as data or images to other sites.
The bump in her tier is due to part of her EM being given to her teammates; since lunar reactions deal more damage based on the team's EM, she's a very good Lunar support.