Passage of Ghouls Luxurious Chest and Pyro Totem Puzzle Guide
✉ Send your thoughts in our Genshin 6.4 Patch Survey!
★ Exclusive: Dive back in time with the Meta History
◆ Hot: Version 6.4, Luna 5 Codes
◆ Builds: Varka, Flins, Skirk, Escoffier
◆ Events: Travelers' Tales, He Who Caught the Wind
◆ Future: Linnea, Version 6.5 Luna VI

You can unlock the Luxurious Chest in the Passage of Ghouls by solving the Pyro Totem Puzzle! See how to complete the Passage of Ghouls puzzle in Genshin Impact with this guide!
List of Contents
Passage of Ghouls Pyro Totem Puzzle Location
West of the Setekh Wenut Area
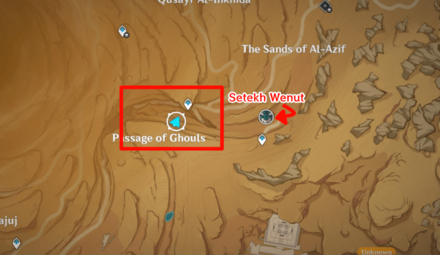
Passage of Ghouls is located on the east side of the Desert of Hadramaveth, a little west of the Setekh Wenut boss area.
Setekh Wenut Location and Boss Guide
Solve the Puzzle for the Luxurious Chest

To unlock the Luxurious Chest in the Passage of Ghouls, you will need to unlock the four Pyro Totems in the area and activate them in the correct order. Unlocking each Pyro Totem also requires you to solve the Weathered Obelisks around each of them.
How to Solve the Passage of Ghouls Pyro Totem Puzzle
First Pyro Totem Solution
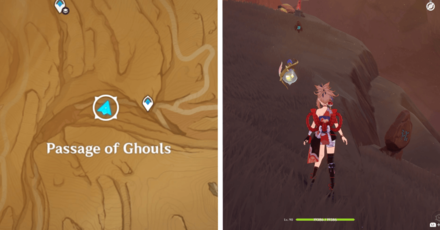
The first Pyro Totem is found near the center of the valley, west of the nearest waypoint. Near the totem is a Weathered Obelisk that you can hit and another one a few steps behind it. Hit the nearest obelisk until its symbol matches with the one behind.
Once the totem is unlocked, activate it with Pyro.
| First Pyro Totem Puzzle Solution |
|---|
 |
Second Pyro Totem Solution
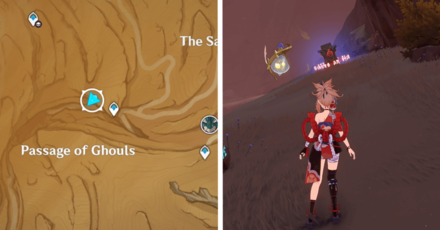
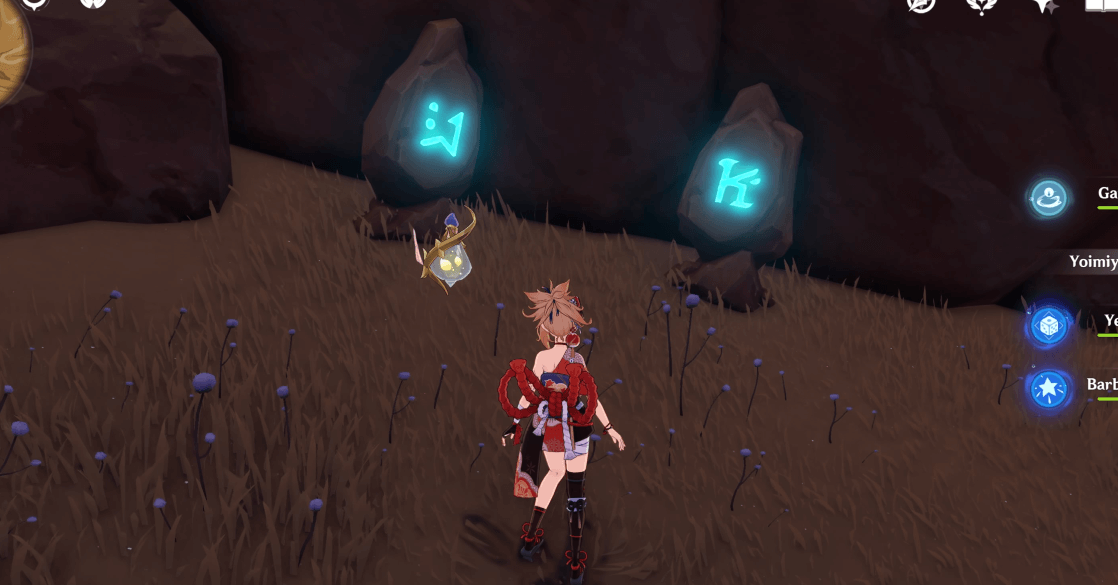
The second Pyro Totem to activate is on the other side of the first totem, but on a more elevated spot. Next to the totem are two Weathered Obelisks. Hit them to match the obelisks east of the Pyro Totem.
Once the totem is unlocked, activate it with Pyro. This should be the second totem activated.
| Second Pyro Totem Puzzle Solution |
|---|
 |
Third Pyro Totem Solution
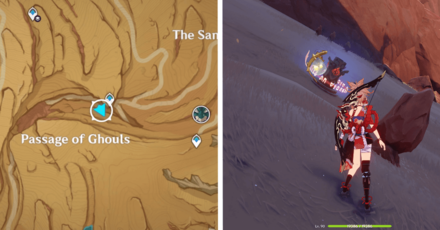
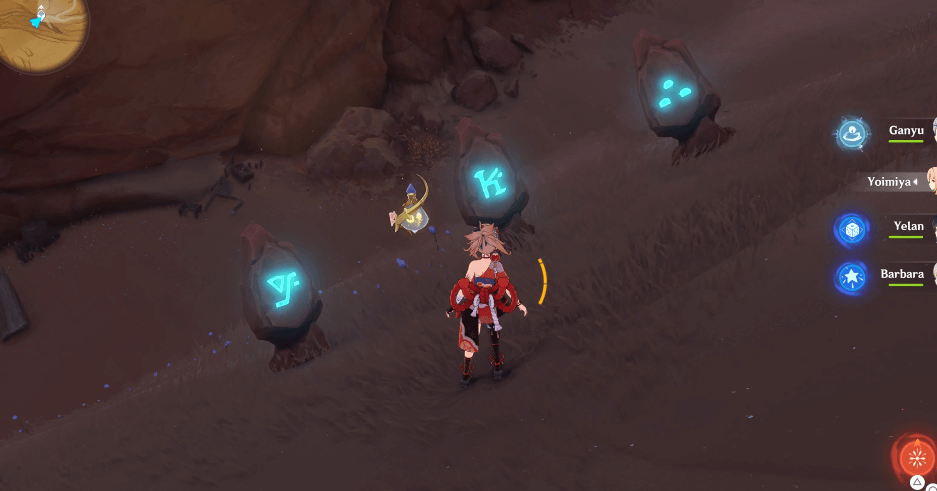
Right below the waypoint in the Passage of Ghouls is the third Pyro Totem. The obelisks that you need to match the set nearest to the totem with are at the cliff to the south. The symbols on these obelisks continuously fade in and out so try to remember them when they become visible.
Change the symbols on the three obelisks next to the totem into the correct ones to unlock the totem. Activate this third totem with Pyro.
| Third Pyro Totem Puzzle Solution |
|---|
 |
Fourth Pyro Totem Solution
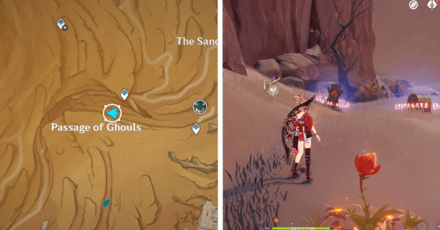
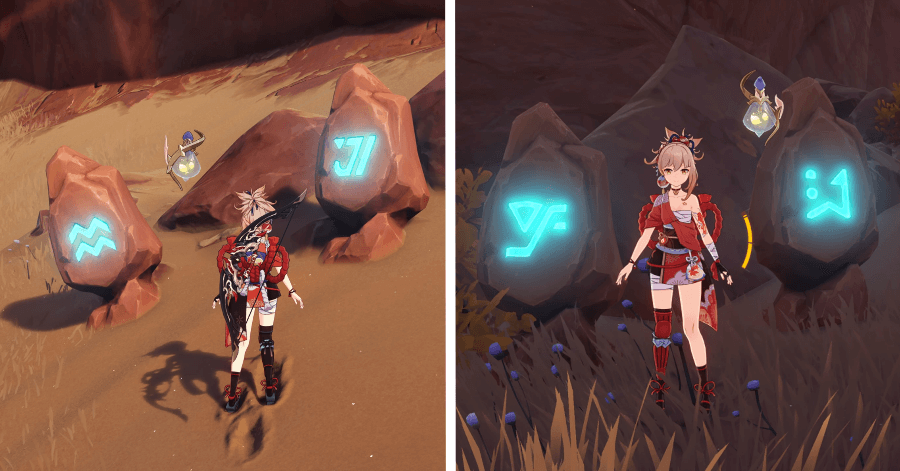
The last Pyro Totem to activate is right next to the Luxurious Chest. Neat! You will have to switch up four Weathered Obelisks this time and the symbols that you need to copy are located on both sides of the area. Match the symbols to unlock the totem and attack it with Pyro to activate the final totem and unlock the Luxurious Chest!
Remember that the four Pyro Totems must be activated in the right order, denoted by the number of Weathered Obelisks they are associated with, to unlock the Luxurious Chest. If you lit up a totem in the wrong order, you can reset them by lighting them all up.
| Fourth Pyro Totem Puzzle Solution |
|---|
 |
Genshin Impact Related Guides
All Tips and Tricks Guides

All Version 3.4 Tips & Tricks
Other Regional Tips & Tricks
Comment
Author
Passage of Ghouls Luxurious Chest and Pyro Totem Puzzle Guide
improvement survey
03/2026
improving Game8's site?

Your answers will help us to improve our website.
Note: Please be sure not to enter any kind of personal information into your response.

We hope you continue to make use of Game8.
Rankings
Gaming News
Popular Games

Genshin Impact Walkthrough & Guides Wiki

Honkai: Star Rail Walkthrough & Guides Wiki

Umamusume: Pretty Derby Walkthrough & Guides Wiki

Pokemon Pokopia Walkthrough & Guides Wiki

Resident Evil Requiem (RE9) Walkthrough & Guides Wiki

Monster Hunter Wilds Walkthrough & Guides Wiki

Wuthering Waves Walkthrough & Guides Wiki

Arknights: Endfield Walkthrough & Guides Wiki

Pokemon FireRed and LeafGreen (FRLG) Walkthrough & Guides Wiki

Pokemon TCG Pocket (PTCGP) Strategies & Guides Wiki
Recommended Games

Diablo 4: Vessel of Hatred Walkthrough & Guides Wiki

Fire Emblem Heroes (FEH) Walkthrough & Guides Wiki

Yu-Gi-Oh! Master Duel Walkthrough & Guides Wiki

Super Smash Bros. Ultimate Walkthrough & Guides Wiki

Pokemon Brilliant Diamond and Shining Pearl (BDSP) Walkthrough & Guides Wiki

Elden Ring Shadow of the Erdtree Walkthrough & Guides Wiki

Monster Hunter World Walkthrough & Guides Wiki

The Legend of Zelda: Tears of the Kingdom Walkthrough & Guides Wiki

Persona 3 Reload Walkthrough & Guides Wiki

Cyberpunk 2077: Ultimate Edition Walkthrough & Guides Wiki
All rights reserved
Copyright© 2012-2024 HoYoverse — COGNOSPHERE. All Rights Reserved.
The copyrights of videos of games used in our content and other intellectual property rights belong to the provider of the game.
The contents we provide on this site were created personally by members of the Game8 editorial department.
We refuse the right to reuse or repost content taken without our permission such as data or images to other sites.


