This survey will take about 1 minute.
Your answers will help us to improve our website.
Genshin Impact
Phlogiston Extraction Research Center Puzzle Guide
✉ Send your thoughts in our Genshin 6.4 Patch Survey!
★ Exclusive: Dive back in time with the Meta History
◆ Hot: Version 6.4, Luna 5 Codes
◆ Builds: Varka, Flins, Skirk, Escoffier
◆ Events: Travelers' Tales, He Who Caught the Wind
◆ Future: Linnea, Version 6.5 Luna VI

The Phlogiston Extraction Research Center in Genshin Impact is an experimental site of the Fatui where several Saurians are being held hostage. See how to use the Key With Rear Notches, how to get the luxurious chest, and all known info about it here!
List of Contents
Phlogiston Extraction Research Center Location
Northeast of the Ancestral Temple

The Phlogiston Research Center is an underground area in Natlan. To reach it, you can either teleport to the Waypoint found northeast from the Ancestral Temple or teleport to the Blazing Ruins Domain.
How to Go to the Phlogiston Research Center
| # | Phlogiston Research Center Directions |
|---|---|
| 1 | 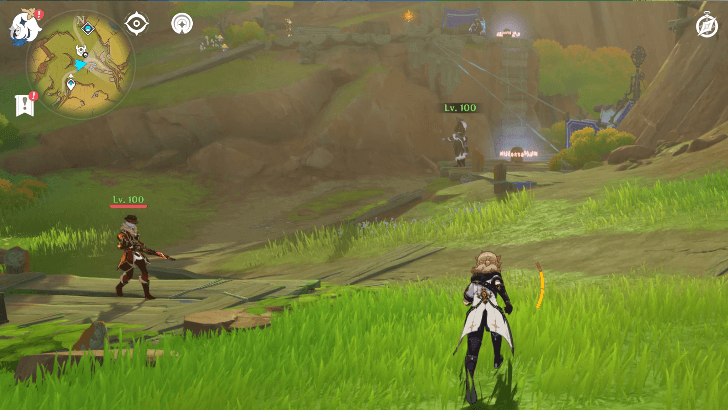
Follow the road until you come across a fork in the road, one of the paths having a lot of Fatui Skirmishers. |
| 2 | 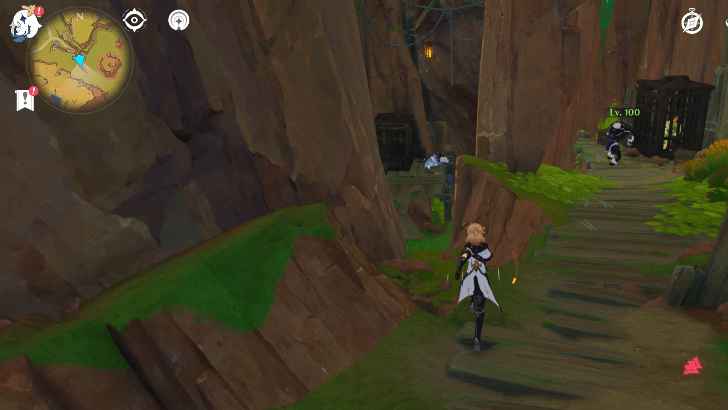
You are on the right track if you end up going deeper, and encountering more Fatui Skirmishers and caged Saurians along the way. |
| 3 |
 At the end of the path is a giant opening in the ground that you can jump into. Glide down and defeat the Fatui Skirmishers at the bottom. |
Phlogiston Extraction Research Center Puzzle Guide
Go Deeper Into the Research Center
| Phlogiston Research Center Puzzle Guide | |
|---|---|
| 2 |
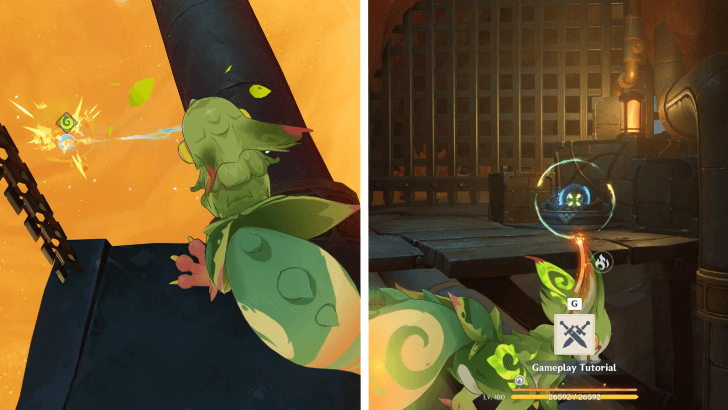
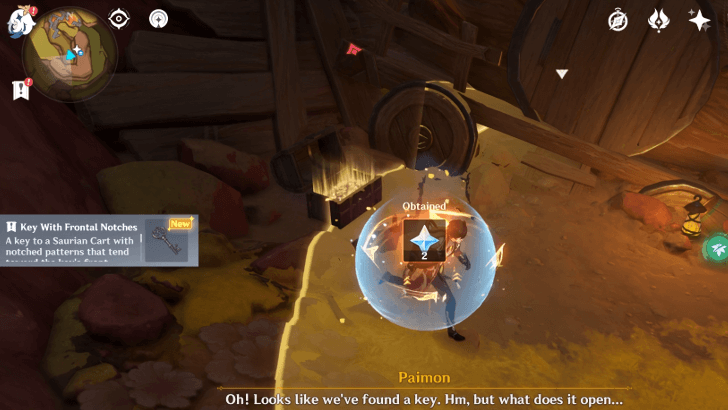 After defeating the Fatui Skirmishers, the Common Chest nearby will open and give you a Key with Frontal Notches. Use this key to open the nearby door, and free the Yumkasaurus inside it. |
| 3 |
 This will unlock a Spiritsconce that that can be used to indwell as the Yumkasaurus. Follow the path as one, as its abilities will come in handy. |
| 4 |
 At some point, you will have to cross a pipe that breaks before you step on it. This will drop a Replica Relay Ball that can be used to open the gate right next to it. |
| 5 |
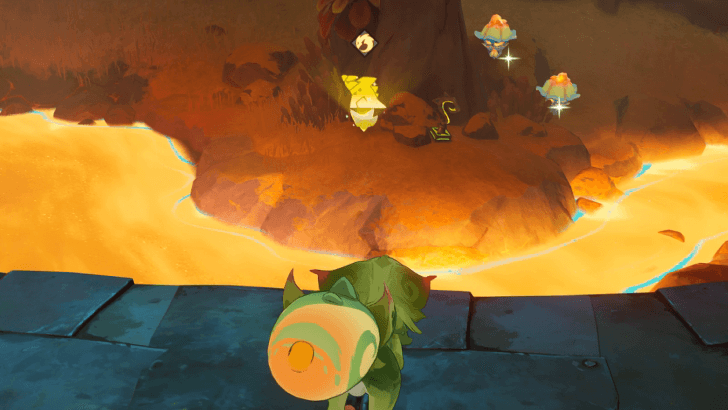
 Go across the platform, until you reach an Electro Fatui Skirmisher. Defeat him, open the Exquisite Chest to get the Key, and claim the Precious Chest inside the cart. This Precious Chest has a chance of rewarding the player with a Green Obsidian Fragment. |
Free the Saurians for an Achievement
| # | Righteous Resistance Achievement Guide |
|---|---|
| 1 | 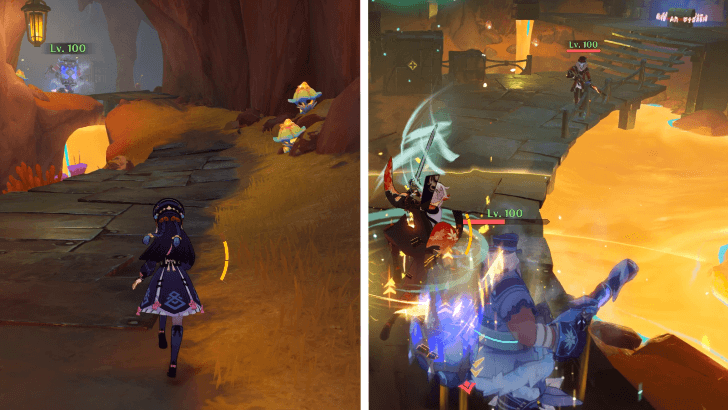 Follow the path where you can see a Cryo Fatui Skirmisher from afar; defeat all the Fatui inside on sight. |
| 2 |
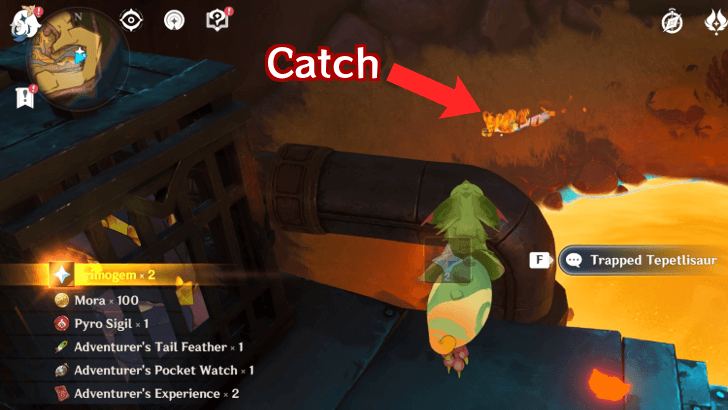 Once cleared, check the small patch of land to the right side of the Trapped Tepetlisaur, and catch the burrowing whelp. |
| 3 |
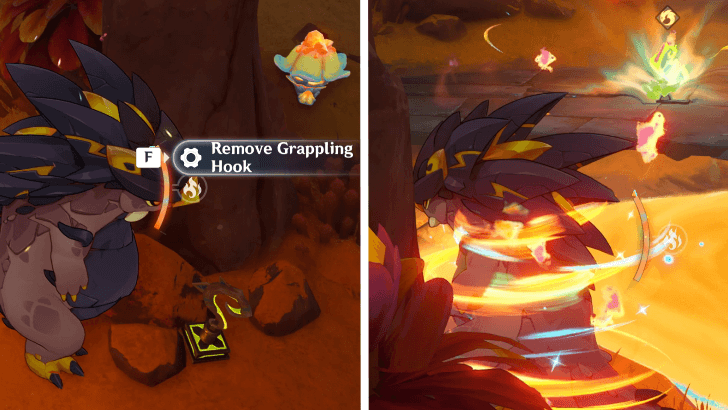
 Doing so unlocks a Tepetlisaur Spiritscone, which you can use to transform into to get the Grappling Hook. |
| 4 |
 Afterwards, indwell back into a Yumkasaurus and attach it to a nearby box. |
| 5 |
 Once attached, use the grappling skill of the Yumkasaurus to drag the box all the way to the edge. |
| 6 |
 This is crucial as claiming the Relay Ball will result in the gate closing; the box will stop it from closing half-way. |
| 7 |
 Bring the Relay Ball you got from closing the gate earlier, and place it onto the left port; this will open a gate in the cave, and Anemo Fatui Skirmishers will spawn. Defeat them, and go to where they came from. |
| 8 |
 The Relay Ball can be found in one of the hanging cells. Indwell into a Yumkasaurus, and use the grappling hook skill to go to one of the Dendro nodes. Afterwards, grab the Relay Ball once you are closer to it. |
| 9 |
 Go behind where you came from until a Relay Ball port can be found besides a gate. Place the Relay Ball there to open the gate, go outside, then grab the Relay Ball again. |
| 10 |
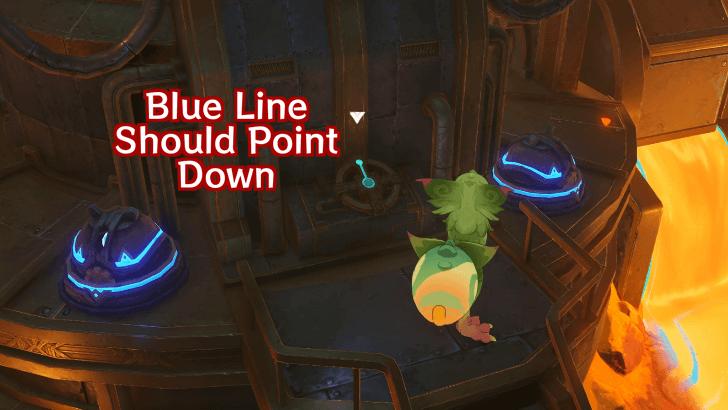 Bring the Relay Ball to the second port on the main base platform, and place it on the unoccupied port. This will activate the main lever. Interact with it twice so that the Blue Line is facing down. |
| 11 |
 This is automatically spawn Fatui Skirmishers on the main base platform, and you have to hold out for one minute. They will keep spawning no matter how many you can defeat in a minute, so treat this as a survival mission. |
| 12 |
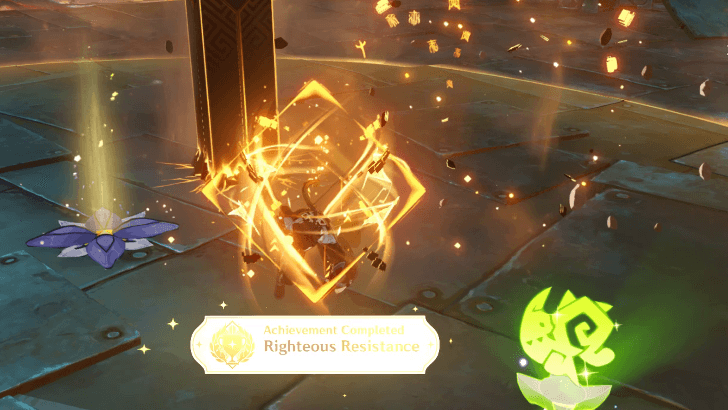 Survive the one minute onslaught of Fatui Skirmishers, and the Righteous Resistance achievement is finally unlocked! |
Leave the Phlogiston Research Center
Claiming the achievement does not mean the mission is over.
| # | Phlogiston Research Center Puzzle Guide |
|---|---|
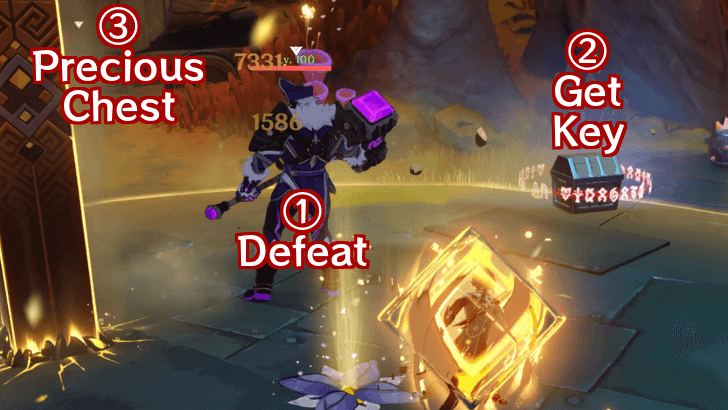
| 1 |
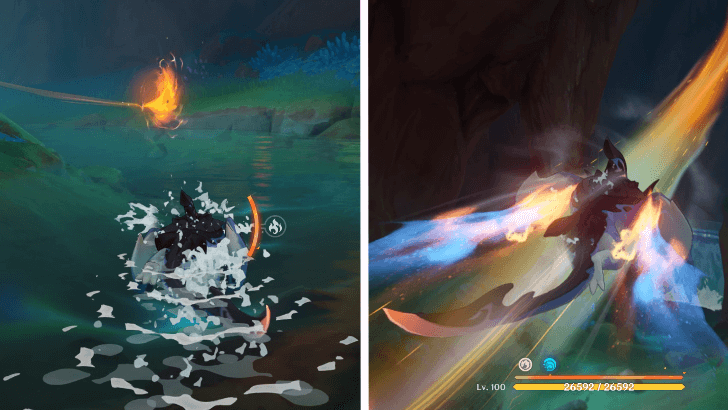
 As soon as the onslaught ends, you have to help the freed Saurians against a Pyro Fatui Agent that has its Pyro clones already active. |
| 2 |
 Ignore the Pyro clones; the main focus is defeating the Pyro Fatui Agent. Doing so will give a chance for the Saurians to escape. |
| 3 |
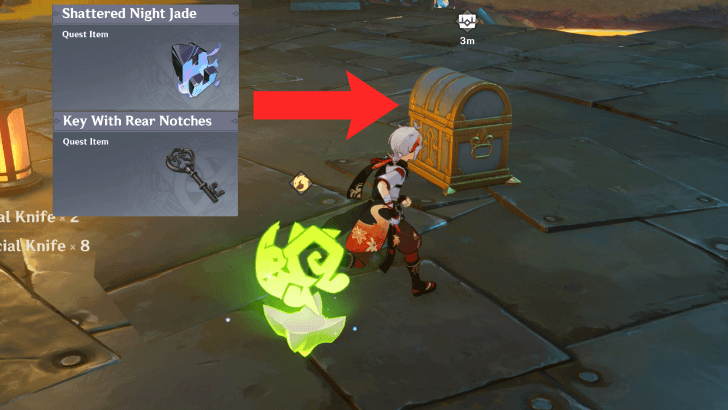 Afterwards, a Luxurious Chest will spawn. Opening it will reward the Traveler with a Shattered Night Jade and a Key with Rear Notches, on top of the usual prizes from opening a Luxurious Chest. The Shattered Night Jade is a crucial item needed to eventually make the Night Jade. |
| 4 |
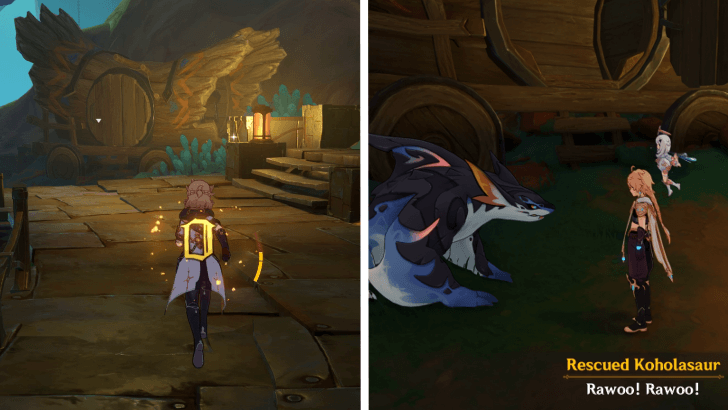 Go back to the area where you went after defeating the Anemo Fatui Skirmishers earlier, and use the Key with Rear Notches to open the final prison and free the Koholasaurus. |
| 5 |
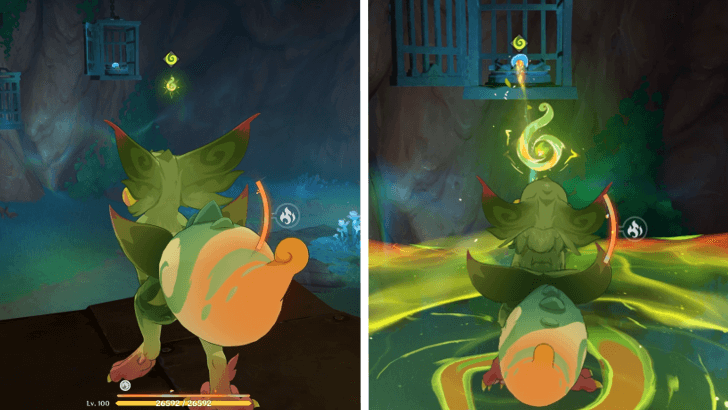
 Freeing the Koholasaurus will spawn a Spiritsconce that will let you indwell into one. Transform, then follow the river path until a Spiritway can be seen. Ride on it to get out of the cave. |
| 6 |
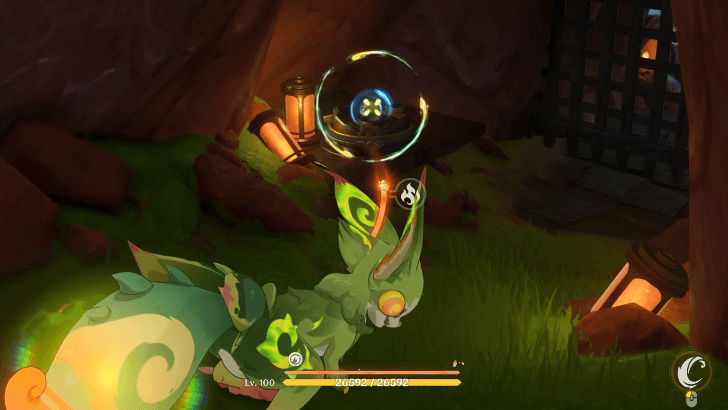
 At the end of the Spiritway, an Exquisite Chest will spawn as you as you land. This marks the official end of this hidden storyline! |
Genshin Impact Related Guides
All Tips and Tricks Guides

All Version 5.0 Tips & Tricks
Other Regional Tips & Tricks
Comment
Author

Phlogiston Extraction Research Center Puzzle Guide
Please participate in our site
improvement survey
03/2026
improvement survey
03/2026
Would you assist in
improving Game8's site?
improving Game8's site?

×
We are listening to our users' valuable opinions and discussing how to act on them.
The information collected through this survey will be used for the purpose of improving our services. In addition, the information will only be disclosed a part of a statistic in a format that will not allow identification of personal information.
Begin Survey
Not Now
×
Please rate each item regarding Game8.co's Advertisements.
Amount of Ads
Very Dissatisfied
Somewhat Dissatisfied
Fine
Somewhat Satisfied
Highly Satisfied
Placement of Ads
Timing of Ad Display
Ad Loading Speed
Safeness of Ads
Content of Ads
×
Please rate each item regarding Game8.co's Quality of Articles.
Amount of information
Very Dissatisfied
Somewhat Dissatisfied
Fine
Somewhat Satisfied
Highly Satisfied
Frequency of updates
Speed of new information
Accuracy of articles
Understandibility of articles
Readability of sentences
×
Please rate each item regarding Game8.co's Usability of the Site.
Ease of finding information
Very Dissatisfied
Somewhat Dissatisfied
Fine
Somewhat Satisfied
Highly Satisfied
Loading Speed
Use of Color
Font Size
Visibility of Images
Easy to Understand Layout
×
Please rate each item regarding Game8.co's Message Boards, Comments.
Ease of Writing
Very Dissatisfied
Somewhat Dissatisfied
Fine
Somewhat Satisfied
Highly Satisfied
Readability
Ease in Finding Information
Comment Quality
Comment Quantity
Admin Response
×
Please rate each item regarding Game8.co's Site's new design.
Please rate our site's new design
Very Dissatisfied
Somewhat Dissatisfied
Fine
Somewhat Satisfied
Highly Satisfied
Do you think that the website's design change makes the site easier to use?
Has the new design made it easier for you to find information on the site?
Has the new design improved the overall visual appeal of the site?
How would you rate your overall satisfaction with the new design of the site?
×
How likely are you to recommend Game8 to someone you know?
Very Unlikely
0
1
2
3
4
5
6
7
8
9
10
Very Likely
If you have other opinions regarding potential improvement to the website, please share them with us. We would appreciate your honest opinion.
Note: This is a free response section, so you can proceed without entering anything.
Note: Please be sure not to enter any kind of personal information into your response.
Note: Please be sure not to enter any kind of personal information into your response.
×
Thank You
×
Thank you for participating in our survey! Your answers will help us to improve the quality of our website and services.
We hope you continue to make use of Game8.
We hope you continue to make use of Game8.
Close


Rankings
Gaming News


![Monster Hunter Stories 3 Review [First Impressions] | Simply Rejuvenating](https://img.game8.co/4438641/2a31b7702bd70e78ec8efd24661dacda.jpeg/thumb)
Popular Games

Genshin Impact Walkthrough & Guides Wiki
Honkai: Star Rail Walkthrough & Guides Wiki
Umamusume: Pretty Derby Walkthrough & Guides Wiki
Pokemon Pokopia Walkthrough & Guides Wiki
Resident Evil Requiem (RE9) Walkthrough & Guides Wiki
Monster Hunter Wilds Walkthrough & Guides Wiki
Wuthering Waves Walkthrough & Guides Wiki
Arknights: Endfield Walkthrough & Guides Wiki
Pokemon FireRed and LeafGreen (FRLG) Walkthrough & Guides Wiki
Pokemon TCG Pocket (PTCGP) Strategies & Guides Wiki


Recommended Games
Diablo 4: Vessel of Hatred Walkthrough & Guides Wiki
Cyberpunk 2077: Ultimate Edition Walkthrough & Guides Wiki
Fire Emblem Heroes (FEH) Walkthrough & Guides Wiki
Yu-Gi-Oh! Master Duel Walkthrough & Guides Wiki
Super Smash Bros. Ultimate Walkthrough & Guides Wiki
Pokemon Brilliant Diamond and Shining Pearl (BDSP) Walkthrough & Guides Wiki
Elden Ring Shadow of the Erdtree Walkthrough & Guides Wiki
Monster Hunter World Walkthrough & Guides Wiki
The Legend of Zelda: Tears of the Kingdom Walkthrough & Guides Wiki
Persona 3 Reload Walkthrough & Guides Wiki


All rights reserved
Copyright© 2012-2024 HoYoverse — COGNOSPHERE. All Rights Reserved.
The copyrights of videos of games used in our content and other intellectual property rights belong to the provider of the game.
The contents we provide on this site were created personally by members of the Game8 editorial department.
We refuse the right to reuse or repost content taken without our permission such as data or images to other sites.