Raiden Shogun Best Builds and Teams
✉ Send your thoughts in our Genshin 6.4 Patch Survey!
★ Exclusive: Dive back in time with the Meta History
◆ Hot: Version 6.4, Luna 5 Codes
◆ Builds: Varka, Flins, Skirk, Escoffier
◆ Events: Travelers' Tales, He Who Caught the Wind
◆ Future: Linnea, Version 6.5 Luna VI

Raiden Shogun is a 5-Star Electro Polearm user that best functions as an Electro DPS in Genshin Impact! See her best builds, recommended artifacts and wepaons, materials, and our rating of the Raiden Shogun in this guide!
| Raiden's Character Guides | |||
|---|---|---|---|
|
|
|
||
List of Contents
Raiden Shogun Rating and Basic Info
Raiden's Character Information
| Raiden | ||
|---|---|---|
 |
Rating |
|
| Rarity | ||
| Element | ||
| Weapon | ||
| Voice Actors |
Anne Yatco (EN)
Sawashiro Miyuki (JP) |
|
Tier List Rankings
| Main DPS | Sub-DPS | Support | Exploration |
|---|---|---|---|
|
|
|
- |
|
Raiden's Stats
| Stat | Base Value |
|---|---|
| HP | 2606 |
| ATK | 68 |
| DEF | 159 |
| Energy Recharge% | 100% |
| Stat | Max Value |
|---|---|
| HP | 12907 |
| ATK | 337 |
| DEF | 789 |
| Energy Recharge% | 132.0% |
Base Stat Calculations
 | Stats indicated above are obtained from Raiden's base values. These numbers also exclude the character's equipped weapon, artifacts, talents, or other passive effects that are not innate to the character. |
|---|---|
 | All characters start with 5% CRIT Rate, 50% CRIT DMG, 100% Energy Recharge, 0 Elemental Mastery, 0% Healing Bonus, and 0% Elemental DMG bonus before any additional stats are applied. The table above includes such values. |
 | The Level 20 stats indicated for this character are calculated before their first ascension. |
Raiden's Ascension and Talent Material Summary
| All Ascension Materials Needed |
|---|
|
|
| All Talent Materials Needed |
|
|
Raiden Shogun's Strengths and Weaknesses
| Raiden Shogun's Strengths | |||
|---|---|---|---|
|
• Energy Recharge scaling benefits her damage and overall utlity for her party members. She can supply energy while also being extremely potent with her personal DPS. • Has one of the most impactful constellations at C2. • Pseudo-permanent Elemental Skill with active Electro application, which makes her one of the best for Hyperbloom team comps. • Passively increases the team's Elemental Burst DMG from her Skill. |
|||
| Raiden Shogun's Weaknesses | |||
| • Elemental Burst does not work with certain characters, like Beidou's burst. |
Raiden Shogun Best Builds
Raiden Shogun Main DPS and Support Builds
Energy Recharge Main DPS
| Best Weapon | |
|---|---|
| Replacement Weapons |
3.
|
| Best Artifacts | |
| Artifact Main Stats | |
| Artifact Sub Stats | CRIT DMG, CRIT Rate, ATK%, Energy Recharge, Elemental Mastery |
| Sample Teams | National:
Hyper:
|
Emblem of Severed Fate is the best artifact for Raiden Shogun as a Main DPS. Her support capabilities are also amplified by stacking Energy Recharge with this build, which should be around 200% to 250%, which in turn also gives her Electro DMG Bonus.
If you have Engulfing Lighting, it is strictly better to use an Energy Recharge mainstat for the Sands piece and an Electro Goblet. If you don't have the weapon, you have the option of using a combination of ER Sands and an ATK% Goblet or ATK% Sands and an Electro Goblet.
Raiden Shogun Sub DPS Builds
Hyperbloom Sub DPS
| Best Weapon | |
|---|---|
| Replacement Weapons |
3.
|
| Best Artifacts | |
| Artifact Main Stats | |
| Artifact Sub Stats | Elemental Mastery, Energy Recharge |
| Sample Teams | Hyperbloom:
Hyperbloom:
|
Hyperbloom is Raiden Shogun's best build as a Sub DPS with Flower of Paradise Lost or Gilded Dreams artifacts to amplify the reaction's damage. No other stat other than Elemental Mastery is important, but you can still stack Energy Recharge for the party.
Theoretically speaking, Flower of Paradise Lost would give you more damage, but Gilded Dreams is generally better to farm if you need Deepwood Memories for your Dendro Support.
Raiden Shogun Talent Priority
Main DPS/Support
| 1st | 2nd | 3rd |
|---|---|---|
| Elemental Burst | Elemental Skill | Normal Attack |
Sub-DPS
| 1st | 2nd | 3rd |
|---|---|---|
| Elemental Skill | Elemental Burst | Normal Attack |
Raiden's core utility as a traditional Electro Main DPS relies on using her Elemental Burst, so leveling it up first is very important. Amping her Elemental Skill is also important as her burst damage buffs scales from it.
In a Hyperbloom build, her own level and Elemental Mastery is more important for her damage, but you can level up her Elemental Skill first should you wish to give a bit of buff for your party members.
Raiden Shogun Best Artifacts
Raiden Shogun Artifact Rankings
Best Main DPS or Support Artifacts
| Artifact | Artifact Bonuses | |
|---|---|---|
| 1st |
|
2-PC: Energy Recharge +20%. 4-PC: Increases Elemental Burst DMG by 25% of Energy Recharge. A maximum of 75% bonus DMG can be obtained in this way. |
| 2nd |
|
2-PC: Energy Recharge +20% |
|
|
2-PC: Electro DMG Bonus +15% | |
| 3rd |
|
2-PC: Energy Recharge +20% |
|
|
2-PC: ATK +15% |
We highly suggest sticking with Emblem of Severed Fate as it is Raiden Shogun's all around best artifact. It also increases both her Energy Recharge and Elemental Burst DMG to act as a Main DPS and Support at the same time.
Best Artifacts for Hyperbloom
| Artifact | Artifact Bonuses | |
|---|---|---|
| 1st |
|
2-PC: Elemental Mastery +80 4-PC: The equipping character's Bloom, Hyperbloom, and Burgeon reaction DMG are increased by 40%. Additionally, after the equipping character triggers Bloom, Hyperbloom, or Burgeon, they will gain another 25% bonus to the effect mentioned prior. Each stack of this lasts 10s. Max 4 stacks simultaneously. This effect can only be triggered once per second. The character who equips this can still trigger its effects when not on the field. |
| 2nd |
|
2-PC: Elemental Mastery +80 4-PC: Within 8s of triggering an Elemental Reaction, the character equipping this will obtain buffs based on the Elemental Type of the other party members. ATK is increased by 14% for each member whose Elemental Type is the same as the equipping character, and EM is increased by 50 for every member with a different Elemental Type. Each of the buffs will count up to 3 characters. This effect can be triggered once every 8s and even when not on the field. |
| 3rd |
|
2-PC: Elemental Mastery +80 |
|
|
2-PC: Elemental Mastery +80 |
As mentioned above, it is more resin efficient to farm for Gilded Dreams' domain than the Flower of Paradise Lost, but if you can spare the time for it, then definitely go for the Flower of Paradise Lost artifact instead for more damage.
Best 4-Star Artifact for Raiden Shogun
| Artifact | Artifact Bonuses |
|---|---|
 The Exile The Exile
|
2-PC: Energy Recharge +20% 4-PC: Using an Elemental Burst regenerates 2 Energy for all party members (excluding the wearer) every 2s for 6s. This effect cannot stack. |
 Instructor Instructor
|
2-PC: Increases Elemental Mastery by 80. 4-PC: Upon triggering an Elemental Reaction, increases all party members' Elemental Mastery by 120 for 8s. |
List of Artifacts and Set Bonuses
Raiden Shogun Best Weapons
Raiden Shogun Weapon Rankings
Main DPS Raiden Shogun Weapons
| Weapon | Weapon Information | |
|---|---|---|
| 1st |
 Engulfing Lightning Engulfing Lightning
|
Base ATK: 608 Bonus Stat: Energy Recharge 55.1% Skill Effect: ATK increased by 28% of Energy Recharge over the base 100%. You can gain a maximum bonus of 80% ATK. Gain 30% Energy Recharge for 12s after using an Elemental Burst. |
| 2nd |
 Staff of Homa Staff of Homa
|
Base ATK: 608 Bonus Stat: CRIT DMG 66.2% Skill Effect: HP increased by 20%. Additionally, provides an ATK Bonus based on 0.8% of the wielder’s Max HP. When the wielder's HP is less than 50%, this ATK Bonus is increased by an additional 1% of Max HP. |
| 3rd |
 Wavebreaker's Fin Wavebreaker's Fin
|
Base ATK: 620 Bonus Stat: ATK 13.8% Skill Effect: For every point of the entire party's combined maximum Energy capacity, the Elemental Burst DMG of the character equipping this weapon is increased by 0.12%. A maximum of 40% increased Elemental Burst DMG can be achieved this way. |
Hyperbloom DPS Raiden Shogun Weapons
| Weapon | Weapon Information | |
|---|---|---|
| 1st |
 Dragon's Bane Dragon's Bane
|
Base ATK: 454 Bonus Stat: Elemental Mastery 221 Skill Effect: Increases DMG against enemies affected by Hydro or Pyro by 20%. |
| 2nd |
 Kitain Cross Spear Kitain Cross Spear
|
Base ATK: 565 Bonus Stat: Elemental Mastery 110 Skill Effect: Increases Elemental Skill DMG by 6%. After Elemental Skill hits an opponent, the character loses 3 Energy but regenerates 3 Energy every 2s for the next 6s. This effect can occur once every 10s. Can be triggered even when the character is not on the field. |
| 3rd |
 Ballad of the Fjords Ballad of the Fjords
|
Base ATK: 510 Bonus Stat: CRIT Rate 27.6% Skill Effect: When there are at least 3 different Elemental Types in your party, Elemental Mastery will be increased by 120. |
Best Free-to-Play Weapon for Raiden Shogun
Main DPS Free-to-Play Weapon
| Weapon | Weapon Information |
|---|---|
 The Catch The Catch
|
Base ATK: 510 Bonus Stat: Energy Recharge 45.9% Skill Effect: Increases Elemental Burst DMG by 16% and Elemental Burst CRIT Rate by 6%. |
Sub DPS Free-to-Play Weapon
| Weapon | Weapon Information |
|---|---|
|
Kitain Cross Spear
|
Base ATK: 565 Bonus Stat: Elemental Mastery 110 Skill Effect: Increases Elemental Skill DMG by 6%. After Elemental Skill hits an opponent, the character loses 3 Energy but regenerates 3 Energy every 2s for the next 6s. This effect can occur once every 10s. Can be triggered even when the character is not on the field. |
All Good Weapons for Raiden Shogun
| Recommended Weapons | How to Get |
|---|---|
| Gacha | |
| Gacha | |
| Gacha | |
| Gacha | |
| Gacha | |
| Inazuma Fishing Association | |
| Crafted | |
| Gacha | |
| Crafted | |
| Gacha | |
| Crafted | |
| Battle Pass | |
| Battle Pass | |
| Gacha | |
Raiden Shogun Best Teams
Electro Burst DPS or Sub-DPS
Raiden ensures two things for any team that she is a part of: increased Energy Regeneration and on-demand Electro Burst DMG. However, the second part relies on her having allies that use their Elemental Bursts as well.
With these in mind, Raiden can slot into her own Hypercarry team, or virtually any Electro-related role as the application and Off-Field DMG that her Elemental Skill brings is more than enough for most team comps.
Raiden International Team
| Main DPS | Sub-DPS | Sub-DPS | Support |
|---|---|---|---|
|
|
|
|
|
The premier F2P team for Raiden Shogun that can rival other high-end team comps, especially with her C2. This team focuses on dealing constant Burst type damage thanks to Raiden's ability to nearly fully recharging the team's high burst cost.
Raiden Hypercarry Team
| Main DPS | Sub-DPS | Support | Support |
|---|---|---|---|
|
|
|
|
|
This team focuses on increasing Raiden Shogun's personal damage to the max, using Kazuha's elemental damage bonus, and Sara and Bennett's ATK bonus buffs before landing Raiden's burst damage.
You will need heavy investment for all these characters, especially Sara's C6 and Raiden's C2 to make it worthwhile.
Raiden Overloaded Team
| Main DPS | Sub-DPS | Support | Support |
|---|---|---|---|
|
|
|
|
|
|
|
|
|
|
For building teams around Raiden with Chevreuse, she works as a Hypercarry greatly buffed by the latter's new mechanics plus buffer supports like Bennett and Sara. Chevreuse essentially replaces Kazuha in her normal Hypercarry team.
If you're looking to run Raiden as a Sub-DPS, a ranged character like Yoimiya will work as her Main DPS as she can target enemies even after they have been knockbacked by the Overloaded effect.
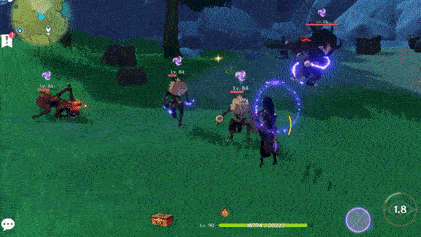
Raiden Hyperbloom Team
| Sub-DPS | Main DPS | Sub-DPS | Support |
|---|---|---|---|
|
|
|
|
|
|
|
|
|
|
|
|
|
|
This Raiden team comp focuses on increasing her personal damage through the Hyperbloom reaction. Strong Dendro and Hydro characters who can create a lot of Dendro Cores are recommended.
Sub-DPS and Support Raiden Team
| Main DPS | Sub-DPS | Support | Support |
|---|---|---|---|
|
|
|
|
|
Raiden can be slotted into any team comp that needs an Electro element, a Sub-DPS burst unit, and a support unit that can help recharge the Elemental Burst of the team. One sample is the Eula-Raiden team comp where Raiden triggers superconduct and recharges Eula and Shenhe's Elemental Burst.
Raiden Shogun Best Constellations
| Imperatrix Umbrosa |
|---|
 |
Constellation and Effects
| Raiden's Constellations | |
|---|---|
| C1 |
Ominous Inscription Chakra Desiderata will gather Resolve even faster. When Electro characters use their Elemental Bursts, the Resolve gained is increased by 80%. When characters of other Elemental Types use their Elemental Bursts, the Resolve gained is increased by 20%. |
| C2 |
Steelbreaker While using Musou no Hitotachi in the Musou Isshin state applied by Secret Art: Musou Shinsetsu, the Raiden Shogun's attacks ignore 60% of opponents' DEF. |
| C3 |
Shinkage Bygones Increases the Level of Secret Art: Musou Shinsetsu by 3. Maximum upgrade level is 15. |
| C4 |
Pledge of Propriety When the Musou Isshin state applied by Secret Art: Musou Shinsetsu expires, all nearby party members (excluding the Raiden Shogun) gain 30% bonus ATK for 10s. |
| C5 |
Shogun's Descent Increases the Level of Transcendence: Baleful Omen by 3. Maximum upgrade level is 15. |
| C6 |
Wishbearer While in the Musou Isshin state applied by Secret Art: Musou Shinsetsu, attacks by the Raiden Shogun that are considered part of her Elemental Burst will decrease all nearby party members' (not including Raiden Shogun herself) Elemental Burst CD by 1s when they hit opponents. This effect can trigger once every 1s and can trigger a total of 5 times during Musou Isshin's duration. |
Best Constellations Rating and Explanation
| Rating | Constellation Effect / Merits | |
|---|---|---|
| C1 | ★★☆ | • Resolve gained through Elemental Bursts of Party members is increased. • More resolves stacks means higher Elemental Burst DMG for Raiden Shogun. |
| C2 | ★★★ |
• Elemental Burst ignores 60% DEF of enemies. • This Constellation provides the highest personal DPS increase for Raiden Shogun |
C2 is Raiden Shogun's Best Constellation
Raiden Shogun at C2 becomes a phenomenal Main DPS and Sub-DPS character at this level. As long as enemies aren't immune to Electro DMG, she will absolutely wipe the floor against any opponent.
Raiden Shogun Ascension and Talent Materials
Raiden Shogun Ascension Materials
| Lv.20→Lv.40 |
|
|---|---|
| Lv.40→Lv.50 |
|
| Lv.50→Lv.60 |
|
| Lv.60→Lv.70 |
|
| Lv.70→Lv.80 |
|
| Lv.80→Lv.90 |
|
Raiden Shogun Talent Level-Up Materials
| Daily Domain Drops | Enemy Drops | Weekly Boss Drops |
|---|---|---|
| Wed/Sat/Sun |
Nobushi |
La Signora Challenge Reward |
|
|
|
|
|
|
|
Raiden Shogun Talents and How to Use
Normal Attack
| Normal Attack: Origin |
|---|
| Perform up to 5 consecutive spear strikes.
Charge Attack Consumes a certain amount of stamina to perform an upward slash. Plunge Attack: Plunges from mid-air to strike the ground below, damaging opponents along the path and dealing AoE DMG upon impact. |
| Attribute | Effect (Lvl 1) |
|---|---|
| 1-Hit DMG | 39.6% |
| 2-Hit DMG | 39.7% |
| 3-Hit DMG | 49.9% |
| 4-Hit DMG | 29% + 29% |
| 5-Hit DMG | 58.1% |
| Charged Attack DMG | 99.6% |
| Charged Attack Stamina Cost | 25.0 |
| Plunge DMG | 63.9% |
| Low/High Plunge DMG | 128%/160% |
Normal Attacks Change After using Elemental Burst
 Secret Art: Musou Shinsetsu |
Raiden Shogun uses a polearm as her weapon of choice. Somewhat similar to Tartaglia, Raiden Shogun's Normal Attacks will change after activating her Elemental Burst and can deal Electro DMG.
Elemental Skill
| Transcendence: Baleful Omen |
|---|
| The Raiden Shogun unveils a shard of her Euthymia, dealing Electro DMG to nearby opponents, and granting nearby party members the Eye of Stormy Judgment.
Eye of Stormy Judgement When characters with this buff attack deal DMG to opponents, the Eye will unleash a coordinated attack, dealing AoE Electro DMG at the opponent's position. Characters who gain the Eye of Stormy Judgment will have their Elemental Burst DMG increased based on the Energy Cost of the Elemental Burst during the Eye's duration. ・The Eye can initiate 1 coordinated attack every 0.9s per party. ・Coordinated attacks generated by characters not controlled by you deal 20% of the normal DMG. |
| Attribute | Effect (Lvl 1) |
|---|---|
| Skill DMG | 117.20% |
| Coordinated ATK DMG | 42.00% |
| Duration | 25.0s |
| Elemental Burst DMG Bonus | 0.22% Per Energy |
| CD | 10.0s |
Deal Off-Party DMG using Elemental Skill
 Transcendence: Baleful Omen |
Raiden Shogun's Elemental Skill, Transcendence: Baleful Omen, can deal Electro DMG to enemies and provide an Eye of Stormy Judgement.
Eye of Stormy Judgement

After using the Skill, Raiden Shogun also summons an Eye of Stormy Judgement, a buff that can increase your party's Elemental Burst DMG while also providing coordinated Electro DMG.
Elemental Burst
| Secret Art: Musou Shinsetsu |
|---|
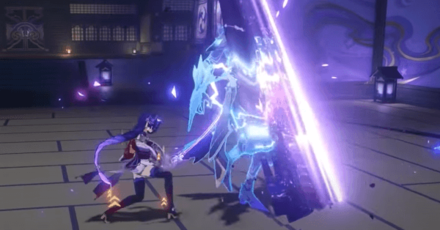
| The Raiden Shogun unleashes the Musou no Hitotachi and deals AoE Electro DMG, using Musou Isshin in combat for a certain duration afterward. The DMG dealt by Musou no Hitotachi and Musou Isshin's attacks will be increased based on the number of Chakra Desiderata's Resolve stacks consumed when the skill is used.
Musou Isshin While in this state, the Raiden Shogun's Normal, Charged, and Plunging ATKs are infused with Electro, which cannot be overriden. When her attacks hit opponents, she regenerates Energy for nearby party members. Energy can be restored this way once every 1s, and this effect can be triggered 5 times throughout the skill's duration. Chakra Desiderata When nearby party members (excluding the Raiden Shogun herself) use their Elemental Bursts, the Raiden Shogun will build up Resolve stacks based on the Energy Cost of these Elemental Bursts. The maximum number of Resolve stacks is 60. The Resolve gained by Chakra Desiderata will be cleared 300s after the Raiden Shogun leaves the field. |
| Attribute | Effect (Lvl 1) |
|---|---|
| Musou no Hitachi Base DMG | 401% |
| Resolve Bonus | 3.89% Initial/0.73% ATK DMG Per Stack |
| Resolve Stacks Gained | 0.15 Per Energy Consumed |
| 1-Hit DMG | 44.7% |
| 2-Hit DMG | 44.00% |
| 3-Hit DMG | 53.8% |
| 4-Hit DMG | 30.9% + 31.0% |
| 5-Hit DMG | 73.9% |
| Charged Attack DMG | 61.6% + 74.4% |
| Plunge DMG | 63.9% |
| Low/High Plunge DMG | 128%/160% |
| Musou Isshin Energy Restoration | 1.6 |
| Musou Isshin Duration | 7.0s |
| CD | 18.0s |
| Energy Cost | 90 |
Deal Electro DMG with her Elemental Burst
After using Raiden Shogun's Elemental Burst, Secret Art: Musou Shinsetsu, she will be able to deal Electro DMG using her Normal Attacks for a short period of time while having increased interruption RES & Electro-charged immunity.
Increase Elemental Burst DMG using Party Members' Bursts

Use the Elemental Bursts of other party members to increase the Raiden Shogun's Resolve stacks. Resolve stacks increase the DMG dealt by Raiden Shogun during her Elemental Burst, therefore the more Resolve you have, the stronger Raiden Shogun gets.
Passive Talent 1
| Wishes Unnumbered |
|---|
| When nearby party members gain Elemental Orbs or Particles, Chakra Desiderata gains 2 Resolve Stacks. This effect can occur once every 3s. |
Passive Talent 2
| Enlighted One |
|---|
| Each 1% above 100% Energy Recharge that the Raiden Shogun possesses grants her: ・0.6% greater Energy restoration from Musou Isshin. ・0.4% Electro DMG Bonus. |
Passive Talent 3
| All-Preserver |
|---|
| Mora expended when ascending Swords and Polearms is decreased by 50%. |
How to Get Raiden
Pull on Raiden's Banner

|
|
| Banner Status | Inactive |
|---|---|
Raiden Shogun was featured in her rerun banner during Phase 2 of Version 5.6 from May 27, 2025 until June 17, 2025. Available alongside her was Kinich's rerun banner!
Related Wish Guides
| Click to view a Banner Guide! | ||
|---|---|---|
 Raiden Banner Raiden Banner |
 Wish Sim Wish Sim |
 All Wishes All Wishes |
Raiden Shogun's In-Game Information
Raiden Character Profile
| Nation | |
|---|---|
| Title | Plane of Euthymia |
| Vision | |
| Gender | Female |
| Race | Puppet |
| Height | Tall Girl |
| Faction | Inazuma City |
| Constellation | Imperatrix Umbrosa |
| Birthday | June 26 |
| Special Dish |
|
| Story Quest |
Chapter: Impeatrix Umbrosa Act 1: Reflections of Mortality Act 2: Transient Dreams |
Character Thoughts About The Raiden Shogun
| Character | In-Game Thoughts |
|---|---|
 Ayaka Ayaka
|
Guesswork: The Almighty Shogun? It would be improper of me to comment, given that I am one of her subjects. All I will say is that... I think that Her Excellency must get lonely on the road to eternity.
Standpoint: To witness the Musou no Hitotachi and live to tell the tale is quite a remarkable feat. Even though I recognize her as our true deity with the power to change Inazuma's fate at will, if there is conflict between the two of you, then... I shall choose to side with you. |
 Ayato Ayato
|
About Raiden Shogun The cost of pursuing eternity has been great for the Almighty Shogun... and for all of Inazuma. These wounds will take time to heal, and as someone with a mediating role to play in the political process, I will be sure to fulfill that which is required of me. |
 Gorou Gorou
|
Grr, the Raiden Shogun... I could never bring myself to accept her past actions, no matter what her reasoning may have been. Though a peace treaty has been signed between Watatsumi Island and the Shogunate, I refues to let my guard down. If conflict ever breaks out again, I will resume my place back on the front line. |
 Itto Itto
|
During the Vision Hunt Decree, the Shogun had to send her top tengu in person to get my Vision off me. Heh, means she must have found me to be quite the pain in the neck. But, y'know, she's abolished the Vision Hunt Decree now, so no hard feelings, I guess. As long as she's learned her lesson, of course. 'Cause if she pulls something like that again, this old pain in the neck will be back with a vengeance. |
 Kazuha Kazuha
|
About Raiden Shogun I've asked myself this question many times since leaving Inazuma. Do I simply resent the Raiden Shogun because of what happened in that duel? Because of the lethal-stroke she dealt my dear friend? I've thought about this a good long time, and I believe the answer is no. My friend died an honorable death in that duel, and the Shogun was not unjustified in her conduct. My dissatisfaction with her has its roots in the Vision Hunt Decree. No-one has the right to rob another of their hopes and dreams — not even a god. |
 Kirara Kirara
|
Parcels sent to Tenshukaku are all packaged intricately with multiple layers of wrapping. Maybe that's what they call a package fit for the Almighty. Shogun. Some of them smell really good... I wonder what's inside. |
 Kokomi Kokomi
|
About Raiden Shogun Now that the Vision Hunt Decree is over, Watatsumi Island has since again returned to normal life. It has never been my intent to scrutinize the rights and wrongs of the Shogun's actions, even to this day. What I do care about is the future of our island. It is my hope that the Shogun will fulfill her promise and that we can live with the Shogunate in peace. However, if there comes a day when she once again casts aside the aspirations of the people, I can assure you that we won't sit by and watch. |
 Neuvillette Neuvillette
|
About Electro Archon As a survivor of the dragon race who has regained my full dragonhood, I must fulfill my oaths and obligations even if it means returning all the water in the oceans back to the heavens. In taking the Authority of Electro, the Narukami placed herself on the list of the usurpers, she will... Oh, you say she has isolated herself in the Plane of Euthymia, and now rarely appears in public? Then I shall pay her a visit in another few centuries. |
 Sara Sara
|
Trust: As I'm sure you've heard many times before, the Almighty Shogun seeks Eternity — an existence beyond the dominion of thought and longing. "Abandon mortal ties, strive for an unchanging Eternity"... The Almighty Shogun's manner is always resolute, and I do not always fully grasp the meaning of her words. But this is her decision, and I trust her.
Service: So, the Vision Hunt Decree was repealed... Yes, it seems that you were right. ...Ahem, but this is not to say that the Almight Shogun made a mistake. She has simply chosen eternity by a different route. I do not know whether the Shogun has finally found inner peace after protecting Inazuma over these millennia. All I know is that however perilous the road ahead may become, I will follow her as I have always done. |
 Sayu Sayu
|
About Raiden Shogun Her Excellency? Definitely not someone I'd ever get to meet. If you've got questions, maybe Miss Ayaka's the person to ask. |
 Shinobu Shinobu
|
After the Sakoku Decree was lifted, the Raiden Shogun issued many decrees aimed at supporting the development of various industries. All those certificates I received during the Sakoku Decree are coming in real handy now, and the gang is finally out of the red... Fate really does have its ways. Who would've thought after all that, I'd still have her to thank? |
 Thoma Thoma
|
Comparison: In my homeland of Mondstadt, almost everyone has great reverence for the Anemo Archon, Barbatos. But people in Inazuma feel a little differently toward the Shogun. How can I put this... They fell love, respect, gratitude... but also fear.
The Unknown: Honestly, I don't harbor any resentment toward the Shogun. Yes, she almost took my Vision away, but ultimately that's just because of her unique perspective. Everyone has their own perspective, there's nothing strange about that. The only thing I don't understand is her goal in doing so. What does she imagine eternity really look like for Inazuma? And why is sacrificing her people's aspirations so necessary to achieve it? I can neither understand nor agree with her approach. |
 Venti Venti
|
About Baal So, I hear you defeated the mighty Raiden Shogun? Ah, I recall the days when she was a kagemusha, seeking to perfect her martial prowess. Hehe, she now no doubt employs a wide range of reasoning to get you to train with her. Oh but yes, come close and I shall let you in on her weakness – desserts! |
 Wanderer Wanderer
|
About Raiden Shogun She completely neglected her own creation, and to add insult to injury, she said it was because she "couldn't bring herself to intervene" in my fate... |
 Yae Miko Yae Miko
|
Locking herself away in the Plane of Euthymia when she clearly wants to be out — it's just willful self-torture, really... On the other hand, it's also rather stubborn-but-cute, don't you think? |
 Yoimiya Yoimiya
|
Fireworks are probably the furthest thing from the "eternity" that the Shogun pursues. She probably feels that their transient glory has no practical purpose in Inazuma. It's probably something that one who has "eternity" in their grasp will find hard to comprehend. It is precisely because we mortals are like fleeting shadows that we need to treasure such flickers of beauty. |
 Zhongli Zhongli
|
About Baal Time tempers all volition. Yet she would give up everyone for her beliefs. Perhaps it is for this very reason that she has come to where she stands today... Should the chance come by me, I too would like to learn of the Eternity for which she so earnestly endeavors. |
The Raiden Shogun's Thoughts About Others
| Character | In-Game Thoughts |
|---|---|
|
Ayaka
|
About Ayaka Kamisato... One of the most distinguished clans in all of Inazuma. Eh? That's exactly what the Shogun said? Well, A—Ayaka's also well-versed in the art of the sword. |
|
Ayato
|
About Ayato Kamisato... One of the most distinguished clans in all of Inazuma. Despite Ayato's trickery in regard of the Tri-Commission's affairs, he is nevertheless a loyal subject. His past misdeeds shall be excused. |
|
Itto
|
About Itto Who? |
 Nahida Nahida
|
About Buer I admire her humility; it is a sign of true wisdom. With the power she holds, Buer is capable of doing many things beyond our wildest imaginations... and yet, she uses her power only to right wrongs and to protect. She is a truly gentle god. |
|
Thoma
|
About Thoma I can’t deny that I am somewhat culpable in the events that lead to him being almost stripped of his vision, but I rather think the Shogun should be the one to extend a formal apology to him… Okay, fine. I’ll give it some thought... |
|
Wanderer
|
About Kunikuzushi He came about as a byproduct of creating the Shogun. Perhaps it's because I feel like I owe him something, but I do not wish to assert control over him. |
Genshin Impact Character Guides

All Characters and Voice Actors
List of All Characters
| Characters by Element | |||
|---|---|---|---|
Playable Characters
 Chasca
 Faruzan
 Heizou
 Ifa
Ifa Jahoda
 Jean
Jean Lan Yan
 Lynette
 Mizuki
 Sucrose
 Traveler (Anemo)
 Varka
Varka Xianyun
 Xiao
Xiao Aloy
Aloy Charlotte
 Chongyun
 Citlali
 Diona
Diona Escoffier
 Eula
Eula Freminet
 Ganyu
Ganyu Kaeya
Kaeya Layla
Layla Mika
Mika Qiqi
Qiqi Rosaria
 Shenhe
 Skirk
Skirk Wriothesley
 Alhaitham
 Baizhu
 Collei
 Emilie
 Kaveh
Kaveh Kinich
 Lauma
Lauma Nefer
Nefer Tighnari
 Traveler (Dendro)
 Yaoyao
 Beidou
 Clorinde
 Cyno
Cyno Dori
Dori Fischl
 Flins
Flins Iansan
 Ineffa
 Keqing
 Lisa
Lisa Ororon
 Raiden
 Razor
Razor Sethos
 Traveler (Electro)
 Varesa
 Albedo
 Chiori
 Illuga
 Kachina
 Navia
Navia Ningguang
 Noelle
 Traveler (Geo)
 Xilonen
 Yun Jin
 Zibai
Zibai Aino
Aino Barbara
 Candace
 Columbina
 Dahlia
 Furina
 Mona
Mona Mualani
 Nilou
Nilou Sigewinne
 Tartaglia
 Traveler (Hydro)
 Xingqiu
 Yelan
Yelan Amber
Amber Arlecchino
 Bennett
 Chevreuse
 Dehya
Dehya Diluc
Diluc Durin
Durin Gaming
 Hu Tao
 Klee
Klee Lyney
Lyney Mavuika
 Traveler (Pyro)
 Xiangling
 Xinyan
 Yanfei
Upcoming Characters
| All Upcoming Characters |
 Alice Alice
|
 Capitano Capitano
|
 Dainsleif Dainsleif
|
 Dottore Dottore
|
|---|---|---|---|
 Linnea Linnea
|
 Lohen Lohen
|
 Nicole Nicole
|
 Pantalone Pantalone
|
 Pierro Pierro
|
 Pulcinella Pulcinella
|
 Rerir Rerir
|
 Sandrone Sandrone
|
 Tsaritsa Tsaritsa
|
|||
Character Lists
| Characters by Rarity | |
|---|---|
| 5-Star Characters | 4-Star Characters |
| Free Characters | |
| Characters by Weapon Used | |
| Sword Users | Claymore Users |
| Polearm Users | Bow Users |
| Catalyst Users | |
| Characters by Role | |
| Main DPS Characters | Sub DPS Characters |
| Support Characters | Healers |
| Shield Characters | Buff Providers |
| Best for Exploration | Local Specialty Passives |
| Double Reward Passives | |
| Characters by Gender | |
| Male Characters | Female Characters |
| Short Male Characters | Short Female Characters |
| Medium Male Characters | Medium Female Characters |
| Tall Male Characters | Tall Female Characters |
| Characters by Height | |
| Short Characters | Medium Characters |
| Tall Characters | |
| Characters by Region | |
| Mondstadt Characters | Liyue Characters |
| Inazuma Characters | Sumeru Characters |
| Fontaine Characters | Natlan Characters |
| Nod-Krai Characters | |
Comment
I pulled her in her last rerun as a new player, hoping that this will be my main electro dps. Since that day, she keep going downwards:( Now, after earning Gaming a 4 star, he is doing more dmg than her :( But her subdps is still viable at least. If Fischl is SS, and Ororon is A, Id say Raiden still land around S tier. More like -S. If another Electro subdps come, definitely be down to A :( So, new f2p player, plz do not. Inazuma storyline may be convincing raiden as the best. Dont.
Author

Raiden Shogun Best Builds and Teams


Rankings
Gaming News


![Monster Hunter Stories 3 Review [First Impressions] | Simply Rejuvenating](https://img.game8.co/4438641/2a31b7702bd70e78ec8efd24661dacda.jpeg/thumb)
Popular Games

Genshin Impact Walkthrough & Guides Wiki
Honkai: Star Rail Walkthrough & Guides Wiki
Umamusume: Pretty Derby Walkthrough & Guides Wiki
Pokemon Pokopia Walkthrough & Guides Wiki
Resident Evil Requiem (RE9) Walkthrough & Guides Wiki
Monster Hunter Wilds Walkthrough & Guides Wiki
Wuthering Waves Walkthrough & Guides Wiki
Arknights: Endfield Walkthrough & Guides Wiki
Pokemon FireRed and LeafGreen (FRLG) Walkthrough & Guides Wiki
Pokemon TCG Pocket (PTCGP) Strategies & Guides Wiki


Recommended Games
Diablo 4: Vessel of Hatred Walkthrough & Guides Wiki
Cyberpunk 2077: Ultimate Edition Walkthrough & Guides Wiki
Fire Emblem Heroes (FEH) Walkthrough & Guides Wiki
Yu-Gi-Oh! Master Duel Walkthrough & Guides Wiki
Super Smash Bros. Ultimate Walkthrough & Guides Wiki
Pokemon Brilliant Diamond and Shining Pearl (BDSP) Walkthrough & Guides Wiki
Elden Ring Shadow of the Erdtree Walkthrough & Guides Wiki
Monster Hunter World Walkthrough & Guides Wiki
The Legend of Zelda: Tears of the Kingdom Walkthrough & Guides Wiki
Persona 3 Reload Walkthrough & Guides Wiki


All rights reserved
Copyright© 2012-2024 HoYoverse — COGNOSPHERE. All Rights Reserved.
The copyrights of videos of games used in our content and other intellectual property rights belong to the provider of the game.
The contents we provide on this site were created personally by members of the Game8 editorial department.
We refuse the right to reuse or repost content taken without our permission such as data or images to other sites.
I agree that Raiden isn't a good pull at this point unless you just want her as a character without regard to meta. To be fair she came out over 4 years ago and power bloat has left her as a so so dps, a decent sub-dps and good energy battery but not a great investment. If you are just looking for bang for your buck Mavuika is still queen since she does top tier dps and sub-dps, but is more flexible than the Nod-Krai characters.