This survey will take about 1 minute.
Your answers will help us to improve our website.
Genshin Impact
Sumeru Arrow Rune Puzzle Locations and Guide
✉ Send your thoughts in our Genshin 6.4 Patch Survey!
★ Exclusive: Dive back in time with the Meta History
◆ Hot: Version 6.4, Luna 5 Codes
◆ Builds: Varka, Flins, Skirk, Escoffier
◆ Events: Travelers' Tales, He Who Caught the Wind
◆ Future: Linnea, Version 6.5 Luna VI

Learn the locations of all three Sumeru Arrow Rune Puzzles in Genshin Impact and how to solve them here! The Sumeru Arrow Rune Puzzle is a series of puzzles that will reward you with a Luxurious Chest upon completion!
List of Contents
What are Sumeru Arrow Rune Puzzles?
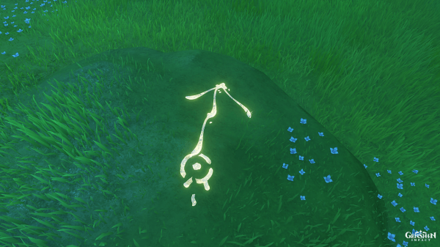
The Sumeru Arrow Rune Puzzle is a series of puzzles that involves mysterious hidden plants that can be revealed by activating Tri-Lakshana Creatures. Completing each challenge lights up a rune arrow pointing at the next puzzle until you reach the final reward.
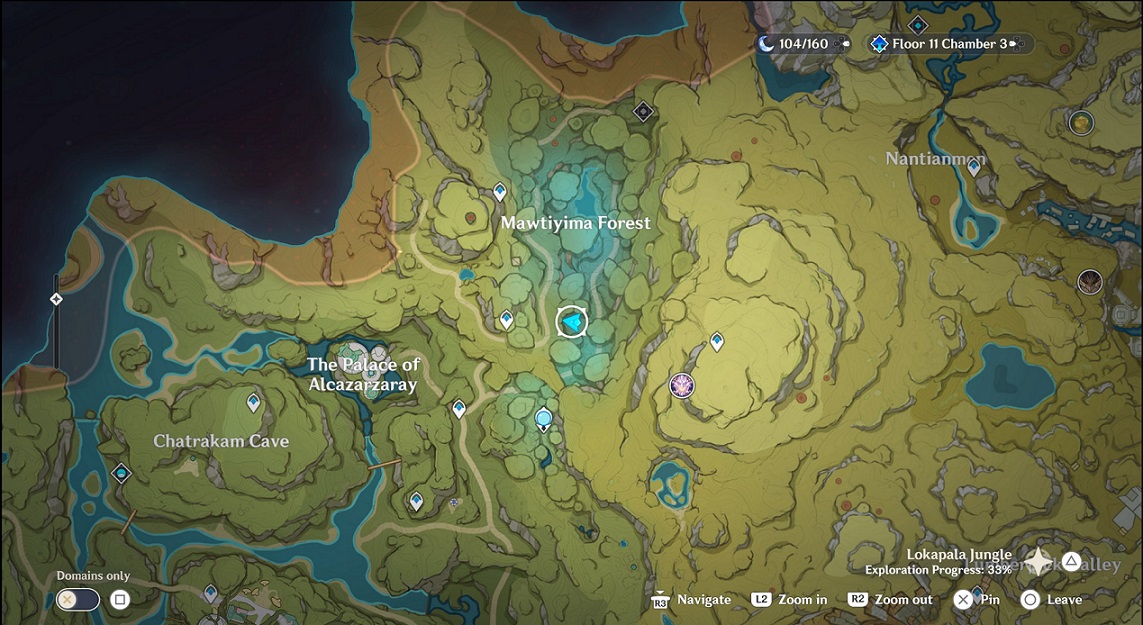
Sumeru Arrow Rune Puzzle Map Locations
All Sumeru Arrow Rune Puzzle Locations
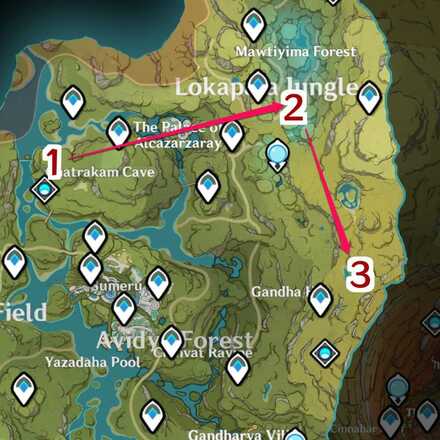
Found in northeast Sumeru
All Sumeru Arrow Rune Puzzles including the final reward are located in northeast Sumeru.
How to Solve the Sumeru Arrow Rune Puzzles
#1. Chatrakam Cave Arrow Rune Puzzle
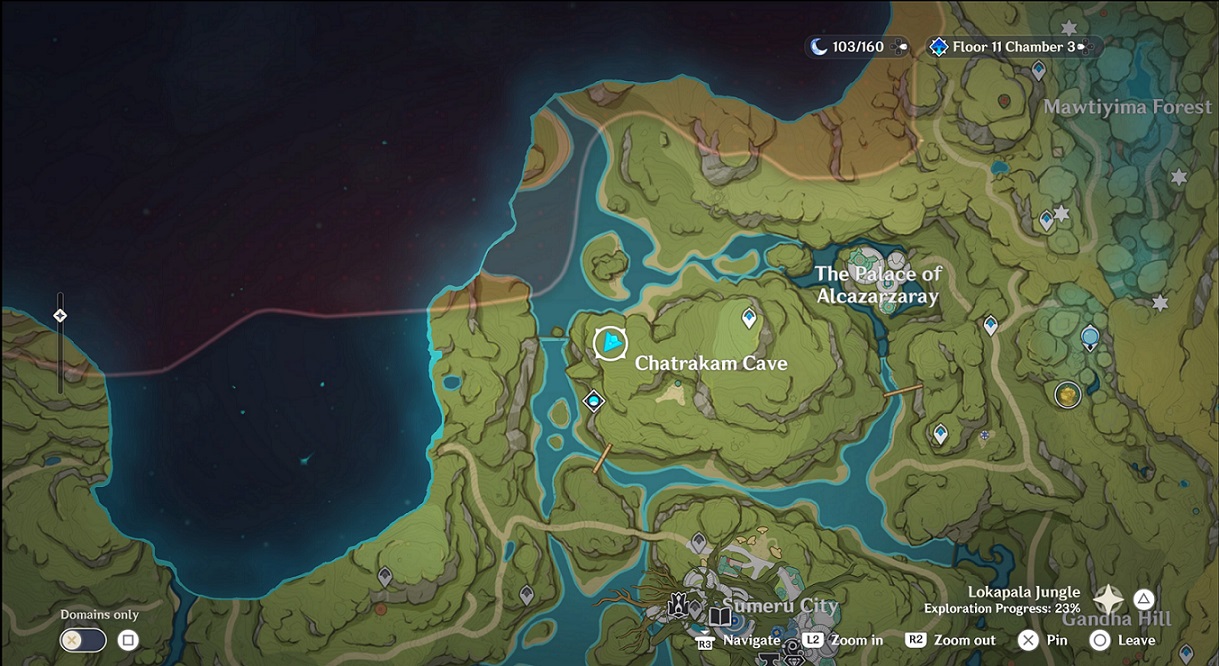
The first Arrow Rune Puzzle is located on Chatrakam Cave. You can easily find this spot by looking for three Pyro Slimes surrounding a scorched bouncy mushroom.
Grab the Dendroculus above
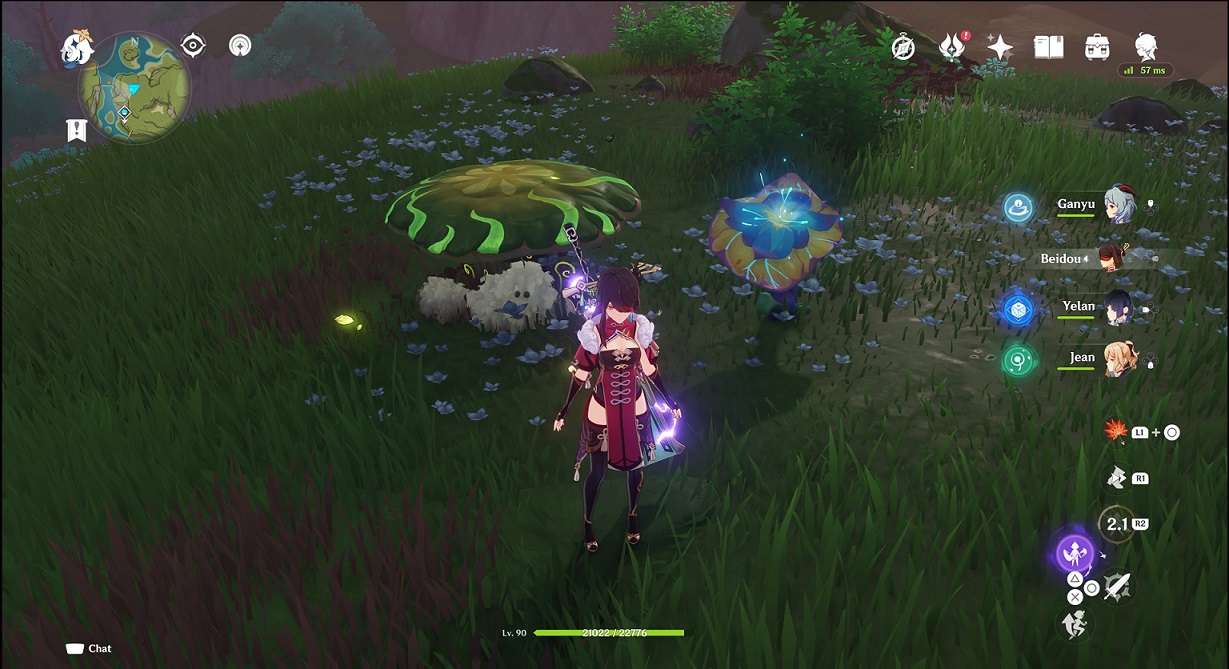
Once the slimes are taken care of, use Dendro on the mushroom to return it to its normal state then activate it with Electro. This will reveal a hidden plant beside it.
Activate the plant to spawn Four-Leaf Sigils above you. Jump on the activated mushroom and use the sigils to reach the Dendroculus and complete this puzzle.
Open the chest after collecting the Dendroculus
A common chest will appear upon collecting the Dendroculus and an arrow rune will light up pointing to the next puzzle.
#2. Mawtiyima Forest Arrow Rune Puzzle
The next Arrow Rune Puzzle is in the southern part of Mawtiyima Forest. You will find another scorched Tri-Lakshana Creature surrounded by Pyro Slimes.
Defeat the Fungi
Defeat the slimes, use Dendro on the mushroom, activate it with Electro, then activate the revealed plant to continue the puzzle. This will spawn Fungi that you'll have to defeat to progress.
Open the chest and check the arrow on the wall
Clearing the challenge will reward you with another common chest. Another arrow rune will also light up on the nearby wall pointing south to the last puzzle.
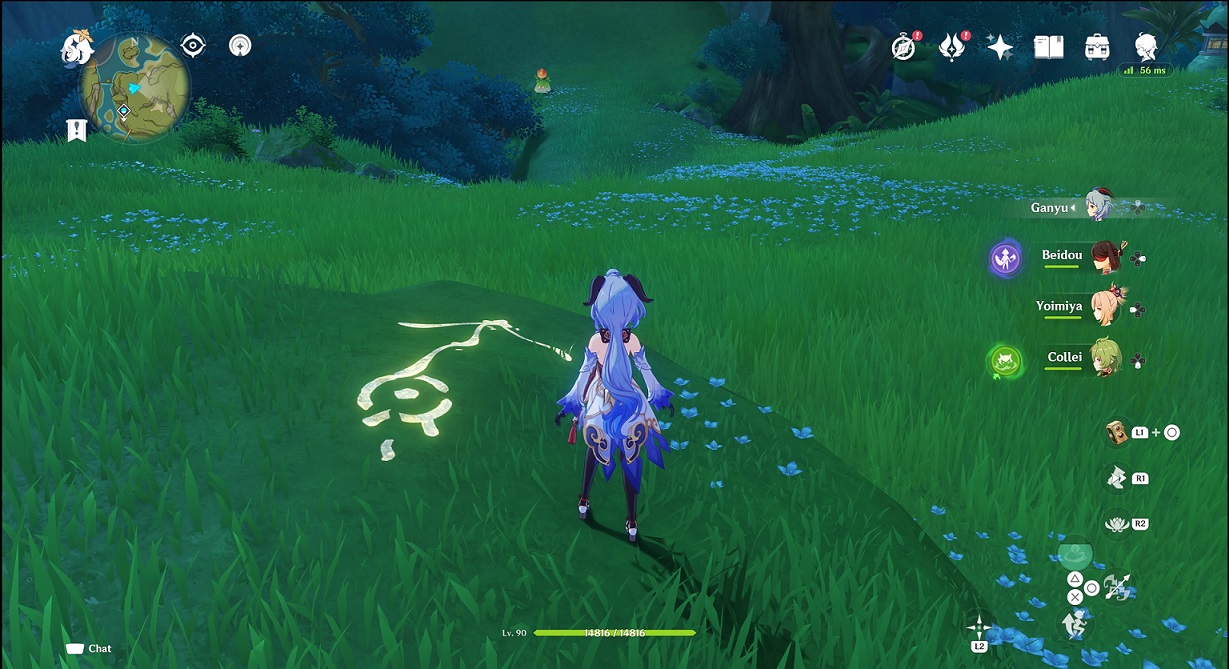
#3. Gandha Hill Arrow Rune Puzzle
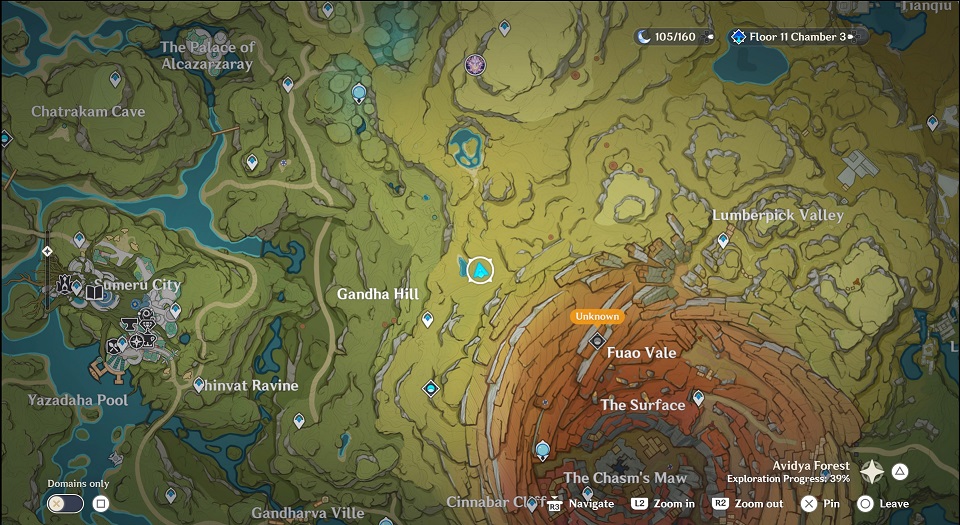
Travel south to Gandha Hill to find the last Arrow Rune Puzzle on the eastern part of Gandha Hill. You will find a Dendro Pile this time, a Tri-Lakshana Creature, surrounded by yet another group of Pyro Slimes.
Activate the plant to reveal Dendro Piles
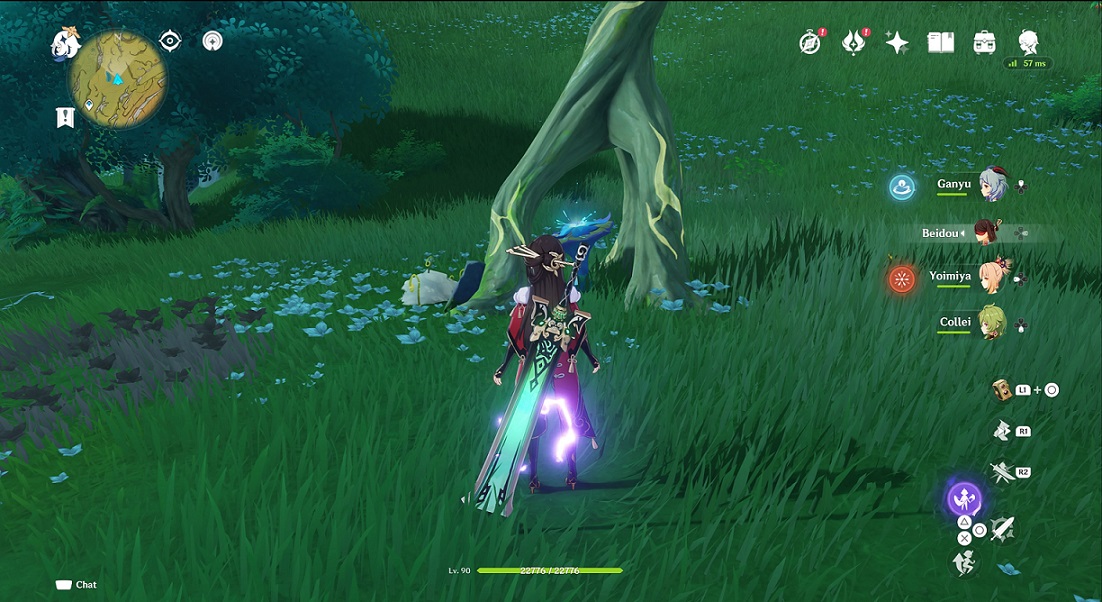
Revitalize the Dendro Pile with Dendro to find a hidden plant underneath it. Apply Electro to the creature and activate the plant to reveal two more Dendro Piles.
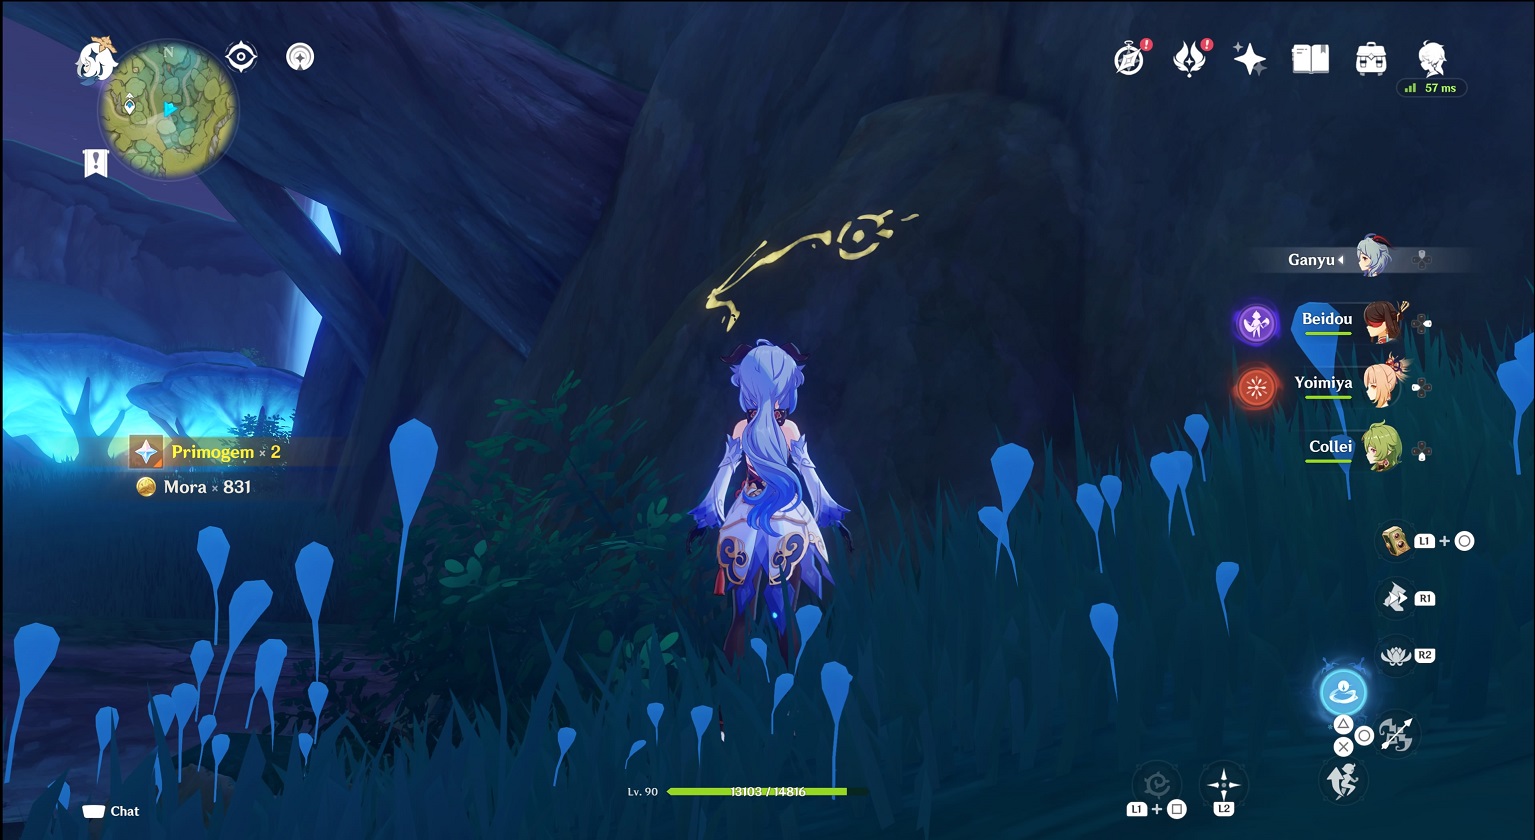
Apply Dendro on the Dendro Piles and defeat the enemies

Apply Dendro to the two new Dendro Piles and defeat the enemies to be rewarded with a common chest and light up another arrow rune pointing to your completion reward!
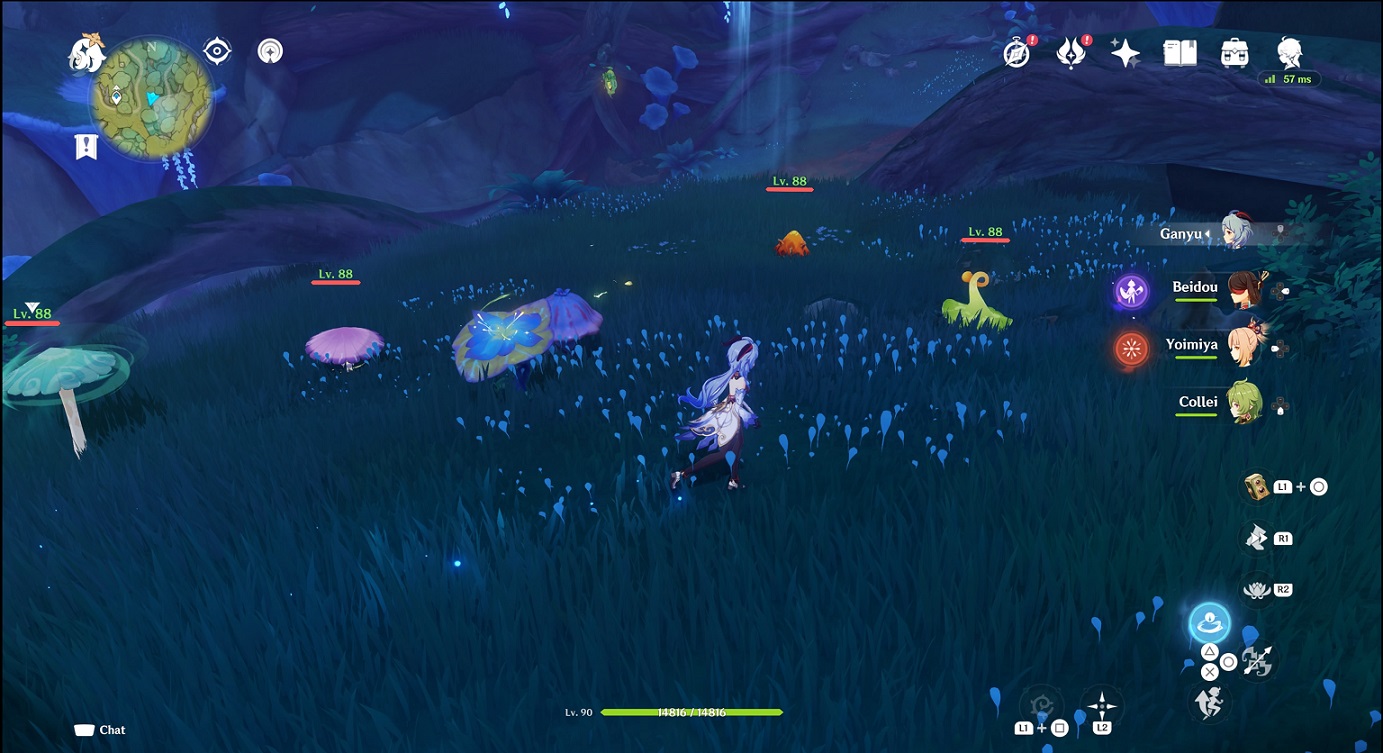
Sumeru Arrow Rune Puzzle Rewards
Obtain a Luxurious Chest at the Final Location
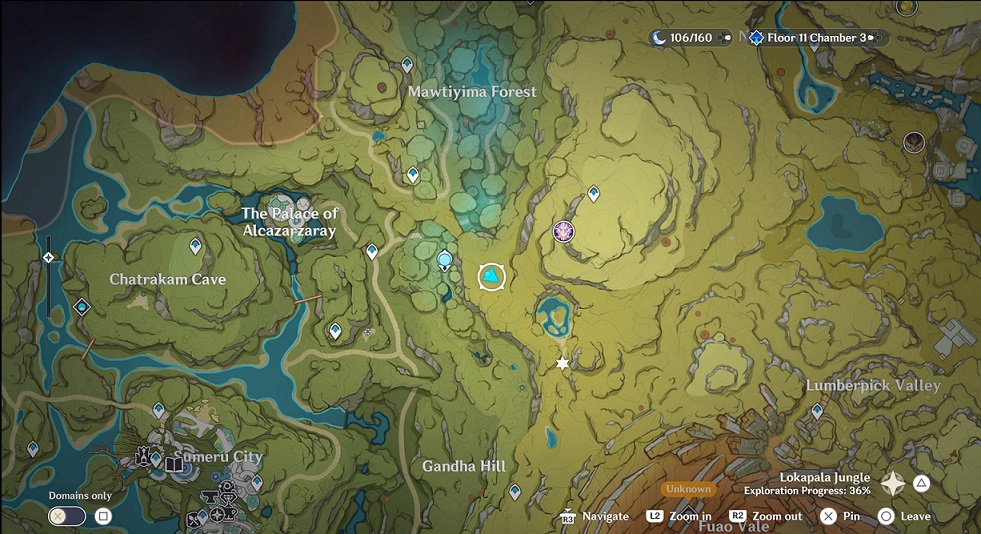
Completing the third puzzle in Gandha Hill will light up the last arrow pointing north. Go to the spot just east of the Statue of the Seven and you'll find a Luxurious Chest in the middle of the field!
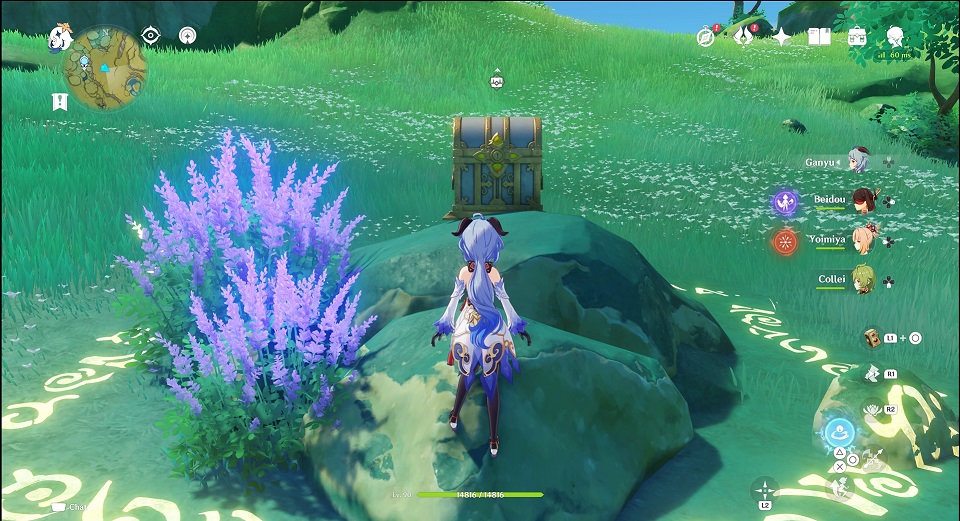
Approaching the chest will spawn enemies around it. Defeat them and the Luxurious Chest will be yours for the taking!
Related Guides
All Tips and Tricks Guides

All Version 3.0 Tips & Tricks
Other Regional Tips & Tricks
Comment
1  Anonymous over 3 years
I did this puzzle, all but the chatrakam one. So, that part of the main puzzle isn't lit up. i must have gotten the dendroculus already or something???? I have no idea. But it won't light up. The pyros are dead, got the first chest, but the second one, and the sigils, won't appear. It's KILLING ME. WHAT DO I DO?
Author

Sumeru Arrow Rune Puzzle Locations and Guide
Please participate in our site
improvement survey
03/2026
improvement survey
03/2026
Would you assist in
improving Game8's site?
improving Game8's site?

×
We are listening to our users' valuable opinions and discussing how to act on them.
The information collected through this survey will be used for the purpose of improving our services. In addition, the information will only be disclosed a part of a statistic in a format that will not allow identification of personal information.
Begin Survey
Not Now
×
Please rate each item regarding Game8.co's Advertisements.
Amount of Ads
Very Dissatisfied
Somewhat Dissatisfied
Fine
Somewhat Satisfied
Highly Satisfied
Placement of Ads
Timing of Ad Display
Ad Loading Speed
Safeness of Ads
Content of Ads
×
Please rate each item regarding Game8.co's Quality of Articles.
Amount of information
Very Dissatisfied
Somewhat Dissatisfied
Fine
Somewhat Satisfied
Highly Satisfied
Frequency of updates
Speed of new information
Accuracy of articles
Understandibility of articles
Readability of sentences
×
Please rate each item regarding Game8.co's Usability of the Site.
Ease of finding information
Very Dissatisfied
Somewhat Dissatisfied
Fine
Somewhat Satisfied
Highly Satisfied
Loading Speed
Use of Color
Font Size
Visibility of Images
Easy to Understand Layout
×
Please rate each item regarding Game8.co's Message Boards, Comments.
Ease of Writing
Very Dissatisfied
Somewhat Dissatisfied
Fine
Somewhat Satisfied
Highly Satisfied
Readability
Ease in Finding Information
Comment Quality
Comment Quantity
Admin Response
×
Please rate each item regarding Game8.co's Site's new design.
Please rate our site's new design
Very Dissatisfied
Somewhat Dissatisfied
Fine
Somewhat Satisfied
Highly Satisfied
Do you think that the website's design change makes the site easier to use?
Has the new design made it easier for you to find information on the site?
Has the new design improved the overall visual appeal of the site?
How would you rate your overall satisfaction with the new design of the site?
×
How likely are you to recommend Game8 to someone you know?
Very Unlikely
0
1
2
3
4
5
6
7
8
9
10
Very Likely
If you have other opinions regarding potential improvement to the website, please share them with us. We would appreciate your honest opinion.
Note: This is a free response section, so you can proceed without entering anything.
Note: Please be sure not to enter any kind of personal information into your response.
Note: Please be sure not to enter any kind of personal information into your response.
×
Thank You
×
Thank you for participating in our survey! Your answers will help us to improve the quality of our website and services.
We hope you continue to make use of Game8.
We hope you continue to make use of Game8.
Close


Rankings
Gaming News


![Monster Hunter Stories 3 Review [First Impressions] | Simply Rejuvenating](https://img.game8.co/4438641/2a31b7702bd70e78ec8efd24661dacda.jpeg/thumb)
Popular Games

Genshin Impact Walkthrough & Guides Wiki
Honkai: Star Rail Walkthrough & Guides Wiki
Umamusume: Pretty Derby Walkthrough & Guides Wiki
Pokemon Pokopia Walkthrough & Guides Wiki
Resident Evil Requiem (RE9) Walkthrough & Guides Wiki
Monster Hunter Wilds Walkthrough & Guides Wiki
Wuthering Waves Walkthrough & Guides Wiki
Arknights: Endfield Walkthrough & Guides Wiki
Pokemon FireRed and LeafGreen (FRLG) Walkthrough & Guides Wiki
Pokemon TCG Pocket (PTCGP) Strategies & Guides Wiki


Recommended Games
Diablo 4: Vessel of Hatred Walkthrough & Guides Wiki
Cyberpunk 2077: Ultimate Edition Walkthrough & Guides Wiki
Fire Emblem Heroes (FEH) Walkthrough & Guides Wiki
Yu-Gi-Oh! Master Duel Walkthrough & Guides Wiki
Super Smash Bros. Ultimate Walkthrough & Guides Wiki
Pokemon Brilliant Diamond and Shining Pearl (BDSP) Walkthrough & Guides Wiki
Elden Ring Shadow of the Erdtree Walkthrough & Guides Wiki
Monster Hunter World Walkthrough & Guides Wiki
The Legend of Zelda: Tears of the Kingdom Walkthrough & Guides Wiki
Persona 3 Reload Walkthrough & Guides Wiki


All rights reserved
Copyright© 2012-2024 HoYoverse — COGNOSPHERE. All Rights Reserved.
The copyrights of videos of games used in our content and other intellectual property rights belong to the provider of the game.
The contents we provide on this site were created personally by members of the Game8 editorial department.
We refuse the right to reuse or repost content taken without our permission such as data or images to other sites.
I've got the same issue. I think I'll just report it as a bug