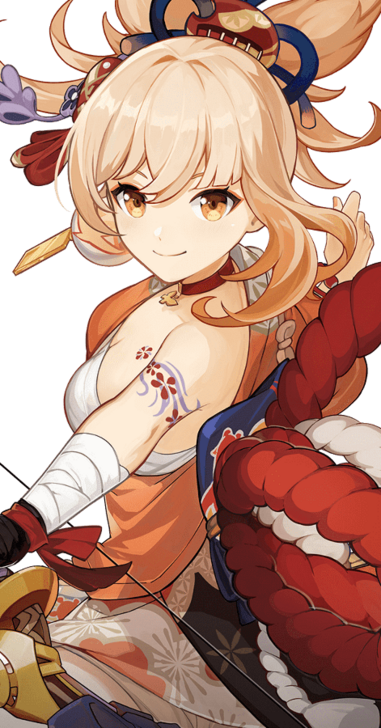
Yoimiya Rating and Best Builds
✉ Send your thoughts in our Genshin 6.4 Patch Survey!
★ Exclusive: Dive back in time with the Meta History
◆ Hot: Version 6.4, Luna 5 Codes
◆ Builds: Varka, Flins, Skirk, Escoffier
◆ Events: Travelers' Tales, He Who Caught the Wind
◆ Future: Linnea, Version 6.5 Luna VI

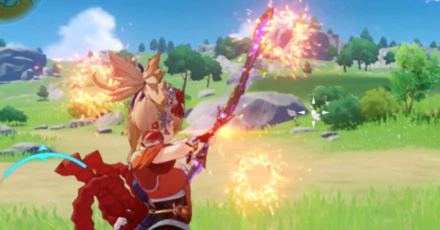
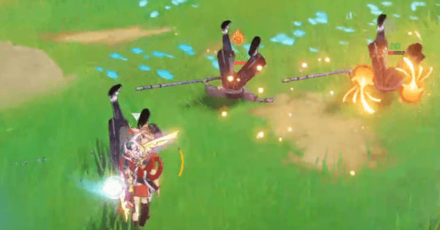
Yoimiya is a Pyro bow user who specializes in defeating single target opponents in Genshin Impact. See Yoimiya's best builds, weapon, artifacts, team comp, materials and our rating of this character in this Genshin Impact guide!
| Yoimiya's Character Guides | |||
|---|---|---|---|
|
|
|
||
List of Contents
Yoimiya Rating and Info
Character Information
| Yoimiya | ||
|---|---|---|
 |
Rating |
|
| Rarity | ||
| Element | ||
| Weapon | ||
| Voice Actors |
Jenny Yokobori (EN)
Ueda Kana (JP) |
|
Tier List Rankings
| Main DPS | Sub-DPS | Support | Exploration |
|---|---|---|---|
|
|
- | - |
|
Character Tier List | Best Characters
Yoimiya's Stats
| Stat | Base Value |
|---|---|
| HP | 2053 |
| ATK | 65 |
| DEF | 124 |
| CRIT Rate% | 5% |
| Stat | Max Value |
|---|---|
| HP | 10164 |
| ATK | 323 |
| DEF | 615 |
| CRIT Rate% | 24.2% |
Base Stat Calculations
 | Stats indicated above are obtained from Yoimiya's base values. These numbers also exclude the character's equipped weapon, artifacts, talents, or other passive effects that are not innate to the character. |
|---|---|
 | All characters start with 5% CRIT Rate, 50% CRIT DMG, 100% Energy Recharge, 0 Elemental Mastery, 0% Healing Bonus, and 0% Elemental DMG bonus before any additional stats are applied. The table above includes such values. |
 | The Level 20 stats indicated for this character are calculated before their first ascension. |
Yoimiya's Ascension and Talent Material Summary
| All Ascension Materials Needed |
|---|
|
|
| All Talent Materials Needed |
|
|
Yoimiya Strengths and Weaknesses
| Strengths |
|---|
|
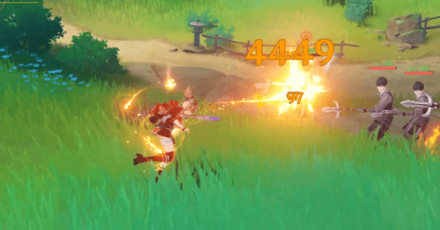
• One of the best single-target damage dealers versus bosses and other Elite enemies. • Specializes in Normal Attacks from a distance. • Special Charged Attack can be used for homing against farther enemies in the Overworld. |
| Weaknesses |
|
• As she's only single-target focused, she lacks AoE and would struggle against groups of larger enemies. • She must remain stationary as dodging or moving breaks up her Normal Attack string, which loses a large part of her damage as her largest scaling is on the last part of its combo. • Elemental Burst effect and ATK buffs don't apply to herself without constellations. • Elemental Burst exists solely to fill her downtime, and her Special Charged Attacks is only realistically usable for exploration, but both abilities are otherwise inessential to her Normal Attacks, which makes up the bulk of her damage. |
Yoimiya Best Builds
Yoimiya Main DPS Builds
Normal Attack Main DPS
| Best Weapon | |
|---|---|
| Replacement Weapons | 1.
3.
|
| Best Artifacts | |
| Artifact Main Stats | |
| Artifact Sub Stats | CRIT DMG, CRIT Rate. ATK%, Elemental Mastery, Energy Recharge |
| Sample Teams | Vaporize:
Overload:
|
This is currently the best Main DPS build for Yoimiya. This is at a cost of not being able to use her Elemental Burst reliably off cooldown but is less of an issue for Sub-DPS characters that don't need the ATK% buff from Yoimiya's burst (like Yelan).
Though the Echoes set could fix the issue, its rng nature makes it too unreliable.
Pyro Reactions DPS
| Best Weapon | |
|---|---|
| Replacement Weapons | 1.
3.
|
| Best Artifacts | |
| Artifact Main Stats | |
| Artifact Sub Stats | Energy Recharge, CRIT DMG, CRIT Rate, ATK%, Elemental Mastery |
| Sample Teams | Vaporize:
Overload:
|
This build for Yoimiya takes advantage of her Pyro-infused normal attacks from her Elemental Skill.
It's slightly behind in damage compared to the Shimenawa set, but outshines it when using an Overloaded or Vaporize team comp, as long as you have characters like Chevreuse or Xingqiu.
Mix and Match Set
| Best Weapon | |
|---|---|
| Replacement Weapons | 1.
3.
|
| Best Artifacts | |
| Artifact Main Stats | |
| Artifact Sub Stats | Energy Recharge, CRIT DMG, CRIT Rate, ATK% |
| Sample Teams | Vaporize:
Overload:
|
Mixing different 2pc. sets together for Yoimiya can be a good middle ground when you don't want to farm for complete sets, especially if you already have perfect substats for each piece.
Yoimiya Talent Priority
| 1st | 2nd | 3rd |
|---|---|---|
| Normal Attack | Elemental Burst | Elemental Skill |
Normal Attacks are the primary source of Yoimiya's damage, so it should be maxed out first. Her Elemental Burst has more utility compared to her Elemental skill, but each should be leveled up somewhat equally.
Yoimiya Best Artifacts
Best Artifacts Ranked
| Artifact | Artifact Bonuses | |
|---|---|---|
| 1st |
|
2-PC: ATK +18%. 4-PC: When casting an Elemental Skill, if the character has 15 or more Energy, they lose 15 Energy and Normal/Charge/Plunging Attack DMG is increased by 50% for 10s. This effect will not trigger again during that duration. |
| 2nd |
|
2-PC: Pyro DMG Bonus +15%. 4-PC: Increases Overloaded, Burning, and Burgeon DMG by 40%. Increases Vaporize and Melt DMG by 15%. Using an Elemental Skill increases 2-Piece Set effects by 50% for 10s. Max 3 stacks. |
| 3rd |
|
2-PC: Pyro DMG Bonus +15%. |
|
|
2-PC: ATK +18%. |
Best 4-Star Artifact for Yoimiya
| Artifact | Artifact Bonuses |
|---|---|
 Martial Artist Martial Artist
|
2-PC: Increases Normal Attack and Charged Attack DMG by 15%. 4-PC: After using Elemental Skill, increases Normal Attack and Charged Attack DMG by 25% for 8s. |
List of Artifacts and Set Bonuses
Yoimiya Best Weapons
Yoimiya Weapon Rankings
| Weapon | Weapon Information | |
|---|---|---|
| 1st |
 Thundering Pulse Thundering Pulse
|
Base ATK: 608 Bonus Stat: CRIT DMG 66.2% Skill Effect: Increases ATK by 20% and grants Thunder Emblem. At stacks 1/2/3, Normal Attack DMG is further increased by 12/24/40%. Each stack has an individual duration and are gotten through: • Normal Attacks with Elemental DMG (duration 5s) • Casting an Elemental Skill (duration 10s) • Having less than 100% Energy (disappears at full Energy) |
| 2nd |
 Aqua Simulacra Aqua Simulacra
|
Base ATK: 542 Bonus Stat: CRIT DMG 88.2% Skill Effect: HP is increased by 16%. When there are opponents nearby, the DMG dealt by the wielder of this weapon is increased by 20%. This will take effect whether the character is on-field or not. |
| 3rd |
 Rust Rust
|
Base ATK: 510 Bonus Stat: ATK 41.3% Skill Effect: Increases Normal Attack DMG by 40% but decreases Charged Attack DMG by 10%. |
Best Free-to-Play Weapon for Yoimiya
| Weapon | Weapon Information |
|---|---|
 Prototype Crescent Prototype Crescent
|
Base ATK: 510 Bonus Stat: ATK 41.3% Skill Effect: Aimed Shot hits on weak points increase Movement SPD by 10% and ATK by 36% for 10s. |
All Recommended Weapons for Yoimiya
| Recommended Weapons | How to Get |
|---|---|
| Gacha | |
| Gacha | |
| Gacha | |
| Gacha | |
| Gacha | |
| Gacha | |
| Gacha | |
| Starglitter Exchange | |
| Battle Pass | |
| Starglitter Exchange | |
Yoimiya Best Team Comp
Raw On-Field Damage Dealer
Yoimiya needs to be on-field to deal most of her damage. She will need to have good Sub-DPS teammates who can provide off-field damage with strong elemental application.
Yoimiya Reverse-Vaporize Team
| Main DPS | Sub-DPS | Sub-DPS/ Support |
Support |
|---|---|---|---|
|
|
|
|
|
|
|
|
|
|
|
|
|
|
|
|
|
|
|
|
Yoimiya's main mode of operation are her Reverse-Vaporize teams where she can take advantage of Hydro units to constantly hit Vaporized shots.
Most teams have Yoimiya as the sole main damage dealer, meaning she would also benefit from defensive options or buffs.
Yoimiya Melt Teams
| Main DPS | Sub-DPS | Sub-DPS/ Support |
Support |
|---|---|---|---|
|
|
|
|
|
|
|
|
|
|
Yoimiya can also function well in Melt Teams as the Main DPS, especially when paired with strong Off-Field Cryo units like Rosaria and Citlali.
Yoimiya Overloaded Team
| Main DPS | Sub-DPS | Sub-DPS | Support |
|---|---|---|---|
|
|
|
|
|
This Yoimiya team comp focuses on dealing damage through Overloaded, but you will need Chevreuse for this specific team comp. You may also use Bennett to add more buffs for Yoimiya.
Yoimiya Reverse-Vaporize Anemo Team
| Main DPS | Sub-DPS | Support | Support |
|---|---|---|---|
|
|
|
|
|
This Anemo Reverse Vaporize team will have Kazuha absorb Hydro in his Elemental Burst. After, swap to Thoma to apply pyro with his Elemental Burst and then swap back to Kazuha to use his Elemental Skill to Swirl Pyro. This is to ensure Yoimiya gets full Pyro Buffs from Kazuha's Viridescent Venerer Set.
Yoimiya Reverse-Vaporize F2P Team
| Main DPS | Sub-DPS | Support | Support |
|---|---|---|---|
|
|
|
|
|
This is a more free to play friendly team for Yoimiya's ideal team comp. Yun Jin can be replaced with Bennett if you need her somewhere else. This build also works wonders if you have Thoma at C6.
Yoimiya Best Constellations
| Carassius Auratus |
|---|
 |
Constellation and Effects
| Yoimiya's Constellations | |
|---|---|
| C1 |
Agate Ryuukin The Aurous Blaze created by Ryuukin Saxifrage lasts for an extra 4s. Additionally, when an opponent affected by Aurous Blaze is defeated within its duration, Yoimiya's ATK is increased by 20% for 20s. |
| C2 |
A Procession of Bonfires When Yoimiya's Pyro DMG scores a CRIT Hit, Yoimiya will gain a 25% Pyro DMG Bonus for 6s. This effect can be triggered even when Yoimiya is not the active character. |
| C3 |
Trickster's Flare Increases the Level of Niwabi Fire-Dance by 3. Maximum upgrade level is 15. |
| C4 |
Pyrotechnic Professional When Yoimiya's own Aurous Blaze triggers an explosion, Niwabi Fire-Dance's CD is decreased by 1.2s. |
| C5 |
A Summer Festival's Eve Increases the Level of Ryuukin Saxifrage by 3. Maximum upgrade level is 15. |
| C6 |
Naganohara Meteor Swarm During Niwabi Fire-Dance, Yoimiya's Normal Attacks have a 50% chance of firing an extra Kindling Arrow that deals 60% of its original DMG. This DMG is considered Normal Attack DMG. |
Best Constellations Rating and Explanation
| Rating | Constellation Effect / Merits | |
|---|---|---|
| C1 | ★★☆ |
• Elemental Burst can now directly benefit Yoimiya. • Not as useful against Boss type enemies. |
| C2 | ★★★ |
• Amazing Constellation thanks to her high Pyro application. • Her Elemental Burst reaction counts towards her own damage, which will buff its damage. |
C2 Does the Most Damage
Unlocking Yoimiya's second constellation is a good stopping point for unlocking most of her potential. Her C6 may look tempting, but keep in mind that it is still rng dependent.
Yoimiya Ascension and Talent Materials
Yoimiya Ascension Materials
| Lv.20→Lv.40 |
|
|---|---|
| Lv.40→Lv.50 |
|
| Lv.50→Lv.60 |
|
| Lv.60→Lv.70 |
|
| Lv.70→Lv.80 |
|
| Lv.80→Lv.90 |
|
Yoimiya Talent Level-Up Materials
| Daily Domain Drops | Enemy Drops | Weekly Boss Drops |
|---|---|---|
| Mon/Thu/Sun |
Samachurls |
Azhdaha Challenge Reward |
|
|
|
|
|
|
|
Yoimiya Talents and How to Use
Normal Attack
| Normal Attack: Firework Flare-Up |
|---|
| Performs up to 5 consecutive shots with a bow.
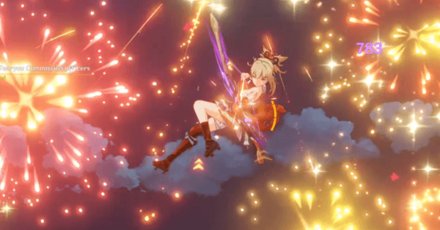
Charge Attack Performs a more precise Aimed Shot with increased DMG. While aiming, flames will accumulate on the arrowhead before being fired off as an attack. Has different effects based on how long the energy has been charged: • Charge Level 1: Fires off a flaming, arrow that deals Pyro DMG. • Charge Level 2: Generates a maximum of 3 Kindling Arrows based on time spent charging, releasing them as part of this Aimed Shot. Kindling Arrows will home in on nearby opponents, dealing Pyro DMG on hit. Plunge Attack: Fires off a shower of arrows in mid-air before falling and striking the ground, dealing AoE upon impact. |
| Attribute | Effect (Lvl 1) |
|---|---|
| 1-Hit DMG | 35.6%x2 |
| 2-Hit DMG | 68.4% |
| 3-Hit DMG | 88.9% |
| 4-Hit DMG | 46.4%x2 |
| 5-Hit DMG | 105.9% |
| Aimed Shot | 43.9% |
| Fully-Charged Aimed Shot | 124% |
| Kindling Arrow DMG | 16% |
| Plunge DMG | 56.8% |
| Low/High Plunge DMG | 114%/142% |
Hunt Animals Easily with Charged Attacks
Yoimiya's Charged Attack Level 2 can home in on moving targets. This makes hunting down wild animals like birds and boars easier as even if they run away, they can still get hit by the arrows.
Elemental Skill
| Niwabi Fire-Dance |
|---|
| Yoimiya waves a sparkler and causes a ring of saltpeter to surround her.
Niwabi Enshou During this time, arrows fired by Yoimiya's Normal Attack will be Blazing Arrows, and their DMG will be increased and converted to Pyro DMG. During this time, Normal Attack: Firework Flare-Up will not generate Kindling Arrows at Charge Level 2. This effect will deactivate when Yoimiya leaves the field. Flavor Text: "Niwabi" is a form of incense firework created by Yoimiya herself. Its ability to be lit without any prior training or preparation has made it a real hit. After many fire-related incidents, the Tenryou Commission ordered the use of "Niwabi" banned, but small, bright sparks can often still be seen springing up at night. If seen from above, they look almost like little twinkling stars. |
| Attribute | Effect (Lvl 1) |
|---|---|
| Blazing Arrow DMG | 137.9% Normal Attack DMG |
| Duration | 10.0s |
| CD | 18.0s |
Use Elemental Skill to Deal Pyro DMG
Yoimiya's Elemental Skill, Niwabi-Fire Dance, imbues her Normal Attacks with Pyro for a short period of time. Use this Talent as often as you can to get the most out of Yoimiya's Normal Attack DMG!
Elemental Burst
| Ryuukin Saxifrage |
|---|
| Yoimiya leaps into the air along with her original creation, the "Ryuukin Saxifrage," and fires forth blazing, rockets bursting with surprises that deal AoE Pyro DMG and mark one of the hit opponents with Aurous Blaze.
Aurous Blaze All Normal/Charged/Plunging Attacks, Elemental Skills, and Elemental Bursts by any party member other than Yoimiya that hit an opponent marked by Aurous Blaze will deal AoE Pyro DMG. When an opponent affected by Aurous Blaze is defeated before its duration expires, the effect will pass on to a nearby opponent, who will inherit the remaining duration. One Aurous Blaze can be triggered every 2s. When Yoimiya is down, Aurous Blaze effects will be deactivated. Flavor Text: Fireworks are man-made starlight, comets fired into the sky. Though they last for but an instant, the memory of their brilliance shall surely live on. |
| Attribute | Effect (Lvl 1) |
|---|---|
| Skill DMG | 127% |
| Aurous Blaze Explosion DMG | 122% |
| Duration | 10.0s |
| CD | 15.0s |
| Energy Cost | 60 |
Elemental Burst Deals AoE DMG & Buffs the Party
Yoimiya's Elemental Burst deals AoE Pyro DMG to surrounding enemies and marks one of the enemies hit with Aurous Blaze. It also buffs other party members' ATK% if her Passive Talent, Summer-Night's Dawn, is unlocked.
What is Aurous Blaze?
Excluding Yoimiya, all party members' attacks on an enemy marked with Aurous Blaze will deal AoE Pyro DMG. Once a marked enemy is defeated, the Aurous Blaze mark is then passed onto another nearby enemy.
Passive Talent 1
| Tricks of the Trouble-Maker |
|---|
| During Niwabi Fire-Dance, shots from Yoimiya's Normal Attack will increase her Pyro DMG Bonus by 2% on hit. This effect lasts for 3s and can have a maximum of 10 stacks. |
Passive Talent 2
| Summer-Night's Dawn |
|---|
| Using Ryuukin Saxifrage causes nearby party members (not including Yoimiya) to gain a 10% ATK increase for 15s. Additionally, a further ATK Bonus will be added on based on the number of "Tricks of the Trouble-Maker" stacks when using Ryuukin Saxifrage. Each stack increases this ATK Bonus by 1%. |
Passive Talent 3
| Blazing Match |
|---|
| When Yoimiya crafts Decoration, Ornament, and Landscape-type Furnishings, she has a 100% chance to refund a portion of the materials used. |
Refunds Furnishing Materials

When Yoimiya is used to craft Furnishings, she can refund a portion of materials used. This makes the most out of your Furnishing crafting materials, and helps you save up to create more!
View Furnishing Crafting Guide
How to Get Yoimiya
Pull on Yoimiya's Banner

|
|
| Banner Status | Inactive |
|---|---|
Yoimiya's rerun banner, Tapestry of Golden Flames was available in Phase 2 of Version 4.3 from January 9, 2024 until January 30, 2024. Her banner is up alongside Raiden's banner rerun, Reign of Serenity.
Chevreuse, Kujou Sara, and Bennett were also featured as four-star characters in both banners. There is currently no other way to get Yoimiya from Wish Banners.
Version 4.3 Release Date and Banners
Related Wish Banner Guides
| Click to view a Banner Guide! | ||
|---|---|---|
 Banner Info Banner Info |
 Wish Sim Wish Sim |
 All Wishes All Wishes |
Yoimiya's In-Game Information
Yoimiya Character Profile
| Nation | |
|---|---|
| Title | Frolicking Flames |
| Vision | |
| Gender | Female |
| Race | Human |
| Height | Medium Girl |
| Faction | Naganohara Fireworks |
| Constellation | Carassius Auratus |
| Birthday | June 21 |
| Special Dish | Summer Festival Fish |
| Story Quest |
Chapter: Carassius Auratus Act 1: Dreamlike Timelessness Act 2: Star-Pickers' Passage |
Yoimiya Voicelines
Thoughts About Yoimiya
| Character | In-Game Thoughts |
|---|---|
 Ayaka Ayaka
|
The Yashiro Commission and the shrine maidens are responsible for festival affairs, and Yoimiya, as a fireworks expert, knows how to create and atmosphere. So we have become well acquainted with her over the years. Hmm? Public order and fire prevention? We factor these concerns in well in advance during the planning stage. To deny people the chance to see fireworks simply for these reasons would leave them feeling very disappointed. |
 Ayato Ayato
|
Ah, the fireworks store owner. Yes, a most... spirited young lady. The Kamisato Clan is on rather close terms with her. She is around the same age as Ayaka, and the two get along very well. I trust her direct and outspoken disposition won't lead Ayaka astray. Ayaka has always been staunchily true to herself, ever since she was a young child. |
 Itto Itto
|
Hmph, she's always showing off her fancy fireworks and toys to the kids. Well, I'm sick of it! Nobody steals my thunder! I'm the one that's supposed to be adored by the kids! Me! That goes for you too, you're siding with me on this, okay... Huh? Whaddya mean, you're not a kid? Eh, details. If you're shorter than me, you're a kid as far I'm concerned. |
 Kazuha Kazuha
|
The last time she commissioned Captain Beidou to ship fireworks to Liyue, I unloaded the shipment myself. They were so heavy! I doubt that anyone besides her could make such huge fireworks. |
 Mizuki Mizuki
|
Oh, you mean the Queen of the Summer Festival? Yes, she is quite memorable. Every once in a while, I perform a mental health survey to see if there are areas around Inazuma where people are more likely to need treatment... It turns out, those who live near Miss Yoimiya have need very little, and I doubt that's a coincidence. It's hard to be anything but positive with such a bright and cheerful person around! |
 Sara Sara
|
As long as she's not setting off fireworks in my camp, I will cause her no trouble. Heh, yes I know — all else aside, her fireworks are spectacular and brilliant, and she deserves all the praise she gets. The issue for me is that fireworks are fleeting in nature. After one brief moment of dazzling light, all that remains is the pitch-black night sky, the same as before. So I often have to caution myself not to become too captivated by this illusory spectacle. It is transient, but Inazuma is eternal, and my mission is to protect Inazuma. |
 Sayu Sayu
|
Every time she sees me she says, "Hey, little tanuki! Let's go hang out at the festival." Firstly, I'm not a tanuki. Secondly, I don't wanna go to a festival. Thirdly, she says she wants to hang out — but really, she just wants me to do a ninjutsu performance during the fireworks show. That's not even related to my work for the Shuumatsuban! |
 Thoma Thoma
|
Of Naganohara Fireworks fame? She's so easy to get along with. Super straightforward, just says whatever she thinks. Oh, and Naganohara fireworks are just incredible, you should take every chance you get to see them in action. Ah, on that note — here, have a coupon! |
 Yae Miko Yae Miko
|
Naganohara fireworks are well worth the wait every year. Word is that she caused quite an uproar among the Tenryou Commission recently by setting off fireworks all over the place. Heh, I'm sure the members of the Kujou Clan must've turned purple with rage... A pity that I couldn't be there to see it for myself. |
Yoimiya's Thoughts About Others
| Character | In-Game Thoughts |
|---|---|
|
Ayaka
|
About Ayaka Seriousness: We cooperate a lot due to work. Unlike people in the other two Commissions, she always lets me finish speaking and answers me seriously without showing any impatience. I'd say that the word ''ladylike'' was practically made just for her. Baths: We once discussed matters concerning the summer festival deep into the night. We were both really tired, and I invited her to go take a bath. But when she heard that it involved many people bathing in the same pool, she went red in an instant! That was when I first learned that noble ladies can't use public baths. |
 Beidou Beidou
|
About Beidou Beidou's been helping me ship my fireworks out ever since Inazuma was locked down. I prepared a huge boat-shaped firework just to surprise her — and when the Crux Fleet was about to leave, this firework went whoosh! Right in front of their eyes, straight into the sky. The sailors got such a huge fright — they thought one of their ships had somehow flown off! But Beidou liked that trick very much, saying that it was exactly what a pleasant surprise should be — very pleasant, and a surprise. |
|
Itto
|
About Itto Duels: Oh, he may look scary, but he is very popular with the children. However, he can be very competitive. Every time we play with the children, it always turns into a showdown between him and me. For example, we'd drink a bowl of ramen soup in one go, or try to eat sour plums without making any faces. The children will cheer us both on and try to guess the winner. And when that happens... well, then I can't let him beat me, right? Arataki's Gang: Arataki's gang? Huh!? So he isn't just someone with too much free time on his hands? |
|
Kazuha
|
About Kazuha People with no worries like myself speak plainly, while those with many cares often speak of ancient poetry or the scenery. They talk of flowers and birds, wind and moon, but never about the reality that confronts them. He's got quite the tale to tell, I'm sure. |
 Kirara Kirara
|
About Kirara The courier from Komaniya Express? She's super reliable and really quick on her feet! Ingredients used in coloring the fireworks always run out quickly, but she always delivers a new batch right when I need them! I gave her a firework once as a thank-you gift, but she was too scared to light it, saying that she got spooked once by the sound of fireworks. Hehe, so I told her to find a nice viewing spot far away and set it off for her. |
 Klee Klee
|
About Klee Wait, you said there was a kid in Mondstadt who was good at making bombs?... Now, they aren't much different from fireworks. In other words, she might be a genius... Ohh, I'd love to meet her. But isn't it dangerous to let children play with explosives? Don't the people of Mondstadt worry about that? |
 Raiden Raiden
|
About Raiden Fireworks are probably the furthest thing from the "eternity" that the Shogun pursues. She probably feels that their transient glory has no practical purpose in Inazuma. It's probably something that one who has "eternity" in their grasp will find hard to comprehend. It is precisely because we mortals are like fleeting shadows that we need to treasure such flickers of beauty. |
|
Sara
|
About Sara Due to public safety and fire, hazard-related concerns, I often get whisked off to the Tenryou Commission's place for a lecture. Kujou Sara's probably the most reasonable of the bunch. At least she'll hear me out before passing any judgment. If I'm in the right, she'll acknowledge my. perspective, and if I'm wrong... Hehe, then I'll get Thoma to come and help me apologize to her! |
|
Sayu
|
About Sayu Let me know if you see her, alright? I'd really love to take her to one of the festivals and introduce her to lots of new friends. She always looks a little down, but if she meets some people she can hang out with, maybe she'll slowly pick herself up again! |
|
Thoma
|
About Thoma He's quite the talker and has reasons behind every word that he says. Sometimes, it might seem like there's no connection, but as he goes on, everything will eventually dovetail nicely towards a single purpose. It's... quite different from how I do things. I ask him for help whenever I encounter a matter I can't settle. |
|
Yae Miko
|
About Yae Miko Ayaka once asked me during a ritual at the shrine if I could prepare some fireworks for the Lady Guuji's leisure. I thought to myself, "isn't the Lady Guuji supposed to sit inside the shrine throughout the ritual?" So I watched her the whole time during the ritual, wondering how she'd like to release the fireworks. I waited, and I waited, and then Ayaka came over at length to tell me that the Lady Guuji was most pleased. I mean, what? She'd already released the fireworks? Was the person sitting inside the shrine not her, then? |
Genshin Impact Character Guides

All Characters and Voice Actors
List of All Characters
| Characters by Element | |||
|---|---|---|---|
Playable Characters
 Chasca
 Faruzan
 Heizou
 Ifa
Ifa Jahoda
 Jean
Jean Lan Yan
 Lynette
 Sucrose
 Traveler (Anemo)
 Varka
Varka Venti
Venti Wanderer
 Xianyun
 Xiao
Xiao Aloy
Aloy Charlotte
 Chongyun
 Citlali
 Diona
Diona Escoffier
 Eula
Eula Freminet
 Ganyu
Ganyu Kaeya
Kaeya Layla
Layla Mika
Mika Qiqi
Qiqi Rosaria
 Shenhe
 Skirk
Skirk Wriothesley
 Alhaitham
 Baizhu
 Collei
 Emilie
 Kaveh
Kaveh Kinich
 Lauma
Lauma Nahida
 Nefer
Nefer Tighnari
 Traveler (Dendro)
 Yaoyao
 Clorinde
 Cyno
Cyno Dori
Dori Fischl
 Flins
Flins Iansan
 Ineffa
 Keqing
 Lisa
Lisa Ororon
 Razor
Razor Sethos
 Shinobu
 Traveler (Electro)
 Varesa
 Albedo
 Chiori
 Gorou
Gorou Illuga
 Kachina
 Navia
Navia Ningguang
 Noelle
 Traveler (Geo)
 Xilonen
 Yun Jin
 Zhongli
 Zibai
Zibai Aino
Aino Barbara
 Candace
 Columbina
 Dahlia
 Furina
 Kokomi
 Mona
Mona Mualani
 Neuvillette
 Nilou
Nilou Sigewinne
 Tartaglia
 Traveler (Hydro)
 Xingqiu
 Yelan
Yelan Amber
Amber Arlecchino
 Bennett
 Chevreuse
 Dehya
Dehya Diluc
Diluc Durin
Durin Gaming
 Hu Tao
 Lyney
Lyney Mavuika
 Traveler (Pyro)
 Xiangling
 Xinyan
 Yanfei
 Yoimiya
Upcoming Characters
| All Upcoming Characters |
 Alice Alice
|
 Capitano Capitano
|
 Dainsleif Dainsleif
|
 Dottore Dottore
|
|---|---|---|---|
 Linnea Linnea
|
 Lohen Lohen
|
 Nicole Nicole
|
 Pantalone Pantalone
|
 Pierro Pierro
|
 Pulcinella Pulcinella
|
 Rerir Rerir
|
 Sandrone Sandrone
|
 Tsaritsa Tsaritsa
|
|||
Character Lists
| Characters by Rarity | |
|---|---|
| 5-Star Characters | 4-Star Characters |
| Free Characters | |
| Characters by Weapon Used | |
| Sword Users | Claymore Users |
| Polearm Users | Bow Users |
| Catalyst Users | |
| Characters by Role | |
| Main DPS Characters | Sub DPS Characters |
| Support Characters | Healers |
| Shield Characters | Buff Providers |
| Best for Exploration | Local Specialty Passives |
| Double Reward Passives | |
| Characters by Gender | |
| Male Characters | Female Characters |
| Short Male Characters | Short Female Characters |
| Medium Male Characters | Medium Female Characters |
| Tall Male Characters | Tall Female Characters |
| Characters by Height | |
| Short Characters | Medium Characters |
| Tall Characters | |
| Characters by Region | |
| Mondstadt Characters | Liyue Characters |
| Inazuma Characters | Sumeru Characters |
| Fontaine Characters | Natlan Characters |
| Nod-Krai Characters | |
Comment
My favorite yoi team: zhongli, yoimiya, yae miko, nahida
Author

Yoimiya Rating and Best Builds


Rankings
Gaming News


![Monster Hunter Stories 3 Review [First Impressions] | Simply Rejuvenating](https://img.game8.co/4438641/2a31b7702bd70e78ec8efd24661dacda.jpeg/thumb)
Popular Games

Genshin Impact Walkthrough & Guides Wiki
Honkai: Star Rail Walkthrough & Guides Wiki
Umamusume: Pretty Derby Walkthrough & Guides Wiki
Pokemon Pokopia Walkthrough & Guides Wiki
Resident Evil Requiem (RE9) Walkthrough & Guides Wiki
Monster Hunter Wilds Walkthrough & Guides Wiki
Wuthering Waves Walkthrough & Guides Wiki
Arknights: Endfield Walkthrough & Guides Wiki
Pokemon FireRed and LeafGreen (FRLG) Walkthrough & Guides Wiki
Pokemon TCG Pocket (PTCGP) Strategies & Guides Wiki


Recommended Games
Diablo 4: Vessel of Hatred Walkthrough & Guides Wiki
Cyberpunk 2077: Ultimate Edition Walkthrough & Guides Wiki
Fire Emblem Heroes (FEH) Walkthrough & Guides Wiki
Yu-Gi-Oh! Master Duel Walkthrough & Guides Wiki
Super Smash Bros. Ultimate Walkthrough & Guides Wiki
Pokemon Brilliant Diamond and Shining Pearl (BDSP) Walkthrough & Guides Wiki
Elden Ring Shadow of the Erdtree Walkthrough & Guides Wiki
Monster Hunter World Walkthrough & Guides Wiki
The Legend of Zelda: Tears of the Kingdom Walkthrough & Guides Wiki
Persona 3 Reload Walkthrough & Guides Wiki


All rights reserved
Copyright© 2012-2024 HoYoverse — COGNOSPHERE. All Rights Reserved.
The copyrights of videos of games used in our content and other intellectual property rights belong to the provider of the game.
The contents we provide on this site were created personally by members of the Game8 editorial department.
We refuse the right to reuse or repost content taken without our permission such as data or images to other sites.
Thank you Durin and hex buffs for Fischl to make Yoimiya relevant (no top tier) again.