Reroll Tier List | Best Characters to Reroll For
✉ Send your thoughts in our Genshin 6.4 Patch Survey!
★ Exclusive: Dive back in time with the Meta History
◆ Hot: Version 6.4, 6.4 Codes, Linnea, Version 6.5
◆ Builds: Varka, Flins, Skirk, Escoffier
◆ Events: Travelers' Tales, Sightseeing With Friends
◆ Endgame: Spiral Abyss (March 2026)
Welcome to Game8's latest ranking for rerolling in Genshin Impact. Here we list the best results you can get from rerolling as well as a bottom line for a good roll. We also explain the type of Wish you should do each time you reroll, so read on for all the details.
| Tier List Guides | ||
|---|---|---|
 Character Tier List Character Tier List |
 Best Builds Best Builds |
 Weapon Tier List Weapon Tier List |
 Tier List Maker Tier List Maker |
 Reroll Tier List Reroll Tier List |
 Best Team Comp Best Team Comp |
List of Contents
Reroll Tier List
Reroll Tier List Summary
| Tier | Characters |
|---|---|
| F2P |
| Tier | Characters |
|---|---|
| Free In-Game / Guaranteed | |
| F2P |
Reroll Tier List Explanation
Each character's reroll rating were computed based on their C0 Tier List rating, how easy it is to level them up, and how accessible their Talent & Ascension Materials are. Below is a quick tabled summary for on each of the Reroll Tiers.
| Reroll Tier List Reference |
|---|
|
SS = The best characters that can carry you from early to late game. Some are also easy to level up and have great open world exploration benefits. S = Great characters to get for a fresh account. These are characters that are useful even in the late game with the right team. Some also have open world exploration benefits. A = Similar to S tier, but have little to no open world exploration benefits. Some are also gated by Ascension material locations. B = Decent characters to get but aren't great until higher investments or can't solo carry your playthrough experience. These characters heavily needs a good team to be built around them. C = Characters that will not give any value at low levels and are hard to ascend due to their Ascension material locations. F2P = Characters that you can get for free and will not need to be rerolled for. |
The Beginner/Noelle Gacha has a different rating due to the character pool being very limited.
Full Reroll Tier List Explanation
SS Rank Reroll Character
| Character | Element | Rarity | Weapon |
|---|---|---|---|
|
|
|
★4 | Sword |
| ・One of the strongest Buffer and Healer in the game. ・Pyro element is useful for exploration. |
|||
|
|
|
★5 | Bow |
| ・Great for gathering groups of enemies. ・Elemental Burst can be used to reach high places for exploration. |
|||
|
|
|
★4 | Sword |
| ・Elemental Skill creates a lot of Elemental Particles and provides damage resistance. ・Elemental Burst deals very good damage. |
|||
|
|
|
★5 | Polearm |
| ・Great support that provides shields that can debuff enemies. ・Pillars can be used as platforms. |
|||
|
|
|
★5 | Sword |
| ・Great character for Sub-DPS/Support. ・Can reach high places, which is useful for exploration. ・Ascension materials cannot be farmed until players reach Inazuma at Adventure Rank 30. |
|||
|
|
|
★5 | Bow |
| ・Elemental Burst deals great damage and buffs the active character. ・Elemental Skill lets you cross distances faster. ・Easy to match with other characters for Elemental Reactions. |
|||
|
|
|
★5 | Catalyst |
| ・Great defensive support for all intents and purposes. ・Provides off-field Dendro application on his burst. |
|||
|
|
|
★5 | Catalyst |
| ・Great Main DPS who can carry both in the overworld and the Spiral Abyss. ・Exploration speed while diving is convinient. |
|||
|
|
|
★5 | Sword |
| ・The Hydro Archon who greatly buffs all characters as long as you have a healer. Noelle is accessible early on and she synergizes well with Furina. ・Can walk on water while Elemental Skill is active. |
|||
|
|
|
★5 | Polearm |
| ・Raw damage and scaling is superb even in non-vaporize situations, and very self-sufficient. ・High risk gameplay may be disadvantagous in the early levels of the game. |
|||
|
|
|
★5 | Sword |
| ・Extremely valuable resistance shredder that can also heal. ・Easy to activate skills and also a great exploration ability. |
|||
|
|
|
★5 | Claymore |
| ・Best exploration choice especially in Natlan. ・Extremely high DPS and ability to switch from on-field or off-field with easy to activate Pyro Application. |
|||
|
|
|
★5 | Catalyst |
| ・Good exploration ability if you need to jump into high spaces. ・Decent shield that lasts longer than its cooldown. ・Best support for team comps focusing on Melt. |
|||
|
|
|
★4 | Polearm |
| ・Extremely valuable ATK support that can also do small healing, on top of having a decent exploration ability. | |||
|
|
|
★5 | Polearm |
| ・Reliable healer & sub-DPS in one character with great Cryo Application. | |||
|
|
|
★5 | Catalyst |
| ・Premiere support for Bloom-related reactions and revitalizes the element as a whole. ・Easy to use and simple to activate her full kit. ・Has a good exploration passive |
|||
|
|
|
★5 | Sword |
| ・Great alternative to Xiangling with good supportive utility. ・Pyro application is a must have on all content and Durin is reliable at this front. |
|||
|
|
|
★5 | Catalyst |
| ・Enables Lunar reactions just from being in the team. ・Can revive the active character from death immediately. |
|||
S Rank Reroll Characters
| Character | Element | Rarity | Weapon |
|---|---|---|---|
|
|
|
★4 | Bow |
| ・Provides a lot of Elemental Particles through her Elemental Skill, which helps charge a character's Elemental Burst. ・Excellent Sub-DPS but can also be used as a Physical Main DPS if needed. |
|||
|
|
|
★5 | Sword |
| ・Anemo Element can easily combo to create Elemental Reactions. ・Provides AoE and Burst Healing. ・Elemental Burst can cleanse debuffs |
|||
|
|
|
★5 | Catalyst |
| ・Unique sprint lets you cross water faster. ・Elemental Skill deals off-field damage and taunts enemies. |
|||
|
|
|
★4 | Catalyst |
| ・Elemental Skill creates a Swirl reaction across a wide area. ・Catalyst weapon allows for Elemental DMG in Normal Attacks. Can be used as a Main DPS for swirling different elements. |
|||
|
|
|
★5 | Polearm |
| ・Amazing Pyro Main DPS that deals high single-target damage. ・Sacrifices HP for even more DMG output. |
|||
|
|
|
★5 | Polearm |
| ・Can act as a Main DPS and suppor teams through her Elemental Burst Mechanics. ・Increadibly high value as a unit. ・Ascension and Talent materials cannot be farmed until players reach Inazuma at Adventure Rank 30. |
|||
|
|
|
★5 | Catalyst |
| ・Can be used as a DPS and a Support. ・Easy to trigger Elemental Reactions with her Elemental Skill. ・Provides the team with ample healing. ・Ascension and Talent materials cannot be farmed until players reach Inazuma at Adventure Rank 30. |
|||
|
|
|
★5 | Catalyst |
| ・Amazing Sub-DPS Character. ・Can also be played as an on-field Main DPS for Hyperbloom and Quicken teams. |
|||
|
|
|
★5 | Catalyst |
| ・Great DPS with high Anemo DMG. ・Able to levitate, excellent for both inside and outside of combat. |
|||
|
|
|
★5 | Sword |
| ・Great on-field Dendro reaction driver. ・Best slotted into bloom teams or a Quicken team. ・Elemental Skill can teleport you to high ledges. |
|||
|
|
|
★5 | Claymore |
| ・Extremely flexible Main DPS that can one-shot overworld opponents. Recommended just for her base scaling. | |||
|
|
|
★5 | Catalyst |
| ・Unless you have plunger attackers, you can only use her as a healer. ・Great exploration ability early in the game. |
|||
|
|
|
★5 | Catalyst |
| ・One of the best region explorers especially in Natlan. ・High frontloaded damage that scales well as you increase in level. |
|||
|
|
|
★5 | Claymore |
| ・Grappling hook is a superb tool for exploring vertically in overworld regions especially in Natlan. ・High frontloaded damage that does better on Burning or Burgeon teams. |
|||
|
|
|
★5 | Bow |
| ・Best aerial explorer especial in Natlan, and can glide easily away from enemies. ・High single-target damage that works best in Rainbow teams. |
|||
|
|
|
★5 | Catalyst |
| ・Great explorer for land and water with a high base DMG plunging attack playstyle. | |||
|
|
|
★5 | Sword |
| ・In terms of strength, she's one of the best with Escoffier, but as she's a 5-star, Skirk is lower on the reroll priority. ・Exploration talent on her Elemental Skill. ・Has accessible F2P teams on Freeze. |
|||
|
|
|
★5 | Polearm |
| ・Easy to use while having good damage. ・Focused on Lunar-Charged but not restricted to only Hydro and Electro. ・100% uptime on both her application and shielding. |
|||
|
|
|
★5 | Polearm |
| ・Has good F2P options especially since Aino is free and he can output the damage early game requires right off the bat. ・Has no traversal exploration passives. |
|||
|
|
|
★5 | Sword |
| ・Lunar-Crystallize DPS that can capitalize on the reaction just from basic Hydro teammates. ・Wants another Nod-Krai character to gain access to Ascendant Gleam. |
|||
|
|
|
★5 | Claymore |
| ・Good option to grab as he synergizes well with older characters that have Hexerei status. ・Carries a powerful leap that allows you to traverse through rough terrain and get past plenty of environmental obstacles. |
|||
A Rank Reroll Characters
| Character | Element | Rarity | Weapon |
|---|---|---|---|
|
|
|
★4 | Claymore |
| ・Elemental Skill provides a damage counter mechanic. ・Elemental Burst provides off-field damage and a shield. |
|||
|
|
|
★5 | Claymore |
| ・Good single-target damage dealer. ・Elemental Burst can hit hard in a wide area. |
|||
|
|
|
★4 | Bow |
| ・Provides a lot of Elemental Particles through her Elemental Skill, which helps charge a character's Elemental Burst. ・Provides Cryo Shield and Heals. |
|||
|
|
|
★5 | Bow |
| ・Ranged character than can swap to a Melee stance to deal Hydro damage. ・Easy to build a team around him. |
|||
|
|
|
★5 | Bow |
| ・Long-range attacker that can take out groups of enemies easily. ・High attack power from Charged Shots. ・Deal a lot of Cryo DMG. |
|||
|
|
|
★5 | Polearm |
| ・Great Main DPSthat deals AoE dmg. ・Self-damange is negligible with good team comp. ・Can jump high to get to hard-to-reach areas during exploration. |
|||
|
|
|
★4 | Polearm |
| ・Elemental Burst deals off-field Damage. ・Can increase the CRIT Rate of your party. ・Increases movement speed during nighttime. |
|||
|
|
|
★5 | Sword |
| ・Can be used as Cryo DPS/Sub-DPS. ・Sprint can be used to quickly move through water instead of swimming. |
|||
|
|
|
★5 | Polearm |
| ・Good support that can boost damage for Cryo team comps. ・Can buff the team with both her Elemental Skill and Burst. ・Ascension materials cannot be farmed until players reach Inazuma at Adventure Rank 30. |
|||
|
|
|
★5 | Catalyst |
| ・Great off-field Damage dealer that has decently wide range. ・Can be used as a decent Main DPS. ・Ascension and Talent materials cannot be farmed until players reach Inazuma at Adventure Rank 30. |
|||
|
|
|
★5 | Sword |
| ・Great Main DPS with Sub-DPS and Support capabilities. ・Elemental Burst is great for Elemental Reactions. ・Elemental Burst also increases Normal Attack DMG for characters in AoE. ・Ascension and Talent materials cannot be farmed until players reach Inazuma at Adventure Rank 30. |
|||
|
|
|
★4 | Sword |
| ・Elemental Skill deals damage and heals the active character. ・One of the great characters paired with Dendro for Elemental Reactions. ・Ascension and Talent materials cannot be farmed until players reach Inazuma at Adventure Rank 30. |
|||
|
|
|
★5 | Bow |
| ・Can deal Dendro DMG from afar. ・High Elemental Burst DMG with little energy requirement. |
|||
|
|
|
★5 | Sword |
| ・One of the best characters to use in Bloom teams. ・Requires a proper team comp just to reach her base potential. |
|||
|
|
|
★4 | Sword |
| ・Good Dendro driver for Bloom-specific team compositions. ・Great for scaling cliffs and mountains for exploration. |
|||
|
|
|
★5 | Bow |
| ・Good starter unit for exploring the Fontaine region. ・Pyro Bow users are desirable for puzzles. |
|||
|
|
|
★5 | Catalyst |
| ・Decent single-target focused Main DPS who specializes in close-combat melt or freeze reactions. ・Normal Attacks can easily ice bridge as a Catalyst user. |
|||
|
|
|
★4 | Catalyst |
| ・Decent Cryo application and damage is okay. ・Can heal the party when stuck in a pinch. |
|||
|
|
|
★4 | Claymore |
| ・Great F2P Main DPS, but materials for him are farther in the game. | |||
|
|
|
★5 | Sword |
| ・Flexible teambuilding depending on your current situation. ・Requires a well defined team to meet her recommended goals in an Electro-related reaction party. |
|||
|
|
|
★5 | Polearm |
| ・Only best for Burning teams, but can exist for semi-permanent Dendro application and Burning uptime. ・Makes Burning damage negligible on allies and on the overworld. |
|||
|
|
|
★4 | Bow |
| ・Staple for Electro-Charged teams. ・Useful for exploration around the Masters of the Night-Wind area and Ochkanatlan. |
|||
|
|
|
★4 | Catalyst |
| ・Good starter shield if you don't have the convenience of Zhongli or Citlali. ・Catalyst Normal Attacks can provide Swirl coverage. |
|||
|
|
|
★5 | Catalyst |
| ・Great Anemo unit for newer players as she's easy to use and can heal with her burst. Best for Swirl Comps which can is immediatelly viable upon obtaining Kaeya or Lisa. | |||
|
|
|
★5 | Catalyst |
| ・Can make do with F2P units early on in the game like Aino and can power through most content in the early game with how strong her Lunar-Bloom output is. ・Bloom teams are usually very restricted in terms of team-building as specific Hydro and Dendro allies are required to maintain consistency with the reaction. |
|||
B Rank Reroll Characters
| Character | Element | Rarity | Weapon |
|---|---|---|---|
|
|
|
★5 | Sword |
| ・Good Electro Main DPS. ・Can use Elemental Skill to teleport. ・Elemental Skill can teleport you to high ledges. |
|||
|
|
|
★5 | Catalyst |
| ・Good Pyro Main DPS. ・Passive talent makes it easy to look for Mondstadt local specialties. |
|||
|
|
|
★4 | Claymore |
| ・A character specialized for melee. ・Can either be built for Electro or Physical damage. |
|||
|
|
|
★5 | Sword |
| ・Can increase damage output of Main DPS. ・Persisting AoE Elemental Skill. ・Elemental Skill can be used to reach high places during exploration. |
|||
|
|
|
★4 | Catalyst |
| ・Catalyst weapon allows for Elemental DMG even with Normal Attacks. ・Charged Attacks deal massive DMG especially with Elemental Reactions. ・A good Pyro Main DPS to start the game with. |
|||
|
|
|
★5 | Claymore |
| ・Main DPS that deals Physical DMG. ・High Elemental Burst Damage. |
|||
|
|
|
★5 | Bow |
| ・Great single-target DPS with high damage. ・Suitable for mid-range attacking. ・Ascension and Talent materials cannot be farmed until players reach Inazuma at Adventure Rank 30. |
|||
|
|
|
★5 | Claymore |
| ・DPS that deals high Physical and Geo damage. ・Ascension and Talent materials cannot be farmed until players reach Inazuma at Adventure Rank 30. |
|||
|
|
|
★4 | Polearm |
| ・Good support that can boost Normal Attack damage. ・Buff effectivity increases in teams with different elements. ・Ascension materials cannot be farmed until players reach Inazuma at Adventure Rank 30. |
|||
|
|
|
★5 | Polearm |
| ・Amazing Normal Attack Electro DPS during Elemental Burst. ・DMG can be increased even further with Dendro application. ・Needs good supports who can help him charge his Elemental Burst. |
|||
|
|
|
★4 | Sword |
| ・Provides strong shields. ・Below average off-field DMG. ・Elemental Skill immidiately ends when her Shields break.. |
|||
|
|
|
★4 | Polearm |
| ・Great off-field Dendro unit that can damage enemies and heal your units. ・Dendro is a very good element, with the addition of being a healer, it makes Yaoyao a very solid unit. |
|||
|
|
|
★4 | Polearm |
| ・Chevreuse Support is mostly an end-game character. For her to truly function as a support, she needs her entire party to be Pyro and Electro characters only. So when rerolling, you can only really use her as a healer Sub-DPS until you get the proper units for her. | |||
|
|
|
★5 | Sword |
| ・Good Geo off-field damage dealer that allows quick swap. ・Ascension and Talent materials cannot be farmed until players reach Inazuma at Adventure Rank 30. |
|||
|
|
|
★4 | Bow |
| ・Versatile playstyle depending on energy levels. ・Can display resources unique to Sumeru on the minimap. |
|||
|
|
|
★5 | Bow |
| ・Decent overworld heals and exploration for underwater. ・Lacks sufficient utility outside of heals. |
|||
|
|
|
★4 | Catalyst |
| ・Great for exploring Natlan and also an okay on-field healer for early game. | |||
|
|
|
★4 | Bow |
| ・Mostly useful on Lunar teams and reliant on constellations. ・Has the ability to heal and grant Swirled-Element off-field application. |
|||
|
|
|
★4 | Polearm |
| ・Buffer that only benefits Geo units for the most part. ・Requires another Nod-Krai character to hit full potential. |
|||
C Rank Reroll Characters
| Character | Element | Rarity | Weapon |
|---|---|---|---|
|
|
|
★4 | Claymore |
| ・Elemental Skill infuses Normal Attacks to deal Cryo damage. ・Elemental Skill also speeds up a character's Normal Attack damage. |
|||
|
|
|
★5 | Sword |
| ・Cryo attacks can create Elemental Reactions to freeze enemies' movement. ・Skills are easy to use together with other characters. |
|||
|
|
|
★4 | Claymore |
| ・Elemental Skill provides a shield and off-field damage. ・Elemental Burst works great on grouped up enemies. ・Advantageous in close combat because of the shield. |
|||
|
|
|
★4 | Claymore |
| ・Talent makes it easy to approach some wildlife for easy collection of materials. Elemental Skill lets you travel faster than sprinting. ・Ascension and Talent materials cannot be farmed until players reach Inazuma at Adventure Rank 30. |
|||
|
|
|
★4 | Bow |
| ・Deals high Electro DMG from Burst. ・Increases party members' ATK. ・Ascension and Talent materials cannot be farmed until players reach Inazuma at Adventure Rank 30. |
|||
|
|
|
★4 | Polearm |
| ・Provide shields. ・Great for an active Sub-DPS role with the use of his Elemental Burst. ・Ascension and Talent materials cannot be farmed until players reach Inazuma at Adventure Rank 30. |
|||
|
|
|
★4 | Bow |
| ・Best support for Geo team comps. ・At C4 Elemental Burst can heal active characters within AoE. ・Ascension and Talent materials cannot be farmed until players reach Inazuma at Adventure Rank 30. |
|||
|
|
|
★4 | Bow |
| ・Boosts Anemo DMG. ・Full potential unlocked only at 6th Constellation. |
|||
|
|
|
★5 | Claymore |
| ・Increases RES to Interruption. ・Redirects damage taken from active character to herself. |
|||
|
|
|
★4 | Polearm |
| ・Good Physical damage support unit. | |||
|
|
|
★4 | Sword |
| ・Hydro shielder on burst but with weak scaling. He can also provide ATK SPD buffs to the party. ・Elemental Skill is a jump pad for puzzles or exploration purposes. |
|||
Free and Guaranteed Characters
| Character | Element | Rarity | Weapon |
|---|---|---|---|
|
|
|
★4 | Bow |
| ・Useful for solving Pyro puzzles. ・Decreases gliding stamina consumption with her Passive Talent. |
|||
|
|
|
★4 | Catalyst |
| ・Elemental Burst heals full party for a large amount of HP. ・Catalyst weapon allows for Elemental DMG in standard attacks. |
|||
|
|
|
★4 | Sword |
| ・Great at applying Cryo element. ・Passive talent is useful for exploration by reducing stamina consumption. |
|||
|
|
|
★4 | Catalyst |
| ・Can deal Electro damage over a wide AoE. ・Can trigger a lot of elemental reactions if used and timed properly. |
|||
|
|
|
★4 | Claymore |
| ・Charged Attacks can take out foes easily. ・Has an Elemental Skill that specializes in DEF. ・Elemental Skill can recover HP for all characters. |
|||
|
|
|
★4 | Polearm |
| ・Has access to a very strong and wide-ranged Elemental Burst. ・Pyro Elemental attacks are also great for exploration. |
|||
|
|
|
★4 | Bow |
| ・Can deal Dendro damage over a wide AoE. | |||
|
|
|
★4 | Sword |
| ・Decent exploration ability for faster travel. ・Free Anemo character to replace Anemo Traveler. |
|||
|
|
|
★4 | Polearm |
| ・Great exploration tools to scale cliffs especially on Natlan. ・Decent off-field damage for Geo or Rainbow teams. |
|||
|
|
|
★5 | Sword |
|
|
|
★4 | Claymore |
| ・Cannot enable Lunar reactions on her own. ・Servicable Hydro application and low burst cost. |
|||
Should I Reroll?
Rerolling is Not Recommended
Rerolling in Genshin impact is extremely slow and the rates for the top tier character is low as well. There are characters that you'll be able to obtain just by playing the game so aiming for a great roll is unnecessary.
We don't recommend you spend time rerolling in Genshin Impact as just one attempt takes 30 minutes on a good run, and high rarity characters have a low chance of appearing. With the PS4 version requiring you to make a whole new PSN account we highly recommend you don't reroll on PS4.
That said, the 5-star characters are unarguably stronger than the 4-star characters obtained via normal play. If you're looking for the cream of the crop but want to avoid monetary investment, look no further than our top-speed rerolling guide.
Gacha (Wish) Banner Recommendations
If you're interested in rerolling, check out the Wish banners below as your first options. Be sure to consider which character you're interested in drawing when choosing your Wish.
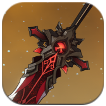
Get the Beginner's Wish First!
One of the current banners, Beginner's Wish, will net you 4★: Noelle from your first 10 pull. On top of that, there is a sale that takes 20% off the cost of Acquaint Fates, making this the best choice for drawing. This banner is limited to 20 pulls, however, so once you pull 20 times it will disappear forever.
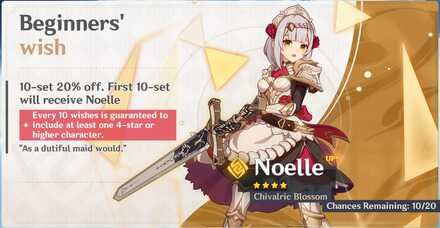
Pull on Either Character Banner
| Current Character Banners | |
|---|---|
 The Lone Light Knocks at Night The Lone Light Knocks at Night
|
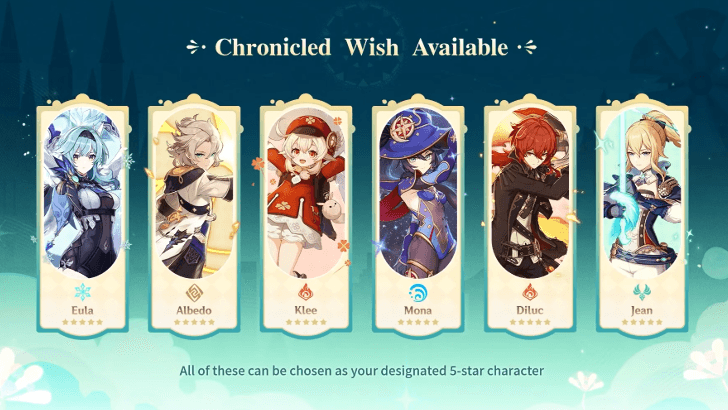 6.4 Chronicled Wish Mondstadt 6.4 Chronicled Wish Mondstadt
|
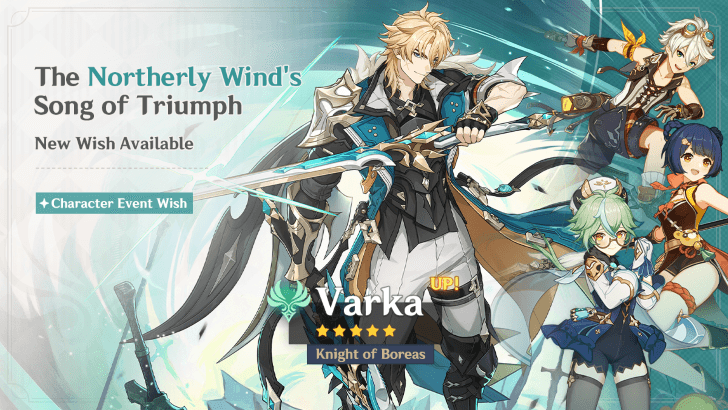 The Northerly Wind's Song of Triumph The Northerly Wind's Song of Triumph
|
|
Once you've run out of pulls on Beginner's Wish, you should start pulling on the current Character Banner and try to get some 5★ characters!
Character Tier List | Best Characters
Genshin Impact Related Guides
All Tier Lists

List of Tier Lists
| All Genshin Impact Tier Lists | |
|---|---|
 Character Tier List Character Tier List |
 Best Team Comp Best Team Comp |
 Weapons Tier List Weapons Tier List |
 Artifact Tier List Artifact Tier List |
| Reroll Tier List |
 Best Free Characters Best Free Characters |
Comment
You best put razor in this list it's his birthday for Christ's sake! The disrespect that boy gets and I've mained him since day one and I still can get through s*** with him. even if I stoped playing when Nathan came out. But you know I'm playing him in 6.0
Author

Reroll Tier List | Best Characters to Reroll For


Rankings
Gaming News


![Marathon Cryo Archive Map Teased as [REDACTED] on Selection Screen](https://img.game8.co/4442236/6357203e58172f6de57f1991e7c39b22.png/thumb)
![The Liar Princess and the Blind Prince Review [PC] | Lovely to Look at but Tedious to Play](https://img.game8.co/4442586/8d95f5faf05780f1765ce7e0938bd825.jpeg/thumb)

Popular Games

Genshin Impact Walkthrough & Guides Wiki
Umamusume: Pretty Derby Walkthrough & Guides Wiki
Pokemon Pokopia Walkthrough & Guides Wiki
Honkai: Star Rail Walkthrough & Guides Wiki
Monster Hunter Stories 3: Twisted Reflection Walkthrough & Guides Wiki
Arknights: Endfield Walkthrough & Guides Wiki
Wuthering Waves Walkthrough & Guides Wiki
Zenless Zone Zero Walkthrough & Guides Wiki
Pokemon TCG Pocket (PTCGP) Strategies & Guides Wiki
Monster Hunter Wilds Walkthrough & Guides Wiki


Recommended Games
Diablo 4: Vessel of Hatred Walkthrough & Guides Wiki
Cyberpunk 2077: Ultimate Edition Walkthrough & Guides Wiki
Fire Emblem Heroes (FEH) Walkthrough & Guides Wiki
Yu-Gi-Oh! Master Duel Walkthrough & Guides Wiki
Super Smash Bros. Ultimate Walkthrough & Guides Wiki
Pokemon Brilliant Diamond and Shining Pearl (BDSP) Walkthrough & Guides Wiki
Elden Ring Shadow of the Erdtree Walkthrough & Guides Wiki
Monster Hunter World Walkthrough & Guides Wiki
The Legend of Zelda: Tears of the Kingdom Walkthrough & Guides Wiki
Persona 3 Reload Walkthrough & Guides Wiki


All rights reserved
Copyright© 2012-2024 HoYoverse — COGNOSPHERE. All Rights Reserved.
The copyrights of videos of games used in our content and other intellectual property rights belong to the provider of the game.
The contents we provide on this site were created personally by members of the Game8 editorial department.
We refuse the right to reuse or repost content taken without our permission such as data or images to other sites.
the IRL lotto is rigged against the player