Dual Evidence Puzzles and Quest Guide
★ Exclusive: Check out the State of Meta for Nod-Krai!
◆ Hot: Luna 5 Livestream & Luna 5 Livestream Codes
◆ Builds: Columbina, Zibai, Illuga, Ineffa, Neuvillette
◆ Luna 4, Lantern Rite 2026, Moonlit Patrol Exercise
◆ Future: Version 6.4, Varka, Lohen
Dual Evidence is the first world quest under the Old Notes and New Friends chain in Sumeru for Genshin Impact. See how to unlock the Dual Evidence quest, and how to solve and investigate the ruins and puzzles in Hypostyle Desert ruins here!
| Old Notes and New Friends Quest Guides | |
|---|---|
| Dual Evidence | Soheil's Wish |
| Invisible Barrier | Hidden Mercenaries |
| Desert's Remembrance | |
List of Contents
How to Unlock Dual Evidence
Complete Golden Slumber
You can unlock Dual Evidence after completing the Golden Slumber quest chain in Khaj-Nisut. Afterwards, wait for a one server reset to access the quest!
Golden Slumber World Quest Chain Guide
Start the Quest in Aaru Village
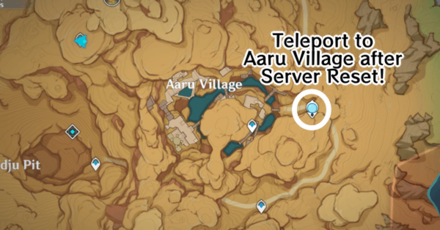
The quest will automatically trigger once you teleport to Aaru Village's Statue of the Seven, or enter the village's vicinity after server reset.
Server Reset Times and Timezones
Dual Evidence Quest Walkthrough
Enter Aaru Village with Kalantari

Make your way to Aaru Village with Kalantari. As you walk through the streets in the objective location, you will be stopped by Soheil. Talk to Soheil afterwards.
Search for Duat Hall
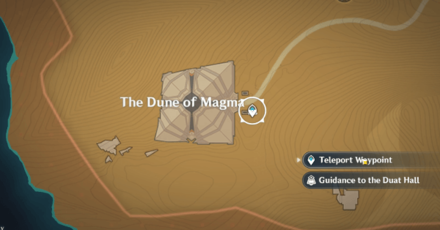
Duat Hall's location, which is indicated from your stone slate, is inside the Dune of Magma pyramid southwest of Hypostyle Desert. The Guidance icon is covered by the Teleport Waypoint, so it may be hard to see at first glance!
| Duat Hall Location Walkthrough | |
|---|---|
| 1 | 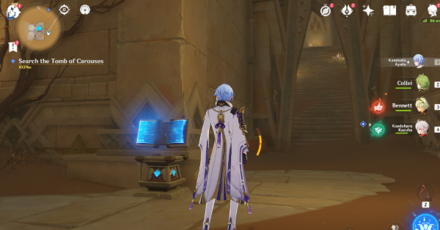 Upon entering Dune of Magma, proceed to the left or right path by interacting the book device. This should open the door. You'll have to use the air current from the Giant Fan Blades if you did go the left path. |
| 2 | Carefully time the release of the Primal Ember. The Giant Fan Blades should have just stopped spinning before you release it or else the Ember will break from the wind! |
| 3 | 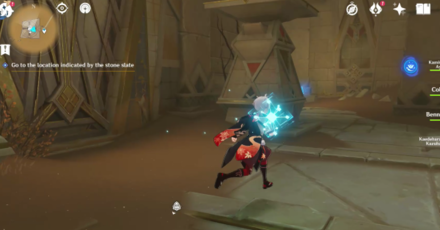 Guide the Primal Ember until it reaches to the main room. The door opens afterwards. |
| 4 | 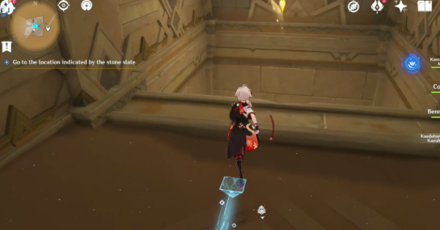 Head inside the door and drop down the hole. You can carry the Forged Primal Lights with you to solve the Remarkable Chest puzzle below! |
| 5 |  Past the Remarkable Chest puzzle, drop down to another hole which leads you to an underground cavern. |
| 6 | 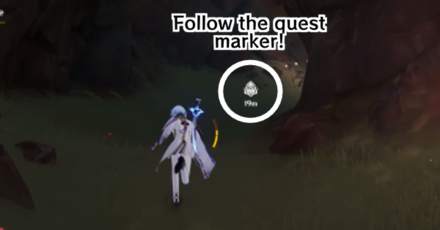 Proceed deep in the cavern while following the quest marker. |
| 7 | 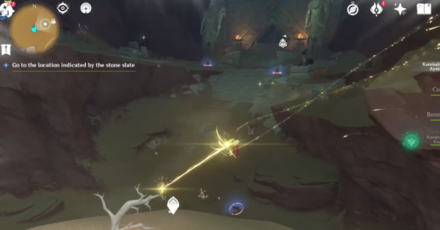 Once you've reached the big area with an inactivated teleport waypoint underneath, you'll find the entrance of Duat Hall on the upper side of slope. |
| 8 | 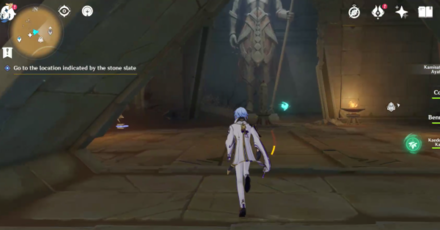 Enter Duat Hall. There should be a seelie on the other side of the room. |
| 9 | 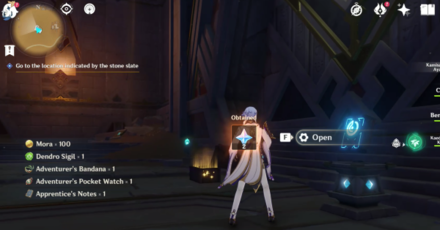 Follow the seelie until it guides you upstairs. There should also be another Teleport Waypoint there. Open the door with the book to complete this objective. |
Obtain full clearance from Aaru Ruins

Complete the following ruins by activating the monolith with all Primal Embers in the following locations:
- Place of Rebirth ruins north of Dune of Magma.
- Place of Breath ruins in Khemenu Temple.
- Place of Swallowing ruins in Duat Hall.
Explore the Place of Rebirth

You can find the Place of Rebirth underneath Duat Hall. Start by going to the Teleport Waypoint north of Dune of Magma.
| Place of Rebirth Walkthrough | |
|---|---|
| 1 |  Teleport north of Dune of Magma, or the entrance to Duat Hall. |
| 2 |  Go down the hole in front of the entrance of Duat Hall. There should be a Dendroculus here and a Four-Leaf Sigil! |
| 3 |  Proceed down the hole and release the first Primal Ember to the flooded room. |
| 4 | 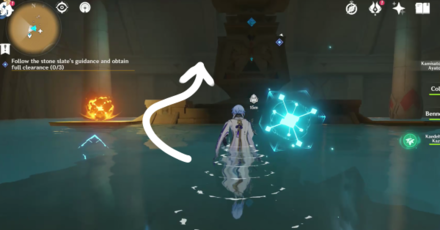 Head inside the corridor on the opposite side of the entrance. |
| 5 |  When you get to the room with multiple lit and fragmented Pyro Torches, look for the Forged Primal Lights outside the ledge on the opposite side of the room and create a Verity Cell on the blue platform. |
| 6 |  Use the newly constructed Verity Cell to reveal the Pyro Torches. Light all of them afterwards. |
| 7 | 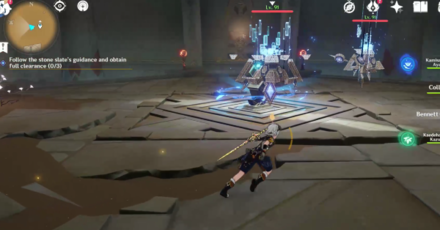 Defeat the enemies, then release the second Primal Ember back to the main room. |
| 8 | 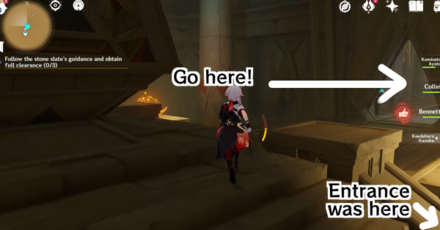 Return to the main room then go to the right path from the entrance. |
| 9 | 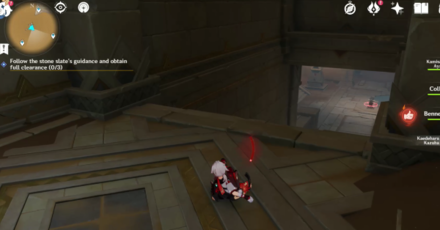 Go down the right staircase. |
| 10 |  In this room, you'll have to move the two cells at the same time. It has a hidden time limit. If you're too slow, the cell will return to the its original position. So alternate between two cells to ensure that both of them will link up to the their own respective cells. |
| 11 |  Release the third and final Primal Ember to the main room. This will up your slate with one clearance! |
Explore the Place of Breath

You can find the Place of Breath underneath Khemenu Temple. Start by going to the Teleport Waypoint you first unlocked during the An Introduction to Indoor Archaeology. You'll need Clearance Level 2 for this, so it's recommended to do the other Places ruins first!
| Place of Rebirth Walkthrough | |
|---|---|
| 1 | 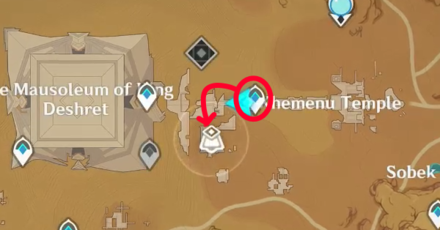 Teleport to Khemenu Temple then head forward to the main room. |
| 2 |  Head forward, then take the left corridor. |
| 3 |  Open the first door you see with the blue book device, then drop down the hole. |
| 4 | 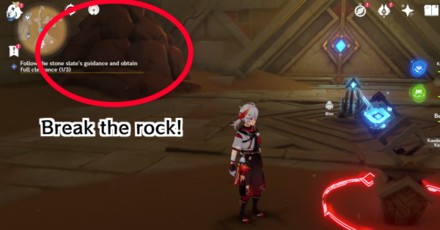 Once you see the beam puzzle, break the rock on the left. |
| 5 | 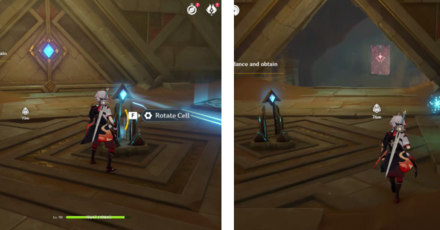 Rotate the cell so that the door opens. The Primal Flame beside you isn't required for this quest (as it's for a different puzzle). For the sake of completing the quest, enter the door to go outside. |
| 6 | 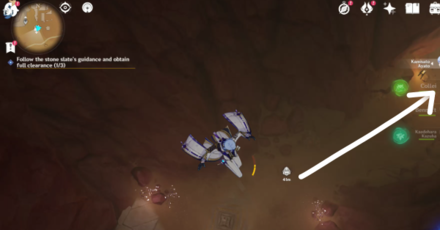 Drop down to the ground and follow the stone slate guidance marker (it will appear when you press "Go" for Place of Rebirth on the third tab in your Scarlet Sand Slate gadget). |
| 7 |  Continue ahead and go up the ramp. |
| 8 |  Follow the slate marker to the triangular entrance of the ruin. |
| 9 |  Go inside the Place of Rebirth. |
| 10 | 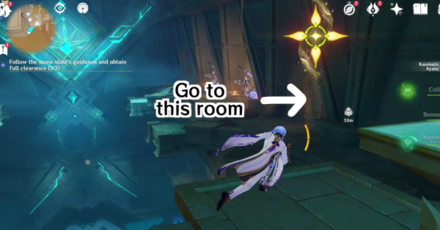 Glide down to the right door from the entrance. |
| 11 | 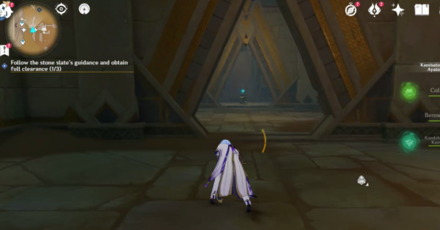 Continue forward until you see the first Primal Ember. |
| 12 | 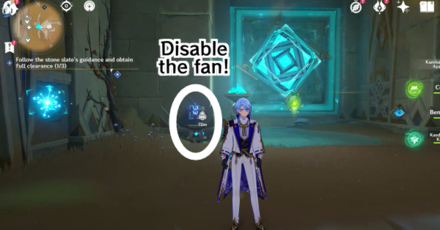 Follow the path of the Primal Ember until you get to the big fan blowing by the corridor. You'll have to disable the fan first by interacting the book (Clearance Level 2). |
| 13 | 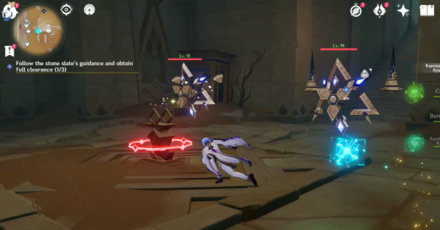 Head inside and defeat the Primal Constructs to get the second Primal Ember. |
| 14 |  Before proceeding, collect the third one first inside the locked room with the book device. Get inside the door, then activate the elevator to go up to the last Ember. |
| 15 | 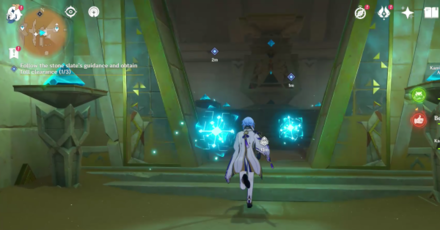 Return with all Primal Embers and offer it to get another clearance level! |
Explore the Place of Swallowing
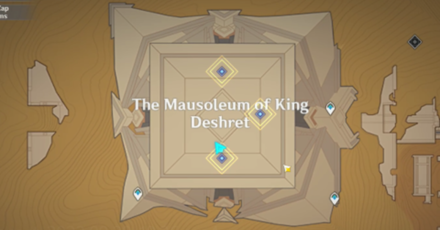
You can find the Place of Swallowing in Duat Hall, or the bluish room where you first see the big room before. It's recommended to leave this last as the next quest objective is in the same location. You can get here by teleporting to the waypoint south of Mausoleum of King Deshret.
| Place of Swallowing Walkthrough | |
|---|---|
| 1 | 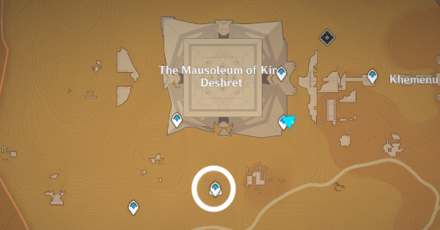 Teleport to Duat Hall and head for the bluish area with broken platforms you were in earlier. Then go forth the big room. |
| 2 | 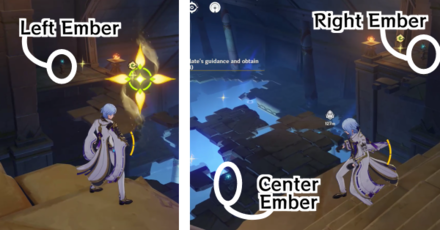 Guide the three Primal Embers on the floating platforms to the room on your right. |
| 3 |  You'll need to time your releases perfectly as the big rotating fans will break them if they're blowing air. The left and center embers will be blown away by horizontal fans, while the fan for the right ember is vertical. |
| 4 | 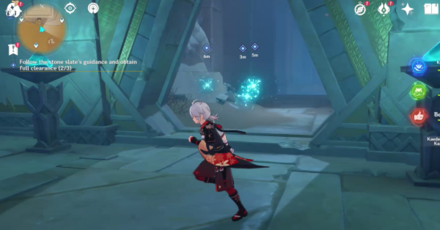 Gather all Primal Embers to the entrance of the right room. |
| 5 |  Offer all of it to the monument to get another clearance. |
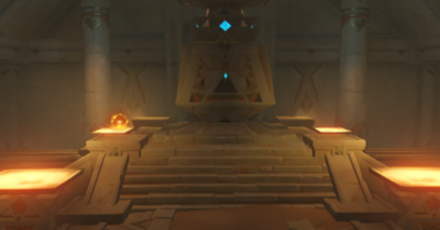
Head to the Great Hall of Truths

From Place of Swallowing, return to the main room and head to the opposite side of the entrance. Enter the Great Hall of Truths by the two big statues. Once there, go near the big device to examine it.
Activate the giant device
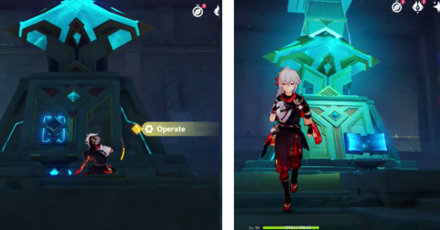
Go to all four monuments on the northwest, northeast, southwest, and southeast corners of the device, then press the operate button on all four books to activate the giant device.
Continue forward the ruins

Return to the giant device and phase through the barrier in the middle. You will then be transported to a giant room.
Light the three Primal Torches
 |
 |
In this area, you will have to release all three Primal Embers to their Primal Torches. All Primal Embers are located by the murals on the wall. This one is fairly simple as all locations are marked in your map, and you just need to guide them to the torches while fighting enemies.
Afterwards, return to the middle and activate the device.
Defeat the Field Annihilation Array

The "big guy with evil intentions" is the Field Annihilation Array, an Algorithm of Semi-Intransient Matrix variant. You can check how to defeat this boss on the guide below!
Algorithm of Semi-Intransient Matrix Guide
Look for valuable items

Open the Precious Chest and get the Record of Aaru's Shut inside.
Talk to Soheil in Aaru Village

After your arduous journey, return to Aaru Village and report your findings to Soheil. This will complete the quest!
Dual Evidence Information
Sub-Quest of Old Notes and New Friends
This quest is a sub-quest to complete the Desert quest chain under Old Notes and New Friends You'll need to clear all quests to unlock all ruins and exploration abilities in the Desert area of Sumeru!
Old Notes and New Friends Guide
Quest Release Date
| Genshin Impact Version 3.1 | |
|---|---|
 |
|
| Release Date | September 28, 2022 |
Dual Evidence was released in Version 3.1, which went live on September 28, 2022! Check out all new content in the newest update here:
Version 3.1 Release Date & Banners
Dual Evidence Rewards
Total Quest Rewards
| Quest Rewards | ||
|---|---|---|
|
|
|
|
|
|
||
Genshin Impact Related Guides

Other Old Notes and New Friends Quest Guides
| Old Notes and New Friends World Quest Guides | ||
|---|---|---|
| Dual Evidence | Soheil's Wish | Invisible Barrier |
| Hidden Mercenaries | Desert's Remembrance | |
Author

Dual Evidence Puzzles and Quest Guide
Premium Articles

Rankings
Gaming News
![Neverness to Everness (NTE) Review [Beta Co-Ex Test] | Rolling the Dice on Something Special](https://img.game8.co/4414628/dd3192c8f1f074ea788451a11eb862a7.jpeg/show)


Popular Games

Genshin Impact Walkthrough & Guides Wiki
Honkai: Star Rail Walkthrough & Guides Wiki
Arknights: Endfield Walkthrough & Guides Wiki
Umamusume: Pretty Derby Walkthrough & Guides Wiki
Wuthering Waves Walkthrough & Guides Wiki
Pokemon TCG Pocket (PTCGP) Strategies & Guides Wiki
Abyss Walkthrough & Guides Wiki
Zenless Zone Zero Walkthrough & Guides Wiki
Digimon Story: Time Stranger Walkthrough & Guides Wiki
Clair Obscur: Expedition 33 Walkthrough & Guides Wiki


Recommended Games
Fire Emblem Heroes (FEH) Walkthrough & Guides Wiki
Pokemon Brilliant Diamond and Shining Pearl (BDSP) Walkthrough & Guides Wiki
Diablo 4: Vessel of Hatred Walkthrough & Guides Wiki
Super Smash Bros. Ultimate Walkthrough & Guides Wiki
Yu-Gi-Oh! Master Duel Walkthrough & Guides Wiki
Elden Ring Shadow of the Erdtree Walkthrough & Guides Wiki
Monster Hunter World Walkthrough & Guides Wiki
The Legend of Zelda: Tears of the Kingdom Walkthrough & Guides Wiki
Persona 3 Reload Walkthrough & Guides Wiki
Cyberpunk 2077: Ultimate Edition Walkthrough & Guides Wiki


All rights reserved
Copyright© 2012-2024 HoYoverse — COGNOSPHERE. All Rights Reserved.
The copyrights of videos of games used in our content and other intellectual property rights belong to the provider of the game.
The contents we provide on this site were created personally by members of the Game8 editorial department.
We refuse the right to reuse or repost content taken without our permission such as data or images to other sites.
Header for Place of Breath Walkthrough still has "Place of Rebirth" Also for No. 6 on the Place of Breath Walkthrough: Drop down to the ground and follow the stone slate guidance marker (it will appear when you press "Go" for Place of Rebirth on the third tab in your Scarlet Sand Slate gadget). It should be "Place of Breath" instead since Place of Rebirth leads to the previously done part.