Yae Miko Rating and Best Builds
✉ Send your thoughts in our Genshin 6.4 Patch Survey!
★ Exclusive: Dive back in time with the Meta History
◆ Hot: Version 6.4, 6.4 Codes, Linnea, Version 6.5
◆ Builds: Varka, Flins, Skirk, Escoffier
◆ Events: Travelers' Tales, Sightseeing With Friends
◆ Endgame: Spiral Abyss (March 2026)

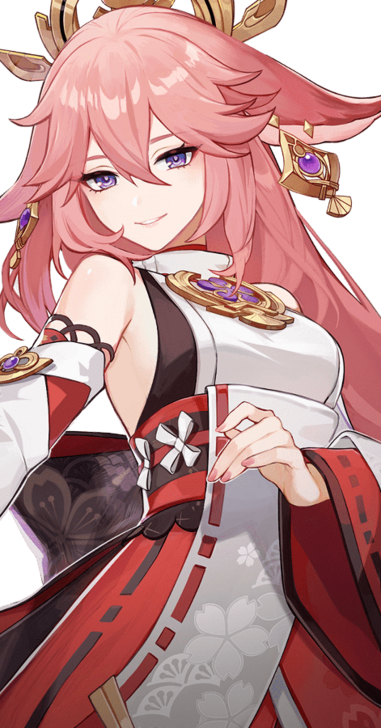
Yae Miko is a 5-star Electro Catalyst character in Genshin Impact, who is best built as an off-field Electro Sub-DPS. See her recommended weapons and artifacts, materials, and our rating of this character in this guide!
| Yae Miko's Character Guides | |||
|---|---|---|---|
|
|
|
|
|
List of Contents
Yae Miko Rating and Info
Character Information
| Yae Miko | ||
|---|---|---|
 |
Rating |
|
| Rarity | ||
| Element | ||
| Weapon | ||
| Voice Actors |
Ratana (EN)
Ayane Sakura (JP) |
|
Tier List Rankings
| Main DPS | Sub-DPS | Support | Exploration |
|---|---|---|---|
| - |
|
- |
|
Character Tier List | Best Characters
Yae Miko's Stats
| Stat | Base Value |
|---|---|
| HP | 2095 |
| ATK | 69 |
| DEF | 115 |
| CRIT Rate% | 5% |
| Stat | Max Value |
|---|---|
| HP | 10372 |
| ATK | 340 |
| DEF | 569 |
| CRIT Rate% | 24.2% |
Base Stat Calculations
 | Stats indicated above are obtained from Yae Miko's base values. These numbers also exclude the character's equipped weapon, artifacts, talents, or other passive effects that are not innate to the character. |
|---|---|
 | All characters start with 5% CRIT Rate, 50% CRIT DMG, 100% Energy Recharge, 0 Elemental Mastery, 0% Healing Bonus, and 0% Elemental DMG bonus before any additional stats are applied. The table above includes such values. |
 | The Level 20 stats indicated for this character are calculated before their first ascension. |
Yae Miko's Ascension and Talent Material Summary
| All Ascension Materials Needed |
|---|
|
|
| All Talent Materials Needed |
|
|
Yae Miko's Strengths and Weaknesses
| Strengths | |||
|---|---|---|---|
|
• Great off-field Electro damage and application especially on Aggravate or Quicken teams. • Elemental Skill totems have wide targetting range and may hit any enemies in the vicinity. It also hits foes randomly, which can be an advantagous perk if you're battling against enemies that are spread out. |
|||
| Weaknesses | |||
|
• Elemental Burst has an extremely high energy cost just for extra damage. It also removes the totems, which requires you to set them up again. • Setup for placing her Elemental Skill require more on-field time, which may lead to team rotation issues. • Elemental Skill totems may unintentionally hit objects and animals in the overworld. |
Yae Miko Best Builds
Yae Miko Sub DPS Builds
General Electro Sub-DPS
| Best Weapon | |
|---|---|
| Replacement Weapons |
3.
|
| Best Artifacts | |
| Artifact Main Stats | |
| Artifact Sub Stats | CRIT Rate, CRIT DMG, Energy Recharge, Elemental Mastery, ATK% |
| Sample Teams | Taser:
Overload:
|
Focusing on the damage of her Elemental Skill, Yae Miko best builds the Golden Troupe artifact to boost her off-field damage. As this set provides big buffs only for her Elemental Skill, her Burst will not benefit much from this artifact.
You may use an Elemental Mastery sands if your team comp is centered around Dendro, otherwise use ATK%.
Aggravate Electro Sub-DPS
| Best Weapon | |
|---|---|
| Replacement Weapons |
5.
|
| Best Artifacts | |
| Artifact Main Stats | |
| Artifact Sub Stats | CRIT Rate, CRIT DMG, Elemental Mastery, Energy Recharge, ATK% |
| Sample Teams | Aggravate:
Aggravate:
|
Elemental Mastery weapons and Gilded Dreams become more enticing to build for Yae Miko on teams that focus on Dendro reactions like Aggravate, especially since it also benefits her Elemental Burst damage.
While the overall damage should be near Golden Troupe on such teams, it's generally more resin efficient to farm this set with Deepwood Memories for your support.
Yae Miko's Talent Priority
| 1st | 2nd | 3rd |
|---|---|---|
| Elemental Skill | Elemental Burst | Normal Attack |
Yae Miko's Elemental Skill has a very short cooldown and will mostly remain active throughout the fight. Prioritize leveling her Elemental Skill over her Elemental Burst to deal more consistent DMG.
Yae Miko Best Artifacts
Best Artifacts Ranked
| Artifact | Artifact Bonuses | |
|---|---|---|
| 1st |
|
2-PC: Elemental Skill DMG +20% 4-PC: Increases Elemental Skill DMG by 25%. Additionally when not on the field, Elemental Skill DMG will be further increased by 25%. This effect will be cleared 2s after taking the field. |
| 2nd |
|
2-PC: Elemental Mastery +80 4-PC: Within 8s of triggering an Elemental Reaction, the character equipping this will obtain buffs based on the Elemental Type of the other party members. ATK is increased by 14% for each member whose Elemental Type is the same as the equipping character, and EM is increased by 50 for every member with a different Elemental Type. Each of the buffs will count up to 3 characters. This effect can be triggered once every 8s and even when not on the field. |
| 3rd |
|
2-PC: Electro DMG Bonus +15% |
|
|
2-PC: Elemental Skill DMG +20% |
Best 4-Star Artifact for Yae Miko
| Artifact | Artifact Bonuses |
|---|---|
 Gambler Gambler
|
2-PC: Increases Elemental Skill DMG by 20%. 4-PC: Defeating an enemy has a 100% chance to remove Elemental Skill CD. Can only occur once every 15s. |
List of Artifacts and Set Bonuses
Yae Miko Best Weapons
Yae Miko Weapon Rankings
| Weapon | Weapon Information | |
|---|---|---|
| 1st |
 Kagura's Verity Kagura's Verity
|
Base ATK: 608 Bonus Stat: CRIT DMG 66.2% Skill Effect: Gains the Kagura Dance effect when using an Elemental Skill, causing the Elemental Skill DMG of the character wielding this weapon to increase by 12% for 16s. Max 3 stacks. This character will gain 12% All Elemental DMG Bonus when they possess 3 stacks. |
| 2nd |
 Skyward Atlas Skyward Atlas
|
Base ATK: 674 Bonus Stat: ATK 33.1% Skill Effect: Increases Elemental DMG Bonus by 12%. Normal attack hits have a 50% chance to earn the favor of the clouds, which actively seeks out nearby enemies to attack for 15s. Dealing 160% ATK DMG. Can only occur once every 30s. |
| 3rd |
 Oathsworn Eye Oathsworn Eye
|
Base ATK: 565 Bonus Stat: ATK 27.6% Skill Effect: Increases Energy Recharge by 24% for 10s after using an Elemental Skill. |
Best Free-to-Play Weapons for Yae Miko
| Weapon | Weapon Information |
|---|---|
 The Widsith The Widsith
|
Base ATK: 510 Bonus Stat: CRIT DMG 55.1% Skill Effect: When a character takes the field, they will gain a random theme song for 10s. This can only occur once every 30s. Recitative: ATK is increased by 60%. Aria: Increases all Elemental DMG by 48%. Interlude: Elemental Mastery is increased by 240. |
 Hakushin Ring Hakushin Ring
|
Base ATK: 565 Bonus Stat: Energy Recharge 30.6% Skill Effect: After the character equipped with this weapon triggers an Electro elemental reaction, nearby party members of an Elemental Type involved in the elemental reaction receive a 10% Elemental DMG Bonus for their element, lasting 6s. Elemental Bonuses gained in this way cannot be stacked. |
All Recommended Weapons for Yae Miko
| Recommended Weapons | How to Get |
|---|---|
| Gacha | |
| Gacha | |
| Gacha | |
| Gacha | |
| Gacha | |
| Battle Pass | |
| Battle Pass | |
| Event | |
| Crafted | |
| Crafted | |
| Gacha | |
| Starglitter Exchange | |
| Starglitter Exchange | |
Yae Miko Best Team Comp
Yae Miko is a Sub-DPS that provides off-field Electro DMG by setting up her Sesshou Sakura turrets.
She shines best in Aggravate and Overload teams, but still works in general use.
Notable Teammates
| Character | Explanation |
|---|---|
|
|
Main DPS Her girlfriend. Yae and Raiden synergizes very well - Raiden lowers Yae's ER Requirements while Yae provides Resolves stacks. |
|
|
Support A staple in buffing Electro units, Sara provides significant ATK boost and, at C6, CRIT DMG buffs. |
|
|
Sub-DPS Amazing pair, especially in reaction teams. Fischl greatly reduces Yae's ER requirements with her A4 passive and Yae can be a reaction driver for it. Best used in Aggravate teams. |
|
|
Sub-DPS Amazing off-field Dendro application. Nahida and Yae makes an incredible duo in an Aggravate team. |
|
|
Support Yae's off-field Electro application allows Chevreuse's buff to be constantly available. Chevreuse also buffs Yae's ATK and, at C6, her Electro DMG. |
|
|
Main DPS Arlecchino and Yae pairs well in Overload teams. Adding Chevreuse, the team benefits a lot of DMG boosts and the off-field Electro DMG allows Arlecchino to utilize Overload DMG. |
|
|
Support Kazuha gives significant DMG buff and RES shred with 4pc Viridescent Venerer. His grouping capability is a good bonus. |
|
|
Support Similar to Kazuha, Xilonen provides RES shred and DMG buff. However, her buffs last longer and heals enough. In exchange, she does not provide any personal damage. |
|
|
Sub-DPS Consistent off-field Pyro application as well as good amount of personal damage allows Xiangling to synergize well with Yae Miko, especially in Overload teams. |
|
|
Main DPS Premier On-field Dendro DPS. A significant asset and often used in Aggravate teams with Yae. |
Dendro Aggravate Team
| Main DPS | Sub-DPS | Sub-DPS | Support |
|---|---|---|---|
|
|
|
|
|
|
|
|
|
|
This Dendro Team comp has Nahida apply the Dendro Aura on the enemy while Alhaitham applies Quicken and triggers the Aggravate reaction from Yae Miko's totems. Zhongli can be replaced by Fischl for more Aggravate procs and energy.
Overloaded Team Comp
| Main DPS | Sub-DPS | Sub-DPS | Support |
|---|---|---|---|
|
|
|
|
|
|
|
|
|
|
On teams that are focused on Overloaded, Chevreuse is the staple team member for such teams to enable the niche. Yae Miko's Elemental Skill can still target enemies even if they're flung away by the Overloaded knockback.
Electro-Charged Team
| Main DPS | Sub-DPS | Sub-DPS | Support |
|---|---|---|---|
|
|
|
|
|
|
|
|
|
|
Electro-Charged is also a viable team comp option for Yae Miko as she can virtually apply high off-field Electro after every rotations!
While Raiden and Tartaglia should provide the most damage and fast reactions to proc Electro-Charged, their positions can be replaced with other Hydro or Electro characters like Xingqiu or Fischl instead.
Yae Miko Best Constellations
| Divina Vulpes |
|---|
 |
Constellation and Effects
| Yae Miko's Constellations | |
|---|---|
| C1 |
Yakan Offering Each time Great Secret Art: Tenko Kenshin activates a Tenko Thunderbolt, Yae Miko will restore 8 Elemental Energy for herself. |
| C2 |
Fox's Mooncall Sesshou Sakura start at Level 2 when created, their max level is increased to 4, and their attack range is increased by 60%. |
| C3 |
The Seven Glamours Increases the Level of Yakan Evocation: Sesshou Sakura by 3. Maximum upgrade level is 15. |
| C4 |
Sakura Channeling When Sesshou Sakura lightning hits opponents, the Electro DMG Bonus of all nearby party members is increased by 20% for 5s. |
| C5 |
Mischievous Teasing Increases the level of Great Secret Art: Tenko Kenshin by 3. Maximum upgrade level is 15. |
| C6 |
Forbidden Art: Daisesshou The Sesshou Sakura's attacks will ignore 60% of the opponents' DEF. |
Best Constellations Rating and Explanation
| Rating | Constellation Effect / Merits | |
|---|---|---|
| C1 | ★★☆ | • Massively reduces her Energy Recharge requirements. |
| C2 | ★★★ | • Significantly increases the range and damage of her Elemental Skill. |
C2 for an Overall Character Improvement
Yae Miko's huge Elemental Burst cost is heavily alleviated by unlocking her first constellation, and getting the second improves her off-field damage and range. This improvement makes her more viable for team comps that don't have another Electro character.
Yae Miko Talents and How to Use
Normal Attack
| Normal Attack: Spiritfox Sin-Eater |
|---|
| Summons forth kitsune spirits, initiating a maximum of 3 attacks that deal Electro DMG.
Charge Attack Consumes a certain amount of Stamina to deal AoE Electro DMG after a short casting time. Plunge Attack: Plunges toward the ground from mid-air, damaging all opponents in her path with thunderous might. Deals AoE Electro DMG upon impact with the ground. |
| Attribute | Effect (Lvl 1) |
|---|---|
| 1-Hit DMG | 39.70% |
| 2-Hit DMG | 38.5% |
| 3-Hit DMG | 56.90% |
| Charged ATK DMG | 142.90% |
| Charged ATK Stamina Cost | 50.0% |
| Plunge DMG | 56.8% |
| Low/High Plunge DMG | 114%/142% |
Deal AoE Damage with Charged Attacks
 Normal Attack: Spiritfox Sin-Eater |
Yae Miko's Normal Attacks can combo up to three times and her Charged Attacks can deal AoE Electro DMG in a straight line, which can be quite useful against mob enemies.
Animation Cancel Yae Miko's Charged Attack

While Yae Miko has a powerful Charged Attack, the animation has quite a long wind up which takes up time. You can cancel this long animation by jumping as soon as you see the Electro Fox wind Yae Miko's right shoulder!
Elemental Skill
| Yakan Evocation: Sesshou Sakura |
|---|
| To Yae, such dull tasks as can be accomplished by driving spirits out need not be done personally. Moves swiftly, leaving a Sesshou Sakura behind.
Sesshou Sakura ・Periodically strikes one nearby opponent with lightning, dealing Electro DMG. ・When there are other Sesshou Sakura nearby, their level will increase, boosting the DMG dealt by these lightning strikes. ・This skill has three charges. A maximum of 3 Sesshou Sakura can exist simultaneously. The initial level of each Sesshou Sakura is 1, and the initial highest level each sakura can reach is 3. If a new Sesshou Sakura is created too close to an existing one, the existing one will be destroyed. |
| Attribute | Effect (Lvl 1) |
|---|---|
| Level 1 DMG | 60.7% |
| Level 2 DMG | 75.80% |
| Level 3 DMG | 94.80% |
| Level 4 DMG | 118.50% |
| Duration | 14.0s% |
| CD | 4.0s |
Spawn Electro Fox Turrets
 Elemental Skill: Yakan Evocation - Sesshou Sakura |
Yae Miko's Elemental Skill, Yakan Evocation - Sesshou Sakura, places a Sesshou Sakura fox turret that periodically attacks an enemy, dealing Electro DMG. A maximum of three Sesshou Sakuras can be placed at a time.
Place the Fox Turrets Close

To maximize the Sesshou Sakura damage, all of them need to close and connect together. The most efficient to do this is by creating a small triangle. Note that you can create a turret right beside the other one, as long as you don't create another one in the same place!
Unlock Ascension Passive to Reset

After unlocking The Shrine's Sacred Shade passive talent, destroying a turret will reset the cooldown for one of the turrets as well. A turret is destroyed once you deploy a new turret on the field or when the duration runs out.
Can be used to Dash Away from Enemies

When you use a Sesshou Sakura Yae Miko will teleport a short distance forward, if you're running and backwards if you're idle. Skillful use of this would put some distance from enemy attacks and create another turret to strike enemies!
However, you need to carefully place it away from potentially harmful items (like exploding barrels, torches, or water) to avoid hurting Yae Miko or your party.
Elemental Skill Forward and Backwards
| Elemental Skill Animation | |
|---|---|
 Forward (While Moving) |
 Backward (While Idle) |
Yae Miko's Elemental Skill have different animations; when used while running or walking, she will dash forward and when she's idle or just standing for a short period of time, she will dash backward!
Elemental Burst
| Great Secret Art: Tenko Kenshin |
|---|
| Legends of "kitsunetsuki," or the manifestation of a kitsune's might, are common in Inazuma's folktales. One that particularly captures the imagination is that of the Sky Kitsune, said to cause lightning to fall down upon the foes of the Grand Narukami Shrine. Summons a lightning strike, dealing AoE Electro DMG.
When she uses this skill, Yae Miko will unseal nearby Sesshou Sakura, destroying their outer forms and transforming them into Tenko Thunderbolts that descend from the skies, dealing AoE Electro DMG. Each Sesshou Sakura destroyed in this way will create one Tenko Thunderbolt. Flavor Text: Only at times like these will Yae reveal her Sky Kitsune form and wield lightning itself. None have seen the Lady Guuji's tails and lived to tell the story... so remember, as far as you are concerned, Lady Yae does not have a tail. |
| Attribute | Effect (Lvl 1) |
|---|---|
| Skill DMG | 260% |
| Tenko Thunderbolt DMG | 334% |
| CD | 22.0s |
| Energy Cost | 90 |
Electrify Enemies with Burst
 Elemental Burst: Great Secret Art - Tenko Kenshin |
When Yae Miko uses her Elemental Burst, she will use up all nearby Sesshou Sakura to deal devastating AoE Electro DMG. After the initial hit, succeeding bolts of lightning will strike the area based on the number of Sesshou Sakura available prior to usage!
Fox Turrets increase Burst DMG
| Without Fox Turrets | With Fox Turret |
|---|---|
 |
|
To increase Yae Miko's Elemental Burst, you need to deploy her fox turrets so that it pulses more with Electro DMG!
Passive Talent 1
| The Shrine's Sacred Shade |
|---|
| When casting her Elemental Burst, Great Secret Art: Tenko Kenshin, each Sesshou Sakura destroyed resets the cooldown for one charge of her Elemental Skill, Yakan Evocation: Sesshou Sakura. |
Passive Talent 2
| Enlightened Blessing |
|---|
| Every point of Elemental Mastery Yae Miko possesses will increase Sesshou Sakura DMG by 0.15%. |
Passive Talent 3
| Meditations of a Yako |
|---|
| Has a 25% chance to get 1 regional Character Talent Material (base material excluded) when crafting. The rarity is that of the base material.
The extra Talent Material created is from the same region and of the same rarity, but of a random type. |
Yae Miko Ascension and Talent Materials
Yae Miko Ascension Materials
| Lv.20→Lv.40 | |
|---|---|
| Lv.40→Lv.50 |
|
| Lv.50→Lv.60 |
|
| Lv.60→Lv.70 |
|
| Lv.70→Lv.80 |
|
| Lv.80→Lv.90 |
|
Yae Miko Talent Level-Up Materials
| Daily Domain Drops | Enemy Drops | Weekly Boss Drops |
|---|---|---|
| Wed/Sat/Sun |
Nobushis |
Raiden Shogun Challenge Reward |
|
|
|
|
|
|
|
How to Get Yae Miko
Pull on Yae Miko's 4.4 Phase 2 Banner

|
|
| Banner Status | Inactive |
|---|---|
Yae Miko's rerun banner, Everbloom Violet was available in Phase 2 of Version 4.4 from February 20, 2024 until March 12, 2024. Her banner was up alongside Xiao's banner rerun, Invitation to Mundane.
Version 4.4 Release Date, Banners, and Skins
Related Wish Banner Guides
| Click to view a Banner Guide! | ||
|---|---|---|
 Banner Info Banner Info |
 Wish Sim Wish Sim |
 All Wishes All Wishes |
Yae Miko's In-Game Information
Yae Miko Character Profile
| Nation | |
|---|---|
| Title | Astute Amusement |
| Vision | |
| Gender | Female |
| Race | Kitsune |
| Height | Tall Girl |
| Faction | Grand Narukami Shrine |
| Constellation | Divina Vulpes |
| Birthday | June 27 |
| Special Dish | Fukuuchi Udon |
| Story Quest |
Chapter: Divina Vulpes Act 1: The Great Narukami Offering |
Thoughts About Yae Miko
| Character | In-Game Thoughts |
|---|---|
 Ayaka Ayaka
|
I have always greatly enjoyed working with Guuji Yae. Organizing festival affairs generally takes a lot of effort and doesn't generate much income, but Guuji Yae's events always come off both elegant and profitable. |
 Ayato Ayato
|
Lady Guuji has been kind to us in the Kamisato Clan, but she has never quite taken to me personally. I trust you'll have heard the way she refers to me... "the Yashiro rascal" and other such flattering monikers. We run into each other semi-regularly, given the overlap in our work, and despite whatever private thoughts we each may have, our working relationship is quite a harmonious one. I have no great objection to this state of affairs — working with intelligent people always makes things highly efficient. In any case... However objectionable she might find me, she would be forced to admit that without me, she would have no one to help execute her weird and wonderful ideas. |
 Gorou Gorou
|
Oh, her... I'd be prefer not to talk about her. Can we change the topic? Or, if there are any tasks I can take off your hand, I'll gladly oblige! Anything at all? ...Ahem, let's just say it'd be best for my general well-being if we can avoid talking about her... |
 Heizou Heizou
|
Come to think of it, Lady Guuji's publishing house also publishes murder mysteries, right? So... when can you introduce me? In this day and age, becoming a famous detective requires more than just ability - you need publicity, too. Huh? C'mon, I'm being serious here! |
 Itto Itto
|
About the Lady with Fox Ears I crushed that Kitsune Ramen eating contest we had. Even all that Fried Tofu couldn't stand in my way — she didn't come close to beating me! ... I was, uh, bedridden for more than a month after that, but you know what? I'd rather lie in bed a winner than walk away a loser! So... Anyway, I had the last laugh, 'cause she had to foot the bill for 32 bowls of noodles! Haha! |
 Kirara Kirara
|
Lady Miko is a widely renowned kitsune youkai in Inazuma, so it's natural for young youkai like myself to approach her with reverence. But contrary to my expectations, she was surprisingly amiable. She even came to visit me in person and taught me lots of useful stuff about how to survive in human society! Things like proper human etiquette, ways to approach people, and different fried tofu recipes... Huh? That last one was just for her? |
 Kokomi Kokomi
|
I have also heard of Guuji Yae's great deeds. In all fairness, I hold her to be an outstanding shrine maiden, and she has performed her duties marvelously. I even heard that she holds responsibility where Yae Publishing House's light novels are concerned. An enigmatic individual to say the least... |
 Mizuki Mizuki
|
Past History: Hundreds of years ago, we were neighbors. Miko was a lot more serious about her pursuits back then, but still, the innocence of youth permeated everything. I miss those days sometimes - Miko had just learned to transform into a human, and life was so simple... Every day, she would come find me and let me taste her dreams. Notes of sakura blossom, paper, ink, Tricolor Dango, and Fried Tofu... That's what I remember. She would beg me to transform into a human with her and drag me into town to find things that matched the flavors of her dreams. If someone caught us, we would immediately transform back into our original forms, and make a break for it. Miko ran so fast, she would leave me in the dust half the time.
Current Situation: Now, Miko is the Guuji of the Grand Narukami Shrine. After growing up, I never tried one of her dreams again. Who knows if any of the flavors are the same as back then... Consuming dreams without permission is the ultimate taboo for my kind. Even if she came to me and asked after so long, I... I think I would refuse. We're business rivals now, and I intend to keep up with her this time. |
 Sara Sara
|
Guuji Yae's actions often leave me with many questions... Nevertheless, the fact that she is the head shrine maiden of the Grand Narukami Shrine clearly shows the level of trust and approval that the Shogun places in her, and for this reason I also greatly respect her. But... if there ever comes a day when she disobeys the Shogun's will, then please accept my apologies in advance. |
 Sayu Sayu
|
She's always patting me on the head... I've never bitten her, though, or even said anything, because I'm frightened of how she'd react if I stood up to her. But what am I gonna do? Because if she keeps on patting my head, I'm gonna get stuck at this height forever! |
 Shinobu Shinobu
|
You can't imagine how boring it is to be a shrine maiden. Even Lady Guuji from the Grand Narukami Shrine has her publishing gig to break up the monotony. I will never go back to being a shrine maiden. Never. |
 Thoma Thoma
|
Lady Miko? Wh—What about her? 'sigh' Every time Miss Kamisato sends me out to deliver messages, my least-favorite destination is Grand Narukami Shrine... Oh! N—Not because Lady Miko scares the bejeebers out of me, it's, uh... respect. Yes! She strikes respect deep into my heary, ahahahaha... |
 Wanderer Wanderer
|
A smooth-talking youkai. Though she pretends to care about humans to gain the favor of her god, all she seeks are entertaining ways to pass her time. |
 Yoimiya Yoimiya
|
Ayaka once asked me during a ritual at the shrine if I could prepare some fireworks for the Lady Guuji's leisure. I thought to myself, "isn't the Lady Guuji supposed to sit inside the shrine throughout the ritual?" So I watched her the whole time during the ritual, wondering how she'd like to release the fireworks. I waited, and I waited, and then Ayaka came over at length to tell me that the Lady Guuji was most pleased. I mean, what? She'd already released the fireworks? Was the person sitting inside the shrine not her, then? |
Yae Miko's Thoughts About Others
| Character | In-Game Thoughts |
|---|---|
|
Ayaka
|
About Ayaka I'm very fond indeed of the Yashiro Commission girl. She adroitly handles every matter that comes before her. Unfortunately, it's often thankless work. Pity. Were she not a member of the Kamisato Clan, I would have long since snatched her up for the Yae Publishing House. |
|
Ayato
|
About Ayato The Yashiro rascal... he's always been an unpredictable one, even as a child. Don't be taken in by his warm smile. There's no knowing what devious scheme might be brewing inside his head — it's really quite maddening... What do you mean, "sly as a fox"? Hmph, if you're trying to insinuate that he and I are anything alike, you are sorely mistaken. |
 Ganyu Ganyu
|
About Ganyu Hmm, now that you mention it, it's been a while since I last saw Ganyu. Before the Sakoku Decree came into effect, the two of us would often meet to discuss bilateral relations between our two nations. I always found her quite reliable. The next time you go to Liyue, take her some more fresh Sea Ganoderma for me. |
|
Gorou
|
About Gorou He certainly has a beautiful tail. Although... mine's a little softer. |
|
Itto
|
About Itto Ah, the oddball oni. Heh, I hear that he's been quite a pain for the Kujou Clan. The Tenryou Commission wanted to remove his messages on the bulletin board, claiming that they were "harmful to the public order." I made quite sure they stayed put, haha. He's an entertaining character... you don't often see oni like him in this day and age. |
|
Kirara
|
About Kirara More youkai have expressed an interest in the human world lately. I wonder if that's a good thing or not. You want to know what I think? Hehe, I would tell them to live for the moment. Besides, how could I ever dislike a little youkai who would willingly take us out to dinner and pay for the meal? |
|
Kokomi
|
About Kokomi These Divine Priestesses seem to be getting cuter every generation. I wonder how she looks performing the Dance of Divine Peace... Perhaps even little schools of fish swish around her while she spins. If she's ever looking for a more experienced head shrine maiden to learn from, I'd be quite happy to share a few tips with her... Hehe, as long as she asked me nicely, of course. |
 Raiden Raiden
|
About Raiden Locking herself away in the Plane of Euthymia when she clearly wants to be out — it's just willful self-torture, really... On the other hand, it's also rather stubborn-but-cute, don't you think? |
|
Sara
|
About Sara Not the sharpest tengu in the forest — she certainly didn't inherit the brilliant mind of daddy tengu, that's for sure. *sigh |
|
Sayu
|
About Sayu Ah yes, the little ninja child... If there's one thing she can do, it's stay hidden. Kano Nana constantly complains to me about it. Apparently, she now spends so much of her time searching for Sayu that she barely has any time to read anymore. If you as me, I'd say that Sayu has a secret ally who is helping her hide all the time... |
|
Shinobu
|
About Shinobu I've heard a lot about Miyuki's little sister. Quite the character, I'm told. Although she comes from a family of shrine maidens, she's gone her own way in life - tried her hand at many different trades, studied abroad in Liyue, even ended up joining the Arataki Gang... Fascinating girl. Maybe I should have Miyuki introduce me. Yes, that'll work — Miyuki wouldn't dream of refusing my request. |
|
Wanderer
|
About Kunikuzushi I thought it was a disaster waiting to happen at the time, but she insisted that she wasn't going to lift a finger against the object of her own creation. Had I known how things would unfold, I would have simply disposed of it without her knowing. Hmm? What about now? Hehe... Well, we're no longer waiting for the disaster to happen, are we? |
|
Yoimiya
|
About Yoimiya Naganohara fireworks are well worth the wait every year. Word is that she caused quite an uproar among the Tenryou Commission recently by setting off fireworks all over the place. Heh, I'm sure the members of the Kujou Clan must've turned purple with rage... A pity that I couldn't be there to see it for myself. |
Genshin Impact Character Guides

All Characters and Voice Actors
List of All Characters
| Characters by Element | |||
|---|---|---|---|
Playable Characters
 Chasca
 Faruzan
 Ifa
Ifa Jahoda
 Jean
Jean Kazuha
 Lan Yan
 Lynette
 Sucrose
 Traveler (Anemo)
 Varka
Varka Venti
Venti Xianyun
 Xiao
Xiao Aloy
Aloy Charlotte
 Chongyun
 Citlali
 Diona
Diona Escoffier
 Eula
Eula Freminet
 Kaeya
Kaeya Layla
Layla Mika
Mika Qiqi
Qiqi Rosaria
 Shenhe
 Skirk
Skirk Wriothesley
 Alhaitham
 Baizhu
 Collei
 Emilie
 Kaveh
Kaveh Kinich
 Lauma
Lauma Nahida
 Nefer
Nefer Tighnari
 Traveler (Dendro)
 Yaoyao
 Beidou
 Clorinde
 Cyno
Cyno Dori
Dori Fischl
 Flins
Flins Iansan
 Ineffa
 Keqing
 Lisa
Lisa Ororon
 Razor
Razor Sethos
 Traveler (Electro)
 Varesa
 Yae Miko
 Albedo
 Chiori
 Illuga
 Kachina
 Navia
Navia Ningguang
 Noelle
 Traveler (Geo)
 Xilonen
 Yun Jin
 Zhongli
 Zibai
Zibai Aino
Aino Barbara
 Candace
 Columbina
 Dahlia
 Furina
 Mona
Mona Mualani
 Neuvillette
 Nilou
Nilou Sigewinne
 Tartaglia
 Traveler (Hydro)
 Xingqiu
 Yelan
Yelan Amber
Amber Arlecchino
 Bennett
 Chevreuse
 Dehya
Dehya Diluc
Diluc Durin
Durin Gaming
 Hu Tao
 Klee
Klee Lyney
Lyney Mavuika
 Traveler (Pyro)
 Xiangling
 Xinyan
 Yanfei
Upcoming Characters
| All Upcoming Characters |
 Alice Alice
|
 Capitano Capitano
|
 Dainsleif Dainsleif
|
 Dottore Dottore
|
|---|---|---|---|
 Linnea Linnea
|
 Lohen Lohen
|
 Nicole Nicole
|
 Pantalone Pantalone
|
 Pierro Pierro
|
 Pulcinella Pulcinella
|
 Rerir Rerir
|
 Sandrone Sandrone
|
 Tsaritsa Tsaritsa
|
|||
Character Lists
| Characters by Rarity | |
|---|---|
| 5-Star Characters | 4-Star Characters |
| Free Characters | |
| Characters by Weapon Used | |
| Sword Users | Claymore Users |
| Polearm Users | Bow Users |
| Catalyst Users | |
| Characters by Role | |
| Main DPS Characters | Sub DPS Characters |
| Support Characters | Healers |
| Shield Characters | Buff Providers |
| Best for Exploration | Local Specialty Passives |
| Double Reward Passives | |
| Characters by Gender | |
| Male Characters | Female Characters |
| Short Male Characters | Short Female Characters |
| Medium Male Characters | Medium Female Characters |
| Tall Male Characters | Tall Female Characters |
| Characters by Height | |
| Short Characters | Medium Characters |
| Tall Characters | |
| Characters by Region | |
| Mondstadt Characters | Liyue Characters |
| Inazuma Characters | Sumeru Characters |
| Fontaine Characters | Natlan Characters |
| Nod-Krai Characters | |
Author

Yae Miko Rating and Best Builds


Rankings
Gaming News


![The Liar Princess and the Blind Prince Review [PC] | Lovely to Look at but Tedious to Play](https://img.game8.co/4442586/8d95f5faf05780f1765ce7e0938bd825.jpeg/thumb)
![Marathon Cryo Archive Map Teased as [REDACTED] on Selection Screen](https://img.game8.co/4442236/6357203e58172f6de57f1991e7c39b22.png/thumb)

Popular Games

Genshin Impact Walkthrough & Guides Wiki
Umamusume: Pretty Derby Walkthrough & Guides Wiki
Pokemon Pokopia Walkthrough & Guides Wiki
Honkai: Star Rail Walkthrough & Guides Wiki
Monster Hunter Stories 3: Twisted Reflection Walkthrough & Guides Wiki
Arknights: Endfield Walkthrough & Guides Wiki
Wuthering Waves Walkthrough & Guides Wiki
Zenless Zone Zero Walkthrough & Guides Wiki
Pokemon TCG Pocket (PTCGP) Strategies & Guides Wiki
Monster Hunter Wilds Walkthrough & Guides Wiki


Recommended Games
Diablo 4: Vessel of Hatred Walkthrough & Guides Wiki
Cyberpunk 2077: Ultimate Edition Walkthrough & Guides Wiki
Fire Emblem Heroes (FEH) Walkthrough & Guides Wiki
Yu-Gi-Oh! Master Duel Walkthrough & Guides Wiki
Super Smash Bros. Ultimate Walkthrough & Guides Wiki
Pokemon Brilliant Diamond and Shining Pearl (BDSP) Walkthrough & Guides Wiki
Elden Ring Shadow of the Erdtree Walkthrough & Guides Wiki
Monster Hunter World Walkthrough & Guides Wiki
The Legend of Zelda: Tears of the Kingdom Walkthrough & Guides Wiki
Persona 3 Reload Walkthrough & Guides Wiki


All rights reserved
Copyright© 2012-2024 HoYoverse — COGNOSPHERE. All Rights Reserved.
The copyrights of videos of games used in our content and other intellectual property rights belong to the provider of the game.
The contents we provide on this site were created personally by members of the Game8 editorial department.
We refuse the right to reuse or repost content taken without our permission such as data or images to other sites.
i’m giggling why does it say “her girlfriend” when explaining why raiden is good with yae