Should You Pull on the Weapon Banner?
✉ Send your thoughts in our Genshin 6.4 Patch Survey!
★ Exclusive: Dive back in time with the Meta History
◆ Hot: Version 6.4, Luna 5 Codes
◆ Builds: Varka, Flins, Skirk, Escoffier
◆ Events: Travelers' Tales, He Who Caught the Wind
◆ Future: Linnea, Version 6.5 Luna VI
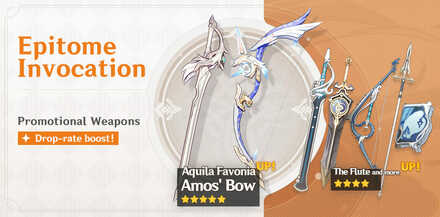
The Epitome Invocation is the Weapon Wish Banner in Genshin Impact. We have a list of Weapon Banner history, the current weapon banner information, and info on if you should pull on the weapon banner!
List of Contents
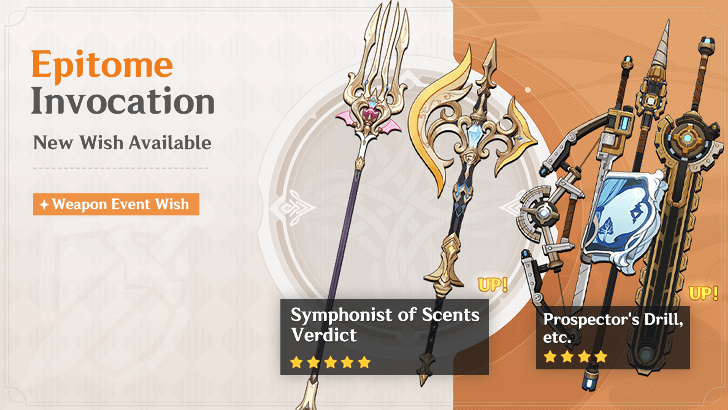
Weapon Banner Dates and Countdown
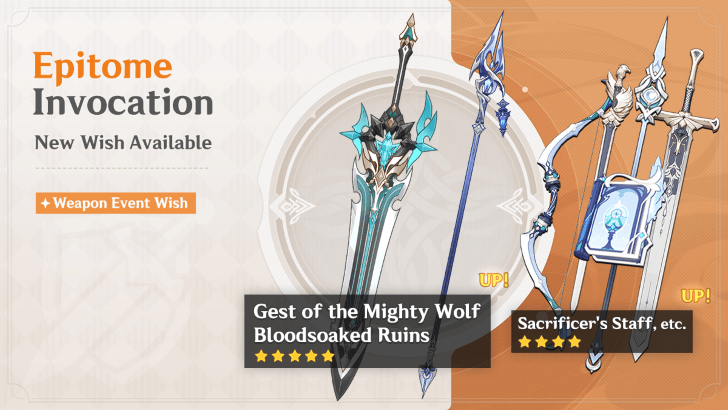
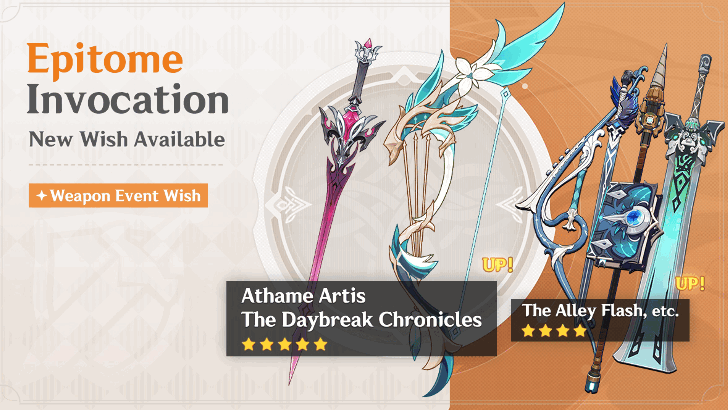
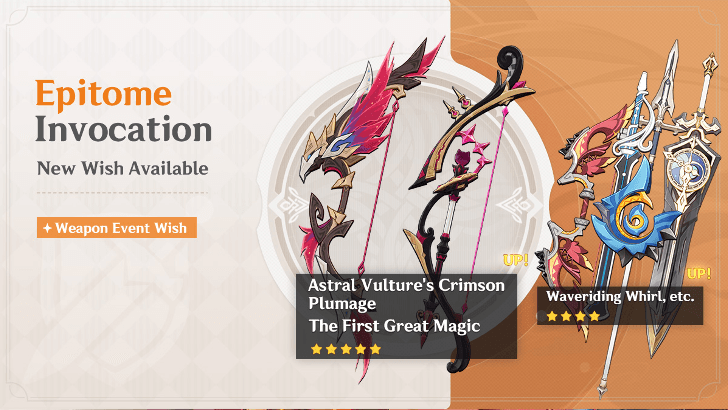
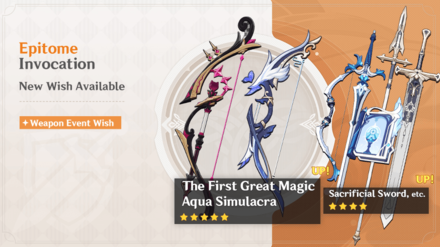
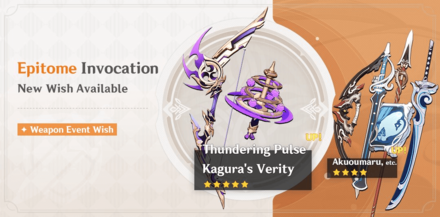
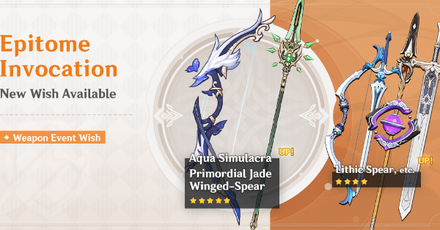
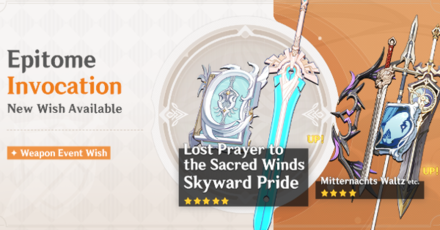
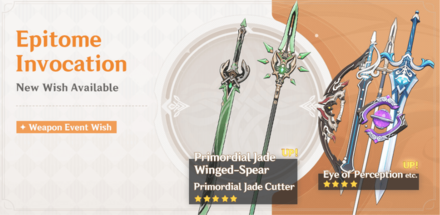
Version 6.4 Epitome Invocation Banner Details
| Banner Date | February 25, 2026 - March 17, 2026 |
|---|---|
| 5-star Rate Up | |
| 4-star Rate Up |
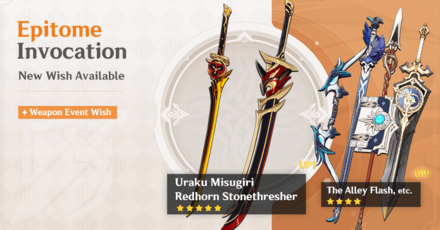
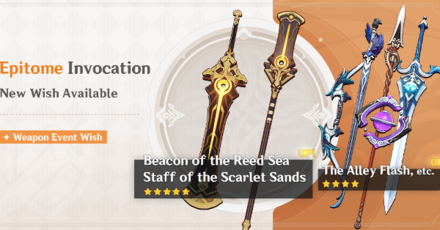
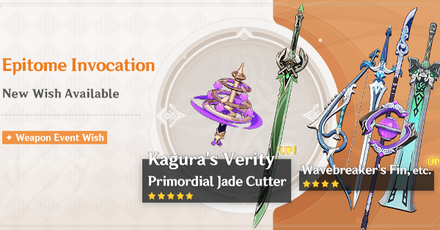
Gest of the Mighty Wolf and Bloodsoaked Ruins are available in Phase 1 of Version 6.4, alongside Varka and Flins's banners!
The 4-Star weapons featured in Phase 1 are Sacrificer's Staff, Sacrificial Bow, Sacrificial Fragments, Favonius Greatsword, and Favonius Sword.
6.4 - Luna V Release Date and Characters
Weapon Banner Countdown
| Server Region | Countdowns |
|---|---|
| Asia (UTC+8) |
Banner Ending in: |
| EU (UTC+1) |
Banner Ending in: |
| NA (UTC-5) |
Banner Ending in: |
Start and End Date for All Servers
| Server | Date and Timezone |
|---|---|
| America (GMT-5) | February 24, 2025 at 10:00 PM March 17, 2026 at 6:00 PM |
| Europe (GMT+1) | February 25, 2026 at 4:00 AM March 17, 2026 at 6:00 PM |
| Asia (GMT+8) | February 25, 2026 at 11:00 AM March 17, 2026 at 6:00 PM |
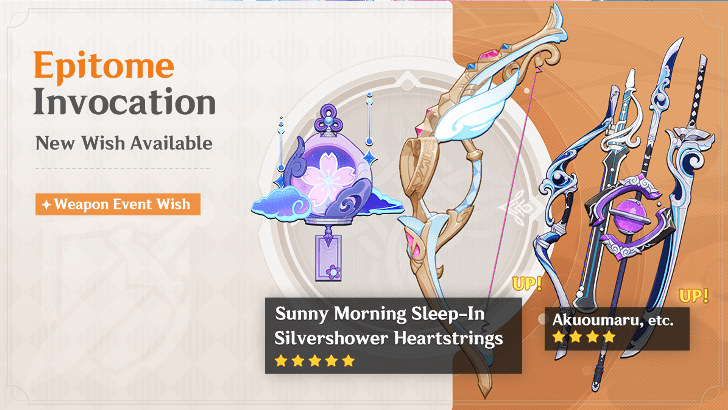
Upcoming Weapon Banners
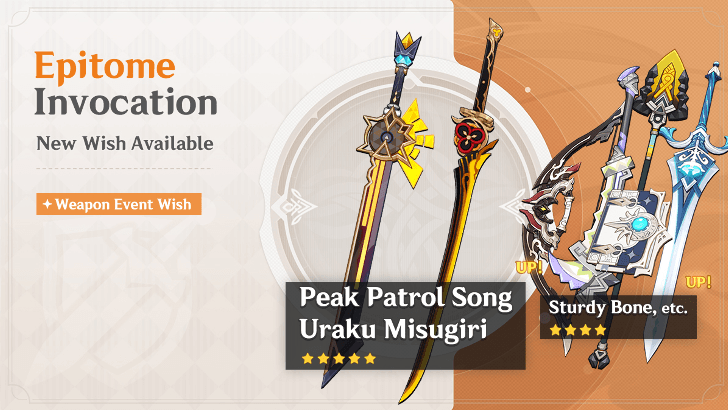
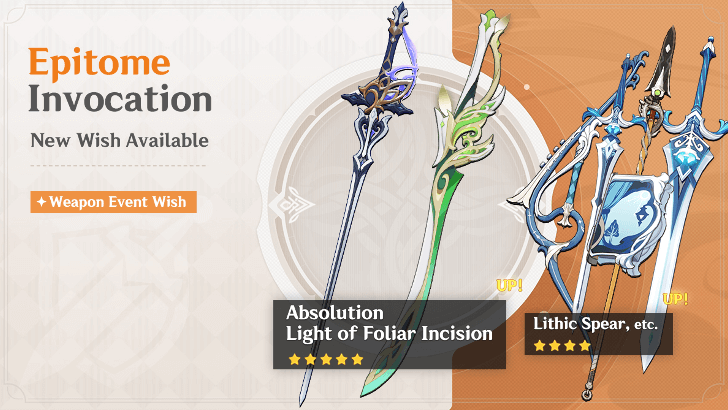
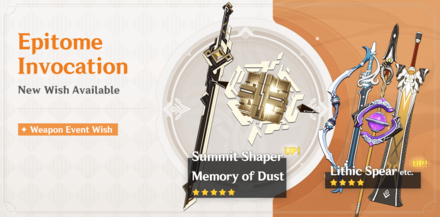
6.4 Luna V Phase 2 Weapon Banner
| Weapon | Type | Signature |
|---|---|---|
|
Polearm |
|
|
|
Sword |
|
The following 5-Star weapons are featured on their respective banner releases in Version 6.4 Luna V. Phase 2, which runs from March 17, 2026 to April 7, 2026, will feature Skirk and Escoffier's Best-in-Slot weapons.
6.4 - Luna V Release Date and Details
Epitome Invocation Gacha Simulator
Current Weapon Gacha Simulator

Epitome Invocation Gacha Rates
| Rarity | Pull Rate |
|---|---|
| 5★ | Weapon: 0.7% Guaranteed after 80 total pulls |
| 4★ | Character: 2.1% Weapon: 3.9% Guaranteed after 10 total pulls |
| 3★ | Weapon: 93.3% |
| Wish System Type | Summary Explanation |
|---|---|
 Pity System Pity System | Every type of Wish Banners have their own Wish Counter. The 10th and 90th wish guarantee only applies if you haven't gotten a 4-star or 5-star wish before reaching the respective required number. |
 Event Wish-2 System Event Wish-2 System | Two Character Event Wish banners are available at the same time and share one Wish Counter. Wishes carry over to the next set of Promotional Character banner. |
The Epitome Invocation Banner has a slightly higher 5-star drop rate than normal. You only need to pull 80 times to get a guaranteed 5-star instead of the usual 90 pulls for character gachas. However, you can't get 5-star characters from this banner!
This banner also utilizes the Epitomized Path, which allows you to get the 5-star Weapon of your choice! This only applies if you fail to obtain it after getting one other 5-star Weapons.
Should You Pull on the Weapon Banner?
Lower Priority Compared to Character Banner
| Weapon | Recommended For |
|---|---|
 Gest of the Mighty Wolf Gest of the Mighty Wolf
|
Varka's Best-in-Slot weapon and a very good choice for other, on-field DPS Claymore users. Note, however, that only Varka and Razor can use the added Witch's Homework buff. |
 Bloodsoaked Ruins Bloodsoaked Ruins
|
Best-in-Slot for Flins and specifically tailored for his playstyle. While it can serve as a Crit Rate Stat stick for other Polearm DPSes, there may be better F2P options depending on the character. |
The rate-up weapons in Version 6.4 are best for players who will be pulling for, or already have, one or both characters.
Varka does not have as many F2P options when it comes to weapons, while Flins has several good choices, so this banner remains less of a priority for those looking to save their pulls.
Best Weapons to Pull from Epitome Invocation
SS Tier - Awesome Pull!
| Weapon | Base Stats and Details |
|---|---|
|
Gest of the Mighty Wolf
★★★★★ |
Base ATK: 46
2nd Stat: CRIT Rate +7.2% Weapon Skill: Increase ATK SPD by 10%. Every time the equipping character's Normal Attack(s) hit opponent(s)/casts their Elemental Skill/performs Charged Attack(s), gain 1/2/2 stacks of Four Winds' Hymn respectively: DMG dealt is increased by 7.5% for 4s. Max 4 stacks. This effect can be triggered once every 0.01s. Additionally, when the party has the "Hexerei: Secret Rite" effect, each stack of Four Winds' Hymn will increase the CRIT DMG of the equipping character by 7.5%. |
S Tier - Great Pull!
| Weapon | Base Stats and Details |
|---|---|
|
Bloodsoaked Ruins
★★★★★ |
Base ATK: 48
2nd Stat: CRIT Rate +4.8% Weapon Skill: For 3.5s after using an Elemental Burst, the equipping character's Lunar-Charged DMG dealt to opponents is increased by 36%. Additionally, after triggering a Lunar-Charged reaction, the equipping character will gain Requiem of Ruin: CRIT DMG is increased by 28% for 6s. They will also regain 12 Elemental Energy. Elemental Energy can be restored this way once every 14s. |
 Sacrificer's Staff Sacrificer's Staff
★★★★ |
Base ATK: 45
2nd Stat: CRIT Rate +2.00% Weapon Skill: For 6s after an Elemental Skill hits an opponent, ATK is increased by 8% and Energy Recharge is increased by 6%. Max 3 stacks. This effect can be triggered even when the equipping character is off-field. |
A Tier - Good Pull!
| Weapon | Base Stats and Details |
|---|---|
 Favonius Sword Favonius Sword
★★★★ |
Base ATK: 41
2nd Stat: Energy Recharge +13.3% Weapon Skill: CRIT Hits have a 60% chance to generate a small amount of Elemental Particles, which will regenerate 6 Energy for the character. Can only occur once every 12s. |
 Favonius Greatsword Favonius Greatsword
★★★★ |
Base ATK: 41
2nd Stat: Energy Recharge +13.3% Weapon Skill: CRIT Hits have a 60% chance to generate a small amount of Elemental Particles, which will regenerate 6 Energy for the character. Can only occur once every 12s. |
 Sacrificial Fragments Sacrificial Fragments
★★★★ |
Base ATK: 41
2nd Stat: Elemental Mastery +48 Weapon Skill: After damaging an opponent with an Elemental Skill, the skill has a 40% chance to end its own CD. Can only occur once every 30s. |
 Sacrificial Bow Sacrificial Bow
★★★★ |
Base ATK: 44
2nd Stat: Energy Recharge +6.7% Weapon Skill: After damaging an opponent with an Elemental Skill, the skill has a 40% chance to end its own CD. Can only occur once every 30s. |
Epitome Invocation 5-Star Weapon Drops
Epitome Invocation 4-Star Weapon Drops
| All ★4 Weapon Drops | ||
|---|---|---|
|
Featured |
Featured |
Featured |
|
Featured |
Featured |
|
|
|
|
|
|
|
|
|
|
|
|
|
|
|
|
|
|
|
|
|
Epitome Invocation 3-Star Weapon Drops
List of Characters in Epitome Invocation
Epitome Invocation 5-Star Character Drops
There are no 5-star characters available in this Wish. Check out our list of 5-star characters to see how to get them!
Epitome Invocation 4-Star Character Drops
| All 4-Star Character Drops | ||
|---|---|---|
|
|
|
|
|
|
|
|
|
|
|
|
|
|
|
|
|
|
|
|
|
|
|
|
|
|
|
|
|
|
|
|
|
|
|
|
|
|
|
|
|
|
|
|
|
|
|
|
|
|
|
|
|
|
|
|
|
|
|
|
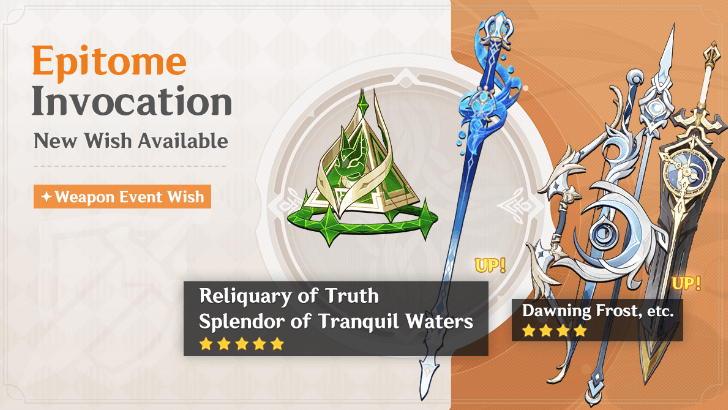
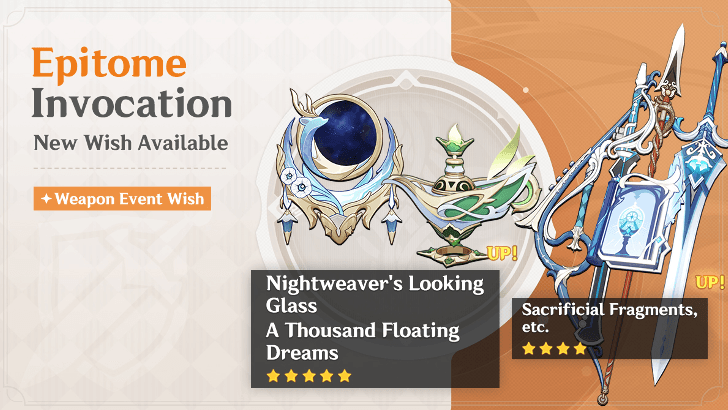
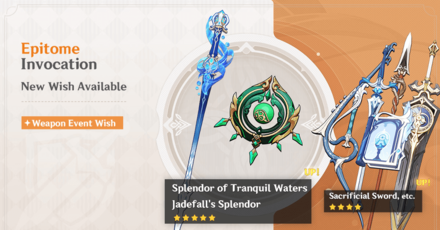
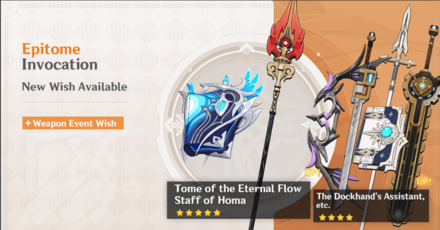
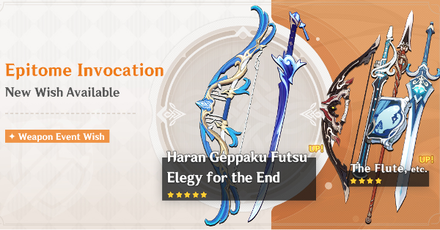
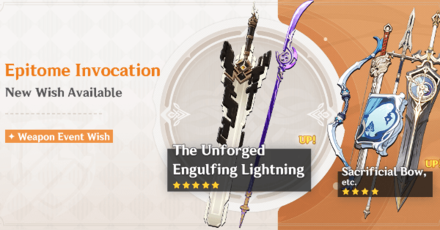
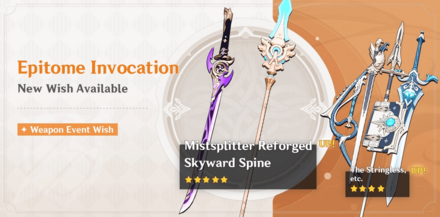
Featured Weapon Banner History
Version 6 - Luna
| Version | Banners | Information |
|---|---|---|
| 6.3 - Luna IV |  Phase 2 |
Banner Dates: February 3, 2026 - February 25, 2026 5 Star Rate-Up: 4 Star Rate-Up: |
 Phase 1 |
Banner Dates: January 14, 2026 - February 3, 2026 5 Star Rate-Up: 4 Star Rate-Up: |
|
| 6.2 - Luna III | 
Phase 2 |
Banner Dates: December 23, 2025 - January 13, 2026 5 Star Rate-Up: 4 Star Rate-Up: |
Phase 1 |
Banner Dates: December 3, 2025 - December 23, 2025 5 Star Rate-Up: 4 Star Rate-Up: |
|
| 6.1 - Luna II | 
Phase 2 |
Banner Dates: November 11, 2025 - December 2, 2025 5 Star Rate-Up: 4 Star Rate-Up: |
Phase 1 |
Banner Dates:[nlOctober 11, 2025 - November 11, 2025 5 Star Rate-Up: 4 Star Rate-Up: |
|
| 6.0 - Luna I | 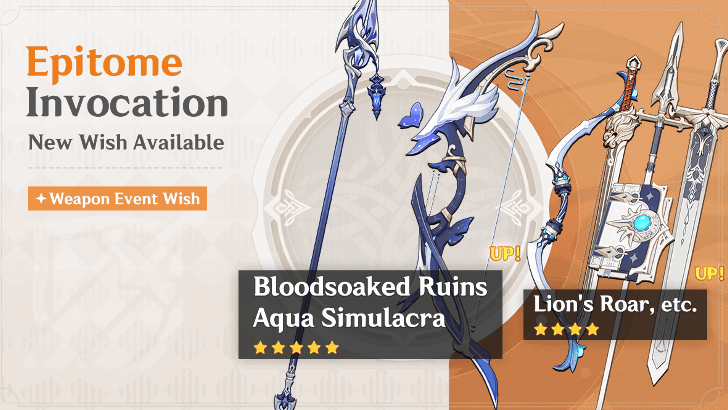
Phase 2 |
Banner Dates: September 30. 2025 - October 10, 2025 5 Star Rate-Up: 4 Star Rate-Up: |
Phase 1 |
Banner Dates: September 10, 2025 - September 30, 2025 5 Star Rate-Up: 4 Star Rate-Up: |
Version 5
| Version | Banners | Information |
|---|---|---|
| 5.8 | 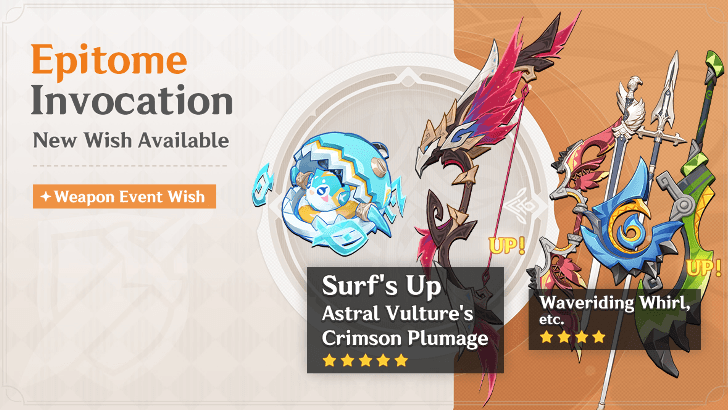
Phase 2 |
Banner Dates: August 19. 2025 - September 9, 2025 5 Star Rate-Up: 4 Star Rate-Up: |
 Phase 1 |
Banner Dates: July 30, 2025 - August 19. 2025 5 Star Rate-Up: 4 Star Rate-Up: |
|
| 5.7 | 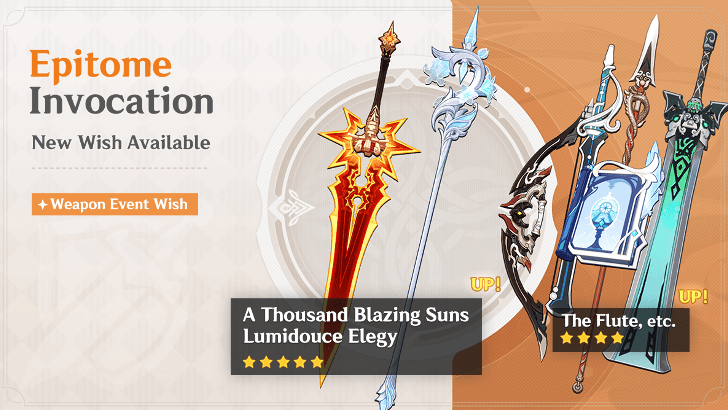 Phase 2 |
Banner Dates: July 8, 2025 - July 29, 2025 5 Star Rate-Up: 4 Star Rate-Up: |
 Phase 1 |
Banner Dates: June 18, 2025 - July 8, 2025 5 Star Rate-Up: 4 Star Rate-Up: |
|
| 5.6 |  Phase 2 |
Banner Dates: May 27, 2025 - June 17, 2025 5 Star Rate-Up: 4 Star Rate-Up: |
 Phase 1 |
Banner Dates: May 7, 2025 - May 27, 2025 5 Star Rate-Up: 4 Star Rate-Up: |
|
| 5.5 |  Phase 2 |
Banner Dates: April 15, 2025 - May 6, 2025 5 Star Rate-Up: 4 Star Rate-Up: |
 Phase 1 |
Banner Dates: March 26, 2025 - April 15, 2025 5 Star Rate-Up: 4 Star Rate-Up: |
|
| 5.4 |  Phase 2 |
Banner Dates: March 4, 2025 - March 25, 2025 5 Star Rate-Up: 4 Star Rate-Up: |
 Phase 1 |
Banner Dates: February 12, 2025 - March 4, 2025 5 Star Rate-Up: 4 Star Rate-Up: |
|
| 5.3 |  Phase 2 |
Banner Dates: January 21, 2025 - February 11, 2025 5 Star Rate-Up: 4 Star Rate-Up: |
 Phase 1 |
Banner Dates: January 1, 2025 - January 21, 2025 5 Star Rate-Up: 4 Star Rate-Up: |
|
| 5.2 |  Phase 2 |
Banner Dates: December 10, 2024 - December 31, 2024 5 Star Rate-Up: 4 Star Rate-Up: |
 Phase 1 |
Banner Dates: November 20, 2024 - December 10, 2024 5 Star Rate-Up: 4 Star Rate-Up: |
|
| 5.1 |  Phase 2 |
Banner Dates: October 29, 2024 - November 19, 2024 5 Star Rate-Up: 4 Star Rate-Up: |
 Phase 1 |
Banner Dates: October 9, 2024 - October 29, 2024 5 Star Rate-Up: 4 Star Rate-Up: |
|
| 5.0 |  Phase 2 |
Banner Dates: September 17, 2024 - October 8, 2024 5 Star Rate-Up: 4 Star Rate-Up: |
 Phase 1 |
Banner Dates: August 28, 2024 - September 17, 2024 5 Star Rate-Up: 4 Star Rate-Up: |
Version 4
| Version | Banners | Information |
|---|---|---|
| 4.8 |  Phase 2 | Banner Dates: July 17, 2024 - August 6, 2024 5 Star Rate-Up: 4 Star Rate-Up: |
 Phase 1 | Banner Dates: August 6, 2024 - August 27, 2024 5 Star Rate-Up: 4 Star Rate-Up: | |
| 4.7 | 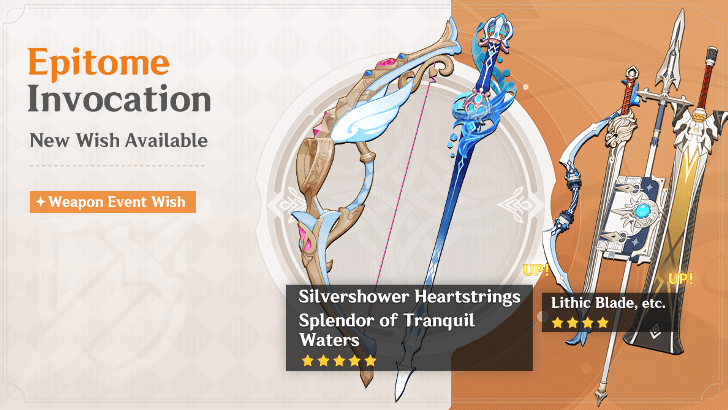 Phase 2 | Banner Dates: June 25, 2024 - July 16, 2024 5 Star Rate-Up: 4 Star Rate-Up: |
 Phase 1 | Banner Dates: June 5, 2024 - June 25, 2024 5 Star Rate-Up: 4 Star Rate-Up: | |
| 4.6 |  Phase 2 | Banner Dates: May 14, 2024 - June 4, 2024 5 Star Rate-Up: 4 Star Rate-Up: |
 Phase 1 | Banner Dates: April 23, 2024 - May 14, 2024 5 Star Rate-Up: 4 Star Rate-Up: | |
| 4.5 |  Phase 2 | Banner Dates: April 2, 2024 - April 23, 2024 5 Star Rate-Up: 4 Star Rate-Up: |
 Phase 1 | Banner Dates: March 12, 2024 - April 2, 2024 5 Star Rate-Up: 4 Star Rate-Up: | |
| 4.4 | 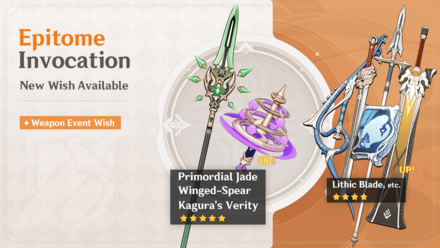 Phase 2 | Banner Dates: February 20, 2024 - March 12, 2024 5 Star Rate-Up: 4 Star Rate-Up: |
 Phase 1 | Banner Dates: January 30, 2024 - February 20, 2024 5 Star Rate-Up: 4 Star Rate-Up: | |
| 4.3 |  Phase 2 | Banner Dates: January 9, 2024 - January 30, 2024 5 Star Rate-Up: 4 Star Rate-Up: |
 Phase 1 | Banner Dates: December 20, 2023 - January 9, 2024 5 Star Rate-Up: 4 Star Rate-Up: | |
| 4.2 |  Phase 2 | Banner Dates: November 28, 2023 - December 19, 2023 5 Star Rate-Up: 4 Star Rate-Up: |
 Phase 1 | Banner Dates: November 8, 2023 - November 28, 2023 5 Star Rate-Up: 4 Star Rate-Up: | |
| 4.1 | 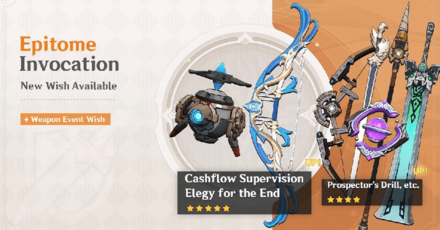 Phase 2 | Banner Dates: October 17, 2023 - November 7, 2023 5 Star Rate-Up: 4 Star Rate-Up: |
 Phase 1 | Banner Dates: September 27, 2023 - October 17, 2023 5 Star Rate-Up: 4 Star Rate-Up: | |
| 4.0 | 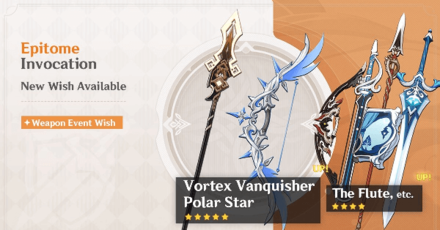 Phase 2 | Banner Dates: September 5, 2023 - September 26, 2023 5 Star Rate-Up: 4 Star Rate-Up: |
 Phase 1 | Banner Dates: August 16, 2023 to September 5, 2023[ 5 Star Rate-Up: 4 Star Rate-Up: |
Version 3
| Version | Banners | Information |
|---|---|---|
| 3.8 | 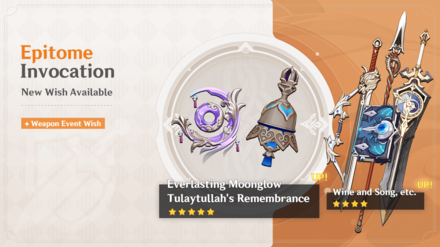 Phase 2 | Banner Dates: July 25, 2023 - August 15, 2023 5 Star Rate-Up: 4 Star Rate-Up: |
 Phase 1 | Banner Dates: July 5, 2023 - July 25, 2023[ 5 Star Rate-Up: 4 Star Rate-Up: | |
| 3.7 |  Phase 2 | Banner Dates: June 13, 2023 - July 4, 2023 5 Star Rate-Up: 4 Star Rate-Up: |
 Phase 1 | Banner Dates: May 23, 2023 - June 13, 2023[ 5 Star Rate-Up: 4 Star Rate-Up: | |
| 3.6 | 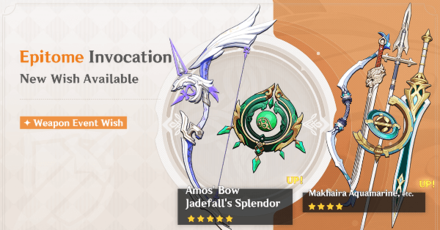 Phase 2 | Banner Dates: May 02, 2023 to May 23, 2023 5 Star Rate-Up: 4 Star Rate-Up: |
 Phase 1 | Banner Dates: April 12, 2023 - May 02, 2023[ 5 Star Rate-Up: 4 Star Rate-Up: | |
| 3.5 |  Phase 2 | Banner Dates: March 21, 2023 - April 11, 2023 5 Star Rate-Up: 4 Star Rate-Up: |
 Phase 1 | Banner Dates: March 1, 2023 - March 21, 2023[ 5 Star Rate-Up: 4 Star Rate-Up: | |
| 3.4 |  Phase 2 | Banner Dates: February 7, 2023 - February 28, 2023 5 Star Rate-Up: 4 Star Rate-Up: |
 Phase 1 | Banner Dates: January 17, 2023 - February 7, 2023[ 5 Star Rate-Up: 4 Star Rate-Up: | |
| 3.3 |  Phase 2 | Banner Dates: December 27, 2022 - January 17, 2023 5 Star Rate-Up: 4 Star Rate-Up: |
 Phase 1 | Banner Dates: December 7, 2022 - December 27, 2022[[ 5 Star Rate-Up: 4 Star Rate-Up: | |
| 3.2 |  Phase 2 | Banner Dates: November 18, 2022 - December 06, 2022 5 Star Rate-Up: 4 Star Rate-Up: |
 Phase 1 | Banner Dates: November 2, 2022 - November 18, 2022[[ 5 Star Rate-Up: 4 Star Rate-Up: | |
| 3.1 |  Phase 2 | Banner Dates: October 14, 2022 - November 1, 2022 5 Star Rate-Up: 4 Star Rate-Up: |
 Phase 1 | Banner Dates: September 28, 2022 - October 14, 2022[[ 5 Star Rate-Up: 4 Star Rate-Up: | |
| 3.0 | 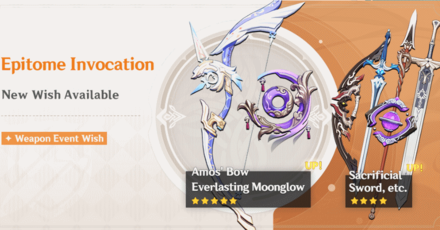 Phase 2 | Banner Dates: September 9, 2022 - September 27, 2022 5 Star Rate-Up: 4 Star Rate-Up: |
 Phase 1 | Banner Dates: August 24 - September 9, 2022[[ 5 Star Rate-Up: 4 Star Rate-Up: |
Version 2
| Version | Banners | Information |
|---|---|---|
| 2.8 |  Phase 2 | Banner Dates: ]August 2 - August 23, 2022 5 Star Rate-Up: 4 Star Rate-Up: |
 Phase 1 | Banner Dates: July 13, 2022 - August 2, 2022[[ 5 Star Rate-Up: 4 Star Rate-Up: | |
| 2.7 |  Phase 2 | Banner Dates: ]June 21, 2022 - July 12, 2022 5 Star Rate-Up: 4 Star Rate-Up: |
 Phase 1 | Banner Dates: May 31, 2022 - June 21, 2022 5 Star Rate-Up: 4 Star Rate-Up: | |
| 2.6 | 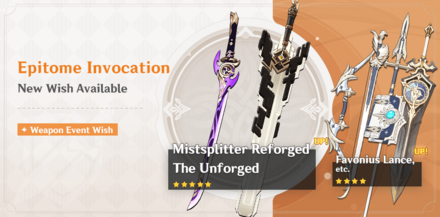 Phase 2 | Banner Dates: ]April 19, 2022 - May 31, 2022 5 Star Rate-Up: 4 Star Rate-Up: |
 Phase 1 | Banner Dates: March 29, 2022 to April 19, 2022 5 Star Rate-Up: 4 Star Rate-Up: | |
| 2.5 | 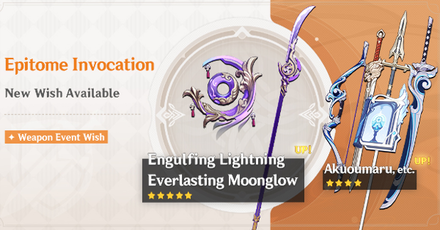 Phase 2 | Banner Dates: ]March 8, 2022 - March 29, 2022 5 Star Rate-Up: 4 Star Rate-Up: |
 Phase 1 | Banner Dates: February 16, 2022 - March 8, 2022 5 Star Rate-Up: 4 Star Rate-Up: | |
| 2.4 |  Phase 2 | Banner Dates: ]January 25, 2022 - February 15, 2022 5 Star Rate-Up: 4 Star Rate-Up: |
 Phase 1 | Banner Dates: January 5, 2022 to January 25, 2022 5 Star Rate-Up: 4 Star Rate-Up: | |
| 2.3 |  Phase 2 | Banner Dates: ]December 14, 2021 to January 4, 2022 5 Star Rate-Up: 4 Star Rate-Up: |
 Phase 1 | Banner Dates: November 24, 2021 to December 14, 2021 5 Star Rate-Up: 4 Star Rate-Up: | |
| 2.2 |  Phase 2 | Banner Dates: ]November 2, 2021 - November 23, 2021 5 Star Rate-Up: 4 Star Rate-Up: |
 Phase 1 | Banner Dates: October 13, 2021 - November 2, 2021 5 Star Rate-Up: 4 Star Rate-Up: | |
| 2.1 | 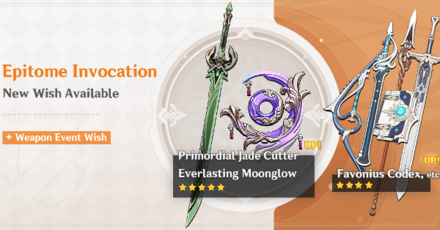 Phase 2 | Banner Dates: ]September 21, 2021 to October 12, 2021 5 Star Rate-Up: 4 Star Rate-Up: |
 Phase 1 | Banner Dates: September 1, 2021 to September 21, 2021 5 Star Rate-Up: 4 Star Rate-Up: | |
| 2.0 |  Phase 2 | Banner Dates: ]August 10, 2021 to August 31, 2021 5 Star Rate-Up: 4 Star Rate-Up: |
 Phase 1 | Banner Dates: July 21, 2021 - August 10, 2021 5 Star Rate-Up: 4 Star Rate-Up: |
Version 1
| Version | Banners | Information |
|---|---|---|
| 1.6 | 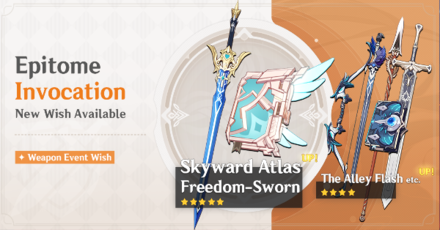 Phase 2 | Banner Dates: ]June 29, 2021 - July 20, 2021 5 Star Rate-Up: 4 Star Rate-Up: |
 Phase 1 | Banner Dates: June 8, 2021 - June 29, 2021 5 Star Rate-Up: 4 Star Rate-Up: | |
| 1.5 |  Phase 2 | Banner Dates: ]May 18, 2021 - June 8, 2021 5 Star Rate-Up: 4 Star Rate-Up: |
 Phase 1 | Banner Dates: Apr 28, 2021 - May 18, 2021 5 Star Rate-Up: 4 Star Rate-Up: | |
| 1.4 |  Phase 2 | Banner Dates: ]Apr 6, 2021 to Apr 27, 2021 5 Star Rate-Up: 4 Star Rate-Up: |
 Phase 1 | Banner Dates: Mar 17, 2021 to Apr 6, 2021 5 Star Rate-Up: 4 Star Rate-Up: | |
| 1.3 | 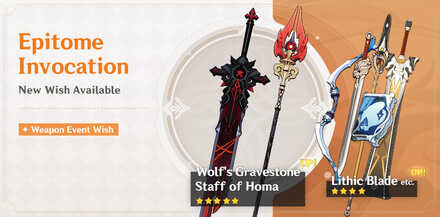 Phase 2 | Banner Dates: ]Feb 23, 2021 - Mar 17, 2021 5 Star Rate-Up: 4 Star Rate-Up: |
 Phase 1 | Banner Dates: Feb 3, 2021 - Feb 23, 2021 5 Star Rate-Up: 4 Star Rate-Up: | |
| 1.2 |  Phase 2 | Banner Dates: ]Jan 12, 2021 to Feb 2, 2021 5 Star Rate-Up: 4 Star Rate-Up: |
 Phase 1 | Banner Dates: Dec 23, 2020 - Jan 12, 2021 5 Star Rate-Up: 4 Star Rate-Up: | |
| 1.1 |  Phase 2 | Banner Dates: ]Dec 1, 2020 - Dec 23, 2020 5 Star Rate-Up: 4 Star Rate-Up: |
 Phase 1 | Banner Dates: Nov 11, 2020 - Dec 1, 2020 5 Star Rate-Up: 4 Star Rate-Up: | |
| 1.0 |  Phase 2 | Banner Dates: ]Oct 18, 2020 - Nov 11, 2020 5 Star Rate-Up: 4 Star Rate-Up: |
 Phase 1 | Banner Dates: Sep 28, 2020 - Oct 18, 2020 5 Star Rate-Up: 4 Star Rate-Up: |
All Genshin Impact Wish Guides

List of Gacha (Wish) Guides
 Gacha Rates and In-App Purchases Gacha Rates and In-App Purchases |
 Best Current Wishes to Pull Best Current Wishes to Pull |
 Pity System Guide Pity System Guide |
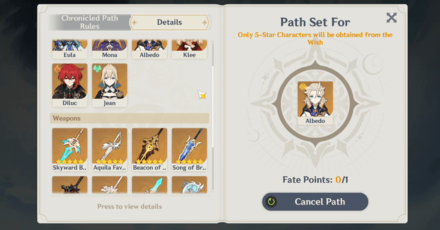
 Epitomized Path Epitomized Path |
 Chronicled Wish Chronicled Wish |
 Capturing Radiance Capturing Radiance |
List of Current Gachas
| All Current Wishes | |
|---|---|
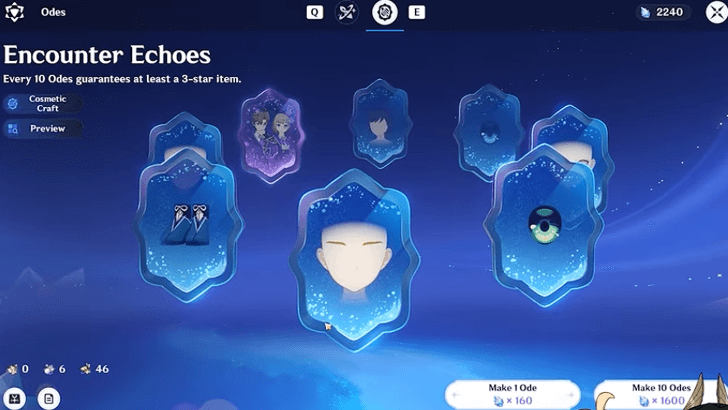 Encounter Echoes Encounter Echoes
|
Epitome Invocation
|
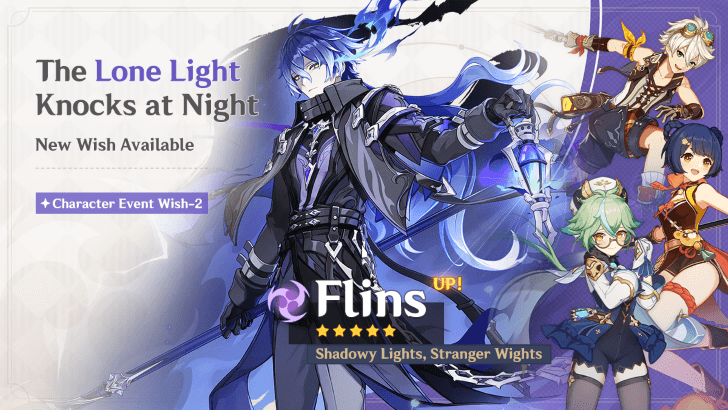 The Lone Light Knocks at Night The Lone Light Knocks at Night
|
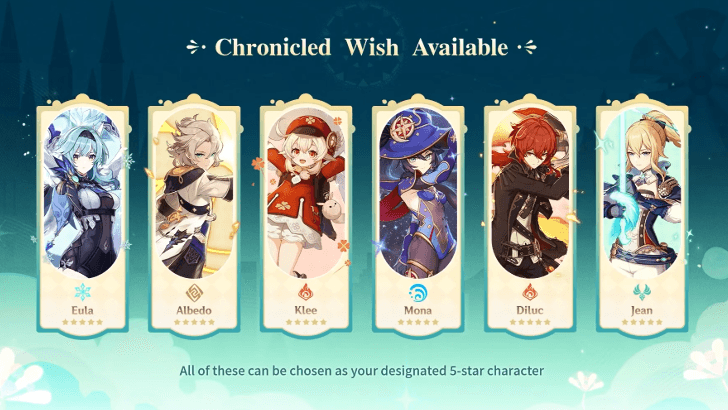 6.4 Chronicled Wish Mondstadt 6.4 Chronicled Wish Mondstadt
|
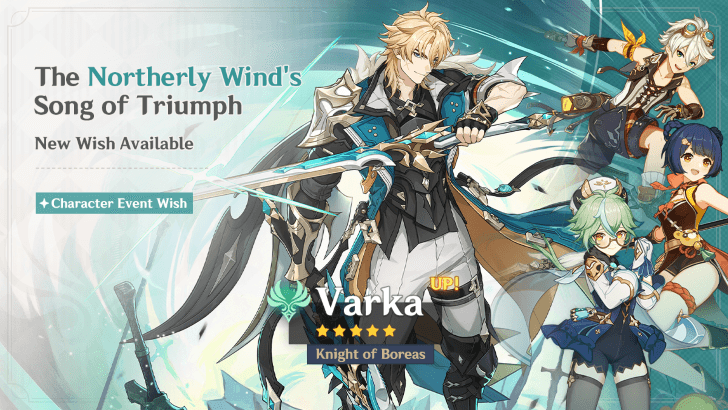 The Northerly Wind's Song of Triumph The Northerly Wind's Song of Triumph
|
 Beginner's Wish Beginner's Wish
|
 Wanderlust Invocation Wanderlust Invocation
|
|
Comment
Pull from this banner once you have a few chars. It can be the dif in a char doing 30-50k dps and 80k-300k dps. Its straight p2w levels of power spikes when you get the right weapons and build chars/teams right.
Author

Should You Pull on the Weapon Banner?


Rankings
Gaming News


![Monster Hunter Stories 3 Review [First Impressions] | Simply Rejuvenating](https://img.game8.co/4438641/2a31b7702bd70e78ec8efd24661dacda.jpeg/thumb)
Popular Games

Genshin Impact Walkthrough & Guides Wiki
Honkai: Star Rail Walkthrough & Guides Wiki
Umamusume: Pretty Derby Walkthrough & Guides Wiki
Pokemon Pokopia Walkthrough & Guides Wiki
Resident Evil Requiem (RE9) Walkthrough & Guides Wiki
Monster Hunter Wilds Walkthrough & Guides Wiki
Wuthering Waves Walkthrough & Guides Wiki
Arknights: Endfield Walkthrough & Guides Wiki
Pokemon FireRed and LeafGreen (FRLG) Walkthrough & Guides Wiki
Pokemon TCG Pocket (PTCGP) Strategies & Guides Wiki


Recommended Games
Diablo 4: Vessel of Hatred Walkthrough & Guides Wiki
Cyberpunk 2077: Ultimate Edition Walkthrough & Guides Wiki
Fire Emblem Heroes (FEH) Walkthrough & Guides Wiki
Yu-Gi-Oh! Master Duel Walkthrough & Guides Wiki
Super Smash Bros. Ultimate Walkthrough & Guides Wiki
Pokemon Brilliant Diamond and Shining Pearl (BDSP) Walkthrough & Guides Wiki
Elden Ring Shadow of the Erdtree Walkthrough & Guides Wiki
Monster Hunter World Walkthrough & Guides Wiki
The Legend of Zelda: Tears of the Kingdom Walkthrough & Guides Wiki
Persona 3 Reload Walkthrough & Guides Wiki


All rights reserved
Copyright© 2012-2024 HoYoverse — COGNOSPHERE. All Rights Reserved.
The copyrights of videos of games used in our content and other intellectual property rights belong to the provider of the game.
The contents we provide on this site were created personally by members of the Game8 editorial department.
We refuse the right to reuse or repost content taken without our permission such as data or images to other sites.
According to here (https://www.youtube.com/watch?v=-z9LUDFGdVg) the gaurantee roll on the 80th didnt kick-in ... and this is after accumulated 2 fate points. ..... In this case in the clip, he'll finally got the desired banner-fuatured weapon on the 106 roll! ... Is this some sort of bug?