Faruzan Best Builds and Teams
✉ Send your thoughts in our Genshin 6.4 Patch Survey!
★ Exclusive: Dive back in time with the Meta History
◆ Hot: Version 6.4, 6.4 Codes, Linnea, Version 6.5
◆ Builds: Varka, Flins, Skirk, Escoffier
◆ Events: Travelers' Tales, Sightseeing With Friends
◆ Endgame: Spiral Abyss (March 2026)

Faruzan is a 4-star Anemo Bow user in Genshin Impact that best functions as an Anemo Support! See Faruzan's best builds, artifacts and weapons, team comps, and other information about her here!
| Faruzan 's Character Guides | |||
|---|---|---|---|
|
|
|
||
List of Contents
Faruzan Rating and Info
Character Information
| Faruzan | ||
|---|---|---|
 |
Rating |
|
| Rarity | ||
| Element | ||
| Weapon | ||
| Voice Actors |
Chandni Parekh (EN)
Horie Yui (JP) |
|
Tier List Rankings
| Main DPS | Sub-DPS | Support | Exploration |
|---|---|---|---|
| - | - |
|
|
Faruzan's Stats
| Stat | Base Value |
|---|---|
| HP | 2061 |
| ATK | 43 |
| DEF | 135 |
| ATK% | 0% |
| Stat | Max Value |
|---|---|
| HP | 9570 |
| ATK | 197 |
| DEF | 628 |
| ATK% | 24.0% |
Base Stat Calculations
 | Stats indicated above are obtained from Faruzan's base values. These numbers also exclude the character's equipped weapon, artifacts, talents, or other passive effects that are not innate to the character. |
|---|---|
 | All characters start with 5% CRIT Rate, 50% CRIT DMG, 100% Energy Recharge, 0 Elemental Mastery, 0% Healing Bonus, and 0% Elemental DMG bonus before any additional stats are applied. The table above includes such values. |
 | The Level 20 stats indicated for this character are calculated before their first ascension. |
Faruzan's Ascension and Talent Material Summary
| All Ascension Materials Needed |
|---|
|
|
| All Talent Materials Needed |
|
|
Faruzan Strengths and Weaknesses
| Faruzan's Strengths |
|---|
|
• Buffs Anemo DMG and decreases enemy Anemo RES for Anemo DPS carries. • Minor crowd control with her Elemental Skill's Special Charged Attacks. • C6 gives a massive spike in damage, Energy regeneration, and buffing. Making it one of the best constellations for a 4-star character. |
| Faruzan's Weaknesses |
|
• High energy cost for her Elemental Burst, and Elemental Skill generates only a few elemental particles. This makes her reliant on getting over 300% Energy Recharge before C6. • Full potential is unlocked at C6, at C5 and below she is faced with heavy Energy Recharge issues. |
Faruzan Best Builds
Faruzan Support Build for Buffer
| Best Weapon | |
|---|---|
| Replacement Weapons |
1.
|
| Best Artifacts | |
| Artifact Main Stats | |
| Artifact Substats | Energy Recharge, CRIT Rate, CRIT DMG |
| Recommended Energy Recharge | ±250~300% Energy Recharge (Pre-C6) |
| Sample Teams | Anemo:
Anemo:
|
Faruzan as a Support is her best build, which works especially well on teams that utilize Anemo to deal DMG. She uses the Noblesse Oblige to buff her Anemo Main DPS, but you can also use Emblem of Severed Fate should you need more Energy Recharge.
Faruzan Support Build for Swirl
| Best Weapon | |
|---|---|
| Replacement Weapons | 1.
|
| Best Artifacts | |
| Artifact Main Stats | |
| Artifact Substats | Energy Recharge, CRIT Rate, CRIT DMG, Elemental Mastery |
| Recommended Energy Recharge | ±250~300% Energy Recharge (Pre-C6) |
| Sample Teams | Double Pyro:
Electro-Charged:
|
This alternative Faruzan build is meant on teams that utilize Swirl to deal DMG. She uses the Viridescent Venerer to debuff the respective Swirl Element. It's recommended to have her at C6 to gain her fullest potential.
Faruzan C6 Support Build
| Best Weapon | |
|---|---|
| Replacement Weapons | 1.
2.
|
| Best Artifacts | |
| Main Stats | |
| Substats | Energy Recharge, CRIT Rate, CRIT DMG |
| Recommended Energy Recharge | ±200% Total Energy Recharge |
| Sample Teams | Anemo:
Anemo:
|
If you have unlocked all of Faruzan's constellations, the Tenacity of the Millelith will be her best set thanks to the effect of her 6th constellation that allows her to deal consistent hits.
While Faruzan won't be able to deal much DMG, she'll make up for it with providing ATK buffs with full uptime.
Faruzan Talent Priority
| 1st | 2nd | 3rd |
|---|---|---|
| Elemental Burst | Elemental Skill | Normal Attack |
Upgrading Faruzan's Elemental Burst should be the main priority as her Anemo DMG buffs will also increase when leveled up. Afterwards, level up your Elemental Skill and Normal Attack talents respectively to increase Faruzan's DPS.
Faruzan Best Artifacts
Faruzan Best Artifacts Ranked
| Artifact | Artifact Bonuses | |
|---|---|---|
| Best |
|
Viable if C6 is unlocked 2-PC: HP +20% 4-PC: When an Elemental Skill hits an opponent, the ATK of all nearby party members is increased by 20% and their Shield Strength is increased by 30% for 3s. This effect can be triggered once every 0.5s. This effect can still be triggered even when the character who is using this artifact set is not on the field. |
| 2nd |
|
2-PC: Anemo DMG Bonus +15% 4-PC: Increases Swirl DMG by 60%. Decreases opponent's Elemental RES to the element infused in the Swirl by 40% for 10s. |
| 3rd |
|
2-PC: Elemental Burst DMG +20%. 4-PC: Using an Elemental Burst increases all party members' ATK by 20% for 12s. This effect cannot stack. |
Faruzan's best artifact set generally is the Viridescent Venerer thanks to its ability to also shred other elemental resistances. Noblesse Oblige is also a viable option if your team doesn't revolve around elemental reactions.
If you have unlocked all of Faruzan's constellations, the Tenacity of the Millelith is her best in slot as her Elemental Skill can now consistently hit enemies.
List of Artifacts and Set Bonuses
Faruzan Best Weapons
Top 3 Faruzan Weapons
| Weapon | Weapon Information | |
|---|---|---|
| 1st |
 Elegy for the End Elegy for the End
|
Base ATK: 608 Bonus Stat: Energy Recharge 55.1% Skill Effect: Increased Elemental Mastery by 60. Gain sigils when dealing damage with Elemental Skill or Burst every .2s even when off-field. At 4 sigils, all sigils will be consumed and Elemental Mastery is increased by 100 and ATK increased by 20% for 12s. Once the effect is triggered, you cannot gain Sigils for 20s. The same buffs from the Millennial Movement series does not stack. |
| 2nd |
 Skyward Harp Skyward Harp
|
Base ATK: 674 Bonus Stat: CRIT Rate 22.1% Skill Effect: Increases CRIT DMG by 20%. Hits have a 60% chance to inflict a small AoE attack, dealing 125% Physical ATK DMG. Can only occur once every 4s. |
| 3rd |
 Favonius Warbow Favonius Warbow
|
Base ATK: 454 Bonus Stat: Energy Recharge 61.3% Skill Effect: CRIT Hits have a 60% chance to generate a small amount of Elemental Particles, which will regenerate 6 Energy for the character. Can only occur once every 12s. |
Weapons with High Energy Recharge or Base ATK are Best for Faruzan
Faruzan will benefit a lot from weapons that either have Energy Recharge for consistent Elemental Burst usage, or high Base ATK for better Anemo DMG buffs.
Best Free-to-Play Weapon for Faruzan
| Weapon | Weapon Information |
|---|---|
|
Favonius Warbow
|
Base ATK: 454 Bonus Stat: Energy Recharge 61.3% Skill Effect: CRIT Hits have a 60% chance to generate a small amount of Elemental Particles, which will regenerate 6 Energy for the character. Can only occur once every 12s. |
Favonius Warbow is the best F2P option
The Favonius Warbow is Faruzan's best weapon you can get for free by completing the A Long Shot during Prologue Act III.
While this weapon doesn't have the highest Base ATK, it makes up for it by providing Energy Recharge and Elemental Particles for Faruzan's Elemental Burst.
All Recommended Weapons for Faruzan
| Recommended Weapons | How to Get |
|---|---|
| Gacha | |
| Gacha | |
| Gacha | |
| Gacha | |
| Sumeru Fishing Association | |
| Event | |
| Gacha | |
| Battle Pass | |
| Gacha | |
| Event | |
Faruzan Best Teams
Premier Anemo Buffer
Faruzan's main role in the team is to buff the party's Anemo DMG. She is recommended for teams that include Anemo DPS characters like the Wanderer, Xiao, or Shikanoin Heizou.
Faruzan Anemo Buffer Teams
Hypercarry Anemo Team
| Main DPS | Sub-DPS | Support | Support |
|---|---|---|---|
|
|
|
|
|
|
|
|
|
|
|
|
|
|
|
This team focuses on dealing high Anemo DMG thanks to the Anemo RES shred from Faruzan. You can build Faruzan with less Energy Recharge with this team.
Faruzan Swirl Teams
Double Anemo Double Pyro
| Support | Main DPS | Sub-DPS | Support |
|---|---|---|---|
|
|
|
|
|
|
|
|
|
|
Faruzan's role in this team comp involves buffing both Anemo and Pyro characters thanks to the Viridescent Venerer artifact set. The Pyro Resonance is beneficial in increasing overall ATK for the party.
Electro-Charged Team
| Support | Main DPS | Sub-DPS | Support |
|---|---|---|---|
|
|
|
|
|
|
|
|
|
|
This team comp focuses on taking out mobs of enemies through Swirls and the Electro-charged reaction while also dealing high Anemo DMG.
Faruzan Best Constellations
Recommended Constellations
| Rating | Constellation Effect / Merits | |
|---|---|---|
| C2 | ★★☆ | • Increases Elemental Burst duration, which makes the Anemo DMG buff stay longer. |
| C6 | ★★★ | • Increased Anemo CRIT DMG. |
C6 is Best for Increased Anemo DMG
Faruzan's utility as an Anemo support is at its best when all of her Constellations are unlocked as her 6th Constellation provides an Anemo CRIT DMG bonus.
Constellation and Effects
| Flosculi Implexi | |
|---|---|
 |
|
| Faruzan's Constellations | |
| C1 |
Truth by Any Means Faruzan can fire off a maximum of 2 Hurricane Arrows using fully charged Aimed Shots while under the effect of a single Manifest Gale created by Wind Realm of Nasamjnin. |
| C2 |
Overzealous Intellect The duration of the Dazzling Polyhedron created by The Wind’s Secret Ways is increased by 6s. |
| C3 |
Spirit-Orchard Stroll Increases the Level of Wind Realm of Nasamjnin by 3. Maximum upgrade level is 15. |
| C4 |
Divine Comprehension The vortex created by Pressurized Collapses will restore Energy to Faruzan based on the number of opponents hit: If it hits 1 opponent, it will restore 2 Energy for Faruzan. Each additional opponent hit will restore 0.5 more Energy for Faruzan. A maximum of 4 Energy can be restored to her per vortex. |
| C5 |
Wonderland of Rumination Increases the Level of The Wind’s Secret Ways by 3. Maximum upgrade level is 15. |
| C6 |
The Wondrous Path of Truth Characters affected by The Wind’s Secret Ways‘ Prayerful Wind’s Benefit have 40% increased CRIT DMG when they deal Anemo DMG. When the active character deals DMG while affected by Prayerful Wind’s Benefit, they will apply Pressurized Collapse to the opponent damaged. This effect can be triggered once every 3s. This CD is shared between all party members. |
Faruzan Talents and How to Use
Normal Attack
| Normal Attack: Parthian Shot |
|---|
| Performs up to 4 consecutive shots with a bow.
Charge Attack Performs a more precise Aimed Shot with increased DMG. While aiming, mighty winds will accumulate on the arrowhead. A fully charged wind arrow will deal Anemo DMG. Plunge Attack: Fires off a shower of arrows in mid-air before falling and striking the ground, hitting opponents along the path and dealing AoE DMG upon impact. |
| Attribute | Effect (Lvl 1) |
|---|---|
| 1-Hit DMG | 44.70% |
| 2-Hit DMG | 42.2% |
| 3-Hit DMG | 53.20% |
| 4-Hit DMG | 71% |
| Aimed Shot | 43.90% |
| Fully-Charged Aimed Shot | 124% |
| Plunge DMG | 56.8% |
| Low/High Plunge DMG | 114%/142% |
Normal Attack: Parthian Shot
Faruzan uses a bow to fire four consecutive shots at enemies! Her aimed shot deals increased Anemo DMG.
Elemental Skill
| Wind Realm of Nasamjnin |
|---|
| Faruzan deploys a polyhedron that deals AoE Anemo DMG to nearby opponents. She will also enter the Manifest Gale state. While in the Manifest Gale state, Faruzan’s next fully charged shot will consume this state and will become a Hurricane Arrow that contains high-pressure currents. This arrow deals Anemo DMG based on the DMG of a fully charged Aimed Shot from “Normal Attack: Parthian Shot.”
Pressurized Collapse The Hurricane Arrow will apply a Pressurized Collapse effect to the opponent or character hit. This effect will be removed after a short delay, creating a vortex that deals AoE Anemo DMG and pulls nearby objects and opponents in. If the Hurricane Arrow does not hit any opponent or character, it will create a Pressurized Collapse effect at its point of impact. The vortex DMG is considered Elemental Skill DMG. The winds of truth buffet the spirits of those who seek truth, dispersing the miasma of preconception. |
| Attribute | Effect (Lvl 1) |
|---|---|
| Skill DMG | 148.80% |
| Pressurized Collapse Vortex DMG | 108.0% |
| Manifest Gale Duration | 18s |
| CD | 6s |
Elemental Skill: Wind Realm of Nasamjnin
Faruzan deploys a polyhedron that deals AoE Anemo DMG to nearby opponents, and enter a ''Manifest Gale'' state. This state is consumed with her next Aimed Shot, which turns into a Hurricane Arrow.
The Hurricane Arrow applies a 'Pressurized Collapse' upon hit, creating a vortex that pulls objects and enemies inward. This skill stays even when Faruzan is not in the field!
Elemental Burst
| The Wind's Secret Ways |
|---|
| Faruzan deploys a Dazzling Polyhedron that unleashes a Whirlwind Pulse and deals AoE Anemo DMG.
While the Dazzling Polyhedron persists, it will continuously move along a triangular path. Once it reaches each corner of that triangular path, it will unleash 1 more Whirlwind Pulse.
Whirlwind Pulse • When the Whirlwind Pulse is unleashed, it will apply Perfidious Wind’s Bale to nearby opponents, decreasing their Anemo RES. • The Whirlwind Pulse will also apply Prayerful Wind’s Benefit to all nearby party members when it is unleashed, granting them an Anemo DMG Bonus. One must have respect for the unknown wisdom that one might find hidden in ancient ruins. |
| Attribute | Effect (Lvl 1) |
|---|---|
| Skill DMG | 377.6% |
| Anemo DMG Bonus | 18.0% |
| Prayerful Wind's Benefit Duration | 4s |
| Anemo RES Decrease | 30% |
| Perfidious Wind's Bale Duration | 4s |
| Duration | 12s |
| CD | 20s |
Elemental Burst: The Wind's Secret Ways
Faruzan deploys a Dazzling Polyhedron, which unleashes a Whirlwind Pulse that deals AoE Anemo DMG. The polyhedron will create a triangular path and unleash another Whirlwind Pulse.
The Whirlwind Pulse applies AoE Anemo DMG, decreases the Anemo RES of any opponents hit, and gives Anemo DMG Bonus to all nearby party members!
Passive Talent 1
| Impetuous Flow |
|---|
| When Faruzan is in the Manifest Gale state created by Wind Realm of Nasamjnin, the amount of time taken to charge a shot is decreased by 60%, and she can apply The Wind’s Secret Ways‘ Perfidious Wind’s Bale to opponents who are hit by the vortex created by Pressurized Collapse. |
Passive Talent 2
| Lost Wisdom of the Seven Caverns |
|---|
| When characters affected by The Wind’s Secret Ways‘ Prayerful Wind’s Gift deal Anemo DMG using Normal, Charged, Plunging Attacks, Elemental Skills, or Elemental Bursts to opponents, they will gain the Hurricane Guard effect: This DMG will be increased based on 32% of Faruzan’s Base ATK. 1 instance of Hurricane Guard can occur once every 0.8s. This DMG Bonus will be cleared after Prayerful Wind’s Benefit expires or after the effect is triggered once. |
Passive Talent: Lost Wisdom of the Seven Caverns

When Faruzan is in the party and a team member uses Normal, Charged, or Plunging Attacks, Elemental Skills or Bursts that deals Anemo DMG to an enemy, DMG will be increased based on Faruzan's Base ATK.
Passive Talent 3
| Tomes Light the Path |
|---|
| Gains 25% more rewards when dispatched on a Sumeru Expedition for 20 hours. |
Passive Talent: Tomes Light the Path

Faruzan gains 25% more rewards from Sumeru Expeditions when deployed for 20 hours or more!
Faruzan Ascension and Talent Materials
Faruzan Ascension Materials
| Lv.20→Lv.40 |
|
|---|---|
| Lv.40→Lv.50 |
|
| Lv.50→Lv.60 |
|
| Lv.60→Lv.70 |
|
| Lv.70→Lv.80 |
|
| Lv.80→Lv.90 |
|
Faruzan Talent Level-Up Materials
| Daily Domain Drops | Enemy Drops | Weekly Boss Drops |
|---|---|---|
| Mon/Thu/Sun |
Eremites |
Scaramouche Boss Challenge Reward |
|
|
|
|
|
|
|
How to Get Faruzan
Pull from Any Active Banner
| All Current Wish Banners | |
|---|---|
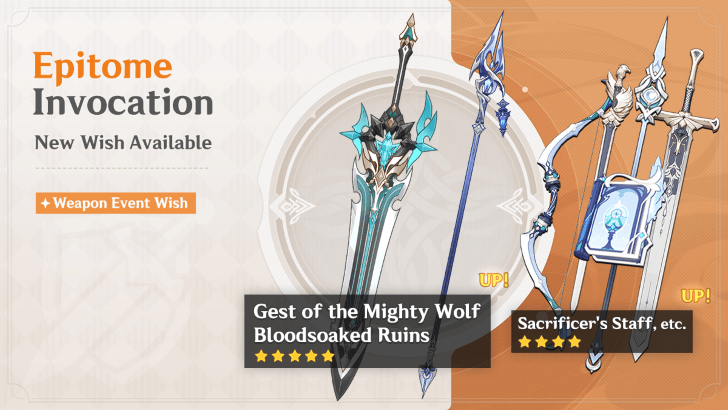 Epitome Invocation Epitome Invocation
|
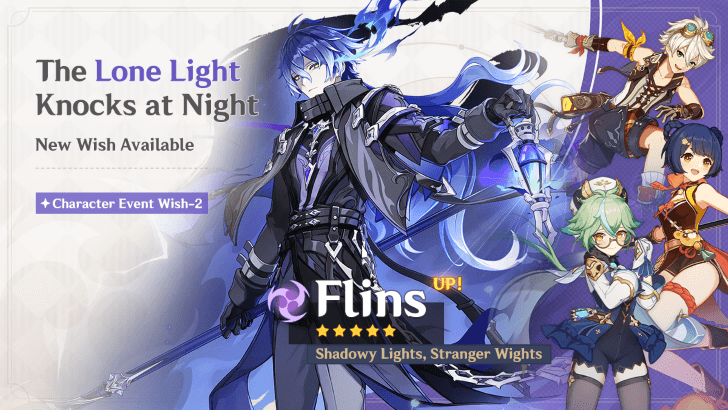 The Lone Light Knocks at Night The Lone Light Knocks at Night
|
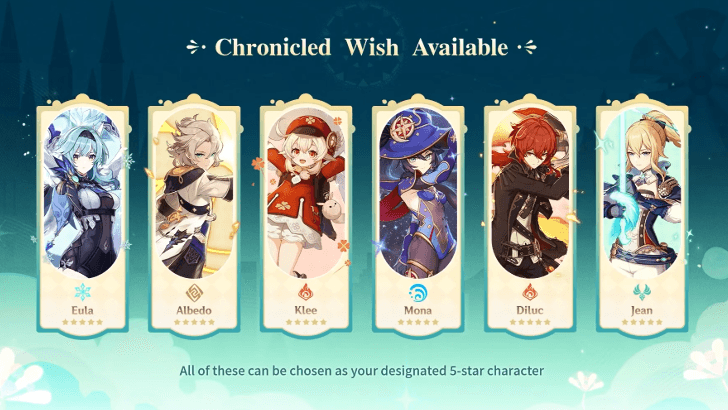 6.4 Chronicled Wish Mondstadt 6.4 Chronicled Wish Mondstadt
|
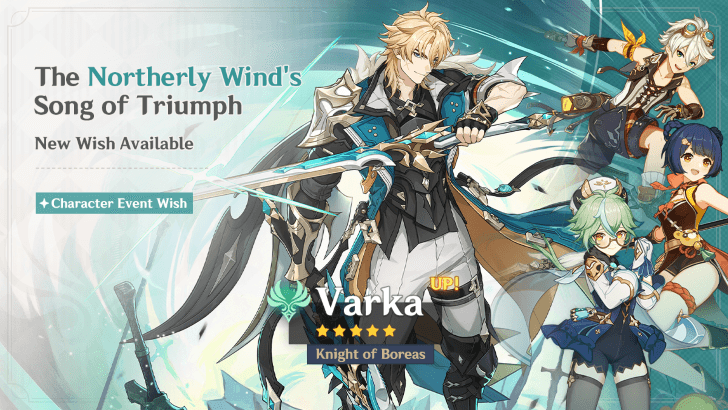 The Northerly Wind's Song of Triumph The Northerly Wind's Song of Triumph
|
 Wanderlust Invocation Wanderlust Invocation
|
|
Faruzan is available at a normal rate on all Wish Banners except Beginner's Wish. This means you can get her from Wanderlust Invocation, Epitome Invocation, and the current Character Event Wishes.
Faruzan last received a rate-up in both Venti and Xilonen's rerun banners during Phase 2 of Version 5.5, which ran from April 15, 2025 until May 6, 2025.
Faruzan's In-Game Information
Character Profile
Faruzan Character Profile
| Nation | |
|---|---|
| Title | Enigmatic Machinist |
| Vision | |
| Gender | Female |
| Race | Human |
| Height | Medium Girl |
| Faction | Haravatat |
| Constellation | Flosculi Implexi |
| Birthday | August 20 |
| Special Dish | Traditionally-Made Charcoal-Baked Ajilenakh Cake |
| Story Quest |
|
Faruzan Release Date
| Genshin Impact Version 3.3 | |
|---|---|
 |
|
| Release Date | December 07, 2022 |
Faruzan was released as a playable character during the first phase of Version 3.3 on December 7, 2022.
Version 3.3 Release Date and Patch Notes
Faruzan Voicelines
Thoughts About Faruzan
| Character | In-Game Thoughts |
|---|---|
 Cyno Cyno
|
I've carefully browsed through the case files regarding Faruzan's disappearance. At the time, I thought maybe she had been conducting some kind of dangerous research, but once I met her in person, I completely abandoned that idea. Though it might be a little hard for me to get along with her, she mostly reminds me of a kindly and chatty parent. She is considerate of others, and would never do anything imprudent. |
 Kaveh Kaveh
|
Madam Faruzan doesn't mince her words, so I can understand why some students at the Akademiya are afraid of her. She doesn't have any bad intentions, though — all she wants is to devote herself completely to the research that interests her. Some people say that all Haravatat scholars are hard to get along with, and uh... heh, I'll let you be the judge of that. I assume she's already asked you to be her student? She sure is a little intense when she's doing the hard sell, huh... But she can walk the walk too. She really does know her stuff. |
 Layla Layla
|
Has Professor Faruzan managed to get any students? People from the Haravatat Darshan say that she always has difficulty getting funding for her projects, so it's hard for her to attract students, too. *sigh*... |
 Nahida Nahida
|
She is suffering from exposure to remnants of King Deshret's power. It's as if the great tortoise of time accidentally threw her off its back and left her suspended in the past. If you're interested, you should be able to catch a glimpse of Sumeru from a bygone age through her. |
 Sethos Sethos
|
It's so rare to meet someone even more chummy than me! One minute I was taking a stroll near the Akademiya, the next minute she'd taken me on as a student, and was insisting on giving me a tour. She gave me a real fright, though, because she said that if I joined Haravatat, I'd get the 20-tongues language-learning package, mastery of all 100% guaranteed... I asked around, and it seems like that's just an in-joke among Akademiya students — there is no 20-language graduation requirement after all. But I don't get it... how is that funny? It's only gonna put people off studying there. |
Faruzan's Thoughts About Others
| Character | In-Game Thoughts |
|---|---|
 Collei Collei
|
About Collei Ah, Collei... She's respectful toward her elders, diligent, and has a hard-working attitude — truly the perfect student! Children like her deserve all the affection and praise. Tighnari really has no reason to be as strict as he has been. Hmph... I need to find a way to win her over... Ahem! What I meant to say was, as a senior scholar, I should find ways to improve the learning environment of younger students. |
|
Cyno
|
About Cyno Cyno's jokes are composed using modern words and language patterns, but I still struggle to decipher any hidden meaning from his grammar and prose... Huh? It's all just literal meanings and homophones? Really...? Then, those jokes don't have any substance at all... |
|
Kaveh
|
About Kaveh Kaveh's a good kid with great potential. I had a casual chat with him once about some principles of mechanism construction. Hmm, how should I put it... He's too much of an artsy romantic, but at least he has some original ideas, which is rare nowadays. I've heard that he's fallen on some hard times, so I'm planning to invite him out for a good meal once my funding gets approved. It'll happen soon, promise. |
|
Layla
|
About Layla Sometimes, she'll lower her head and keep her distance when she sees me. However, she's all smiles and greetings at night... I don't quite get her. Anyway, most kids in Rtawahist are geniuses. A quirk or two isn't anything to concern myself with. |
|
Nahida
|
About Nahida Knowledge is naturally something that cannot be limited or restrained. It's like how Kshahrewar can utilize Haravatat's research findings. All scholars will be grateful to Lesser Lord Kusanali for releasing the Akademiya— no, the entire City of Wisdom from the shackles of selfish desires. All who thirst for knowledge are now afforded the opportunity to search for treasures in the vast sea of knowledge. |
 Nilou Nilou
|
About Nilou I remember her; she's a courteous girl. I've only been to the Grand Bazaar a few times, but she's already remembered my name and face, and she's even tried to get the others to stop arguing with me. She really gets it! All youngsters should be more like her. |
|
Sethos
|
About Sethos Oh? You mean the new arrival? Yes, didn't he show up at the perfect time! I still don't know which Darshan he belongs to, but I seem to run into him all the time these days: out on the streets, in shops, at restaurants... It's like he's everywhere at once. The way he nods his head when he talks, it's like... oh, I don't know, like... a little puppy, yes. Eloquent young fellow, too. Seems like a good egg. Anyway, are you acquainted with him? You must encourage him to enroll in my classes. Tell him Madam Faruzan will take good care of him. |
 Tighnari Tighnari
|
About Tighnari One of my favorite projects is researching rainforest ruins. Ah right, I should ask Tighnari to come with me next time. It's always fun to travel with the living copy of the Rainforest Survival Guide. I must say, even though I've been around for more than a hundred years, he's seen far more varieties of fungi than I've had the chance to taste... |
Genshin Impact Character Guides

All Characters and Voice Actors
List of All Characters
| Characters by Element | |||
|---|---|---|---|
Playable Characters
 Chasca
 Faruzan
 Heizou
 Ifa
Ifa Jahoda
 Jean
Jean Kazuha
 Lan Yan
 Lynette
 Mizuki
 Sayu
Sayu Sucrose
 Traveler (Anemo)
 Varka
Varka Venti
Venti Wanderer
 Xianyun
 Xiao
Xiao Aloy
Aloy Ayaka
Ayaka Charlotte
 Chongyun
 Citlali
 Diona
Diona Escoffier
 Eula
Eula Freminet
 Ganyu
Ganyu Kaeya
Kaeya Mika
Mika Qiqi
Qiqi Rosaria
 Shenhe
 Skirk
Skirk Wriothesley
 Alhaitham
 Baizhu
 Emilie
 Kinich
 Kirara
 Lauma
Lauma Nefer
Nefer Traveler (Dendro)
 Yaoyao
 Beidou
 Clorinde
 Dori
Dori Fischl
 Flins
Flins Iansan
 Ineffa
 Keqing
 Lisa
Lisa Ororon
 Raiden
 Razor
Razor Sara
Sara Shinobu
 Traveler (Electro)
 Varesa
 Yae Miko
 Albedo
 Chiori
 Gorou
Gorou Illuga
 Itto
Itto Kachina
 Navia
Navia Ningguang
 Noelle
 Traveler (Geo)
 Xilonen
 Yun Jin
 Zhongli
 Zibai
Zibai Aino
Aino Ayato
Ayato Barbara
 Candace
 Columbina
 Dahlia
 Furina
 Kokomi
 Mona
Mona Mualani
 Neuvillette
 Sigewinne
 Tartaglia
 Traveler (Hydro)
 Xingqiu
 Yelan
Yelan Amber
Amber Arlecchino
 Bennett
 Chevreuse
 Dehya
Dehya Diluc
Diluc Durin
Durin Gaming
 Hu Tao
 Klee
Klee Lyney
Lyney Mavuika
 Thoma
Thoma Traveler (Pyro)
 Xiangling
 Xinyan
 Yanfei
 Yoimiya
Upcoming Characters
| All Upcoming Characters |
 Alice Alice
|
 Capitano Capitano
|
 Dainsleif Dainsleif
|
 Dottore Dottore
|
|---|---|---|---|
 Linnea Linnea
|
 Lohen Lohen
|
 Nicole Nicole
|
 Pantalone Pantalone
|
 Pierro Pierro
|
 Pulcinella Pulcinella
|
 Rerir Rerir
|
 Sandrone Sandrone
|
 Tsaritsa Tsaritsa
|
|||
Character Lists
| Characters by Rarity | |
|---|---|
| 5-Star Characters | 4-Star Characters |
| Free Characters | |
| Characters by Weapon Used | |
| Sword Users | Claymore Users |
| Polearm Users | Bow Users |
| Catalyst Users | |
| Characters by Role | |
| Main DPS Characters | Sub DPS Characters |
| Support Characters | Healers |
| Shield Characters | Buff Providers |
| Best for Exploration | Local Specialty Passives |
| Double Reward Passives | |
| Characters by Gender | |
| Male Characters | Female Characters |
| Short Male Characters | Short Female Characters |
| Medium Male Characters | Medium Female Characters |
| Tall Male Characters | Tall Female Characters |
| Characters by Height | |
| Short Characters | Medium Characters |
| Tall Characters | |
| Characters by Region | |
| Mondstadt Characters | Liyue Characters |
| Inazuma Characters | Sumeru Characters |
| Fontaine Characters | Natlan Characters |
| Nod-Krai Characters | |
Comment
well the tier list of her follows whoever the best anemo carry atm in the meta, so you are correct but it didnt make it weird
Author

Faruzan Best Builds and Teams


Rankings
- We could not find the message board you were looking for.
Gaming News

![Monster Hunter Stories 3 Review [First Impressions] | Simply Rejuvenating](https://img.game8.co/4438641/2a31b7702bd70e78ec8efd24661dacda.jpeg/show)
![The Liar Princess and the Blind Prince Review [PC] | Lovely to Look at but Tedious to Play](https://img.game8.co/4442586/8d95f5faf05780f1765ce7e0938bd825.jpeg/thumb)
![Marathon Cryo Archive Map Teased as [REDACTED] on Selection Screen](https://img.game8.co/4442236/6357203e58172f6de57f1991e7c39b22.png/thumb)

Popular Games

Genshin Impact Walkthrough & Guides Wiki
Umamusume: Pretty Derby Walkthrough & Guides Wiki
Pokemon Pokopia Walkthrough & Guides Wiki
Honkai: Star Rail Walkthrough & Guides Wiki
Monster Hunter Stories 3: Twisted Reflection Walkthrough & Guides Wiki
Arknights: Endfield Walkthrough & Guides Wiki
Wuthering Waves Walkthrough & Guides Wiki
Zenless Zone Zero Walkthrough & Guides Wiki
Pokemon TCG Pocket (PTCGP) Strategies & Guides Wiki
Monster Hunter Wilds Walkthrough & Guides Wiki


Recommended Games
Diablo 4: Vessel of Hatred Walkthrough & Guides Wiki
Cyberpunk 2077: Ultimate Edition Walkthrough & Guides Wiki
Fire Emblem Heroes (FEH) Walkthrough & Guides Wiki
Yu-Gi-Oh! Master Duel Walkthrough & Guides Wiki
Super Smash Bros. Ultimate Walkthrough & Guides Wiki
Pokemon Brilliant Diamond and Shining Pearl (BDSP) Walkthrough & Guides Wiki
Elden Ring Shadow of the Erdtree Walkthrough & Guides Wiki
Monster Hunter World Walkthrough & Guides Wiki
The Legend of Zelda: Tears of the Kingdom Walkthrough & Guides Wiki
Persona 3 Reload Walkthrough & Guides Wiki


All rights reserved
Copyright© 2012-2024 HoYoverse — COGNOSPHERE. All Rights Reserved.
The copyrights of videos of games used in our content and other intellectual property rights belong to the provider of the game.
The contents we provide on this site were created personally by members of the Game8 editorial department.
We refuse the right to reuse or repost content taken without our permission such as data or images to other sites.
I don't care if it's a niche meme build - they need to add Main DPS Faruzan. Marechausse Hunter, Chasca's bow, Furina+Benny(+Jean).