This survey will take about 1 minute.
Your answers will help us to improve our website.
Genshin Impact
Furnace of Fiery Embers Puzzle Guide
✉ Send your thoughts in our Genshin 6.4 Patch Survey!
★ Exclusive: Dive back in time with the Meta History
◆ Hot: Version 6.4, Luna 5 Codes
◆ Builds: Varka, Flins, Skirk, Escoffier
◆ Events: Travelers' Tales, He Who Caught the Wind
◆ Future: Linnea, Version 6.5 Luna VI

Furnace of Fiery Embers in Genshin Impact are hidden locations that require players to solve Iridescent Inscription puzzles. See all Fiery Embers locations, how to get the free 4-star sword, and all known info about this puzzle here in this guide!
List of Contents
All Furnace of Fiery Embers Locations
Furnace of Fiery Embers Map Overview
| List of All Furnace of Fiery Embers Locations | ||
|---|---|---|
 |
||
| Furnace 1 | Furnace 2 | Furnace 3 |
| Furnace 4 | Furnace 5 | - |
All Furnace of Fiery Embers are located in Ochkanatlan, which means you first have to unlock the area before accessing each location! Keep in mind that the Furnaces can be done in any order, however, for the sake of this guide, we numbered for easier reference!
Natlan Interactive Map and Location
How to Solve Furnace of Fiery Embers
Furnace 1 Solution
| How to Activate Furnace 1 | |
|---|---|
| 1 | 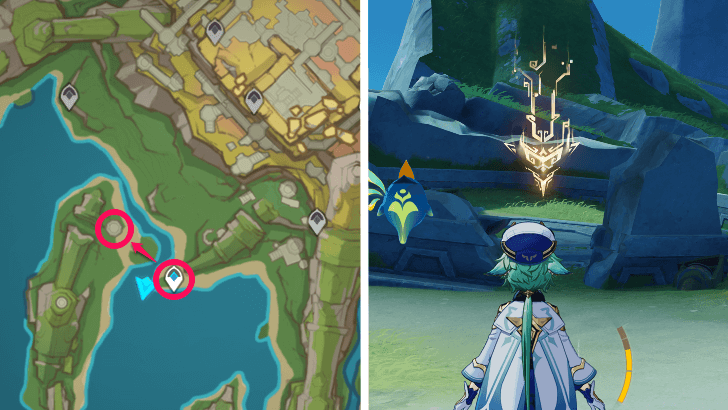 All Furnaces of Fiery Embers are located on the island of Ochkanatlan, with the first found in the southwestern portion of the island's main body. |
| 2 |  After interacting with the sigil to enter the Furnace, approach the sigil again and watch it move away. |
| 3 | 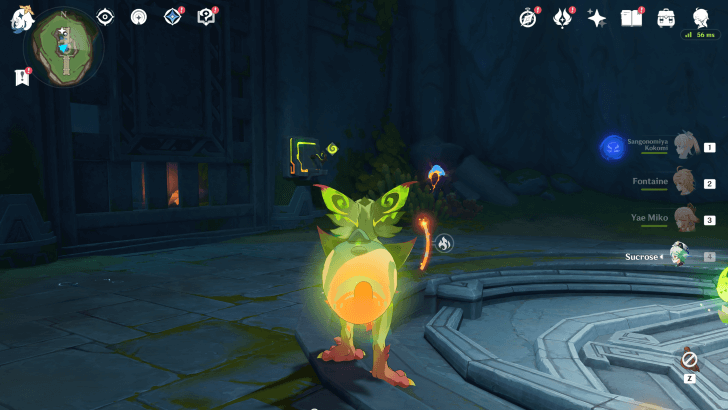 Indwell a Yumkasaurus from the Spiritsconce, then pull the nearby hook to open the gate and walk through it. |
| 4 | 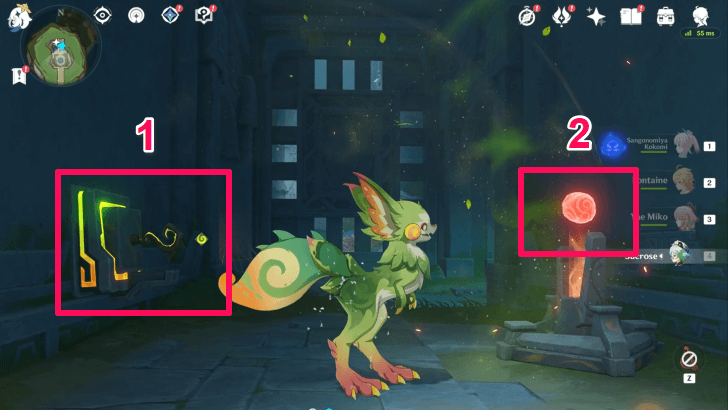 On the other side of the gate, pull the hook to open it again, then quickly use the Yumkasaurus' ability take the red ball and walk past the gates before they close. |
| 5 |  Aim the red ball at the target using the Yumkasaurus' ability, then fire. Afterwards, grapple upwards with the Yumkasaur and continue to follow the sigil. |
| 6 | 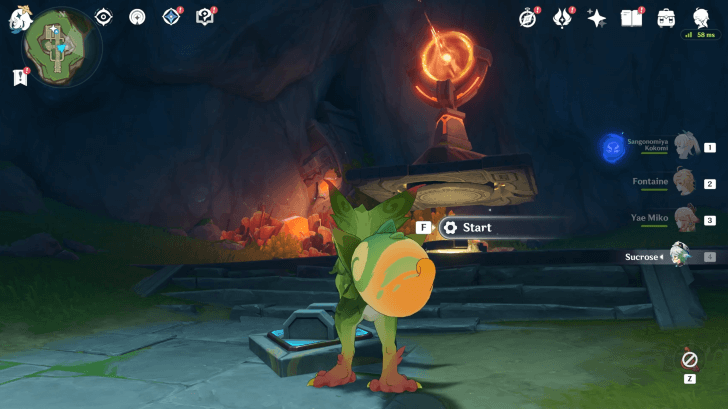 Use the elevator at the end of the hallway to reach a new area. Here, use the lever on the east side of the room to turn the mechanism until it faces its western counterpart. |
| 7 |  Pick up the bue ball, then walk to the gate on the western side of the room. From here, shoot the ball at the eastern mechanism, which will pass it to the western mechanism. Pull the hook to open the gate to ensure that the projectile hits the target. |
| 8 |  Get the sigil that moved behind the western gate, then follow it to the center of the room. |
| 9 | 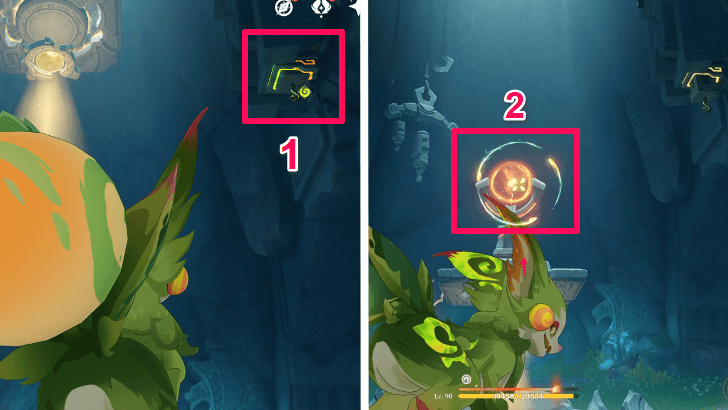 After the barrier drops, pull down the hook on the ceiling to lower the third mechanism. Quickly pick up the blue ball and fire it through this mechanism to unlock the last gate. |
| 10 | 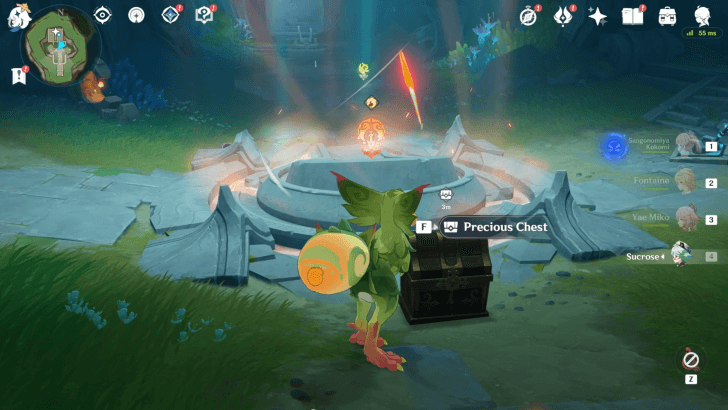 Get the sigil behind the middle gate, as well as the nearby Pyroculus. Claim the rewards once both sigils reach the center of the room, then leave by using the Qucusarus Spiritsconce. |
Furnace 2 Solution
| How to Activate Furnace 2 | |
|---|---|
| 1 |  The next Furnace is located at the tip of the northernmost part of Ochkanatlan. Note that the upper teleporter only appears during the unlocking of the Furnace, so use the lower one as indicated. |
| 2 | 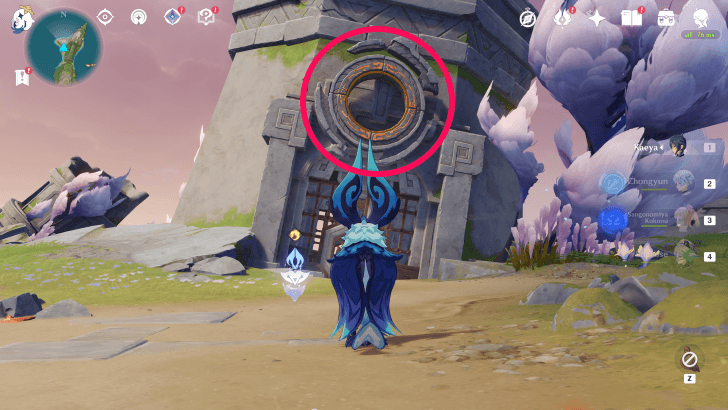 Indwell an Iktomisaurus and use its ability on the hoop above the locked door. Open the chest inside to cause the floor to crumble, and fall down the hole. |
| 3 |  Follow the Sigil until it activates a fireball mechanism. Take cover from the blasts, then use the Iktomisaurus' normal attack to hit the blue crystal. Then, use its ability to scan the hoop above the fireball mechanism. |
| 4 |  Use the Iktomisaurus' high jump to go above the fireball mechanism, and then drop down onto it to disable it. Then, use the elevator to go down to the next area. Note: There is a hidden area accessible via a broken wall while going down the elevator. Face northward to find the crack. |
| 5 | 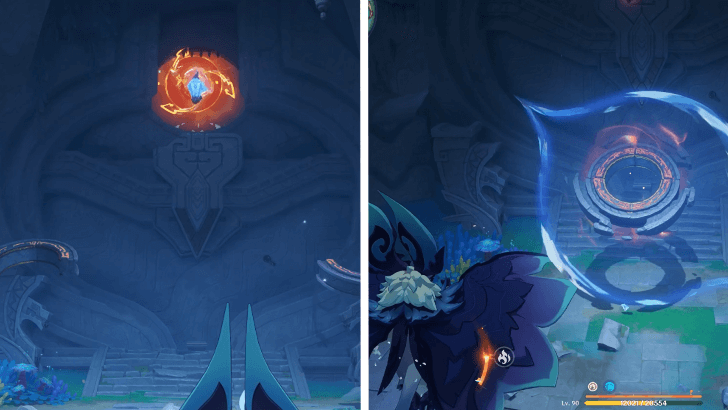 Approach the Sigil in the new area, which causes it to move away again. Another fireball mechanism and blue crystal appear shortly after. Wait for the crystal to get hit by a fireball, then use the Iktomisaurus' ability on the hoop that forms afterwards. |
| 6 | 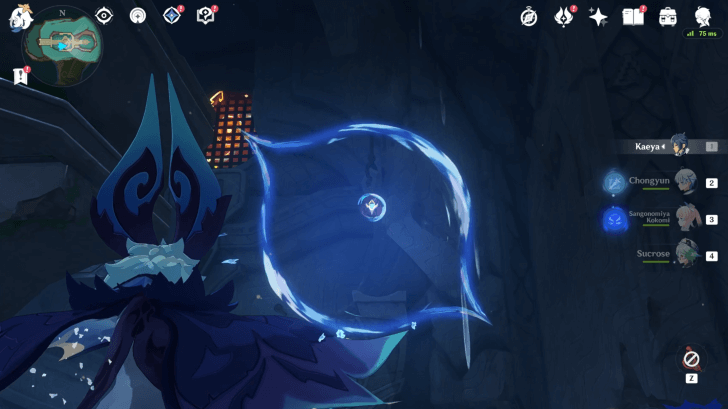 After the pillar rises, scan the purple Spiritsconce on the right side of the room to boost the Iktomisaurus' high jump. Use the boosted jump to get on top of the pillar, and touch the Sigil to get teleported. |
| 7 | 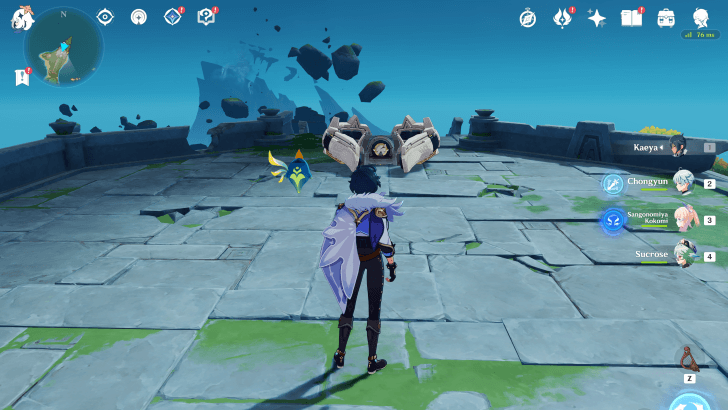 Defeat the Secret Source Automaton Hunter-Seeker, then interact with the the Sigil and follow it all the way back down. |
| 8 | 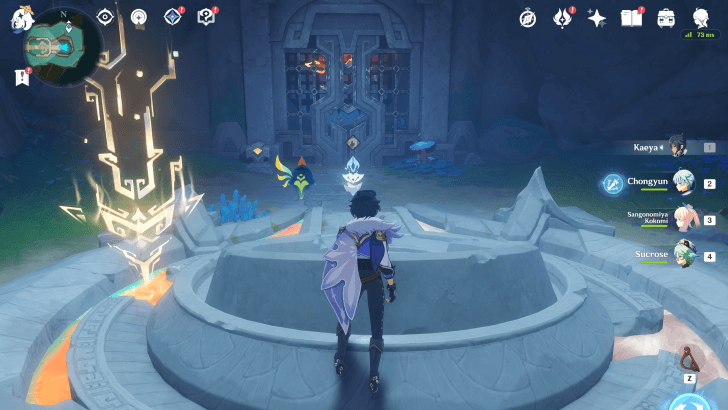 Once in this underground area, use the nearby mechanism to open the door and have the second sigil move forward. Once both sigils reach the central platform, open the chest and leave by using the updraft as a Qucusaurus. |
Furnace 3 Solution
| Step | Guide |
|---|---|
| 1 | 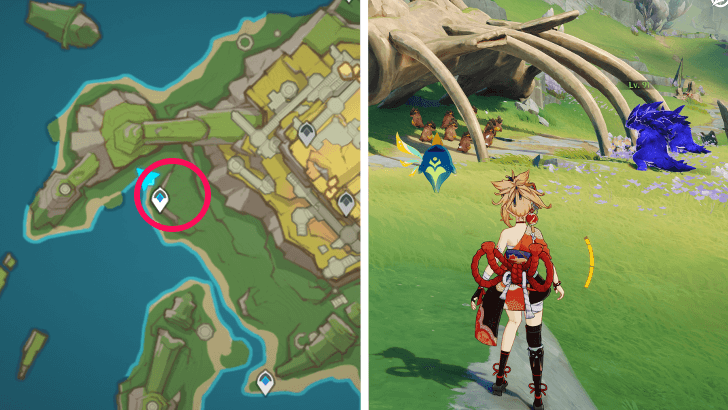 Teleport to the marked waypoint and defeat the Tenebrous Mimiflora guarding the young Tepetlisauri. You'll then see a group of Tepetlisaurus Whelps guarded by two-purplish Tepetlisaurus a couple of steps away from the Waypoint. |
| 2 | 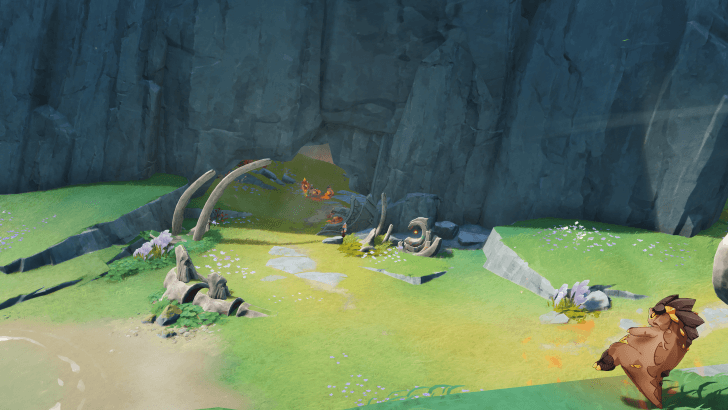 Once the Tenebrous Mimiflora have been defeated, open the chest that appears for a brief cutscene. Head to the newly-opened cave afterwards. |
| 3 | 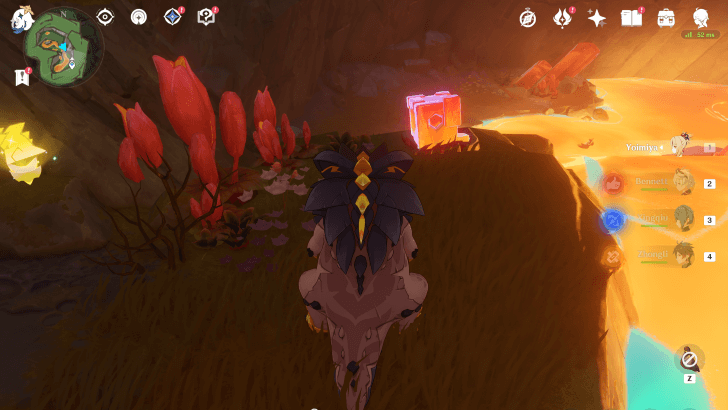 Follow the cave all the way to the bottom. Indwell a Tepetlisaurus Spiritsconce at the bottom, and use its ability to burrow into the ground. Then, while burrowed, use a normal attack beside four of these glowing cubes. |
| 4 | 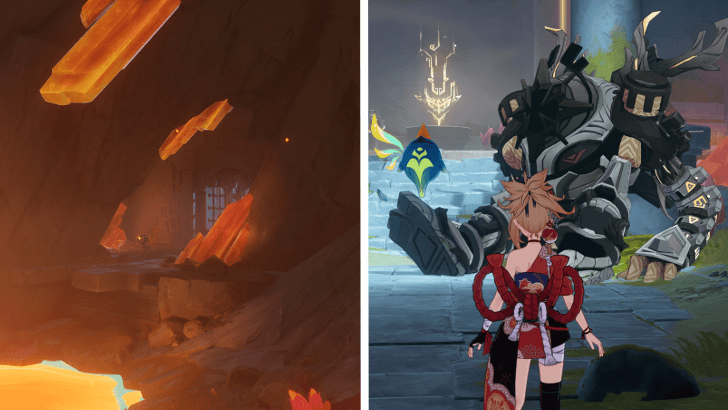 Hitting all four cubes will open another section of the cave. Head this way and defeat the Ruin Grader, then open the chest and touch the Sigil once it's been defeated. |
| 5 |  The Sigil will break the barrier on the right, and go up. Indwell a Tepetlisaurus and follow it through the fissure in the wall. |
| 6 | 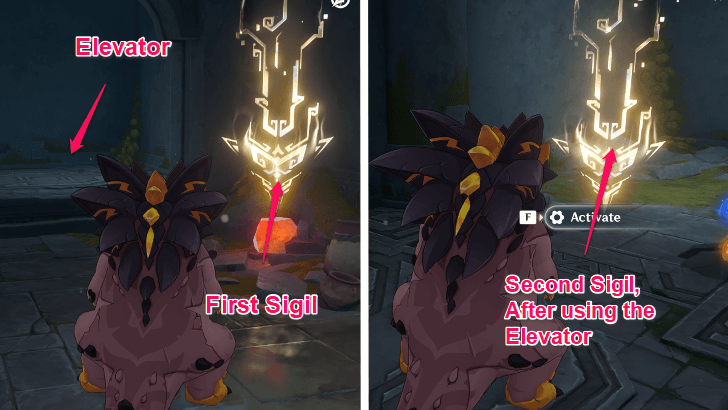 Touch the Sigil again, and it will continue to go upwards. Using the elevator nearby will send you back down to the first floor, behind the left barrier. Touch the Sigil here, and it will follow the path of the first Sigil, also going up. Follow it back upstairs using the same fissure. |
| 7 |  Touch the Sigil again on the second floor, then use the elevator. This time, it will go up, leading you to both Sigils. Touch them both to send them to the pedestal in the adjacent room. |
| 8 |  Claim your rewards when both Sigils disappear, then leave by indwelling a Qucusaurus and using the updraft. |
Furnace 4 Solution
| How to Activate Furnace 4 | |
|---|---|
| 1 |
 The fourth furnace is located on an island to the southeast of Ochkanatlan. You can get to this location by flying as a Qucusaurus from the teleport waypoint found northwest of the island. |
| 2 |
 Defeat the Cryo Abyss Mage to unlock the challenge marker. |
| 3 |
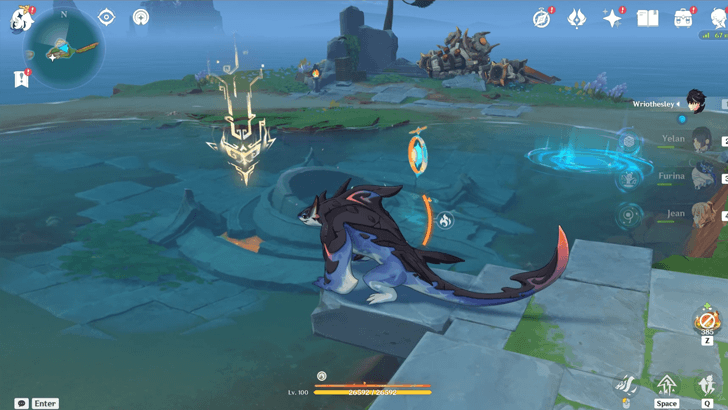
 Transform into a Qucusaurus and fly towards both sigils and activate them. The first sigil is on top of an obelisk in the middle of the island, and the second is below the broken bridge near the teleport waypoint. |
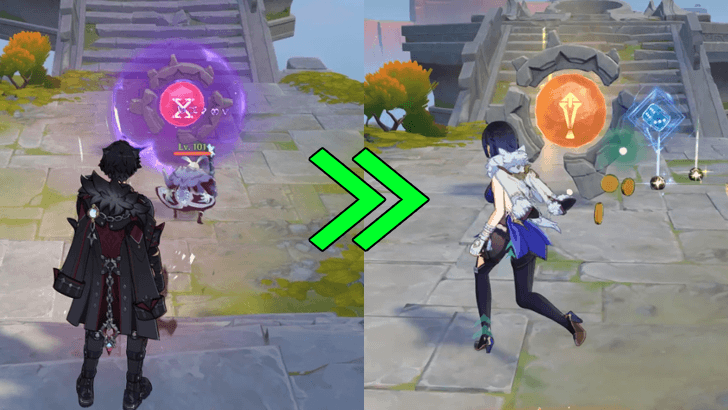
| 4 |
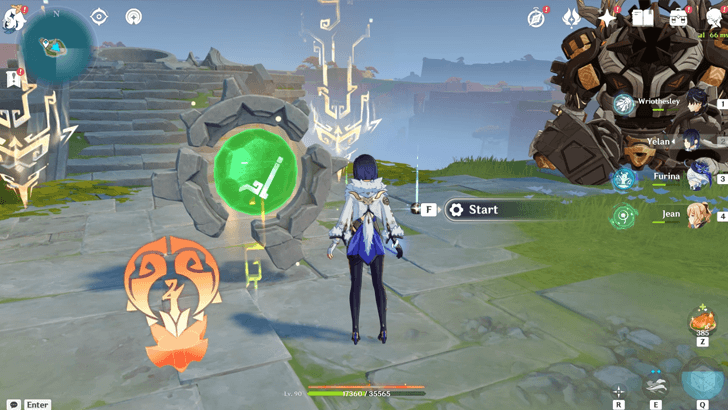 Return to the challenge marker and you'll find it bears a check mark. Hit Start and the Ruin Grader will engage. Defeat it to activate the fourth furnace, then claim your rewards from the Luxurious Chest. Note: From here, you can directly fly north to activate the fifth furnace. |
Furnace 5 Solution
| How to Activate Furnace 5 | |
|---|---|
| 1 |
 The fifth furnace is located on the easternmost island of Ochkanatlan. You can get to this location by flying as a Qucusaurus from the fourth furnace. |
| 2 |
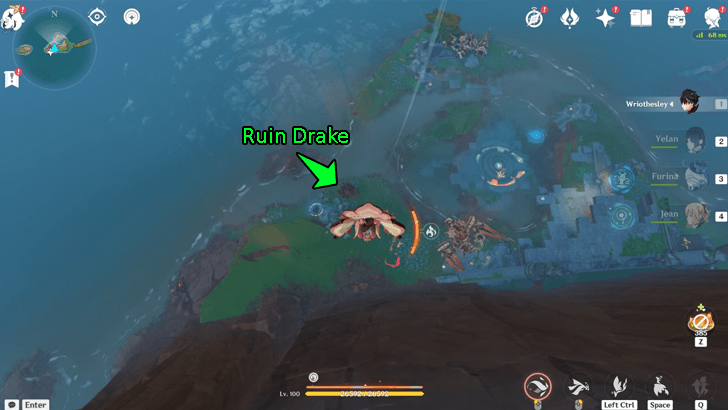 Hop off the northern side of the cliff after touching the sigil. Defeat the Ruin Drake - Earthguard at the bottom to unlock the chest. |
| 3 |
 Head east and transform into a Koholasaurus using the Spiritsconce by the water. Break all of the floating objects as you make a lap around the island. |
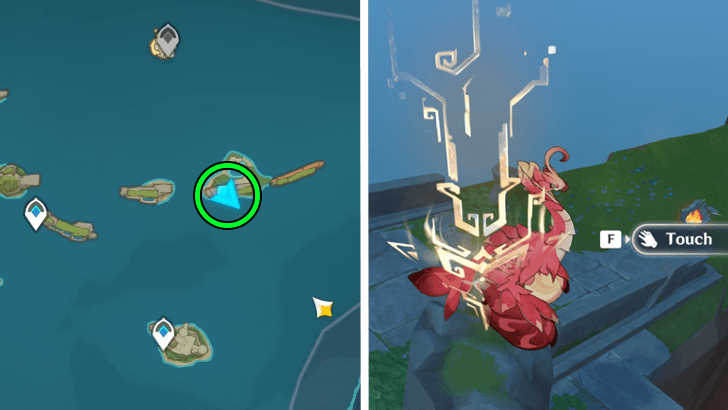
| 4 |
 A Spiritway will appear when you've successfully broken all the floating objects surrounding the island. Proceed inside to get transported to a floating island. |
| 5 |
 When you arrive at the floating island, activate the teleport waypoint and touch the sigil to activate the fifth furnace. Open the Precious Chest to receive a Crimson Obsidian Fragment which is used to create a Crimson Obsidian Ring. |
| 6 |
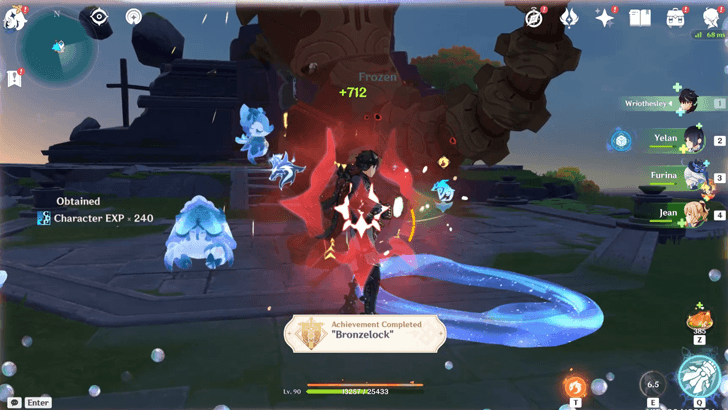 The local legend Bronzelock will power up as you approach it. Defeat it to earn the achievement Bronzelock, rewarding you with 5 Primogems. |
| 7 |
 Turn south, transform into a Qucusaurus, and return to the fifth furnace. Claim your rewards from the Exquisite Chest. |
How to Get the Free 4-Star Sword
Complete All the Furnace of Fiery Embers
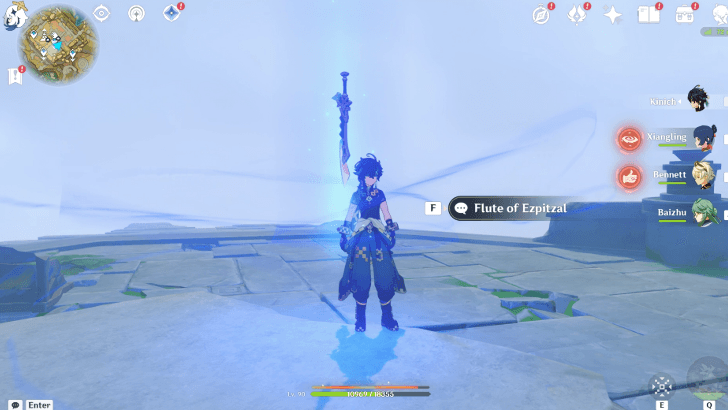
You can get a free copy of the 4-star sword Flute of Ezpitzal after completing all the challenges on all the Furnace of Fiery Ember locations. All you have to do is to draw sword surrounded by all the Iridescent Inscriptions in Ashflow Street, to get teleported to the location of the Tonatiuh, where the free sword is located!
How to Get the 4-Star Sword
| How to Get the Free 4-Star Sword | |
|---|---|
| 1 |  Go to Ashflow Street by using the Waypoint in the Cradle of Dreams. For reference, simply use the Waypoint indicated on the image above. |
| 2 |  While facing southeast, jump all the way down to Ashflow Street, and head towards the left side of the nearby waterfall. There should be a bunch of floating Inscriptions, as well as a Pyroculus, if you haven't claimed it yet. |
| 3 | 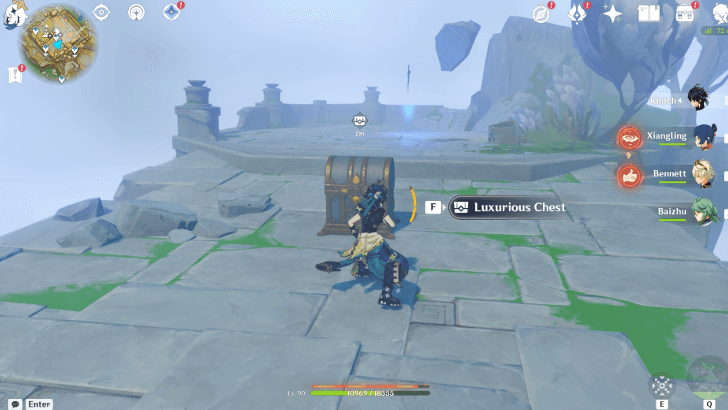 Then, draw the buried sword in the middle of the pedestal to get teleported to a floating platform. There's a Luxurious Chest nearby which may give you a Crimson Obsidian Fragment, and the Flute of Ezpitzal should be floating steps away from it. |
Genshin Impact Related Guides
All Tips and Tricks Guides

All Version 5.2 Tips & Tricks
Other Regional Tips & Tricks
Author

Furnace of Fiery Embers Puzzle Guide
Please participate in our site
improvement survey
03/2026
improvement survey
03/2026
Would you assist in
improving Game8's site?
improving Game8's site?

×
We are listening to our users' valuable opinions and discussing how to act on them.
The information collected through this survey will be used for the purpose of improving our services. In addition, the information will only be disclosed a part of a statistic in a format that will not allow identification of personal information.
Begin Survey
Not Now
×
Please rate each item regarding Game8.co's Advertisements.
Amount of Ads
Very Dissatisfied
Somewhat Dissatisfied
Fine
Somewhat Satisfied
Highly Satisfied
Placement of Ads
Timing of Ad Display
Ad Loading Speed
Safeness of Ads
Content of Ads
×
Please rate each item regarding Game8.co's Quality of Articles.
Amount of information
Very Dissatisfied
Somewhat Dissatisfied
Fine
Somewhat Satisfied
Highly Satisfied
Frequency of updates
Speed of new information
Accuracy of articles
Understandibility of articles
Readability of sentences
×
Please rate each item regarding Game8.co's Usability of the Site.
Ease of finding information
Very Dissatisfied
Somewhat Dissatisfied
Fine
Somewhat Satisfied
Highly Satisfied
Loading Speed
Use of Color
Font Size
Visibility of Images
Easy to Understand Layout
×
Please rate each item regarding Game8.co's Message Boards, Comments.
Ease of Writing
Very Dissatisfied
Somewhat Dissatisfied
Fine
Somewhat Satisfied
Highly Satisfied
Readability
Ease in Finding Information
Comment Quality
Comment Quantity
Admin Response
×
Please rate each item regarding Game8.co's Site's new design.
Please rate our site's new design
Very Dissatisfied
Somewhat Dissatisfied
Fine
Somewhat Satisfied
Highly Satisfied
Do you think that the website's design change makes the site easier to use?
Has the new design made it easier for you to find information on the site?
Has the new design improved the overall visual appeal of the site?
How would you rate your overall satisfaction with the new design of the site?
×
How likely are you to recommend Game8 to someone you know?
Very Unlikely
0
1
2
3
4
5
6
7
8
9
10
Very Likely
If you have other opinions regarding potential improvement to the website, please share them with us. We would appreciate your honest opinion.
Note: This is a free response section, so you can proceed without entering anything.
Note: Please be sure not to enter any kind of personal information into your response.
Note: Please be sure not to enter any kind of personal information into your response.
×
Thank You
×
Thank you for participating in our survey! Your answers will help us to improve the quality of our website and services.
We hope you continue to make use of Game8.
We hope you continue to make use of Game8.
Close


Rankings
Gaming News


![Monster Hunter Stories 3 Review [First Impressions] | Simply Rejuvenating](https://img.game8.co/4438641/2a31b7702bd70e78ec8efd24661dacda.jpeg/thumb)
Popular Games

Genshin Impact Walkthrough & Guides Wiki
Honkai: Star Rail Walkthrough & Guides Wiki
Umamusume: Pretty Derby Walkthrough & Guides Wiki
Pokemon Pokopia Walkthrough & Guides Wiki
Resident Evil Requiem (RE9) Walkthrough & Guides Wiki
Monster Hunter Wilds Walkthrough & Guides Wiki
Wuthering Waves Walkthrough & Guides Wiki
Arknights: Endfield Walkthrough & Guides Wiki
Pokemon FireRed and LeafGreen (FRLG) Walkthrough & Guides Wiki
Pokemon TCG Pocket (PTCGP) Strategies & Guides Wiki


Recommended Games
Diablo 4: Vessel of Hatred Walkthrough & Guides Wiki
Cyberpunk 2077: Ultimate Edition Walkthrough & Guides Wiki
Fire Emblem Heroes (FEH) Walkthrough & Guides Wiki
Yu-Gi-Oh! Master Duel Walkthrough & Guides Wiki
Super Smash Bros. Ultimate Walkthrough & Guides Wiki
Pokemon Brilliant Diamond and Shining Pearl (BDSP) Walkthrough & Guides Wiki
Elden Ring Shadow of the Erdtree Walkthrough & Guides Wiki
Monster Hunter World Walkthrough & Guides Wiki
The Legend of Zelda: Tears of the Kingdom Walkthrough & Guides Wiki
Persona 3 Reload Walkthrough & Guides Wiki


All rights reserved
Copyright© 2012-2024 HoYoverse — COGNOSPHERE. All Rights Reserved.
The copyrights of videos of games used in our content and other intellectual property rights belong to the provider of the game.
The contents we provide on this site were created personally by members of the Game8 editorial department.
We refuse the right to reuse or repost content taken without our permission such as data or images to other sites.
its a great weapon to xilonen, and you can refine it