Best Charge Blade Builds for High Rank
★ Arkveld Gamma Armor | MH Stories 3 Collab
☆ Version 1.041: Sororal α Armor | Shatterseal
★ How to Unlock Proof of a Hero Quest
☆ Omega Planetes | Savage Omega | Builds vs Omega
★ Armor Set Search updated for Ver 1.041
☆ HR50+ Builds | Tier List | Weapon Guides
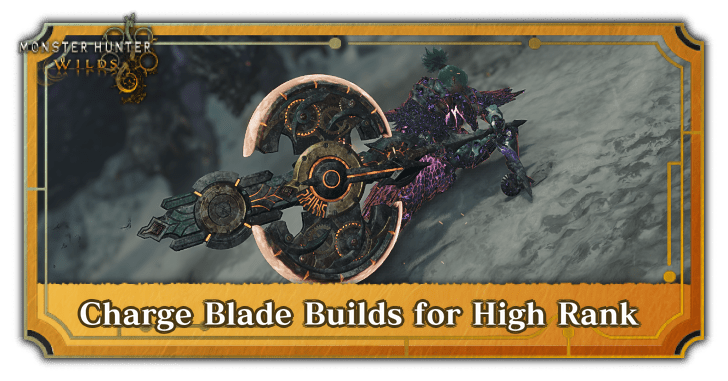
These are the best High Rank Charge Blade builds in Monster Hunter Wilds. Learn about all the builds in High Rank, tips for building, and the best Skills and Armor pieces to use with the Charge Blade while in High Rank.
| All Charge Blade Builds | |
|---|---|
| Low Rank Builds | High Rank Builds |
| State of the Meta: Title Update 4 | |
List of Contents
Charge Blade Builds Progression (High Rank)
Endgame Builds and Recommendation
| Rating | Build Name |
|---|---|
| HR100+ Builds | |
| ★★★★★ |
Gog Lord's Soul CB High elemental damage build using Gogmapocalypse and Lord's Soul |
| ★★★★★ |
Gog Magala Elemental CB High elemental damage, AED-focused build using Gogmapocalypse |
| ★★★★ |
NEW Arkveld Gamma Savage Axe CB High Affinity Lord's Soul build focused on Savage Axe play style. |
| ★★★★ |
Omega Lord's Soul CB High Affinity, Omega Resonance Charge Blade build ideal for multiplayer hunts. |
| HR50+ Builds | |
| ★★★★ |
Zoh Shia WEX Agitator CB High damage Savage Axe Mode build that uses 2x Zoh Shia pieces in combination with 2x Gore for affinity. |
| ★★★★ |
Lord's Soul Agitator CB High damage build with Lord's Soul bolstered by Agitator and Max Might. |
| ★★★★ |
Guts Mixed CB An endgame build using Gamma piecse to enable Guts (Tenacity) for damage while having Gore set for affinity. |
| ★★★★ |
Lagi Gore Max Affinity CB A max Affinity build that uses Azure Bolt. |
| ★★★ |
Rey Dau Latent Power Burst CB Affinity and Burst-centric Savage Axe Mode build using 4x Rey Dau pieces. |
| ★★★ |
4x Zoh Shia Comfort CB Agitator and WEX CB build that uses 4x Zoh Shia pieces for passive healing. |
Progression Builds
| Hunter Rank | Build Name |
|---|---|
| HR36++ | Frenzy Burst Agitator CB |
| HR21 - HR35 | Agitator Burst CB |
| HR9 - HR20 | Mixed Foray CB |
Note that if you are still comfortable with a previous build you're using, you can skip some builds. This is a suggested build progression that you can follow until endgame.
| Date | Changes |
|---|---|
| February 23, 2026 | Added Arkveld Gamma Savage Axe CB. |
| January 8, 2026 | Updated Gog Lord's Soul CB. Added build summary. |
| December 24, 2025 | Added Gog Lord's Soul CB. Grouped together equipment with a HR100 requirement. |
| December 18, 2025 | Added Gog Magala Elemental CB build using Gogmazios armor pieces. |
| October 22, 2025 | Added Omega Lord's Soul CB, including an RNG (Appraised) Talisman. |
| August 15, 2025 | Added Lord's Soul Agitator CB, including an RNG (Appraised) Talisman. |
| July 23, 2025 | • Added Afi-Gore AGI-WEX CB build for the Festival of Accord: Flamefete event. • Added Guts Mixed Charge Blade build. |
| May 8, 2025 | Added 4x Zoh Shia Comfort CB Build. |
| May 7, 2025 | Took out the 2x Sakuratide Agitator General Build at the end of the Blossomdance Event. The archived build can be found on the Sakuratide α Armor page. |
| April 30, 2025 | Added Rey Dau Latent Power Burst CB build. |
| April 25, 2025 | Added TU1 2x Sakuratide Agitator General Build for the Blossomdance Event. |
| April 14, 2025 | • Adjusted Artian weapon write-up for HR50++; suggested Critical Boost also as a substitute to Rapid Morph. |
| April 6, 2025 | • Added HR50++ Charge Blade build for Title Update 1. |
| March 19, 2025 | • Adjusted Artian Reinforcements table cell to show the ideal stat rolls per Artian build. Applied to HR36++ and HR21-35 Charge Blade builds. • Corrected Blast stat value in HR21-35 build write-up, since element values differed per status ailment type (Paralysis being lower than Blast, for example). • Added Build Playstyle and Combos section for HR36++ Charge Blade build. |
| March 8, 2025 | • Overhauled HR36++ Charge Blade build, making major changes to the ff: ┣ Armor pieces: Removed 2x G. Ebony and 1x Udra, then swapped them in with 2x Dahaad and 1x Arkvulcan. Re-ordered Gore pieces. ┣ Changed non-artian alternative weapon from Leidenskraft to Dear Lutemia, particularly due to underperforming gains from Critical Element of the current game version. ┗ Added Ideal Reinforcement bonuses under Reinforcements column for HR36++ |
| March 7, 2025 | • Adjusted Artian Weapon write-ups to indicate their base status values. (70 for Rarity 8 artian, 30 for Rarity 6 artian, both not yet including Elemental Attack bonus from 3 matching element infusions). |
| March 4, 2025 | • Adjsted HR21-40 Charge Blade build to HR21-35 bracket. • Added HR36++ Charge Blade build (G. Ebony x Gore x Udra). |
| March 2, 2025 | • Posted first HR9-20 Charge Blade build. • Added first HR21-35 Charge Blade build. |
Endgame High Rank Build (HR100+)
Gog Lord's Soul Charge Blade
Best Weapon
| Weapon | Rarity | ATK | DEF |
|---|---|---|---|
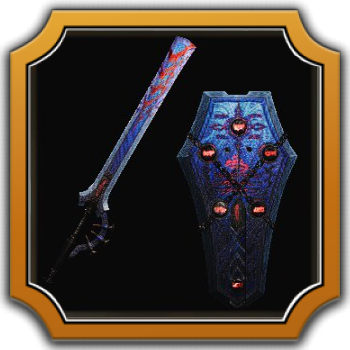 Promised Abyss Promised Abyss
|
8 | 738 (205) |
0 |
| Slots | Element | Affinity | |
| ③③③ |
|
0% | |
| Phial | Element Phial | ||
| Weapon Decorations |
|---|
This weapon decoration setup is an example for Fire element Charge Blade. You may swap these to the appropriate elements if you wish.
| Production Bonus | Reinforcement Prioritization |
|---|---|
|
・Element +30 ・Attack +5 ・Attack +5 ・Attack +5 Element Type: Any |
・Element + 50 ・Element + 50 ・Element + 50 ・Element + 50 ・Sharpness +30 |
|
Focus: Element Focus Set Skill: Gogmapocalypse Group Skill: Lord's Soul |
|
Armor Loadout
| Armor | Slots | Skills |
|---|---|---|
|
|
Agitator Lv. 1 ー ー |
Stamina Surge Lv. 1
Weakness Exploit Lv. 1
Maximum Might Lv. 1
|
|
|
Weakness Exploit Lv. 1 Stamina Surge Lv. 1 ー |
Speed Eating Lv. 2
Aquatic/Oilsilt Mobility Lv. 1
Adrenaline Rush Lv. 2
|
|
|
Weakness Exploit Lv. 1 Weakness Exploit Lv. 1 ー |
Evade Extender Lv. 2
|
|
|
Maximum Might Lv. 1 Divine Blessing Lv. 1 Divine Blessing Lv. 1 |
Peak Performance Lv. 1
Burst Lv. 2
|
|
|
Weakness Exploit Lv. 1 Maximum Might Lv. 1 Divine Blessing Lv. 1 |
Peak Performance Lv. 2
Agitator Lv. 1
|
| Charm | ||
| Armor Decorations | ||
| DEF and RES Totals |
Defense: 470
|
|
Decorations are randomly obtained, so feel free to adjust with what is available.
Skill Summary
| Weapon Skills | |||
|---|---|---|---|
| Elemental Attack | 3 | Power Prolonger | 3 |
| Load Shells | 2 | Handicraft | 2 |
| Guard Up | 1 | ー | |
| Armor Skills | |||
| Agitator | 5 | Weakness Exploit | 5 |
| Divine Blessing | 3 | Maximum Might | 3 |
| Peak Performance | 3 | Adrenaline Rush | 2 |
| Burst | 2 | Evade Extender | 2 |
| Speed Eating | 2 | Stamina Surge | 2 |
| Aquatic/Oilsilt Mobility | 1 | ー | |
| Group / Set Skills | |||
| Mutual Hostility II | Guts (Tenacity) | ||
| Thunderous Roar I | ー | ||
This build is an alternative elemental set that has Guts (Tenacity) to boost raw and allow you to survive one lethal attack. Mutual Hostility II is also kept as a powerful set skill that boosts elemental damage and provides a barrier that absorbs damage.
Gog Magala Elemental Charge Blade Build
Best Weapon
| Weapon | Rarity | ATK | DEF |
|---|---|---|---|
|
Promised Abyss
|
8 | 738 (205) |
0 |
| Slots | Element | Affinity | |
| ③③③ |
|
0% | |
| Phial | Element Phial | ||
| Weapon Decorations |
|---|
This weapon decoration setup is an example for Fire element Charge Blade. You may swap these to the appropriate elements if you wish.
| Production Bonus | Reinforcement Prioritization |
|---|---|
|
・Element +30 ・Attack +5 ・Attack +5 ・Attack +5 Element Type: Any |
・Element + 50 ・Element + 50 ・Element + 50 ・Element + 50 ・Sharpness +30 |
|
Focus: Element Focus Set Skill: Gogmapocalypse Group Skill: Any |
|
When amending reinforcements, aim for as much Element Boosts as possible to maximize elemental damage, with one Sharpness Boost.
Gog Magala Elemental CB Armor Loadout
| Armor | Slots | Skills |
|---|---|---|
|
|
Burst Lv. 1 Antivirus Lv. 1 ー |
Peak Performance Lv. 2
Elemental Absorption Lv. 2
|
|
|
Burst Lv. 1 Evade Extender Lv. 1 ー |
Speed Eating Lv. 2
Aquatic/Oilsilt Mobility Lv. 1
Adrenaline Rush Lv. 2
|
|
|
Coalescence Lv. 1 Coalescence Lv. 1 ー |
Evade Window Lv. 1
Constitution Lv. 1
|
|
|
Coalescence Lv. 1 Fire Resistance Lv. 1 Fire Resistance Lv. 1 |
Peak Performance Lv. 1
Burst Lv. 2
|
|
|
Burst Lv. 1 Fire Resistance Lv. 1 Antivirus Lv. 1 |
Flinch Free Lv. 1
Antivirus Lv. 1
|
| Charm | ||
| Armor Decorations | ||
| DEF and RES Totals |
Defense: 462
|
|
Decorations are randomly obtained, so feel free to adjust with what is available.
Skill Summary
| Weapon Skills | |||
|---|---|---|---|
| Elemental Attack | 3 | Power Prolonger | 3 |
| Load Shells | 2 | Handicraft | 2 |
| Guard Up | 1 | ー | |
| Armor Skills | |||
| Burst | 5 | Antivirus | 3 |
| Coalescence | 3 | Fire Resistance | 3 |
| Peak Performance | 3 | Adrenaline Rush | 2 |
| Convert Element | 2 | Elemental Absorption | 2 |
| Speed Eating | 2 | Aquatic/Oilsilt Mobility | 1 |
| Constitution | 1 | Evade Extender | 1 |
| Evade Window | 1 | Flinch Free | 1 |
| Group / Set Skills | |||
| Mutual Hostility II | Black Eclipse I | ||
This build boasts high elemental damage with a Gogma Artian Weapon with full Element reinforcements, complemented by skills like Mutual Hostility II, Elemental Attack, Burst, Coalescence, and Elemental Absorption.
With Title Update 4 raising the elemental damage cap, elemental Charge Blades can now deal tremendous damage.
This is an AED-focused build that relies on aggression, as it doesn't have Guard and Offensive Guard that reward a reactive play style. Since this build goes all-in on elemental damage, Savage Axe attacks aren't as effective.
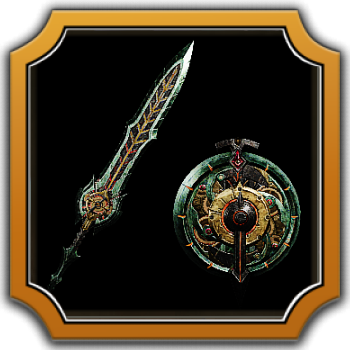
Arkveld Gamma Savage Axe CB
Best Weapon
| Weapon | Rarity | ATK | DEF |
|---|---|---|---|
Promised Abyss
|
8 | 810 (225) |
0 |
| Slots | Element | Affinity | |
| ③③③ |
|
-10% | |
| Phial | Impact Phial | ||
| Weapon Decorations |
|---|
Substitute the weapon decorations above with any available alternatives.
| Production Bonus | Reinforcement Prioritization |
|---|---|
|
• Element +30 • Attack +5 • Attack +5 • Attack +5 Element Type:Any |
• Attack +5 • Attack +5 • Affinity +10 (EX) • Sharpness +30 • Sharpness +30 |
|
*Aim for Affinity EX to offset the negative Affinity from Attack Focus. Focus: Attack Focus Set Skill: Gore Magala's Tyranny Group Skill: Any |
|
Armor Loadout
| Armor | Slots | Skills |
|---|---|---|
|
|
Maximum Might Lv. 1 Dragon Resistance Lv. 1 ー |
Weakness Exploit Lv. 3
|
|
|
Maximum Might Lv. 1 Maximum Might Lv. 1 ー |
Agitator Lv. 2
|
|
|
Dragon Resistance Lv. 1 Dragon Resistance Lv. 1 ー |
Weakness Exploit Lv. 2
Flayer Lv. 2
|
|
|
ー
ー
ー
|
Evade Extender Lv. 2
Burst Lv. 2
|
|
|
Antivirus Lv. 1 Antivirus Lv. 1 Antivirus Lv. 1 |
Flinch Free Lv. 1
Earplugs Lv. 2
|
| Charm | ||
| Armor Decorations | ||
| DEF and RES Totals |
Defense: 476
|
|
Decorations are randomly obtained, so feel free to adjust with what is available.
You may swap the three Dragon Res Jewels for the appropriate Elemental Resistance Jewels depending on the matchup.
Skill Summary
| Weapon Skills | |||
|---|---|---|---|
| Artillery | 3 | Load Shells | 2 |
| Critical Boost | 3 | Handicraft | 1 |
| Armor Skills | |||
| Agitator | 5 | Weakness Exploit | 5 |
| Antivirus | 3 | Dragon Resistance | 3 |
| Maximum Might | 3 | Burst | 2 |
| Evade Extender | 2 | Flayer | 2 |
| Earplugs | 2 | Flinch Free | 1 |
| Group / Set Skills | |||
| Hasten Recovery I | Guts (Tenacity) | ||
| Black Eclipse I | ー | ||
This is a comfy Lord's Soul build for hunters who prefer the Savage Axe play style. It has multiple Affinity skills that is augmented by Critical Boost 3.
It also has several utility skills to enable aggression: Load Shells 2 for faster phial charging, Evade Extender 2 for mobility, and Earplugs 2 to prevent interruption from weak monster roars.
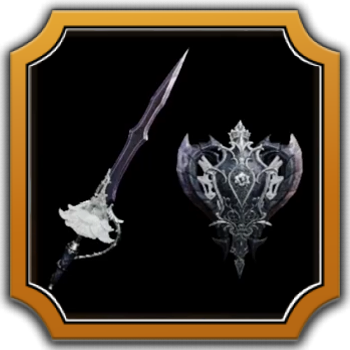
Omega Lord's Soul Charge Blade Build
Best Weapon
| Weapon | Rarity | ATK | DEF |
|---|---|---|---|
 Chrono Gear Chrono Gear
|
8 | 810 (225) |
0 |
| Slots | Element | Affinity | |
| ③③③ |
|
5% | |
| Phial | Impact Phial | ||
| Weapon Decorations |
|---|
| Production Bonus | Artian Reinforcements |
|---|---|
| • Attack +5 • Attack +5 • Attack +5 • Elemental Attack + 30 Element Type: |
• Attack +5
• Attack +5 • Attack +5 • Attack +5 • Sharpness +30 |
Non-Artian Alternative
| Weapon | Rarity | ATK | DEF |
|---|---|---|---|
 Blazing Yirmiya Blazing Yirmiya

|
8 | 792 (220) |
0 |
| Slots | Element | Affinity | |
| ③②① |
|
5% | |
| Skills |
Whiteflame Torrent Lv. 1
|
||
| Phial | Impact | ||
| Weapon Decorations |
|---|
Omega Lord's Soul CB Armor Loadout
| Armor | Slots | Skills |
|---|---|---|
|
|
Agitator Lv. 1 Maximum Might Lv. 1 ー |
Divine Blessing Lv. 1
Weakness Exploit Lv. 1
|
|
|
Shock Absorber Lv. 1 ー ー |
Latent Power Lv. 3
|
|
|
Agitator Lv. 1 Agitator Lv. 1 ー |
Evade Extender Lv. 2
|
|
|
Agitator Lv. 1 Maximum Might Lv. 1 ー |
Divine Blessing Lv. 1
Burst Lv. 1
|
|
|
Maximum Might Lv. 1 Divine Blessing Lv. 1 Adaptability Lv. 1 |
Quick Sheathe Lv. 3
Agitator Lv. 1
|
| Appraised Charm (HR 100+) |
Attack Boost Lv. 3 Weakness Exploit Lv. 1 |
|
| Alternate Charm (HR 50+) |
||
| Armor Decorations | ||
| DEF and RES Totals |
Defense: 341
|
|
Decorations are randomly obtained, so feel free to adjust with what is available.
Skill Summary
| Weapon Skills | |||
|---|---|---|---|
| Critical Boost | 3 | Offensive Guard | 3 |
| Attack Boost | 4 | Load Shells | 2 |
| Handicraft | 2 | ー | |
| Armor Skills | |||
| Agitator | 5 | Maximum Might | 3 |
| Latent Power | 3 | Quick Sheathe | 3 |
| Divine Blessing | 3 | Evade Extender | 2 |
| Weakness Exploit | 2 | Burst | 1 |
| Adaptability | 1 | Shock Absorber | 1 |
| Group / Set Skills | |||
| Thunderous Roar I | Resonance I | ||
| Guts (Tenacity) | ー | ||
| Skill Buffs Breakdown | |||
|
Affinity
・AGI5: +15% ・MM3: +30% ・LP3: +50% ・WEX2: +15% ・Resonance I: +20% ・Weapon: 5% Lowest-Highest: ・5%~135% |
Attack | Element
・OG3: +34 (15%) ・AGI5: +20 ・AB4: +13 ・BST1: +5~8 ・Resonance I: +10 ・Guts: +11 ・Weapon: 225 Raw Lowest-Highest: ・238~321 Raw |
||
The skill summary above uses the specified Appraised Talisman and Artian weapon loadout.
This build is ideal for multiplayer or when hunting with Support Hunters to gain +20% Affinity or +10 Attack from Omega Resonance.
This build has high Affinity thanks to Maximum Might, Latent Power, and Agitator. It also has Lord's Soul for a consistent boost in damage, as long as Guts (Tenacity) is not triggered.
Endgame High Rank Build (HR50+)
Zoh Shia WEX Agitator Charge Blade Build
Best Weapon
| Weapon | Rarity | ATK | DEF |
|---|---|---|---|
Chrono Gear
|
8 | 810 (225) |
0 |
| Slots | Element | Affinity | |
| ③③③ |
|
5% | |
| Phial | Impact Phial | ||
| Weapon Decorations |
|---|
| Production Bonus | Artian Reinforcements |
|---|---|
| • Attack +5 • Attack +5 • Attack +5 • Elemental Attack + 30 Element Type: |
• Attack +5
• Attack +5 • Attack +5 • Attack +5 • Sharpness +30 |
For this build's Artian weapon, the most optimal setup is a full 3x Attack Bonus with 3x Paralysis infusions for the elemental bonus, then 4x Attack Reinforcements with 1 Sharpness Boost bonus. Paralysis is a great status ailment to use against monsters since it immobilizes them frequently in a hunt.
Extra affinity is not needed since most will come from your armor skills. You'll just want to focus on damage-boosting skills like Offensive Guard and comfort skills like Rapid Morph to make the weapon snappier. Critical Boost can be a substitute to either Offensive Guard (if it's often unused) or Rapid Morph (if you are already comfortable with its speed).
Non-Artian Alternative
| Weapon | Rarity | ATK | DEF |
|---|---|---|---|
|
Blazing Yirmiya
|
8 | 792 (220) |
0 |
| Slots | Element | Affinity | |
| ③②① |
|
5% | |
| Skills |
Whiteflame Torrent Lv. 1
|
||
| Phial | Impact | ||
| Weapon Decorations |
|---|
For a non-Artian alternative, the Blazing Yirmiya in the Zoh Shia tree is a good choice for an Impact Phial that deals Dragon damage. It also comes with Whiteflame Torrent which can serve as a bonus 50 damage that procs on a monster as you hit it over time.
Zoh Shia WEX Agitator CB Armor Loadout
| Armor | Slots | Skills |
|---|---|---|
|
|
Weakness Exploit Lv. 1 Maximum Might Lv. 1 Constitution Lv. 1 |
Recovery Speed Lv. 1
Agitator Lv. 1
|
|
|
Weakness Exploit Lv. 1 ー ー |
Agitator Lv. 2
|
|
|
Constitution Lv. 1 Recovery Speed Lv. 1 Recovery Speed Lv. 1 |
Weakness Exploit Lv. 2
|
|
|
Weakness Exploit Lv. 1 Maximum Might Lv. 1 ー |
Constitution Lv. 2
|
|
|
Burst Lv. 1 Antivirus Lv. 1 Antivirus Lv. 1 |
Flinch Free Lv. 1
Antivirus Lv. 1
|
| Appraised Charm (HR 100+) |
Agitator Lv. 1 Handicraft Lv. 1 |
|
| Alternate Charm (HR 50+) |
||
| Armor Decorations | ||
| DEF and RES Totals |
Defense: 323
|
|
Decorations are randomly obtained, so feel free to adjust with what is available.
For this build, we made use of 2 Numinous pieces for Super Recovery I, 1 piece G. Arkveld, and 2 pieces of Gore for Black Eclipse I.
Skill Summary
| Weapon Skills | |||
|---|---|---|---|
| Offensive Guard | 3 | Rapid Morph | 3 |
| Guard | 2 | Load Shells | 2 |
| Handicraft | 2 | ー | |
| Armor Skills | |||
| Agitator | 5 | Weakness Exploit | 5 |
| Constitution | 4 | Antivirus | 3 |
| Recovery Speed | 3 | Maximum Might | 2 |
| Burst | 1 | Flinch Free | 1 |
| Group / Set Skills | |||
| Black Eclipse I | Super Recovery I | ||
| Ward of Wyveria | - | ||
| Skill Buffs Breakdown | |||
|
Affinity
・MM2: +20% ・WEX5: +30%~50% ・AGI5: +15% ・Weapon: 5% Lowest-Highest: ・5%~90% |
Attack | Element
・OG3: +34 (15%) ・AGI5: +20 Raw ・BST1: +5~8 Raw ・Weapon: 225 Raw Lowest-Highest:: ・230~287 Raw |
||
The skill summary above uses the specified Appraised Talisman.
This build's main highlight is its high affinity potential through the synergy of Agitator 5 (15%), Weakness Exploit 5 (30~50%), Antivirus 3 (25%), and Maximum Might 2 (20%). This sits at a potential affinity range of 90~110% not including a weapon, giving you enough room to build towards more raw damage increase without worrying about affinity loss.
It also has its own share of comfort skills, namely Constitution 4 for better stamina management on guards and dodges, and Recovery Speed 3 to synergize with Super Recovery I. Alternatively, you may swap out any of these 1-slot decorations to fit in 3x Divine Blessing when needed.
Best Mantles to Use
| Best Mantles | Explanation |
|---|---|
|
|
• In exchange for gradual health loss, the Corrupted Mantle greatly increases damage and affinity the more you hit a monster. Health loss can be deactivated with repeated hits, so this is safe to use if you get your attacks in. • A good use for this mantle would be to use it during Axe Mode where you perform the most damaging moves. |
|
|
• This is a good mantle for tanking hits and if you want to ensure your performances cannot be interrupted in crucial moments • A good time to use this mantle is also during Axe Mode to prevent interruptions to your Element Discharges attacks. |
The Corrupted Mantle is the best choice for the Charge Blade since it increases your attack power and affinity as you hit a monster. For an alternative mantle, the Rocksteady Mantle is a good choice for tanking monsters as you swing Element Discharges at them during Axe Mode!
Best Secondary Weapons
| Weapon & Type | Explanation |
|---|---|
|
(Hunting Horn) |
• A good secondary weapon that can also use this build's armor-based damage skills is the Hunting Horn. Agitator is pretty much beneficial to nearly all hard-hitting weapons that deal raw damage, with Burst being suitable for those that are capable of multi-hit (like the Hunting Horn's Echo Bubble). |
Build Playstyle and Combos
The recommended playstyle to maximize the build is as follows. For combo rotations and CB mode terms, refer to our Charge Blade Weapon Guide for details:
- When starting a fight, Sneak Attack is always recommended for free damage (note that this does not work for monsters like Zoh Shia). You can then begin building into a charge combo from there.
- Charge your sword energy fast with attacks such as Sword: Charged Rising Slash for building energy into Element Boost mode (charging your shield). The recommended movement combo for getting into Element Boost is via cancelling AED into Elemental Roundslash.
- After you activate Element Boost, prioritized activating Savage Axe as soon as possible. Play reactively at this point, making sure to observe and catch windows for Perfect Guards for instant Savage Axe activation.
- Do not be greedy with Savage Axe and dodge only when necessary; hold down the chainsaw effect ONLY in long windows of opportunity, and stick to regular Element Discharges for small windows. Exit Axe Mode immediately via Elemental Roundslash to either Guard Point or Perfect Guard an incoming attack.
- When the monster is toppled, enter Axe Mode via Shield Thrust into AED, or Charge into Element Discharge, then proceed to rotate Element Discharges onto the downed monster. Repeat until the monster begins to rise, then go back into Sword Mode and play reactively again.
- Activating Sword Mode Boost mode (charging your sword) is optional but can be beneficial for adding damage to your sword attacks. It just takes a lot of time to charge compared to other modes since you have faster access to your highest DPS mode Savage Axe anyways.
This build benefits a reactive playstyle that maximizes the uptime of Offensive Guard and the mobility offered by both Load Shells and Rapid Morph. Given the mobility buffs, Shield Thrust into AED cancelled into Elemental Roundslash becomes a fast and flexible morph combo bridge often used for this playstyle (can gap-close, and allows you to decide to go on offense or defense).
You do not have to worry too much about stamina loss since no stamina is consumed in actions other than dodging or guarding. Most of the time, your guards will consume very little stamina so it will be covered under the grace period of Maximum Might.
Lord's Soul Agitator Charge Blade Build
Best Weapons
| Weapon | Rarity | ATK | DEF |
|---|---|---|---|
|
Chrono Gear
|
8 | 810 (225) |
0 |
| Slots | Element | Affinity | |
| ③③③ |
|
5% | |
| Phial | Impact Phial | ||
| Weapon Decorations |
|---|
| Production Bonus | Artian Reinforcements |
|---|---|
| • Attack +5 • Attack +5 • Attack +5 • Elemental Attack + 30 Element Type: |
• Attack +5
• Attack +5 • Attack +5 • Attack +5 • Sharpness +30 |
Non-Artian Alternative
| Weapon | Rarity | ATK | DEF |
|---|---|---|---|
|
Blazing Yirmiya
|
8 | 792 (220) |
0 |
| Slots | Element | Affinity | |
| ③②① |
|
5% | |
| Skills |
Whiteflame Torrent Lv. 1
|
||
| Phial | Impact | ||
| Weapon Decorations |
|---|
Lord's Soul Agitator Armor Loadout
| Armor | Slots | Skills |
|---|---|---|
|
|
Agitator Lv. 1 Counterstrike Lv. 1 Constitution Lv. 1 |
Maximum Might Lv. 2
|
|
|
Constitution Lv. 1 ー ー |
Latent Power Lv. 3
|
|
|
Agitator Lv. 1 Agitator Lv. 1 ー |
Evade Extender Lv. 2
|
|
|
Counterstrike Lv. 1 Counterstrike Lv. 1 Constitution Lv. 1 |
Weakness Exploit Lv. 1
Maximum Might Lv. 1
|
|
|
Burst Lv. 1 Constitution Lv. 1 Constitution Lv. 1 |
Quick Sheathe Lv. 3
Agitator Lv. 1
|
| Appraised Charm (HR 100+) |
Razor Sharp Lv. 3 Agitator Lv. 1 |
|
| Alternate Charm (HR 50+) |
||
| Armor Decorations | ||
| DEF and RES Totals |
Defense: 333
|
|
Decorations are randomly obtained, so feel free to adjust with what is available.
If you don't have the appraised charm, use a Challenger Charm II instead and swap one Challenger Jewel for a Tenderizer Jewel.
Skill Summary
| Weapon Skills | |||
|---|---|---|---|
| Critical Boost | 4 | Offensive Guard | 3 |
| Razor Sharp | 3 | Load Shells | 2 |
| Handicraft | 2 | ー | |
| Armor Skills | |||
| Constitution | 5 | Agitator | 5 |
| Counterstrike | 3 | Latent Power | 3 |
| Maximum Might | 3 | Quick Sheathe | 3 |
| Evade Extender | 2 | Burst | 1 |
| Weakness Exploit | 1 | ー | |
| Group / Set Skills | |||
| Thunderous Roar I | Guts (Tenacity) | ||
| Azure Bolt I | ー | ||
| Skill Buffs Breakdown | |||
|
Affinity
・AGI5: +15% ・MM3: +30% ・WEX1: +8% ・LP3: +30% ・Weapon: 5% Lowest-Highest: ・5%~83% |
Attack | Element ・AGI5: +20 Raw ・CS3: +25 Raw ・BST1: +8 Raw ・Crit.B3: +34% Crit Dmg. ・Weapon: 225 Raw Lowest-Highest: ・225~278 Raw ・+34% Crit Dmg |
||
This is a balanced build with consistent damage thanks to the +5% attack boost of Lord's Soul that lasts until its Guts component is triggered. Offense-wise it has maxed out Agitator and Maximum Might, and Latent Power enhanced by Thunderous Roar.
Blocking and punishing attacks is made easier and encouraged with maxed out Constitution, and is rewarded with the damage boost provided by Offensive Guard.
Comfort skills include Load Shells, Razor Sharp, and a value point in Handicraft to stay aggressive. Evade Extender and Quick Sheathe help reposition against dangerous attacks.
Guts Mixed Charge Blade Build
Best Weapon
| Weapon | Rarity | ATK | DEF |
|---|---|---|---|
|
Chrono Gear
|
8 | 810 (225) |
0 |
| Slots | Element | Affinity | |
| ③③③ |
|
5% | |
| Phial | Impact Phial | ||
| Weapon Decorations |
|---|
| Production Bonus | Artian Reinforcements |
|---|---|
| • Attack +5 • Attack +5 • Attack +5 • Elemental Attack + 30 Element Type: |
• Attack +5
• Attack +5 • Attack +5 • Attack +5 • Sharpness +30 |
Non-Artian Alternative
| Weapon | Rarity | ATK | DEF |
|---|---|---|---|
|
Blazing Yirmiya
|
8 | 792 (220) |
0 |
| Slots | Element | Affinity | |
| ③②① |
|
5% | |
| Skills |
Whiteflame Torrent Lv. 1
|
||
| Phial | Impact | ||
| Weapon Decorations |
|---|
This build uses the same weapon setup as our top CB build: Chrono Gear for Artian and Blazing Yirmiya for a non-artian pick. Artian weapon still hold up today thus far due to it being able to allow three 3-slot decorations, so make sure to invest into making them!
Guts Mixed CB Build Armor Loadout
| Armor | Slots | Skills |
|---|---|---|
|
|
Agitator Lv. 1 ー ー |
Stamina Surge Lv. 1
Weakness Exploit Lv. 1
Maximum Might Lv. 1
|
|
|
Agitator Lv. 1 Antivirus Lv. 1 ー |
Evade Window Lv. 2
|
|
|
Agitator Lv. 1 Weakness Exploit Lv. 1 ー |
Evade Extender Lv. 2
|
|
|
Agitator Lv. 1 Maximum Might Lv. 1 ー |
Constitution Lv. 2
|
|
|
Burst Lv. 1 Antivirus Lv. 1 Antivirus Lv. 1 |
Quick Sheathe Lv. 3
Agitator Lv. 1
|
| Appraised Charm (HR 100+) |
Weakness Exploit Lv. 1 Handicraft Lv. 1 |
|
| Charm (HR 50+) |
||
| Armor Decorations | ||
| DEF and RES Totals |
Defense: 325
|
|
Decorations are randomly obtained, so feel free to adjust with what is available.
Skill Summary
| Weapon Skills | |||
|---|---|---|---|
| Offensive Guard | 3 | Rapid Morph | 3 |
| Guard | 2 | Load Shells | 2 |
| Handicraft | 1 | ー | |
| Armor Skills | |||
| Agitator | 5 | Weakness Exploit | 4 |
| Antivirus | 3 | Quick Sheathe | 3 |
| Constitution | 2 | Evade Extender | 2 |
| Evade Window | 2 | Maximum Might | 2 |
| Burst | 1 | Stamina Surge | 1 |
| Group / Set Skills | |||
| Thunderous Roar I | Guts (Tenacity) | ||
| Black Eclipse I | ー | ||
The skill summary above uses the specified Appraised Talisman.
This is a mixed set of Gamma pieces and Gore that takes advantage of both the damage boost from Guts (Tenacity) and the affinity boosted by Black Eclipse. Making this set has also resulted in comfort skills such as Evade Extender, Constitution, and Quick Sheathe.
Lagi Gore Max Affinity CB Build
Best Weapon
| Weapon | Rarity | ATK | DEF |
|---|---|---|---|
|
Chrono Gear
|
8 | 810 (225) |
0 |
| Slots | Element | Affinity | |
| ③③③ |
|
5% | |
| Phial | Impact Phial | ||
| Weapon Decorations |
|---|
| Production Bonus | Artian Reinforcements |
|---|---|
|
• Attack +5 • Attack +5 • Attack +5
Element Type:
|
• Attack +5 • Attack +5 • Attack +5 • Attack +5 • Sharpness +30 |
This build uses mostly Attack production bonuses and reinforcements to take advantage of the high Affinity. One Sharpness reinforcement is taken for added comfort along with two levels of Handicraft.
Non-Artian Alternative
| Weapon | Rarity | ATK | DEF |
|---|---|---|---|
 Rebellious Charger Rebellious Charger

|
8 | 756 (210) |
0 |
| Slots | Element | Affinity | |
| ③②① |
None
|
25% | |
| Skills |
Bladescale Honing Lv. 1
|
||
| Phial | Impact | ||
| Weapon Decorations |
|---|
For the non-Artian alternative, the Rebellious Charger is a good option due to Bladescale Honing protecting your Sharpness bar.
Lagi Gore Max Affinity Armor Loadout
| Armor | Slots | Skills |
|---|---|---|
|
|
Agitator Lv. 1 Stamina Surge Lv. 1 Antivirus Lv. 1 |
Maximum Might Lv. 2
|
|
|
Agitator Lv. 1 Antivirus Lv. 1 ー |
Evade Window Lv. 2
|
|
|
Agitator Lv. 1 Burst Lv. 1 ー |
Evade Extender Lv. 2
|
|
|
Weakness Exploit Lv. 1 Maximum Might Lv. 1 ー |
Constitution Lv. 2
|
|
|
Antivirus Lv. 1 ー ー |
Latent Power Lv. 1
Weakness Exploit Lv. 2
|
| Appraised Charm (HR 100+) |
Agitator Lv. 1 Handicraft Lv. 1 |
|
| Charm (HR50+) |
||
| Armor Decorations | ||
| DEF and RES Totals |
Defense: 317
|
|
Decorations are randomly obtained, so feel free to adjust with what is available.
Skill Summary
| Weapon Skills | |||
|---|---|---|---|
| Handicraft | 3 | Critical Boost | 3 |
| Load Shells | 2 | Offensive Guard | 3 |
| Armor Skills | |||
| Agitator | 5 | Antivirus | 3 |
| Maximum Might | 3 | Weakness Exploit | 3 |
| Constitution | 2 | Evade Extender | 2 |
| Evade Window | 2 | Burst | 1 |
| Latent Power | 1 | Stamina Surge | 1 |
| Group / Set Skills | |||
| Black Eclipse I | Azure Bolt I | ||
| Skill Buffs Breakdown | |||
|
Affinity
・AGI5: +15% ・MM3: +30% ・AV3: +25% ・WEX3: +25% ・LP1: +10% ・AB1: +15% ・Weapon: 5% Lowest-Highest: ・5%~125% |
Attack | Element
・AGI5: +20 Raw ・OG3: +34 Raw (+15%) ・BST1: +8 Raw ・Crit.B3: +34% Crit Dmg. ・Weapon: 225 Raw Lowest-Highest: ・225~287 Raw ・+34% Crit Dmg |
||
The skill summary above uses the specified Appraised Talisman.
This build has multiple Affinity skills and can easily max out over the course of a hunt. It also has staples such as Offensive Guard 3 and Load Shells 2,
Comfort skills included are Handicraft 2, Evade Extender 2, and Evade Window 2. Stamina skills such as Constitution 2 and Stamina Surge help with Maximum Might 3 uptime.
Rey Dau Gamma Latent Power Burst CB Build
Best Weapon
| Weapon | Rarity | ATK | DEF |
|---|---|---|---|
|
Chrono Gear
|
8 | 810 (225) |
0 |
| Slots | Element | Affinity | |
| ③③③ |
|
5% | |
| Phial | Impact Phial | ||
| Weapon Decorations |
|---|
| Production Bonus | Artian Reinforcements |
|---|---|
| • Attack +5 • Attack +5 • Attack +5 • Elemental Attack + 30 Element Type: |
• Attack +5
• Attack +5 • Attack +5 • Attack +5 • Sharpness +30 |
This build uses the same Artian weapon setup as the WEX Agitator build above, aim for 4x Attack Reinforcement bonuses with 1x Sharpness Boost bonus since the armor set will cover the build's Affinity needs.
For weapon decorations, Critical Boost is vital to take advantage of the extremely high Affinity of the build. Offensive Guard and Load Shells are Charge Blade staples. An extra point each in Handicraft and Guard are also nice to have.
Non-Artian Alternative
| Weapon | Rarity | ATK | DEF |
|---|---|---|---|
|
Blazing Yirmiya
|
8 | 792 (220) |
0 |
| Slots | Element | Affinity | |
| ③②① |
|
5% | |
| Skills |
Whiteflame Torrent Lv. 1
|
||
| Phial | Impact | ||
| Weapon Decorations |
|---|
The non-Artian alternative also uses the Blazing Yirmiya, which you can slot in a higher level of Critical Boost at the cost of losing Offensive Guard, while still retaining Load Shells.
Rey Dau Gamma LP CB Armor Loadout
| Armor | Slots | Skills |
|---|---|---|
|
|
Burst Lv. 1 ー ー |
Stamina Surge Lv. 1
Weakness Exploit Lv. 1
Maximum Might Lv. 1
|
|
|
Shock Absorber Lv. 1 ー ー |
Latent Power Lv. 3
|
|
|
Burst Lv. 1 Burst Lv. 1 ー |
Evade Extender Lv. 2
|
|
|
ー
ー
ー
|
Latent Power Lv. 2
Maximum Might Lv. 2
|
|
|
Weakness Exploit Lv. 1 ー ー |
Burst Lv. 2
|
| Appraised Charm (HR 100+) |
Weakness Exploit Lv. 1 Handicraft Lv. 1 |
|
| Charm (HR 50+) |
||
| Armor Decorations | ||
| DEF and RES Totals |
Defense: 321
|
|
Decorations are randomly obtained, so feel free to adjust with what is available.
This build uses 4 Rey Dau Gamma pieces to activate Thunderous Roar to maximize the effects of Latent Power. The Mizutsune Greaves grants Burst which is essentially a free damage boost while in Savage Axe Mode.
Note that this build gives up comfort skills in exchange for more offense. Try not to be too greedy when Latent Power is active!
Skill Summary
| Weapon Skills | |||
|---|---|---|---|
| Critical Boost | 3 | Offensive Guard | 3 |
| Load Shells | 2 | Handicraft | 2 |
| Guard | 1 | - | |
| Armor Skills | |||
| Latent Power | 5 | Burst | 5 |
| Weakness Exploit | 4 | Maximum Might | 3 |
| Evade Extender | 2 | Stamina Surge | 1 |
| Shock Absorber | 1 | ー | |
| Group / Set Skills | |||
| Thunderous Roar II | Guts (Tenacity) | ||
| Skill Buffs Breakdown | |||
|
Affinity
・LP5: +50% ・MM3: +30% ・WEX4: +20%~35% ・Weapon: 5% Lowest-Highest: ・5%~120% |
Attack | Element
・OG3: +34 (15%) ・Guts: +11 Raw (5%) ・BST5: +5~18 Raw ・Crit.B3: +34% Crit. Dmg. ・Weapon: 225 Raw Lowest-Highest:: ・230~288 Raw |
||
The skill summary above uses the specified Appraised Talisman.
This build goes all-in on Affinity, reaching upwards of 100% when Latent Power 5, Weakness Exploit 4, and Maximum Might 3 are all active. Critical Boost augments the critical hits.
Burst 5 is provides a massive raw and elemental damage boost, which you can easily proc in Savage Axe Mode.
You can also swap 2 of the Chain Jewels for comfort skills like Earplugs depending on the matchup, or other offensive skills like Agitator or Coalescence if you prefer having them.
Best Mantles to Use
| Best Mantles | Explanation |
|---|---|
|
|
Greastly boosts damage and affinity. Health loss can be deactivated with multiple and repeated hits, especially in Savage Axe mode. |
|
|
Allows you to perform Savage Axe combos without getting interrupted. |
The Corrupted Mantle is the best choice for the Charge Blade as it enhances your already high damage output. Pair it with the Rocksteady Mantle to stay on the offensive.
Best Secondary Weapons
| Weapon & Type | Explanation |
|---|---|
|
(Switch Axe) |
A good secondary offensive weapon that benefit from the Affinity-centric armor skills, with Evade Extender 2 providing mobility to reposition and keep up the assault. |
Build Playstyle and Combos
This build generally follows the play style of the Charge Blade as found in our Charge Blade Weapon Guide. Since the build leans more towards an active and offensive play style, take note of the following tips:
- Charge your shield with Shield: Element Boost instead of Elemental Roundslash as the build doesn't have Rapid Morph.
- Be proactive in looking for opportunities to proc Offensive Guard, but be wary of some attacks that have a follow-up that can punish you.
- Try to time your Savage Axe Mode when Latent Power is up.
- Keep up the offensive by taking advantage of the Evade Extender 2 baked into the Rey Dau gauntlets.
- Use Sword Boost Mode until you find an opportunity to enter Savage Axe Mode.
4x Zoh Shia Comfort CB Build
Best Weapon
| Weapon | Rarity | ATK | DEF |
|---|---|---|---|
|
Chrono Gear
|
8 | 810 (225) |
0 |
| Slots | Element | Affinity | |
| ③③③ |
|
5% | |
| Phial | Impact Phial | ||
| Weapon Decorations |
|---|
| Production Bonus | Artian Reinforcements |
|---|---|
| • Attack +5 • Attack +5 • Attack +5 • Elemental Attack + 30 Element Type: |
• Attack +5
• Attack +5 • Attack +5 • Attack +5 • Sharpness +30 |
For this build, we recommend the usual 3x Attack Bonus with 3x Paralysis infusions for the elemental bonus, then 4x Attack Boost with 1x Shaprness Boost bonuses. Trading in a bonus for 1x Sharpness Boost is also good for sharpness multiplier maintenance.
A part of the Artian weapon's decoration setup is based on comfort. If you want to maximize damage, we suggest trading in any of the 2 existing jewels for 2 Critical Jewels that will give you Critical Boost 5.
Non-Artian Alternative
| Weapon | Rarity | ATK | DEF |
|---|---|---|---|
|
Blazing Yirmiya
|
8 | 792 (220) |
0 |
| Slots | Element | Affinity | |
| ③②① |
|
5% | |
| Skills |
Whiteflame Torrent Lv. 1
|
||
| Phial | Impact | ||
| Weapon Decorations |
|---|
For a non-Artian weapon, the Blazing Yirmiya in the Zoh Shia tree is a good Impact Phial option for its skill Whiteflame Torrent, high raw damage, and ample White Sharpness reserve.
4x Zoh Comfort Charge Blade Armor Loadout
| Armor | Slots | Skills |
|---|---|---|
|
|
Burst Lv. 1 Maximum Might Lv. 1 Shock Absorber Lv. 1 |
Recovery Speed Lv. 1
Agitator Lv. 1
|
|
|
Burst Lv. 1 ー ー |
Agitator Lv. 2
|
|
|
Divine Blessing Lv. 1 Divine Blessing Lv. 1 Divine Blessing Lv. 1 |
Weakness Exploit Lv. 2
|
|
|
Maximum Might Lv. 1 ー ー |
Agitator Lv. 2
Coalescence Lv. 1
|
|
|
Weakness Exploit Lv. 1 Maximum Might Lv. 1 ー |
Recovery Speed Lv. 1
Counterstrike Lv. 1
Elemental Absorption Lv. 1
|
| Appraised Charm (HR 100+) |
Weakness Exploit Lv. 1 Handicraft Lv. 1 |
|
| Charm (HR 50+) |
||
| Armor Decorations | ||
| DEF and RES Totals |
Defense: 339
|
|
Decorations are randomly obtained, so feel free to adjust with what is available.
Skill Summary
| Weapon Skills | |||
|---|---|---|---|
| Offensive Guard | 3 | Rapid Morph | 3 |
| Guard | 2 | Load Shells | 2 |
| Handicraft | 2 | ー | |
| Armor Skills | |||
| Agitator | 5 | Weakness Exploit | 5 |
| Divine Blessing | 3 | Maximum Might | 3 |
| Burst | 2 | Recovery Speed | 2 |
| Coalescence | 1 | Counterstrike | 1 |
| Elemental Absorption | 1 | Shock Absorber | 1 |
| Group / Set Skills | |||
| Ward of Wyveria | Super Recovery II | ||
| Skill Buffs Breakdown | |||
|
Affinity
・MM3: +30% ・WEX5: +30%~50% ・Weapon: 5% Lowest-Highest: ・5%~120% |
Attack | Element
・OG3: +34 (15%) ・AGI5: +20 Raw ・BST2: +5~10 Raw ・CS1: +10 Raw ・COA1: +5 Ele (1.05x) Status ・Weapon: 225 Raw Lowest-Highest:: ・230~299 Raw ・100~105 Ele |
||
The skill summary above uses the specified Appraised Talisman.
This build maintains its core damage and affinity skills of Agitator 5, Weakness Exploit 5, Maximum Might 3, and Burst 1. For supplementary damage, Counterstrike 1 is also present.
For comfort-oriented armor skills, Super Recovery II is present to give passive healing. Recovery Speed 2 for red health will help speed up the recovery of red health in conjunction with Super Recovery.
High Rank Build (HR 36+)
Frenzy Burst Agitator Charge Blade Build
Best Weapon
| Weapon | Rarity | ATK | DEF |
|---|---|---|---|
|
Chrono Gear
|
8 | 774 (215) |
0 |
| Slots | Element | Affinity | |
| ③③③ |
|
20% | |
| Phial | Impact Phial | ||
| Weapon Decorations |
|---|
| Production Bonus | Artian Reinforcements |
|---|---|
| • Affinity +5 • Attack +5 • Attack +5 • Elemental Attack + 30 Element Type: |
• Attack +5
• Attack +5 • Attack +5 • Affinity +5 • Affinity +5 |
For the Artian Charge Blade, the preferred production bonus would be Attack followed by Affinity. The best elemental choice for the Charge Blade is Paralysis since monsters in a paralyzed state are much easier to precisely use the Savage Axe on compared to monsters who are drowsed by Sleep.
The base status value for the Artian weapon will be 70 (base 270 if you opted for elements). Matching 3 elemental infusions will grant the +30 Elemental Attack production bonus.
Non-Artian Alternative
| Weapon | Rarity | ATK | DEF |
|---|---|---|---|
 Dear Lutemia Dear Lutemia

|
8 | 756 (210) |
0 |
| Slots | Element | Affinity | |
| ③②① |
|
15% | |
| Skills |
Critical Status Lv. 3
Poison Duration Up Lv. 1
|
||
| Phial | Impact | ||
| Weapon Decorations |
|---|
For the non-artian alternative, the Dear Lutemia has been a good pick due to its existing set of skills (Critical Status 3 and Poison Duration Up 1), long white sharpness, Poison element, and 15% affinity. It's also an Impact Phial type, so most of its phial damage will come from your raw value.
100% Affinity Alternative Potential
For this build, your ideal CB stat would be 215 true raw (displayed without coefficient) with 15% affinity. Combined with Agitator (+15% affinity), Black Eclipse 1 cured with Antivirus (+25% affinity), and Maximum Might 3 (+30%) gives you a potential 85% affinity base. This can be optimized for a 100% potential affinity ceiling with the Corrupted Mantle (10% affinity) if the Artian weapon's bonuses provide at least base 20% affinity.
Charge Blade Armor Loadout
| Armor | Slots | Skills |
|---|---|---|
|
|
Maximum Might Lv. 1 Maximum Might Lv. 1 ー |
Agitator Lv. 1
|
|
|
Burst Lv. 1 Maximum Might Lv. 1 ー |
Weakness Exploit Lv. 1
|
|
|
ーーー
|
Adaptability Lv. 1
Agitator Lv. 2
|
|
|
Burst Lv. 1 Partbreaker Lv. 1 ー |
Constitution Lv. 2
|
|
|
Burst Lv. 1 Antivirus Lv. 1 Antivirus Lv. 1 |
Flinch Free Lv. 1
Antivirus Lv. 1
|
| Charm | ||
| Armor Decorations |
Alternative, swap out two 2-slot decos for: |
|
| DEF and RES Totals |
Defense: 307
|
|
Decorations are randomly obtained, so feel free to adjust with what is available.
For this build, we went with 2 piece Dahaad to fill in Agitator with Challenger Charm II and use Binding Counter, 2 piece Gore to Black Eclipse for Antivirus, and 1 piece Arkvulcan to fit in extra 3-slot and 2-slot decorations.
Alternative armor pieces that you can swap out in this build are the 2 Dahaad pieces with 2 G. Fulgur (G. Fulgur Helm and G. Fulgur Vambraces). This is if you see it fit to take advantage of Second Wind in a dodge-heavy playstyle. Else, Maximum Might retriggers easily even without Second Wind if you conserve your dodges and frequently use Perfect Guards (Maximum Might has a 2-second grace period before deactivation if stamina is not restored to full).
All of the CB's combos, some which can be used heavily for gap-closing and movement such as Fade Slash, Shield Thrust, and Elemental Roundslash, do not use stamina at all. We see Binding Counter 1 to be a more suitable set bonus for the added conditional +25 true raw damage on Power Clash and recovery from other binding status ailments for 1 minute.
Skill Summary
| Weapon Skills | |||
|---|---|---|---|
| Offensive Guard | 3 | Guard | 2 |
| Load Shells | 2 | Handicraft | 1 |
| Rapid Morph | 1 | ー | |
| Armor Skills | |||
| Agitator | 5 | Antivirus | 3 |
| Burst | 3 | Maximum Might | 3 |
| Constitution | 2 | Adaptability | 1 |
| Flinch Free | 1 | Partbreaker | 1 |
| Weakness Exploit | 1 | ー | |
| Group / Set Skills | |||
| Black Eclipse I | Binding Counter I | ||
| Skill Buffs Breakdown | |||
|
Affinity
・MM3: +30% ・AGI5: +15% ・AV5: +25% ・WEX1: +5%~8% ・Weapon: 20% Lowest-Highest: ・20%~98% |
Attack | Element
・OG3: +32 (15%) ・AGI5: +20 Raw ・BST2: +5~12 Raw ・Weapon: 215 Raw Lowest-Highest:: ・220~279 Raw |
||
For this build, Agitator and Burst is your consistent flat-damage boost option with conditional boosted DPS potential from Offensive Guard, Rapid Morph, Load Shells (faster phial charging), and Binding Counter.
Your affinity is mainly boosted via Agitator also in combination with Maximum Might (30%) and Black Eclipse's Frenzy cured with Antivirus (25%). Maximum Might will be fairly easy to maintain since Charge Blade combos do not consume stamina and stamina recovery starts quite quickly after blocking attacks (especially with Perfect Guard).
The combination of all of these skills should give you a fast, high-powered Charge Blade playstyle that benefits a lot from Perfect Blocks and can deal tons of damage in Axe Mode. You also have an option to swap out some pieces, such as two 2-slot decorations for Earplugs for minimal to no interruptions from most roars during Element Discharges.
Best Mantles to Use
| Best Mantles | Explanation |
|---|---|
|
|
• In exchange for gradual health loss, the Corrupted Mantle greatly increases damage and affinity the more you hit a monster. Health loss can be deactivated with repeated hits, so this is safe to use if you get your attacks in. • A good use for this mantle would be to use it during Axe Mode where you perform the most damaging moves. |
|
|
• This is a good mantle for tanking hits and if you want to ensure your performances cannot be interrupted in crucial moments • A good time to use this mantle is also during Axe Mode to prevent interruptions to your Element Discharges attacks. |
The Corrupted Mantle is the best choice for the Charge Blade since it grows your attack power and affinity as long as you keep hitting the monster. Corrupted Mantle gives at most 10% more affinity and 4.5% more raw attack.
For an alternative mantle, the Rocksteady Mantle is a good choice for tanking monsters as you swing Element Discharges at them during Axe Mode!
Best Secondary Weapons
| Weapon & Type | Explanation |
|---|---|
|
(Hunting Horn) |
• A good secondary weapon that can also use this build's armor-based damage skills is the Hunting Horn. Agitator is pretty much beneficial to nearly all hard-hitting weapons that deal raw damage, with Burst being suitable for those that are capable of multi-hit (like the Hunting Horn's Echo Bubble). |
High Rank Climber Build (HR 21 to HR 35)
Agitator Burst Charge Blade Build
Best Weapon
| Weapon | Rarity | ATK | DEF |
|---|---|---|---|
Artian Defender I
|
6 | 702 (195) |
0 |
| Slots | Element | Affinity | |
| ②②② |
|
20% | |
| Phial | Impact Phial | ||
| Weapon Decorations |
|---|
| Production Bonus | Artian Reinforcements |
|---|---|
| • Attack +5 • Attack +5 • Affinity +5 • Elemental Attack + 30
Element Type:
|
• Attack +5
• Attack +5 • Attack +5 • Affinity +5 • Affinity +5 |
For this build, using the Artian Defender I is the best choice since it allows a lot of damage and comfort customization through reinforcement and its three 2-slot decorations.
The base status Blast value for this weapon willl be 80 (base 230 if you opt for elemental). Matching 3 elemental infusions will grant a +30 Elemental Attack production bonus, totalling 110 base Blast value.
Non-Artian Alternative
| Weapon | Rarity | ATK | DEF |
|---|---|---|---|
 Chthonian Flame II Chthonian Flame II

|
6 | 612 (170) |
0 |
| Slots | Element | Affinity | |
| ②①ー |
|
10% | |
| Skills |
Offensive Guard Lv. 3
|
||
| Phial | Element | ||
| Weapon Decorations |
|---|
If you opt to use a non-artian weapon, the Chthonian Flame II is a recommended option due to its full 3 levels of Offensive Guard giving a 15% more raw attack buff whenever you perform a well-timed guard such as a Perfect Guard.
| Weapon | Rarity | ATK | DEF |
|---|---|---|---|
 Albirath Blade II Albirath Blade II  | 6 | 648 (180) | 0 |
| Slots | Element | Affinity | |
| ②①ー | | 15% | |
| Skills | Critical Element Lv. 1 Master's Touch Lv. 1 | ||
| Phial | Impact | ||
For an alternative to the Chthonian Flame II, you can opt to use Albirath Blade II which has a base 15% affinity and Fire element damage. It's also Element Phial, meaning its phial explosions will deal elemental damage.
It has the skills Critical Element for more elemental DPS potential and Master's Touch for 80% chance on maintaining sharpness during critical hits.
| Weapon | Rarity | ATK | DEF |
|---|---|---|---|
 Axelion Blade I Axelion Blade I  | 6 | 684 (190) | 0 |
| Slots | Element | Affinity | |
| ②①ー | | 10% | |
| Skills | Critical Boost Lv. 3 | ||
| Phial | Element | ||
Another alternative Charge Blade is the Axelion Blade I which has Critical Boost 3 also with 10% affinity similar to the Albirath Blade I. This is a good choice if you're trying to maximize damage out of crits.
Charge Blade Armor Loadout
| Armor | Slots | Skills |
|---|---|---|
|
|
Maximum Might Lv. 1 ーー |
Burst Lv. 2
|
|
|
Evade Extender Lv. 1 ーー |
Agitator Lv. 2
|
|
|
ーーー
|
Divine Blessing Lv. 1
Burst Lv. 2
|
|
|
Divine Blessing Lv. 1 Divine Blessing Lv. 1 ー |
Agitator Lv. 2
|
|
|
Evade Extender Lv. 1 ーー |
Windproof Lv. 1
Weakness Exploit Lv. 1
|
| Charm | ||
| Armor Decorations | ||
| DEF and RES Totals |
Defense: 241
|
|
Decorations are randomly obtained, so feel free to adjust with what is available.
The armor set of this build consists of 2 pieces of G. Ebony to get 4 levels of Burst which compliments the Savage Axe's multi-hit playstyle and 2 pieces of Blango for 4 levels of Agitator for affinity and damage boosts since most monsters in High Rank are often enraged.
The last piece for this set is 1 piece of G. Rathalos for Weakness Exploit. WEX will be benefit the Charge Blade's multi-hit damage a lot on wounds, especially on its Focus Strike's chainsaw effect.
Skill Summary
| Weapon Skills | |||
|---|---|---|---|
| Offensive Guard | 2 | Load Shells | 2 |
| Critical Boost | 2 | ー | |
| Armor Skills | |||
| Agitator | 4 | Burst | 4 |
| Divine Blessing | 3 | Evade Extender | 2 |
| Flayer | 1 | Maximum Might | 1 |
| Weakness Exploit | 1 | Windproof | 1 |
| Group / Set Skills | |||
| War Cry I | Burst Boost I | ||
| Skill Buffs Breakdown | |||
|
Affinity
・AGI4: +10% ・MM1: +10% ・WEX1: +5%~8% ・Weapon: 20% Lowest-Highest: ・20%~48% |
Attack | Element
・OG2: +20 (10%) ・AGI4: +16 Raw ・BST4: +5~15 Raw ・WarCry1: +3 Raw ・Crit.B2: +31% Crit. Dmg. ・Weapon: 195 Raw Lowest-Highest:: ・200~249 Raw |
||
For this build, your core damage skills are Agitator and Burst since they affect overall damage and affinity. Weakness Exploit is an extra addition for better damage on Savage Axe hits against wounds, and Offensive Guard for even more damage on well-timed guards (covering Perfect Guard and Guard Points).
For comfort, the best skill for the Charge Blade at this point is Load Shells 2 which doubles the sword energy charged for phials (5 phials on yellow charge, 10 phials on red charge). This will help you charge into a full-duration shield Element Boost quickly, and will also get you to an enhanced phial state in just 1 combo of 2 charge attacks.
Other comfort skills include Evade Extender for better dodging and repositioning in Axe Mode, and Maximum Might for taking advantage on more affinity when you're constantly doing Element Discharge combos.
Best Secondary Weapons
| Weapon & Type | Explanation |
|---|---|
|
(Hunting Horn) |
• A good secondary weapon to pair with this build is a Hunting Horn. Just like the Charge Blade, it is capable of multi-hit attacks with the use of Echo Bubble, and will pair well with other comfort skills. |
Starter High Rank Build (HR 9 to HR 20)
Mixed Foray Charge Blade Build
Best Weapon
| Weapon | Rarity | ATK | DEF |
|---|---|---|---|
Dear Lutemis I

|
5 | 576 (160) |
0 |
| Slots | Element | Affinity | |
| ②①ー |
|
15% | |
| Skills |
Critical Status Lv. 2
Poison Duration Up Lv. 1
|
||
| Phial | Impact | ||
| Weapon Decorations |
|---|
The best weapon for this build at this stage of High Rank is the Rathian Dear Lutermis I. This Charge Blade already has 15% base affinity, and has crucial DPS-related status skills Critical Status and Poison Duration Up.
This Charge Blade also uses Impact Phials, so expect the damage of your phials to come from raw. This paired with the build's raw skills will also increase its effectiveness.
| Weapon | Rarity | ATK | DEF |
|---|---|---|---|
 Barina Bouclier III Barina Bouclier III  | 5 | 540 (150) | 0 |
| Slots | Element | Affinity | |
| ②①ー | | 15% | |
| Skills | Critical Draw Lv. 1 Critical Status Lv. 1 | ||
| Phial | Impact | ||
An alternative weapon that can be used with this build is the Barina Bouclier III. This Charge Blade deals Paralysis buildup which can also trigger its core skill Foray.
Note that Paralysis doesn't have as much uptime as Poison, so you'll want to give it your all once the monster has been immobilized.
Charge Blade Armor Loadout
| Armor | Slots | Skills |
|---|---|---|
|
|
Divine Blessing Lv. 1 ーー |
Foray Lv. 1
|
|
|
ーーー |
Foray Lv. 2
|
|
|
Stun Resistance Lv. 1 ーー |
Constitution Lv. 1
Agitator Lv. 1
|
|
|
Partbreaker Lv. 1 ーー |
Foray Lv. 1
|
|
|
Partbreaker Lv. 1 ーー |
Burst Lv. 1
|
| Charm | ||
| Decorations List | Armor Decorations: | |
| DEF and RES Totals |
Defense: 185
|
|
Decorations are randomly obtained, so feel free to adjust with what is available.
For this build, we opted to use 2 pieces of Rathian and 1 piece of Lala Barina to get Foray 4. Afterwards, a balanced mix of pieces providing Agitator and Burst were thrown in for some damage boost through other means outside of Foray's trigger on status effects.
Skill Summary
| Weapon Skills | |||
|---|---|---|---|
| Critical Boost | 2 | Critical Status | 2 |
| Offensive Guard | 1 | Poison Duration Up | 1 |
| Armor Skills | |||
| Foray | 4 | Partbreaker | 2 |
| Agitator | 1 | Burst | 1 |
| Constitution | 1 | Divine Blessing | 1 |
| Flayer | 1 | Stun Resistance | 1 |
| Skill Buffs Breakdown | |||
|
Affinity
・Foray4: +15% ・AGI1: +3% ・Weapon: 15% Lowest-Highest: ・15%~33% |
Attack | Element
・OG1: +8 (5%) ・Foray4: +12 Raw ・BST1: +5~8 Raw ・AGI1: +4 Raw ・Crit.B2: +31% Crit. Dmg. ・Weapon: 160 Raw Lowest-Highest:: ・165~192 Raw |
||
This build's main core skill is Foray which gives increased damage and affinity against monsters affected by poison or paralysis. For some more damage, at least 1 level of other damage skills are present.
Since we're expecting some signifcant affinity to be added with Foray, having Critical Boost at level 2 will give a significant boost to critical hit damage.
Lastly for comfort, Divine Blessing, Stun Resistance, and Evade Extender skills from decorations are added in. Constitution comes as a bonus skill from the same armor piece providing Agitator.
Best Secondary Weapons
| Weapon & Type | Explanation |
|---|---|
|
(Hunting Horn) |
• Another weapon that can benefit from this build's skills is a Rathian Hunting Horn. This weapon also has a lot of healing songs, so it's useful to have if you're in a pinch! |
|
(Charge Blade) |
• For an alternative weapon of the same type that can trigger Foray, you can use the Barina Bouclier III that deals Paralysis buildup. |
Monster Hunter Wilds Related Guides
List of Builds for Each Weapon
All Weapon Builds in Monster Hunter Wilds
| All Weapon Builds & Guides | |
|---|---|
|
Low Rank | High Rank |
Low Rank | High Rank |
|
Low Rank | High Rank |
Low Rank | High Rank |
|
Low Rank | High Rank |
Low Rank | High Rank |
|
Low Rank | High Rank |
Low Rank | High Rank |
|
Low Rank | High Rank |
Low Rank | High Rank |
|
Low Rank | High Rank |
Low Rank | High Rank |
|
Low Rank | High Rank |
Low Rank | High Rank |
Non-Meta Builds in Monster Hunter Wilds
| Non-Meta Builds & Guides | |
|---|---|
| Immortal Build | Support Build |
| Best Gathering Sets | How to Make a Good Build |
| Rey Dau Gamma Builds | Uth Duna Gamma Builds |
Comment
I was confused about this as well but there can’t be Lords Soul like this right? Since Gog skill only needs 2 pieces for Level 1 one of these pieces probably should be something else
Author

Best Charge Blade Builds for High Rank
Premium Articles

Rankings
Gaming News


![Monster Hunter Stories 3 Review [First Impressions] | Simply Rejuvenating](https://img.game8.co/4438641/2a31b7702bd70e78ec8efd24661dacda.jpeg/thumb)
Popular Games

Genshin Impact Walkthrough & Guides Wiki
Honkai: Star Rail Walkthrough & Guides Wiki
Umamusume: Pretty Derby Walkthrough & Guides Wiki
Pokemon Pokopia Walkthrough & Guides Wiki
Resident Evil Requiem (RE9) Walkthrough & Guides Wiki
Monster Hunter Wilds Walkthrough & Guides Wiki
Wuthering Waves Walkthrough & Guides Wiki
Arknights: Endfield Walkthrough & Guides Wiki
Pokemon FireRed and LeafGreen (FRLG) Walkthrough & Guides Wiki
Pokemon TCG Pocket (PTCGP) Strategies & Guides Wiki


Recommended Games
Diablo 4: Vessel of Hatred Walkthrough & Guides Wiki
Cyberpunk 2077: Ultimate Edition Walkthrough & Guides Wiki
Fire Emblem Heroes (FEH) Walkthrough & Guides Wiki
Yu-Gi-Oh! Master Duel Walkthrough & Guides Wiki
Super Smash Bros. Ultimate Walkthrough & Guides Wiki
Pokemon Brilliant Diamond and Shining Pearl (BDSP) Walkthrough & Guides Wiki
Elden Ring Shadow of the Erdtree Walkthrough & Guides Wiki
Monster Hunter World Walkthrough & Guides Wiki
The Legend of Zelda: Tears of the Kingdom Walkthrough & Guides Wiki
Persona 3 Reload Walkthrough & Guides Wiki


All rights reserved
©CAPCOM
The copyrights of videos of games used in our content and other intellectual property rights belong to the provider of the game.
The contents we provide on this site were created personally by members of the Game8 editorial department.
We refuse the right to reuse or repost content taken without our permission such as data or images to other sites.
Ohh I get it it’s rolled on the weapon as well