Guardian Arkveld Weakness and Drops
★ Arkveld Gamma Armor | MH Stories 3 Collab
☆ Version 1.041: Sororal α Armor | Shatterseal
★ How to Unlock Proof of a Hero Quest
☆ Omega Planetes | Savage Omega | Builds vs Omega
★ Armor Set Search updated for Ver 1.041
☆ HR50+ Builds | Tier List | Weapon Guides
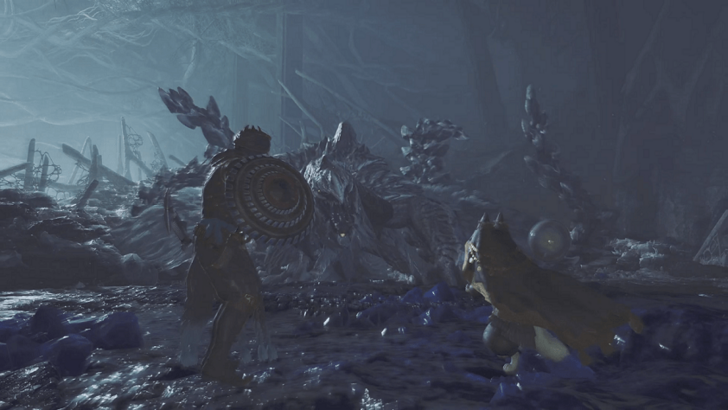
Guardian Arkveld is a Construct in Monster Hunter Wilds. Learn how to beat Guardian Arkveld, its weaknesses, drops, locations, attack patterns and more!
| All Related Guardian Arkveld Articles | ||
|---|---|---|
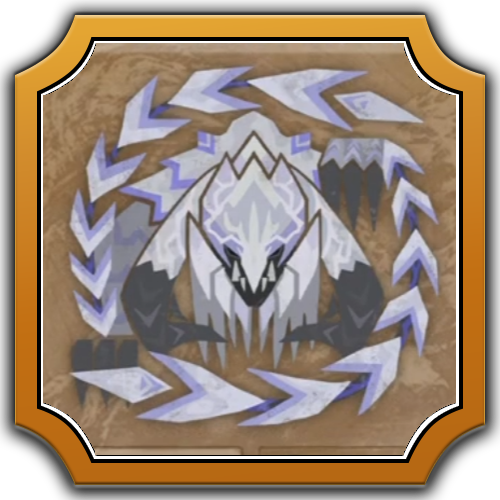 Guardian Arkveld Guardian Arkveld
|
 Weapons Weapons
|
 Armor Sets Armor Sets
|
List of Contents
Guardian Arkveld Weakness
Basic Information
 |
||
| Type | Roar | Wind Pressure |
|---|---|---|
| Construct | Weak | Minor |
| Tremor | Status Effect | Element |
| None | Dragonblight | Dragon |
Damage Type Weakness
Hitzone Values and Weakness Breakdown
※ Click the tabs to switch between Damage Type and Elemental Damage Hitzone effectiveness.
| Part | |||
|---|---|---|---|
| Head | |||
| Torso | |||
| Left Wing | |||
| Right Wing | |||
| Left Chainblade | |||
| Right Chainblade | |||
| Left Leg | |||
| Right Leg | |||
| Tail | |||
| Overall |
| Part | |||||
|---|---|---|---|---|---|
| Head | |||||
| Torso | |||||
| Left Wing | |||||
| Right Wing | |||||
| Left Chainblade | |||||
| Right Chainblade | |||||
| Left Leg | |||||
| Right Leg | |||||
| Tail | |||||
| Overall |
The numbers shown above showcase the effectiveness of damage types against the monster's hitzones. Parts with higher numbers mean the damage type is more effective, with 1 being the lowest and 20 as the highest.
Hitzone DPS Summary
| Dragon is the best element to use against Guardian Arkveld. Try to aim for its Chainblades to deal the most amount of Dragon damage. |
Kinsect Extract From Parts
| Head | Torso | ||
|---|---|---|---|
| Left Wing | Right Wing | ||
| Left Chainblade | Right Chainblade | ||
| Left Leg | Right Leg | ||
| Tail | - | - |
Insect Glaive Weapon Guide and Best Combos
Status Ailment and Item Weakness
| Status Ailment | Items | ||
|---|---|---|---|
| |
|
||
| |
|
||
| |
|
||
| |
|
||
| |
|
||
| |
|
||
Breakable Parts
| Breakable |
・Head ・Chainblades ・Tail (Severable) |
|---|
Guardian Arkveld Item Loadout
Recommend Items to Bring
|
|
|
|
|
|
|
|
|
|
|
|
|
|
|
|
Since Guardian Arkveld is one of the harder initial monsters in High Rank, it's good to stock up on healing items and support items that increase your defense and attack power. Items like Mega Demondrug and Mega Armorskin, along with Mega Potions and Honey, will greatly help for this hunt. If your Blight Resistance or Dragon Resistance is low, don't forget to bring Nulberries to cure Dragonblight if ever.
To increase survivability, you can opt to equip the Mending Mantle after finishing the quest required to unlock it.
Use the Flash Pods to topple Guardian Arkveld whenever it's doing the Flying Sweep attack.
List of All Items and Materials
Guardian Arkveld Locations and Quests
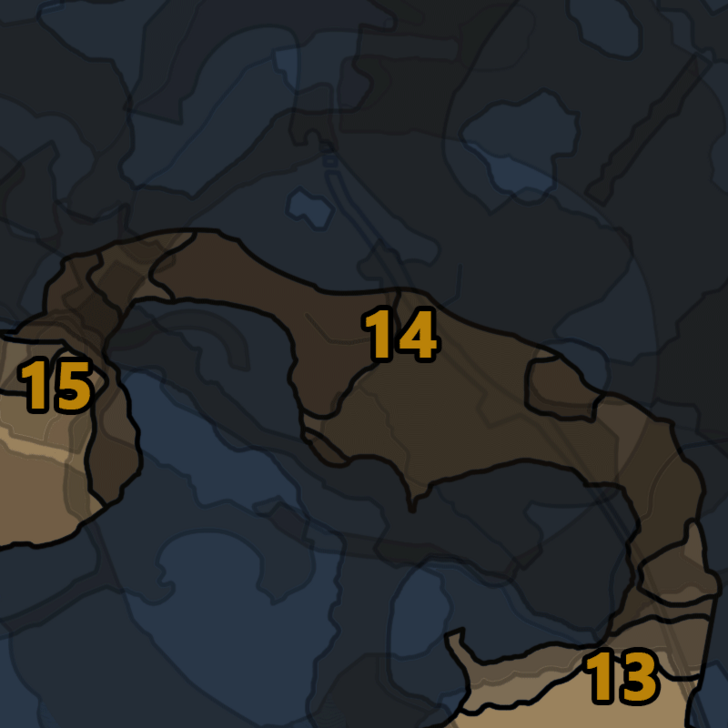
Known Habitats
| Region | Starting Area | Visited Areas | Resting Area |
|---|---|---|---|
 Ruins of Wyveria Ruins of Wyveria |

|

|

|
Quest Appearances
| Quest Type | Lvl. | Quest Name |
|---|---|---|
| Assignment Quest | 3★ | Repel the Guardian Arkveld |
| Assignment Quest | 3★ | The Pale Dream of a Lone Shadow |
No Guardian Arkveld Investigations
As of the release of Title Update 1, there is currently no way to rematch Guardian Arkveld after completing the two Assignments where you encounter it.
The High Rank Arkveld is a normal Arkveld, which appears in Optional Quests and Investigations.
How to Beat Guardian Arkveld
| Guardian Arkveld Monster Fight Tips |
|---|
|
|
Focus on the Guardian Arkveld's Chains When They are Glowing
The Chains are the Guardian Arkveld's weakness. Attack the Chains when they are glowing to disable the Guardian Arkveld as it topples once each Chain explode.
Make sure to exploit the moment when Arkveld's chains are not glowing since this period allows you to deal more damage while taking less from Arkveld's attacks.
Go for the Guardian Arveld's Chainblades, Head, and Tail
Along with the Guardian Arveld's Chainblades, focus on its head and tail to break or sever them to yield more rewards.
Use Slinger Pods to Escape Grab Attack
You can escape the Guardian Arkveld's grab attack by using any Slinger Pods. Prepare these items in advance in case you get grabbed by the Guardian Arkveld.
Use Slinger Pods to Destroy Crystals
The Guardian Arkveld's Chain attacks will form guardian crystals on the ground. Use Slinger Pods to destroy these crystals and make them explode to deal damage when the Guardian Arkveld is near it.
Use Items and Environment to Gain Advantage
Interact with the environment and use traps to disrupt the Guardian Arkveld and gain advantage during the hunt.
Guardian Arkveld Attack Patterns
Moveset and Openings
| Attack | Description |
|---|---|
| Charged Dragon Blast | The Guardian Arkveld will roar as its Chains spark red and will then glow white to red before slamming down both Chains and releasing a wave of dragon explosions in front of it. Avoid this move by sticking to the Guardian Arkveld's head or running behind it. Take advantage of this attack by using Focus Strike on Arkveld's arms after it performs this move. |
| Dragon Blast | The Guardian Arkveld charges its Chains with energy as it sparks red and slams it forward, releasing a dragon explosion. Avoid this move by distancing backwards or running behind the Guardian Arkveld. |
| Wing Scythe | The Guardian Arkveld's Chains glows white before it leaps forward perform a frontal strike. Avoid this attack by dodging towards the attack or dodging backward. |
| Flying Sweep | The Guardian Arkveld's Chains glows white and leap backwards before it soars and sweeps the ground using one of its Chains. You can avoid damage from this attack by dodging to the opposite side of the chain. You can also use Flash Pods to topple Arkveld during this move. |
| Chain Slam | The Guardian Arkveld slams each arm forward, pounding the ground with its Chains. The Guardian Arkveld can do this same move with a charged version. Avoid this attack by dodging to the opposite side of the arm or countering it with a Perfect Block to start a Power Clash. |
| Double Chain Slam | The Guardian Arkveld slams both arms forward at the same time, pounding the ground will all of its Chains. You can avoid this attack by running to the sides, or by using the Superman Dive (Dive-Evade). |
| Chain Strike | The Guardian Arkveld does a quick Chain strike using one of its arms. Dodge on the opposite arm's direction or block this attack. |
| Chain Charge | The Guardian Arkveld charges forward, using its Chains as a battering ram. Dodge to the side to avoid damage from this attack. |
| Tail Thrust | The Guardian Arkveld turns around and briefly retracts its tail before it lunges it towards your direction. Avoid this attack by dodging sideways or using a Perfect Guard. |
| Grab Attack | The Guardian Arkveld twists its body while attacking with one of its Chains before it grabs the Hunter. It is recommended to use any slinger ammo to break free from the grab attack. |
Guardian Arkveld Variants
Arkveld
| Monster | Basic Information |
|---|---|
 Arkveld Arkveld |
Habitats: First Encounter: After What Lies Ahead Mission |
Arkvelds can be first encountered after finishing the HR40 Assignment What Lies Ahead in Chapter 6. The non-guardian variant of Arkveld can spawn randomly in any locale.
Guardian Arkveld Drops
Low Rank Materials
| |
| |
| |
| |
Guardian Arkveld drops generic Guardian Materials, all of which can be obtained from hunting Low Rank Guardian monsters.
To obtain the materials required for High Rank Guardian Arkveld Weapons and Armor, hunting a regular or tempered Arkveld is required.
Monster Hunter Wilds Related Guides
All Monsters Guides
Arch-Tempered Monsters
| Arch-Tempered Monster Guides | |
|---|---|
 AT Rey Dau AT Rey Dau |
 AT Uth Duna AT Uth Duna |
 AT Nu Udra AT Nu Udra |
 AT Jin Dahaad AT Jin Dahaad |
 AT Arkveld AT Arkveld |
|
All Large Monsters
Comment
Author
Guardian Arkveld Weakness and Drops
Premium Articles
Rankings
Gaming News
Popular Games

Genshin Impact Walkthrough & Guides Wiki

Honkai: Star Rail Walkthrough & Guides Wiki

Umamusume: Pretty Derby Walkthrough & Guides Wiki

Pokemon Pokopia Walkthrough & Guides Wiki

Resident Evil Requiem (RE9) Walkthrough & Guides Wiki

Monster Hunter Wilds Walkthrough & Guides Wiki

Wuthering Waves Walkthrough & Guides Wiki

Arknights: Endfield Walkthrough & Guides Wiki

Pokemon FireRed and LeafGreen (FRLG) Walkthrough & Guides Wiki

Pokemon TCG Pocket (PTCGP) Strategies & Guides Wiki
Recommended Games

Diablo 4: Vessel of Hatred Walkthrough & Guides Wiki

Cyberpunk 2077: Ultimate Edition Walkthrough & Guides Wiki

Fire Emblem Heroes (FEH) Walkthrough & Guides Wiki

Yu-Gi-Oh! Master Duel Walkthrough & Guides Wiki

Super Smash Bros. Ultimate Walkthrough & Guides Wiki

Pokemon Brilliant Diamond and Shining Pearl (BDSP) Walkthrough & Guides Wiki

Elden Ring Shadow of the Erdtree Walkthrough & Guides Wiki

Monster Hunter World Walkthrough & Guides Wiki

The Legend of Zelda: Tears of the Kingdom Walkthrough & Guides Wiki

Persona 3 Reload Walkthrough & Guides Wiki
All rights reserved
©CAPCOM
The copyrights of videos of games used in our content and other intellectual property rights belong to the provider of the game.
The contents we provide on this site were created personally by members of the Game8 editorial department.
We refuse the right to reuse or repost content taken without our permission such as data or images to other sites.

 Rey Dau
 Nu Udra
 Balahara
 Doshaguma
 Chatacabra
 Uth Duna
 Lala Barina
 Quematrice
 Rompopolo
 Ajarakan
 Yian Kut-Ku
 Congalala
 Rathalos
 Gypceros
 Rathian
 Gravios
 Nerscylla
 Gore Magala
 Hirabami
 Mizutsune
 Jin Dahaad
 Blangonga
 Guardian Doshaguma
 Guardian Rathalos
 Guardian Ebony Odogaron
 Xu Wu
Xu Wu Zoh Shia
 Guardian Fulgur Anjanath
 Lagiacrus
 Seregios
 Omega Planetes


![Monster Hunter Stories 3 Review [First Impressions] | Simply Rejuvenating](https://img.game8.co/4438641/2a31b7702bd70e78ec8efd24661dacda.jpeg/thumb)


