Mutual Hostility Skill Effects
★ Arkveld Gamma Armor | MH Stories 3 Collab
☆ Version 1.041: Sororal α Armor | Shatterseal
★ How to Unlock Proof of a Hero Quest
☆ Omega Planetes | Savage Omega | Builds vs Omega
★ Armor Set Search updated for Ver 1.041
☆ HR50+ Builds | Tier List | Weapon Guides
Mutual Hostility is a Set Bonus Skill under the Gogmapocalypse set in Monster Hunter Wilds. Learn the effects of Mutual Hostility and armor sets with Mutual Hostility.
List of Contents
Mutual Hostility Skill Effect
Gogmapocalypse Set Bonus Skill
| Skill | Pieces | Effect |
|---|---|---|
| Mutual Hostility I | 2 | Increases elemental attack when large monsters become enraged. |
| Mutual Hostility II | 4 | Level I effect is increased, and you gain a temporary damage barrier. (Barrier reactivates after cooldown.) |
Gogmapocalypse Set Bonus Effects
Boost Element When Monsters are Enraged
| Skill | Elemental Modifier |
|---|---|
| Mutual Hostility I | 1.2x + 20 |
| Mutual Hostility II | 1.3x + 40 |
Based on our testing, Mutual Hostility boosts all weapons the same way, by increasing the element by a fixed percentage and adding a fixed value after.
Note that the elemental cap was also increased in TU4 to be 2.3x the base elemental value or +400 (whichever is higher).
Mutual Hostility I
| Original Value | Mutual Hostility I | |
|---|---|---|
| Great Sword | 300 | 380 |
| 600 | 740 | |
| Dual Blades | 300 | 380 |
| 140 | 188 | |
| Bow | 300 | 380 |
| 200 | 260 |
Mutual Hostility II
| Original Value | Mutual Hostility II | |
|---|---|---|
| Great Sword | 700 | 950 |
| Dual Blades | 300 | 430 |
75 HP Barrier at Mutual Hostility II
Can Nullify Damage Exceeding its HP
At Mutual Hostility II, a temporary damage barrier is granted to you when a monster is enraged. This means you can nullify damage even from one-hit kill attacks by Gogmazios or Omega Planetes.
The 75 HP can be calculated from testing with a Corrupted Mantle (3 damage per second). The barrier has been observed to disappear after 25 seconds with the mantle (3 x 25 = 75 HP).
Like Agitator, this skill is incredibly easy to trigger since it triggers on enraged states, so it's a great survivability skill to have, much like Guts (Tenacity).
Reactivation Cooldown is Around 2 Minutes
The reactivation time for the barrier is approximately 2 minutes and begins as soon as your barrier dissipates from taking enough damage. This reactivation timer may vary slightly depending on whether the monster exits and re-enters the enraged state.
Expires in Around 2 Minutes and 20 Seconds When No Damage is Taken
Note that the barrier will also dissipate on its own if you have not taken any damage for approximately 2 Minutes and 20 seconds. The cooldown duration remains the same, so the barrier will reactivate again after.
Equipment with Mutual Hostility Skill
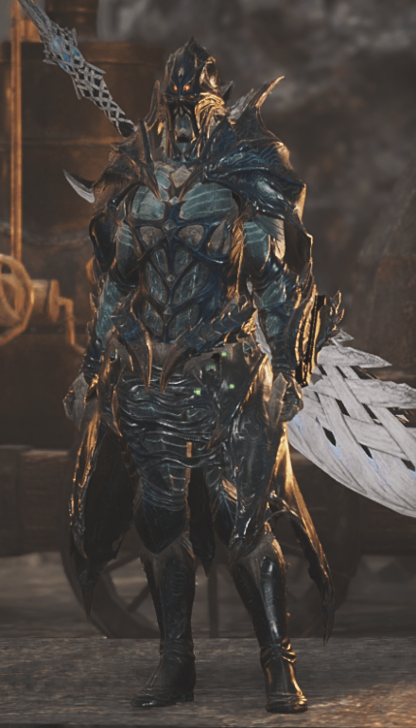
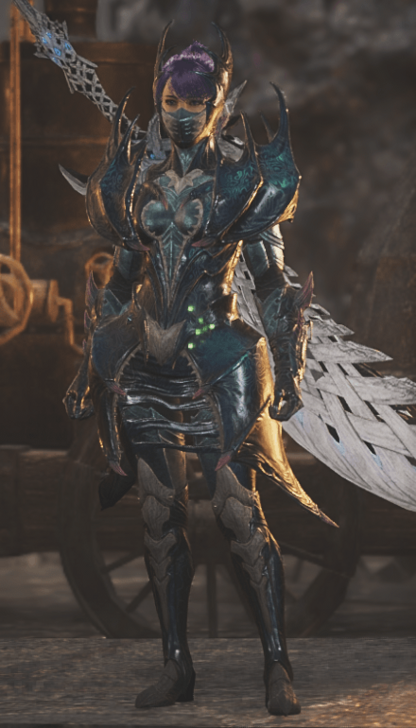
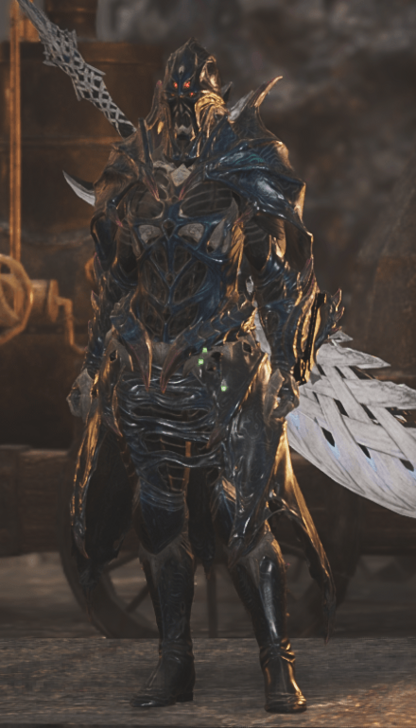
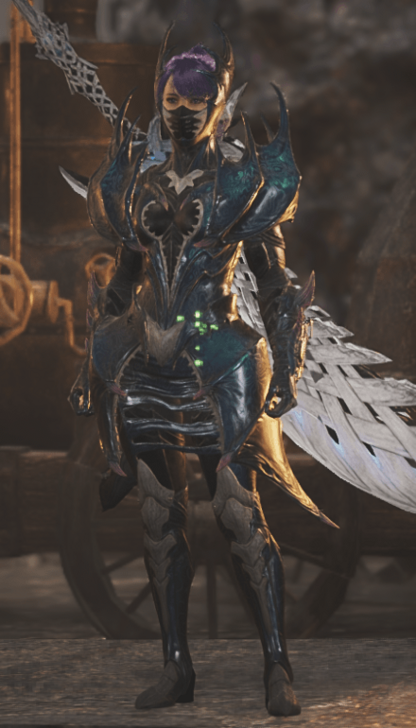
Armor Sets
| Set | Male Armor | Female Armor |
|---|---|---|
| Gogmazios α Set |
 |
 |
| Gogmazios β Set |
 |
 |
Monster Hunter Wilds Related Guides

| List of Skill Types | |
|---|---|
| Weapon Skills | Armor Skills |
| Group Skills | Set Bonus Skills |
| Food Skills | |
All Set Bonus Skills
Comment
Author
Mutual Hostility Skill Effects
improvement survey
03/2026
improving Game8's site?

Your answers will help us to improve our website.
Note: Please be sure not to enter any kind of personal information into your response.

We hope you continue to make use of Game8.
Premium Articles
Rankings
Gaming News
Popular Games

Genshin Impact Walkthrough & Guides Wiki

Honkai: Star Rail Walkthrough & Guides Wiki

Umamusume: Pretty Derby Walkthrough & Guides Wiki

Pokemon Pokopia Walkthrough & Guides Wiki

Resident Evil Requiem (RE9) Walkthrough & Guides Wiki

Monster Hunter Wilds Walkthrough & Guides Wiki

Wuthering Waves Walkthrough & Guides Wiki

Arknights: Endfield Walkthrough & Guides Wiki

Pokemon FireRed and LeafGreen (FRLG) Walkthrough & Guides Wiki

Pokemon TCG Pocket (PTCGP) Strategies & Guides Wiki
Recommended Games

Diablo 4: Vessel of Hatred Walkthrough & Guides Wiki

Fire Emblem Heroes (FEH) Walkthrough & Guides Wiki

Yu-Gi-Oh! Master Duel Walkthrough & Guides Wiki

Super Smash Bros. Ultimate Walkthrough & Guides Wiki

Pokemon Brilliant Diamond and Shining Pearl (BDSP) Walkthrough & Guides Wiki

Elden Ring Shadow of the Erdtree Walkthrough & Guides Wiki

Monster Hunter World Walkthrough & Guides Wiki

The Legend of Zelda: Tears of the Kingdom Walkthrough & Guides Wiki

Persona 3 Reload Walkthrough & Guides Wiki

Cyberpunk 2077: Ultimate Edition Walkthrough & Guides Wiki
All rights reserved
©CAPCOM
The copyrights of videos of games used in our content and other intellectual property rights belong to the provider of the game.
The contents we provide on this site were created personally by members of the Game8 editorial department.
We refuse the right to reuse or repost content taken without our permission such as data or images to other sites.


