Builds and Best Armor for Each Weapon (March 2026)
★ Arkveld Gamma Armor | MH Stories 3 Collab
☆ Version 1.041: Sororal α Armor | Shatterseal
★ How to Unlock Proof of a Hero Quest
☆ Omega Planetes | Savage Omega | Builds vs Omega
★ Armor Set Search updated for Ver 1.041
☆ HR50+ Builds | Tier List | Weapon Guides
Making the best build for a weapon is essential for maximizing your performance in Monster Hunter Wilds (MHWilds). Learn the best armor and loadout for each weapon type, with builds catered for Low Rank and High Rank hunters!
List of Contents
All Builds in Monsters Hunter Wilds
| Jump to a Weapon! | |||
|---|---|---|---|
|
|
|
|
|
|
|
|
|
|
|
|
|
|
|
|
|
|
||
Great Sword Builds
| Great Sword Build Guides | |
|---|---|
| Low Rank Builds | High Rank Builds |
| Great Sword Weapon Guide | |
The Great Sword is a huge weapon that boasts high one-strike damage to an enemy. It is also a weapon capable of blocking, so you can execute some offset attacks and power clashes here and there!
The Great Sword will benefit mostly from a general increase in its raw Attack stat through skills such as Agitator, with the charge-boosting skill Focus. Make sure to have those in your skills when building this weapon!
Great Sword Builds and Best Armor
Long Sword Builds
| Long Sword Build Guides | |
|---|---|
| Low Rank Builds | High Rank Builds |
| Long Sword Weapon Guide | |
The Long Sword is the ultimate counterattack weapon that has access to various countermoves that nullify even the strongest of monster moves – if you time them correctly. It is the definition of a high-risk & high reward gameplay with the returns more than compensates for the risk.
The Long Sword benefits greatly from skills that increases raw attack such as Agitator, but at the same time wants a bunch of critical skills (like Weakness Exploit) here and there for maximizing the damage ceiling. Since it uses a lot of countermoves that take advantage of super/hyper armor, it also benefits a lot from Counterstrike.
Long Sword Builds and Best Armor
Sword and Shield Builds

| Sword and Shield Build Guides | |
|---|---|
| Low Rank Builds | High Rank Builds |
| Sword and Shield Weapon Guide | |
The Sword and Shield continues to be a great weapon type for beginners, boasting a good balance between defense, offense, and mobility. The weapon also has a unique property of being able to use items while the weapon is unsheathed which can come clutch!
This weapon can benefit greatly when paired with skills that boost element, status, and KO damage; skills such as Element Attack boosts (ex. Fire Attack), Critical Status, and Slugger. Its shield can also benefit from some powerful skills such as Offensive Guard.
Sword and Shield Builds and Best Armor
Dual Blades Builds

| Dual Blades Build Guides | |
|---|---|
| Low Rank Builds | High Rank Builds |
| Dual Blades Weapon Guide | |
Known as the elemental king, the Dual Blades is a fast, multi-hit weapon that boasts great mobility on top of damage! It is a DPS-oriented weapon and will usually require stamina management so keep that in mind when aiming for skills!
Noting the Dual Blades' reputation as the elemental king, it should work well with skills that improve elemental damage like Elemental Damage Up skills & Critical Element. However, it would require much stamina management skills like Stamina Surge and Constitution on the side.
Dual Blades Builds and Best Armor
Hammer Builds
| Hammer Build Guides | |
|---|---|
| Low Rank Builds | High Rank Builds |
| Hammer Weapon Guide | |
The Hammer is the true definition of knockout, with its main purpose revolving around knocking out monsters by applying enough blunt damage on the monsters' heads. It excels at blunt violence and knockouts, but it can be demanding on stamina.
With this in mind, the Hammer benefits greatly from skills that increase its general raw Attack stat like Agitator and those that increase its KO capabilities like Slugger. Aim for skills that will also make it easier to handle charges, such as Constitution.
Hunting Horn Builds
| Hunting Horn Build Guides | |
|---|---|
| Low Rank Builds | High Rank Builds |
| Hunting Horn Weapon Guide | |
Considered as the best support-type weapos in the game, the Hunting Horn can dish out tons of damage while playing songs that provide buffs to your entire team. Make sure to weave the notes in your combo to maximize the damage dealt!
Like the Hammer, the Horn also benefits from general raw damage boosts like Attack Boost and utility buildup skills like Slugger. Horn Maestro is also a mandatory skill for the Hunting which increases the effect duration of your buffs. Just like the Hammer, it primarily deals blunt, KO damage.
Hunting Horn Builds and Best Armor
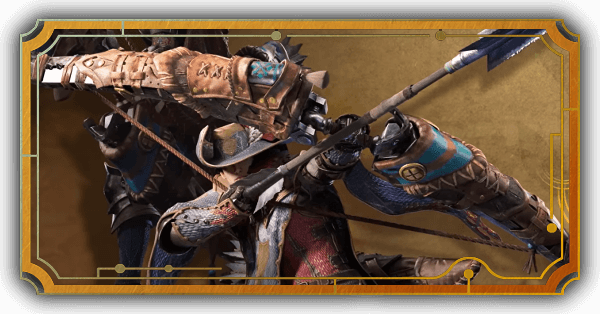
Lance Builds
| Lance Build Guides | |
|---|---|
| Low Rank Builds | High Rank Builds |
| Lance Weapon Guide | |
The Lance is the premier defensive weapon in the game, capable of defending itself with its large shield. It can also counter-attack easily with its perfect guard and can stay in front of the monster most of the time.
Considering its reliance on its huge shield, the Lance benefits from skills that improve its guarding and counterattacking prowess like Guard and Offensive Guard. Following these defensive skills, you can add more damage-boosting ones like Agitator or Attack Boost.
Gunlance Builds
| Gunlance Build Guides | |
|---|---|
| Low Rank Builds | High Rank Builds |
| Gunlance Weapon Guide | |
The Gunlance (GL) is the Lance's more explosive sibling thanks to its access to shells that explode when used against monsters. Unlike its sibling, it does not rely on consistent pokes but rather on swipes and the shells it unloads periodically.
With this in mind, the Gunlance benefits from skills that improve explosive power like Artillery! You also might want to slot in skills that manage its sharpness like Razor Sharp or Handicraft, mostly because shelling tends to go through your sharpness quite easily.
Gunlance Builds and Best Armor
Switch Axe Builds

| Switch Axe Build Guides | |
|---|---|
| Low Rank Builds | High Rank Builds |
| Switch Axe Weapon Guide | |
The Switch Axe (SA or SWAX) is composed of two things: the Sword and the Axe. Switching between the two is key to success with the Switch Axe with the two forms working with each other perfectly. The management between the two forms can be daunting but is extremely satisfying when mastered.
Considering the Switch Axe is an extremely mobile weapon, it benefits greatly from builds that contain Evade Extender and Rapid Morph. This ensures that your Hunter is nimble enough to play around the monster and deal damage from anywhere. In addition, you may also want to put in Power Prolonger to extend the duration of your Amped State on top of the general damage boosting skills like Agitator!
Switch Axe Builds and Best Armor
Charge Blade Builds
| Charge Blade Build Guides | |
|---|---|
| Low Rank Builds | High Rank Builds |
| Charge Blade Weapon Guide | |
The Charge Blade (CB) is one of the more mechanically weapons in Monster Hunter with multiple modes to manage. It becomes more straightforward to use as you play with it, giving you fast, and consistent access to one of the most damaging weapon types in the game.
The Charge Blade can benefit from general attack increasing skills like Agitator and more, but its phial explosions can also use Artillery. Moreover, it can also be an elemental weapon if it's using an Element Phial so elemental damage skills could also work.
Charge Blade Builds and Best Armor
Insect Glaive Builds

| Insect Glaive Build Guides | |
|---|---|
| Low Rank Builds | High Rank Builds |
| Insect Glaive Weapon Guide | |
The Insect Glaive (IG) is the aerial attack king, with access to multiple aerial attacks that can reach any towering monster in the game. It is also a great elemental attacker especially when working with its Kinsect.
The weapon benefits greatly from skills that manage stamina like Constitution and damage-improving skills like Attack Boost. You should also consider building this weapon with an element or status as it can deal elemental and status damage quite nicely thanks to its decent attack frequency.
Insect Glaive Builds and Best Armor
Bow Builds
| Bow Build Guides | |
|---|---|
| Low Rank Builds | High Rank Builds |
| Bow Weapon Guide | |
Considered one of the most offensive-oriented weapons in the game, the Bow can deal increased damage without sacrificing mobility. It also operates at a distance, so you can be safe while dealing tons of damage. In addition, it can also be a great elemental weapon mostly because the Bow can shoot a lot of arrows in a short span of time - making elemental application a breeze.
The Bow is also excellent at applying elemental damage, similar to the Dual Blades. It can attack frequently with its combos and can hit weak spots easily. Make sure to slot in stamina management skills like Constitution and Stamina Surge though as the weapon tends to go through your stamina bar quickly.
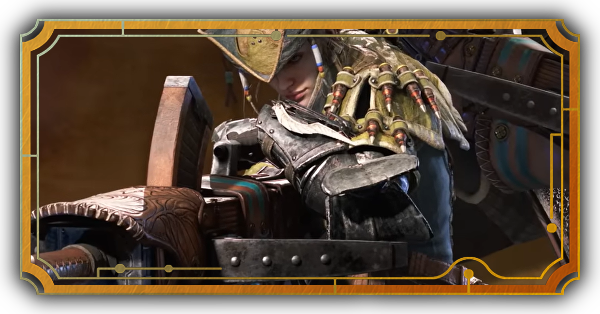
Light Bowgun Builds
| Light Bowgun Build Guides | |
|---|---|
| Low Rank Builds | High Rank Builds |
| Light Bowgun Weapon Guide | |
The Light Bowgun (LBG) is considered the more mobile weapon of the two bowgun types, with it focusing more on supporting while dishing damage on the side. It can also be the best secondary weapon, especially if the LBG has access to more supportive ammo types like the Demon and Armor Ammo.
The skills for the LBG depend on the build and ammo it supports, but it can be mostly built as a hyper-attacker with elemental bullets. Depending on the ammo type it shoots, you may also need to put skills that improve Ammo Type Up skills. In addition, skills that improve stamina and evasion like Constitution and Evade Extender help to keep you safe and comfy.
Light Bowgun Builds and Best Armor
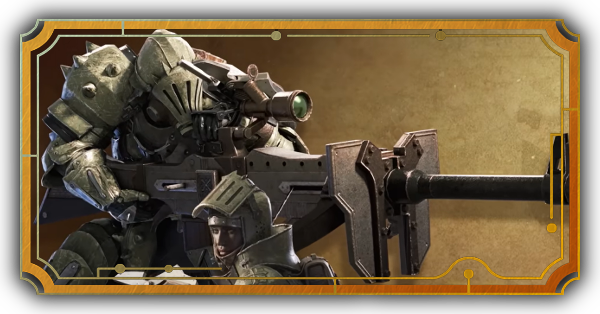
Heavy Bowgun Builds
| Heavy Bowgun Build Guides | |
|---|---|
| Low Rank Builds | High Rank Builds |
| Heavy Bowgun Weapon Guide | |
The Heavy Bowgun (HBG), as the name suggests, is the heavier cousin of the Light Bowgun. What it lacks in mobility though is compensated with immense firepower which enables it to deal huge damage from a distance! It may not be beginner-friendly though, but is insanely efficient when mastered.
Like the Light Bowgun, the skills for the HBG will depend on the ammo it supports. You will have to slot in skills that improve on the damage of a specific Ammo type via Ammo Type Up skills while also slotting in attack-oriented skills like Attack Boost and Critical Boost!
Heavy Bowgun Builds and Best Armor
Best Builds for Beating Omega Planetes
Optimize Build According to Roles
| Role | Role Summary |
|---|---|
| Tank |
・Prioritizes holding enmity ・Ideally uses Lance or Gunlance ・Guard and Guard Up recommended |
| Support |
・Heals and buffs allies ・Ideally uses SNS or Hunting Horn ・Wide-Range recommended |
| DPS |
・Provides consistent damage ・Any Lagiacrus weapon is ideal ・Thunder Attack recommended |
The best builds for beating Omega Planetes depend on the role you choose to fulfill.
Tanks are advised to use the Lance or Gunlance to comfortably maintain enmity. Supports should consider Sword and Shield for quick item use, or Hunting Horn to provide team-wide buffs. DPS players can opt for any Lagiacrus weapon, as Omega Planetes is weak to Thunder.
Best Builds for Omega Planetes
All Non-Meta Builds in Monster Hunter Wilds
| Jump to a Build! | ||
|---|---|---|
| Immortal | Support | Gathering |
The Immortal Build
|
|
The Immortal Build, as the name implies, prioritizes survivability above all else. Running this build makes you hard to kill thanks to your high defense, numerous resistances, and strengthened healing items.
Support Build
|
|
The Support Build revolves around strengthening and healing your allies, allowing them to take down monsters faster without fear of fainting. Running this build makes you a backline player while your teammates deal most of the damage.
Gathering Build
| Gathering and Exploration |
|---|
| Honey Farming |
Gathering Builds strengthen your gathering prowess by increasing the amount of items you get while also putting you out of harm's way while gathering.
Builds Meta in Monster Hunter WIlds
Current Meta Armor Sets
| Armor | Pros and Cons |
|---|---|
|
NEW Gogmazios ★★★★★ |
(+) Great for mixed sets to activate Set Bonus Skills such as Second Wind and Burst Boost. (+) Gogmapocalypse works well with elemental builds. (-) β pieces have underwhelming Set Bonus Skills and have identical slot configurations as α pieces. |
|
Gore Magala ★★★★★ |
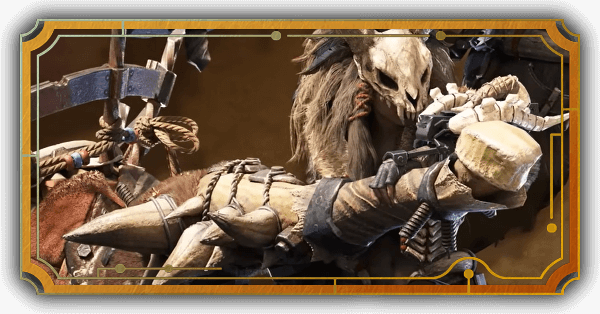
(+) Provides an easy source of Affinity via Black Eclipse and Antivirus. (+) Both α and β set contains Level 3 Decoration Slots (-) Basically forces you to run Antivirus to take advantage of the set bonus, even when only using 2 pieces |
|
Zoh Shia ★★★★★ |
(+) Provides great passive healing thanks to Super Recovery. (+) Great for elemental builds thanks to Coalescence and Elemental Absorption (-) Only the β set contains Level 3 Decoration Slots. |
|
Rey Dau γ ★★★★★ |
(+) Guts (Tenacity) provides an attack buff as long as it's active. (+) Has Latent Power and Maximum Might, which are good sources of Affinity (-) Only craftable if you have done the event quest for Arch-Tempered Rey Dau, which is not always available. |
|
Nu Udra γ ★★★★ |
(+) Guts (Tenacity) is particularly useful for challenging hunts, such as Arch-Tempered Monsters and 9 Star Quests. (-) DPS boosting skills are conditional. |
|
Lagiacrus ★★★★ |
(+)Azure Bolt provides affinity when activated (+) Good source of Weakness Exploit and Maximum Might (-) β set contains only two Level 3 Decoration slots (-) Running four pieces for Azure Bolt II limits your skill choices |
|
G. Arkveld ★★★★ |
(+) Hand armor is a great filler piece thanks to Weakness Exploit 2 (+) Running at least 2 pieces for Decimator is great for HP recovery (-) The set relies on Wounds and Flayer, which is not that reliable |
|
G. Ebony ★★★ |
(+) Piece can be paired with Gogmazios Coil α to activate Burst Boost. (+) Pieces can be Transcended for more decoration slots and defense. |
|
G. Fulgur ★★★ |
(+) Piece be paired with Gogmazios Vambraces α to activate Second Wind. (+) Second Wind synergizes well with Maximum Might. (+) Pieces can be Transcended for more decoration slots and defense. |
|
Seregios ★★★ |
(+) Great for evasion builds thanks to Razor's Edge and Adrenaline Rush (+) Numerous Level 3 Decoration Slots for build flexibility (-) Not all weapons can effectively use Adrenaline Rush, limiting this armor's use |
|
Bale and Omega ★★★ |
(+) Omega Resonance provides a flexible boost in damage (+) Soul of the Dark Knight provides decent utility for Great Sword. (-) Skills are niche and require specific conditions to activate. (-) Omega Resonance may force you into a bad position. |
Gogmazios α chest, arms, and waist pieces are strong for mixed sets, enabling Set Bonus Skills such as Second Wind and Burst Boost. Gogmapocalypse is especially effective for elemental builds after Title Update 4's buffs to elemental scaling.
The Gore Magala set remains one of the top picks due to the free Affinity provided by Black Eclipse, making it useful for all weapons, especially when combined with Antivirus. The Zoh Shia set is also recommended for its offensive skills and comfort thanks to Super Recovery.
Guts (Tenacity) is becoming a valuable skill for difficult Arch-Tempered Monsters and 9 Star Quests, and can be activated by equipping at least three Rey Dau γ or Nu Udra γ pieces. Other notable skills from Rey Dau γ pieces are Latent Power and Maximum Might, while Nu Udra γ has Burst, Resentment, and Counterstrike.
The Omega set is ideal for multiplayer hunts, as it relies on other hunters to activate its buffs. It also requires careful attention to your own positioning, since the buffs you receive depend on the location of your allies.
Running Full Sets is Not Always Good
It's important to note that when picking your armor, running a full set from one monster is not always ideal, even if it gives you a Level 2 set bonus. This is because full armor sets usually lock you to a few core skills, with the ability to add skills dictated by that armor set's Decoration slots and your available Talismans.
Not only that, but using a full armor set also means you have one or two elemental resistances that are very low. The Rey Dau γ set, for example, gives you a -10 Resistance to Water and a -15 Resistance to Ice, which can make normally survivable elemental attacks fatal.
Current Meta Weapons
| Weapon Tree | Pros and Cons |
|---|---|
|
NEW Gogma Artian Weapons ★★★★★ |
(+) Direct upgrades for regular Artian weapons (+) Can have one Set Bonus and one Group Skill to enable various builds (-) Rerolling for reinforcements and skills rapidly consumes materials and zenny. |
|
Zoh Shia ★★★★ |
(+) Melee weapons have high Raw, white Sharpness, and okay Affinity. (+) Whiteflame Torrent is nice for additional damage output. (+) Good alternative for Artian weapons against Gogmazios (-) Decoration slots may feel lacking due to decreasing levels (3-2-1). |
|
Artian ★★★★ |
(+) Very flexible in terms of stats and element.
(+) Can reach high stat values with the correct reinforcement. (+) Has three Level 3 Decoration slots for skill flexibility. (-) Reinforcement stats are random. (-) Rerolling can get tiring and can burn through materials quickly. |
|
G.Arkveld/Arkveld ★★★ |
(+) Guardian variant has high Raw and decent sharpness, perfect for builds that don't crit.
(+) Normal variant has slightly lower raw, but has white Sharpness and neutral Affinity. (+) Guardian Gunlance and Great Sword are some of the best in the game. (-) Negative Affinity on Guardian variations. (-) Decoration slots on normal variant may feel lacking thanks to decreasing level (3-2-1). |
|
Lagiacrus ★★★ |
(+) Great Thunder weapons thanks to high Raw and decent white Sharpness.
(+) Convert Thunder Resistance perfect for converting excess resistance to damage. (+) Decent Ammo loadout for Bowguns. (-) Convert Thunder Resistance useless if current armor has no Thunder Resistance. |
|
Seregios ★★★ |
(+) Bladescale Honing and Bladescale Loading perfect for evasion-heavy weapons.
(+) Evading Reload on Bowguns makes Spread Ammo viable. (+) Decent white sharpness on melee weapons and High Affinity for all of them. (-) Practice needed to fully maximize Bladescale skills. |
|
True Omega's Sword & True Omega's Rod ★★★ |
(+) Synthetic Shield and Synergy is great for party play. (-) Requires using specific moves to activate: Perfect Guard and Rising Spiral Slash respectively. |
Gogma Artian Weapons are direct upgrades to regular Artian weapons and are currently regarded as the definitive endgame choice. Their superior stats and skills allow for greater build diversity. Regular Artian weapons are still usable, but they should be upgraded to unlock their full potential.
As for normal weapons, G.Arkveld and Arkveld weapons, provide high raw damage, although the Guardian variant suffers from negative Affinity. The new Lagiacrus weapons, on the other hand, are great Thunder weapons, and can help with the upcoming Arch-Tempered Uth Duna.
While highly situational, the new Seregios weapons are also great, especially for evasion-heavy weapons like the Dual Blades, Light Bowgun, and Bow. You will, however, need to practice to maximize the skill, while also creating an armor set specifically for dodging.
Monster Hunter Wilds Related Guides
Monster Hunter Wilds Walkthrough Wiki
| Monster Hunter Wilds Wiki Contents | |
|---|---|
 Weapons Weapons |
 Armor Sets Armor Sets |
 Monsters Monsters |
 Builds Builds |
 Story Walkthrough Story Walkthrough |
 Artian Weapons Artian Weapons
|
 Maps and Locations Maps and Locations |
 Items and Materials Items and Materials |
 Tips and Tricks Tips and Tricks |
 Game Mechanics Game Mechanics |
 Endemic Life Endemic Life |
 Skills Skills |
 Decorations Decorations |
 Talismans Talismans |
 Characters Characters |
 Quests Quests |
 Palico Palico |
 Trophies Trophies |
 Cosmetics Cosmetics |
 Furniture Furniture |
 Festivals Festivals
|
 News and Game Info News and Game Info |
 Message Boards Message Boards |
|
Recommended Guides
 State of the Meta
 Best Weapons Tier List
 Secondary Weapons
 Weapon Combos
 Best Items to Bring
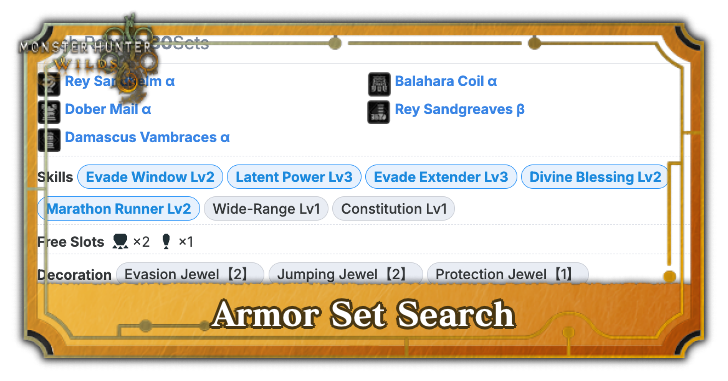 Armor Set Search
 Endgame Guide
 Unchangeable Features and Missables
 Best Skills
 Best Beginner Weapons
 Easter Eggs and Secrets
 Respawn Timers
 Is MH Wilds Too Easy?
 Best Meals and Food Effects
 Best Status Effect
 List of All Bugged Skills
 Best Co-op Strategies
 Weapon Popularity Tier List
 How to Prepare for Title Update 1
 Weapon Changes from the Beta
 Weapon Changes from Rise and World
 List of All DLC and Prices
 Talisman Rating Tool
 Best Talismans
 Armor Transcending Guide
Author

Builds and Best Armor for Each Weapon (March 2026)
Premium Articles
Rankings
- We could not find the message board you were looking for.
Gaming News


![Monster Hunter Stories 3 Review [First Impressions] | Simply Rejuvenating](https://img.game8.co/4438641/2a31b7702bd70e78ec8efd24661dacda.jpeg/thumb)
Popular Games

Genshin Impact Walkthrough & Guides Wiki
Honkai: Star Rail Walkthrough & Guides Wiki
Umamusume: Pretty Derby Walkthrough & Guides Wiki
Pokemon Pokopia Walkthrough & Guides Wiki
Resident Evil Requiem (RE9) Walkthrough & Guides Wiki
Monster Hunter Wilds Walkthrough & Guides Wiki
Wuthering Waves Walkthrough & Guides Wiki
Arknights: Endfield Walkthrough & Guides Wiki
Pokemon FireRed and LeafGreen (FRLG) Walkthrough & Guides Wiki
Pokemon TCG Pocket (PTCGP) Strategies & Guides Wiki


Recommended Games
Diablo 4: Vessel of Hatred Walkthrough & Guides Wiki
Cyberpunk 2077: Ultimate Edition Walkthrough & Guides Wiki
Fire Emblem Heroes (FEH) Walkthrough & Guides Wiki
Yu-Gi-Oh! Master Duel Walkthrough & Guides Wiki
Super Smash Bros. Ultimate Walkthrough & Guides Wiki
Pokemon Brilliant Diamond and Shining Pearl (BDSP) Walkthrough & Guides Wiki
Elden Ring Shadow of the Erdtree Walkthrough & Guides Wiki
Monster Hunter World Walkthrough & Guides Wiki
The Legend of Zelda: Tears of the Kingdom Walkthrough & Guides Wiki
Persona 3 Reload Walkthrough & Guides Wiki


All rights reserved
©CAPCOM
The copyrights of videos of games used in our content and other intellectual property rights belong to the provider of the game.
The contents we provide on this site were created personally by members of the Game8 editorial department.
We refuse the right to reuse or repost content taken without our permission such as data or images to other sites.
Will there be any new meta builds with Tempered Lagiacrus? Thanks a lot