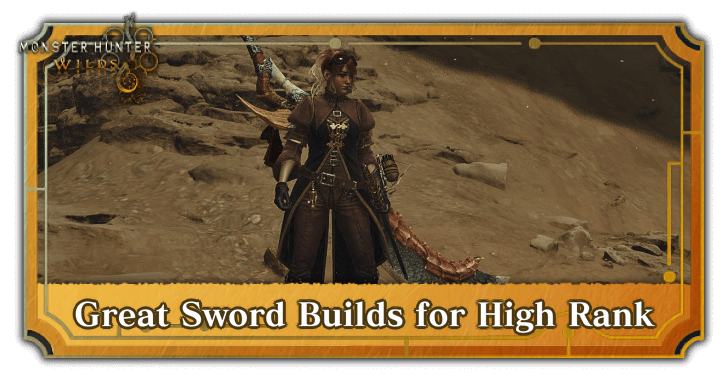
Best Great Sword Builds for High Rank
★ Arkveld Gamma Armor | MH Stories 3 Collab
☆ Version 1.041: Sororal α Armor | Shatterseal
★ How to Unlock Proof of a Hero Quest
☆ Omega Planetes | Savage Omega | Builds vs Omega
★ Armor Set Search updated for Ver 1.041
☆ HR50+ Builds | Tier List | Weapon Guides
These are the best High Rank Great Sword builds in Monster Hunter Wilds. Learn about all the builds in the late game, tips for building for High Rank, and the best Skills and Armor pieces to use with the Great Sword while in High Rank.
| All Great Sword Builds | |
|---|---|
| Low Rank Builds | High Rank Builds |
| State of the Meta: Title Update 4 | |
List of Contents
Great Sword Builds Progression (High Rank)
Endgame Builds and Recommendation
| Rating | Build Name |
|---|---|
| HR100+ Builds | |
| ★★★★★ |
Bale Dahaad Gore GS A high damage build that takes advantage of the Bale, Gore, and Dahaad set bonuses. |
| ★★★★★ |
NEW Comfy Arkveld Gamma GS An Agi-Wex-MM focused build with numerous comfort skills to keep your HP and Stamina topped up. |
| ★★★★★ |
NEW Offense Focus Arkveld Gamma GS Sacrifices some of the comfort from the Comfy Arkveld Gamam Build to squeeze out even more damage. |
| ★★★★★ |
GogMax Agi Wex GS A high damage build that takes advantage of the new Gogmazios weapons and armor to get multiple Set and Group skills. |
| ★★★★ |
Lagi-Guts Critical GS An AGI-WEX Great Sword build maximizing critical rate and Counterstrike. Uses Nu Udra γ chestpiece. |
| HR50+ Builds | |
| ★★★★ |
Dark Knight GS A high-risk, high-reward build that relies on Heroics, Resentment, and The Blackest Night to keep your HP low for maximum damage. |
| ★★★★★ |
Lagi-Rey Guts Counter GS High damage Guts build using Gamma and Lagi pieces with an Appraised Talisman. |
| ★★★★★ |
LAgiZoh Crit Sleep GS A high damage AGI and WEX build that sacrifices one level of Super Recovery for more Affinity, as well as comfort via Earplugs 2. |
| ★★★★ |
Ful-Gore Zoh Agitator GS High damage AGI build using Black Eclipse with comfort from Second Wind I and Earplugs 2. |
| ★★★ |
GoreDuna Comfort GS A Great Sword build that prioritizes comfort and mobility, allowing you to easily dodge monster attacks and relocate to a more favorable position while still dealing decent damage. |
Progression Builds
| Hunter Rank | Build Name |
|---|---|
| HR36++ | Critical Sleep GS |
| HR21 - HR35 | Agitated Max Might Exploiter GS |
| HR9 - HR20 | WEX Agitator GS |
Note that if you are still comfortable with a previous build you're using, you can skip some builds. This is a suggested build progression that you can follow until the endgame.
| Date | Changes |
|---|---|
| February 19, 2026 | ・Added Comfy Arkveld Gamma GS and Offense Focus Arkveld Gamma GS builds. ・Removed Modified Crit Sleep GS and Rey Dau Gamma GS builds. |
| December 24, 2025 | ・Added Bale Dahaad Gore Great Sword build. |
| December 17, 2025 | ・Added GogMax Agi Wex Great Sword build. Uses the new Gogmazios Armor and Gogma Aritan Weapons. |
| October 21, 2025 | ・Added Lagi-Guts Great Sword build. Uses the Nu Udra γ chestpiece. |
| September 30, 2025 | ・Added Dark Knight GS build. |
| August 15, 2025 | ・Added Lagi-Rey Guts Counter GS with a new Appraised Talisman. |
| July 23, 2025 | ・Added 2x AfiGore Offense GS build for the Flamefete Event. |
| June 30, 2025 | ・Added LAgiZoh Crit Sleep GS build. |
| May 13, 2025 | ・Started adding Skill Buffs Breakdown and DEF and RES Totals table sections for HR50++ builds. ・Added missing weapon skills to Rey Dau Gamma GS build Skill Summary. |
| May 7, 2025 | Took out the 2x Sakuratide Agitator General Build at the end of the Blossomdance Event. The archived build can be found on the Sakuratide α Armor page. |
| May 5, 2025 | Added Ful-Gore Zoh Agitator GS build. |
| April 30, 2025 | Added Rey Dau Gamma GS build. |
| April 25, 2025 | Added TU1 2x Sakuratide Agitator General Build for the Blossomdance Event. |
| April 5, 2025 | Added TU1 HR50++ Build: Modified Critical Sleep GS, which is similar to the HR36++ build but with Maximum Might and the new Super Recover skill from the Zoh Shia armor set. |
| March 19, 2025 | Added required reinforcement stats to Artian Weapons in the HR21-35 and HR36++ builds. |
| March 10, 2025 | Replaced HR21-35 build's suggested Artian Blade I element from Any to Sleep. |
| March 7, 2025 | Replaced HR36++ build that revolves around Weakness Exploit and Maximum Might with a Sleep GS build that revolves around Agitator, Weakness Exploit, Counterstrike, and Offensive Guard. |
| March 5, 2025 | Edited Maximum WEX Flay GS: Replaced Chainblade Charm II with Challenger Charm II to decrease Flayer levels and add Agitator Levels. |
| March 3, 2025 | Added HR36++ Maximum WEX Flay GS Build that revolves around Weakness Exploit and Maximum Might. |
| March 2, 2025 | Added HR21 - HR35 Agitated Max Might Exploiter GS Build that uses Agitator, Maximum Might, Weakness Exploit, and Second Win. |
| March 1, 2025 | Added HR9 - HR20 WEX Agitator GS Build that uses Weakness Exploit and Agitator. |
Endgame High Rank Build (HR 100++)
Bale Dahaad Gore GS
Best Weapon
| Weapon | Rarity | ATK | DEF |
|---|---|---|---|
 Ostrak Oblivion Ostrak Oblivion
|
8 | 1104 (230) |
0 |
| Slots | Element | Affinity | |
| ③③③ |
|
0% |
| Weapon Decorations |
|---|
| Production Bonus | Reinforcement Prioritization |
|---|---|
|
• Element +30 • Attack +5 • Attack +5 • Attack +5 Element Type: Any |
• Attack +5 • Attack +5 • Attack +5 • Affinity +10 (EX) • Sharpness +30 |
|
Focus: Attack Focus Set Skill: Gore Magala's Tyranny Group Skill: Lord's Soul |
|
Bale Dahaad Gore Great Sword Armor Loadout
| Armor | Slots | Skills |
|---|---|---|
|
|
Antivirus Lv. 1 Antivirus Lv. 1 ー |
Resentment Lv. 2
Maximum Might Lv. 2
|
|
|
Earplugs Lv. 1 Earplugs Lv. 1 ー |
Agitator Lv. 2
|
|
|
Latent Power Lv. 1 ー ー |
Resentment Lv. 1
Latent Power Lv. 1
Maximum Might Lv. 1
|
|
|
Quick Sheathe Lv. 1 ー ー |
Bind Resistance Lv. 2
Agitator Lv. 3
|
|
|
Burst Lv. 1 Quick Sheathe Lv. 1 Quick Sheathe Lv. 1 |
Flinch Free Lv. 1
Antivirus Lv. 1
|
| Armor Decorations | ||
| Talisman | ||
| DEF and RES Totals |
Defense: 466
|
|
Decorations are randomly obtained, so feel free to adjust with what is available.
Skill Summary
| Weapon Skills | |||
|---|---|---|---|
| Critical Boost | 5 | Focus | 3 |
| Handicraft | 1 | - | |
| Armor Skills | |||
| Agitator | 5 | Antivirus | 3 |
| Counterstrike | 3 | Maximum Might | 3 |
| Quick Sheathe | 3 | Resentment | 3 |
| Earplugs | 2 | Latent Power | 2 |
| Bind Resistance | 2 | Flinch Free | 1 |
| Burst | 1 | - | |
| Group / Set Skills | |||
| Guts (Tenacity) | Black Eclipse I | ||
| Binding Counter I | Dark Arts | ||
This build takes advantage of Gogmazios weapons to be able to slot in 3 Set Bonuses while keeping Guts (Tenacity). This set also relies on keeping Resentment and Dark Arts active by having red health to increase both raw and elemental damage.
Comfy Arkveld Gamma GS
Best Weapon
| Weapon | Rarity | ATK | DEF |
|---|---|---|---|
|
Ostrak Oblivion
|
8 | 1104 (230) |
0 |
| Slots | Element | Affinity | |
| ③③③ |
|
0% |
| Weapon Decorations |
|---|
| Production Bonus | Reinforcement Prioritization |
|---|---|
|
• Element +30 • Attack +5 • Attack +5 • Attack +5 Element Type: Any |
• Attack +5 • Attack +5 • Attack +5 • Affinity +10 (EX) • Sharpness +30 |
|
Focus: Attack Focus Set Skill: Fulgur Anjanath's Will Group Skill: Any |
|
Comfy Arkveld Gamma GS Armor Loadout
| Armor | Slots | Skills |
|---|---|---|
|
|
Counterstrike Lv. 1 Recovery Up Lv. 1 ー |
Weakness Exploit Lv. 3
|
|
|
Weakness Exploit Lv. 1 Weakness Exploit Lv. 1 ー |
Counterstrike Lv. 2
|
|
|
Maximum Might Lv. 1 Recovery Up Lv. 1 ー |
Maximum Might Lv. 2
Agitator Lv. 1
|
|
|
Earplugs Lv. 1 Earplugs Lv. 1 Recovery Up Lv. 1 |
Flayer Lv. 1
Elemental Absorption Lv. 3
|
|
|
Burst Lv. 1 Constitution Lv. 1 Constitution Lv. 1 |
Quick Sheathe Lv. 3
Agitator Lv. 1
|
| Charm | ||
| Armor Decorations | ||
| DEF and RES Totals |
Defense: 470
|
|
Decorations are randomly obtained, so feel free to adjust with what is available.
Skill Summary
| Weapon Skills | |||
|---|---|---|---|
| Critical Boost | 3 | Focus | 3 |
| Offensive Guard | 3 | Handicraft | 2 |
| Armor Skills | |||
| Agitator | 5 | Weakness Exploit | 5 |
| Counterstrike | 3 | Elemental Absorption | 3 |
| Maximum Might | 3 | Quick Sheathe | 3 |
| Recovery Up | 3 | Constitution | 2 |
| Earplugs | 2 | Burst | 1 |
| Flayer | 1 | ー | |
| Group / Set Skills | |||
| Guts (Tenacity) | Hasten Recovery I | ||
| Second Wind I | - | ||
This build takes advantage of the Gogmazios weapon and armor, as well as the Arkveld γ armor, to provide skills that can help you deal more damage, while still having enough comfort skills to make hunts go smoothly.
Offense Focus Arkveld Gamma GS
Best Weapon
| Weapon | Rarity | ATK | DEF |
|---|---|---|---|
|
Ostrak Oblivion
|
8 | 1104 (230) |
0 |
| Slots | Element | Affinity | |
| ③③③ |
|
0% |
| Weapon Decorations |
|---|
| Production Bonus | Reinforcement Prioritization |
|---|---|
|
• Element +30 • Attack +5 • Attack +5 • Attack +5 Element Type: Any |
• Attack +5 • Attack +5 • Attack +5 • Affinity +10 (EX) • Sharpness +30 |
|
Focus: Attack Focus Set Skill: Soul of the Dark Knight Group Skill: Any |
|
Offense Focus Arkveld Gamma GS Armor Loadout
| Armor | Slots | Skills |
|---|---|---|
|
|
Counterstrike Lv. 1 Quick Sheathe Lv. 1 ー |
Weakness Exploit Lv. 3
|
|
|
Agitator Lv. 1 Burst Lv. 1 ー |
Counterstrike Lv. 2
|
|
|
Maximum Might Lv. 1 Quick Sheathe Lv. 1 ー |
Maximum Might Lv. 2
Agitator Lv. 1
|
|
|
Earplugs Lv. 1 Earplugs Lv. 1 Quick Sheathe Lv. 1 |
Resentment Lv. 1
Constitution Lv. 2
|
|
|
Weakness Exploit Lv. 1 Weakness Exploit Lv. 1 ー |
Flayer Lv. 2
Blight Resistance Lv. 2
|
| Charm | ||
| Armor Decorations | ||
| DEF and RES Totals |
Defense: 470
|
|
Decorations are randomly obtained, so feel free to adjust with what is available.
Skill Summary
| Weapon Skills | |||
|---|---|---|---|
| Critical Boost | 3 | Focus | 3 |
| Offensive Guard | 3 | Handicraft | 2 |
| Armor Skills | |||
| Agitator | 5 | Weakness Exploit | 5 |
| Counterstrike | 3 | Maximum Might | 3 |
| Quick Sheathe | 3 | Constitution | 2 |
| Earplugs | 2 | Flayer | 2 |
| Blight Resistance | 1 | Burst | 1 |
| Resentment | 1 | ー | |
| Group / Set Skills | |||
| Guts (Tenacity) | Dark Arts | ||
| Hasten Recovery I | - | ||
This build sacrifices some of the comfort skills provided by the previous build, focusing instead on improving your damage as much as possible. While not as comfortable as the previous build, it can potentially deal much more damage.
GogMax Agi Wex GS
Best Weapon
| Weapon | Rarity | ATK | DEF |
|---|---|---|---|
Ostrak Oblivion
|
8 | 1056 (220) |
0 |
| Slots | Element | Affinity | |
| ③③③ |
|
15% |
| Weapon Decorations |
|---|
| Production Bonus | Reinforcement Prioritization |
|---|---|
|
• Element +30 • Attack +5 • Attack +5 • Attack +5 Element Type: Sleep |
• Attack +5 • Attack +5 • Attack +5 • Attack +5 • Attack +5 |
|
Focus: Affinity Focus Set Skill: Zoh Shia's Pulse Group Skill: Lord's Soul |
|
You may also opt for Paralysis element over Sleep. Reinforcement bonuses will go up after Amendment.
When converting your Varianza to Ostrak Oblivion, you must select the Affinity Focus option. Although you will lose 10 Raw Attack in doing this, you can easily gain it back and even get more once you amend your reinforcements.
GogMax Agi Wex GS Armor Loadout
| Armor | Slots | Skills |
|---|---|---|
|
|
Burst Lv. 1 Counterstrike Lv. 1 Recovery Speed Lv. 1 |
Recovery Speed Lv. 1
Agitator Lv. 1
|
|
|
Weakness Exploit Lv. 1 Weakness Exploit Lv. 1 ー |
Counterstrike Lv. 2
|
|
|
Maximum Might Lv. 1 Recovery Speed Lv. 1 ー |
Maximum Might Lv. 2
Agitator Lv. 1
|
|
(Transcend) |
Agitator Lv. 1 Agitator Lv. 1 ー |
Stamina Surge Lv. 1
|
|
|
Weakness Exploit Lv. 1 Constitution Lv. 1 Constitution Lv. 1 |
Quick Sheathe Lv. 3
Agitator Lv. 1
|
| Armor Decorations | ||
| Appraised Charm (HR 100+) |
Weakness Exploit Lv. 1 Handicraft Lv. 1 |
|
| Alternate Charm | ||
| DEF and RES Totals |
Defense: 396
|
|
Decorations are randomly obtained, so feel free to adjust with what is available.
Skill Summary
| Weapon Skills | |||
|---|---|---|---|
| Critical Boost | 3 | Focus | 3 |
| Handicraft | 3 | Offensive Guard | 3 |
| Armor Skills | |||
| Agitator | 5 | Weakness Exploit | 5 |
| Counterstrike | 3 | Maximum Might | 3 |
| Quick Sheathe | 3 | Recovery Speed | 3 |
| Constitution | 2 | Burst | 1 |
| Stamina Surge | 1 | ー | |
| Group / Set Skills | |||
| Guts (Tenacity) | Second Wind I | ||
| Super Recovery I | - | ||
| Skill Buffs Breakdown | |||
|
Affinity
・MM3: +30% ・WEX5: +30~50% ・AGI5: +15% ・Weapon: 15% Lowest-Highest: ・15%~110% |
Attack | Element
・CS3: +25 ・AGI5: +20 Raw ・OG3: +36 (15%) Raw ・Guts: +11 (5%) Raw ・BST1: +5~10 Raw, +80 Ele ・Crit.B3: (+34% Crit Dmg.) ・Weapon: 220 Raw Lowest-Highest: ・220~322 Raw ・+80 Ele ・+34% Crit Dmg (Does not take into consideration Gogma Artian Weapon Amends) |
||
This build takes advantage of the new Gogma Artian Weapon and Armor Transcending systems to maximize the amount of armor, Group Bonus, and Set Bonus you can fit into a build. For offensive skills, this build has Weakness Exploit, Agitator, Counterstrike, Maximum Might, Guts (Tenacity), and Burst to provide buffs to both your Raw Attack and Affinity. The weapon itself also has Critical Boost and Offensive Guard for even more damage.
Maximum Might in particular synergizes well with Second Wind, ensuring that the bonus Affinity will always stay active. As for comfort skills, the build has Quick Sheathe and Focus to help your attacks flow faster, while Constitution and Stamina Surge will help your Stamina stay full. The build also has Super Recovery and Recovery Up to keep your HP full, allowing you to stay in the fight for longer.
Lagi-Guts Critical GS
Best Weapon
| Weapon | Rarity | ATK | DEF |
|---|---|---|---|
 Varianza Varianza
|
8 | 1104 (230) |
0 |
| Slots | Element | Affinity | |
| ③③③ |
|
5% |
| Weapon Decorations |
|---|
| Production Bonus | Reinforcement Prioritization |
|---|---|
|
• Element +30 • Attack +5 • Attack +5 • Attack +5 Element Type: Sleep |
• Attack +5 • Attack +5 • Attack +5 • Attack +5 • Attack +5 |
You may also opt for Paralysis element over Sleep.
Lagi-Guts Great Sword Armor Loadout
| Armor | Slots | Skills |
|---|---|---|
|
|
Agitator Lv. 1 Counterstrike Lv. 1 Adaptability Lv. 1 |
Maximum Might Lv. 2
|
|
|
Weakness Exploit Lv. 1 Weakness Exploit Lv. 1 ー |
Counterstrike Lv. 2
|
|
|
Agitator Lv. 1 Agitator Lv. 1 ー |
Evade Extender Lv. 2
|
|
|
Earplugs Lv. 1 Earplugs Lv. 1 Stun Resistance Lv. 1 |
Weakness Exploit Lv. 1
Maximum Might Lv. 1
|
|
|
Burst Lv. 1 Stun Resistance Lv. 1 Stun Resistance Lv. 1 |
Quick Sheathe Lv. 3
Agitator Lv. 1
|
| Armor Decorations | ||
| Appraised Charm (HR 100+) |
Critical Eye Lv. 3 Agitator Lv. 1 |
|
| DEF and RES Totals |
Defense: 333
|
|
Decorations are randomly obtained, so feel free to adjust with what is available.
Skill Summary
| Weapon Skills | |||
|---|---|---|---|
| Critical Boost | 5 | Critical Eye | 4 |
| Focus | 3 | Handicraft | 1 |
| Armor Skills | |||
| Agitator | 5 | Weakness Exploit | 3 |
| Counterstrike | 3 | Maximum Might | 3 |
| Quick Sheathe | 3 | Stun Resistance | 3 |
| Earplugs | 2 | Evade Extender | 2 |
| Adaptability | 1 | Burst | 1 |
| Shock Absorber | 1 | ー | |
| Group / Set Skills | |||
| Guts (Tenacity) | Azure Bolt I | ||
| Skill Buffs Breakdown | |||
|
Affinity
・MM3: +30% ・WEX3: +15~25% ・AZBolt1: +15% ・CE4: +16% ・AGI5: +15% ・Weapon: 5% Lowest-Highest: ・5%~106% |
Attack | Element
・CS3: +25 ・AGI5: +20 Raw ・Guts: +11 (5%) Raw ・BST1: +5~8 Raw ・Crit.B5: (+40% Crit Dmg.) ・Weapon: 230 Raw Lowest-Highest: ・220~294 Raw ・+40% Crit Dmg |
||
This is a Guts-Lagi Great Sword build that makes use of the Nu Udra γ chestpiece to maximize Counterstrike. With all skills activated, the build sits at 96% crit rate (106% on wounds). This mixed set allows for more affinity uptime compared to a previous Latent Power option.
For comfort, Earplugs 2 is included. You can swap this out for any other skill as needed (such as Stamina Surge). If you are still yet to get an optimal Appraised Charm, you can use the Exploiter Charm II first to at least max out Weakness Exploit.
High Rank Build (HR 50++)
Dark Knight GS
Best Weapon
| Weapon | Rarity | ATK | DEF |
|---|---|---|---|
 True Shadowbringer True Shadowbringer

|
8 | 1056 (220) |
30 |
| Slots | Element | Affinity | |
| ③②① |
|
0% | |
| Skills |
Darkside Lv. 1
|
||
| Weapon Decorations |
|---|
The True Shadowbringers is the best Great Sword for this build thanks to its Darkside Skill that provides Base Attack at the cost of HP. This will make it easier to stay below the Heroics threshold, maximizing your damage.
Equip a Focus/Dragon Jewel for faster Charged Attacks and additional Dragon Element. Afterward, equip a Guardian Jewel II and Guardian Jewel for three levels in Offensive Guard.
Dark Knight GS Armor Loadout
| Armor | Slots | Skills |
|---|---|---|
|
|
Divine Blessing Lv. 1 Divine Blessing Lv. 1 ー |
Resentment Lv. 2
Maximum Might Lv. 2
|
|
|
Counterstrike Lv. 1 ー ー |
Quick Sheathe Lv. 2
Latent Power Lv. 2
|
|
|
Burst Lv. 1 ー ー |
Resentment Lv. 1
Latent Power Lv. 1
Maximum Might Lv. 1
|
|
|
Agitator Lv. 1 Counterstrike Lv. 1 Divine Blessing Lv. 1 |
Resentment Lv. 1
Constitution Lv. 2
|
|
|
Counterstrike Lv. 1 ー ー |
Resentment Lv. 1
Latent Power Lv. 2
|
| Appraised Charm (HR 100+) |
Heroics Lv. 3 Dragon Attack Lv. 2 |
|
| Alternate Charm (HR50+) |
||
| Armor Decorations | ||
| DEF and RES Totals |
Defense: 341
|
|
Decorations are randomly obtained, so feel free to adjust with what is available.
The Appraised Charm listed above is a Rarity 6 Charm. Using its Rarity 5 counterpart is still viable, although you will lose one level of Dragon Attack.
Skill Summary
| Weapon Skills | |||
|---|---|---|---|
| Dragon Attack | 3 | Focus | 3 |
| Offensive Guard | 3 | Darkside | 1 |
| Armor Skills | |||
| Latent Power | 5 | Resentment | 5 |
| Heroics | 4 | Constitution | 3 |
| Counterstrike | 3 | Divine Blessing | 3 |
| Maximum Might | 3 | Quick Sheathe | 2 |
| Agitator | 1 | Burst | 1 |
| Group / Set Skills | |||
| The Blackest Night | ー | ||
The skill summary above uses the specified Appraised Talisman.
This build is a high-risk, high-reward build that uses The Blackest Night (TBN)'s ability to put you at 1HP to easily activate Heroics. This, combined with True Shadowbringer's ability to drain your HP, will help you stay within the Heroics threshold for longer. Other than Heroics, you will also get additional damage buffs from Resentment, as your red HP will not get reduced thanks to TBN's Undead Redemption buff.
You will also get Attack buffs from Counterstrike, Agitator, and Burst. Burst in particular will be easier to stack thanks to Darkside's bonus attack. As for Affinity, Latent Power and Maximum Might will be your main source of Affinity, providing 80% Affinity when both are active.
The effectiveness of this build, however, will rely heavily on player skill, as you will be at low HP during your burst window. Additionally, it requires you to know a monster's skill set as you need to make sure that the shield from TBN will break for Undead Redemption to activate. If played wrong, it can lead to suboptimal damage or danger due to being at low health.
If you do not have the specified Appraised Charm, you can go ahead and use the Grit Charm IV, although you will lose levels in Dragon Attack.
Lagi-Rey Guts Counterstrike GS
Best Weapon
| Weapon | Rarity | ATK | DEF |
|---|---|---|---|
|
Varianza
|
8 | 1032 (215) |
0 |
| Slots | Element | Affinity | |
| ③③③ |
|
20% |
| Weapon Decorations |
|---|
| Production Bonus | Reinforcement Prioritization |
|---|---|
|
• Element +30 • Attack +5 • Affinity +5 • Affinity +5 Element Type: Sleep |
• Attack +5 • Attack +5 • Attack +5 • Attack +5 • Affinity +5 |
For this build, we went with using the Sleep-element Varianza as the main Artian weapon for its 3-3-3 slot flexibility, combined with possible high Attack Rolls.
Non-Artian Alternative
| Weapon | Rarity | ATK | DEF |
|---|---|---|---|
 Blazing Veiah Blazing Veiah

|
8 | 1056 (220) |
0 |
| Slots | Element | Affinity | |
| ③②① |
|
5% | |
| Skills |
Whiteflame Torrent Lv. 1
|
||
| Weapon Decorations |
|---|
For the non-artian alternative, our pick is the Blazing Veiah for its White Sharpness, high raw attack, and higher raw damage potential with Whiteflame Torrent.
Lagi-Rey Guts Counter GS Armor Loadout
| Armor | Slots | Skills |
|---|---|---|
|
|
Agitator Lv. 1 Earplugs Lv. 1 Divine Blessing Lv. 1 |
Maximum Might Lv. 2
|
|
|
Divine Blessing Lv. 1 ー ー |
Latent Power Lv. 3
|
|
|
Agitator Lv. 1 Agitator Lv. 1 ー |
Evade Extender Lv. 2
|
|
|
Earplugs Lv. 1 Counterstrike Lv. 1 Divine Blessing Lv. 1 |
Weakness Exploit Lv. 1
Maximum Might Lv. 1
|
|
|
Agitator Lv. 1 Speed Eating Lv. 1 Speed Eating Lv. 1 |
Quick Sheathe Lv. 3
Agitator Lv. 1
|
| Armor Decorations | ||
| Appraised Charm (HR 100+) |
Attack Boost Lv. 3 Counterstrike Lv. 1 |
|
| Alternate Charm (HR 50+) |
||
| DEF and RES Totals |
Defense: 333
|
|
The decoration setups above are set based on the specified Appraised Charm.
Skill Summary
| Weapon Skills | |||
|---|---|---|---|
| Attack Boost | 3 | Focus | 3 |
| Critical Boost | 3 | Offensive Guard | 3 |
| Handicraft | 2 | ー | |
| Armor Skills | |||
| Agitator | 5 | Counterstrike | 3 |
| Divine Blessing | 3 | Latent Power | 3 |
| Maximum Might | 3 | Quick Sheathe | 3 |
| Earplugs | 2 | Evade Extender | 2 |
| Speed Eating | 2 | Weakness Exploit | 1 |
| Group / Set Skills | |||
| Thunderous Roar I | Guts (Tenacity) | ||
| Azure Bolt I | ー | ||
The skill summary above uses the specified Appraised Talisman.
This Great Sword setup builds into Guts (Tenacity) by using 3 Gamma set pieces, leaning most of its damage into raw attack while maintaining some comfort through Divine Blessing, Evade Extender, and Earplugs.
Using the new Random Talisman, we can push raw attack further with Attack Boost Lv. 3 while maintaining Counterstrike Lv. 3. If you are using the Alternate Talisman, we suggest you swap out the lone Counter Jewel [2] in the build to Earplugs Jewel [2] to get Earplugs Lv. 3.
LAgiZoh Crit Sleep GS
Best Weapon
| Weapon | Rarity | ATK | DEF |
|---|---|---|---|
|
Varianza
|
8 | 1080 (225) |
0 |
| Slots | Element | Affinity | |
| ③③③ |
|
10% |
| Weapon Decorations |
|---|
| Production Bonus | Reinforcement Prioritization |
|---|---|
|
• Element +30 • Attack +5 • Attack +5 • Affinity +5 Element Type: Sleep |
• Attack +5 • Attack +5 • Attack +5 • Attack +5 • Attack +5 |
Get one Affinity Infusion and two Attack Infusions while building your Varianza, as well as five Attack Infusions when reinforcing.
Use Critical Jewel III to increase your Critical damage. Afterward, get a Focus/Handicraft Jewel and a Guardian/Handicraft Jewel to increase your charge speed, get attack buffs from Offensive Guard, and increase your weapon's sharpness. Equip a Focus Jewel III and a Guardian Jewel III if you do not have the hybrid jewels needed.
Non-Artian Alternative
| Weapon | Rarity | ATK | DEF |
|---|---|---|---|
|
Blazing Veiah
|
8 | 1056 (220) |
0 |
| Slots | Element | Affinity | |
| ③②① |
|
5% | |
| Skills |
Whiteflame Torrent Lv. 1
|
||
| Weapon Decorations |
|---|
The Zoh Shia Great Sword Blazing Veiah is a good alternative, thanks to its strong Raw, White Sharpness, and the Whiteflame Torrent skill. Equip a Critical Jewel III, Focus Jewel II, and a Dragon Jewel on it for more damage.
LAgiZoh Crit Sleep GS Armor Loadout
| Armor | Slots | Skills |
|---|---|---|
|
|
Agitator Lv. 1 Earplugs Lv. 1 Recovery Speed Lv. 1 |
Maximum Might Lv. 2
|
|
|
Agitator Lv. 1 ー ー |
Agitator Lv. 2
|
|
|
Quick Sheathe Lv. 1 Quick Sheathe Lv. 1 Quick Sheathe Lv. 1 |
Weakness Exploit Lv. 2
|
|
|
Counterstrike Lv. 1 Counterstrike Lv. 1 Recovery Speed Lv. 1 |
Weakness Exploit Lv. 1
Maximum Might Lv. 1
|
|
|
Agitator Lv. 1 Earplugs Lv. 1 ー |
Recovery Speed Lv. 1
Counterstrike Lv. 1
Elemental Absorption Lv. 1
|
| Armor Decorations | ||
| Appraised Charm (HR 100+) |
Weakness Exploit Lv. 1 Handicraft Lv. 1 |
|
| Alternate Charm (HR 50+) |
||
| DEF and RES Totals |
Defense: 331
|
|
Decorations are randomly obtained, so feel free to adjust with what is available.
Skill Summary
| Weapon Skills | |||
|---|---|---|---|
| Critical Boost | 3 | Focus | 3 |
| Handicraft | 3 | Offensive Guard | 3 |
| Armor Skills | |||
| Agitator | 5 | Weakness Exploit | 5 |
| Counterstrike | 3 | Maximum Might | 3 |
| Quick Sheathe | 3 | Recovery Speed | 3 |
| Earplugs | 2 | Elemental Absorption | 1 |
| Group / Set Skills | |||
| Ward of Wyveria | Super Recovery I | ||
| Azure Bolt I | ー | ||
| Skill Buffs Breakdown | |||
|
Affinity
・WEX5: +30%~50% ・MM3: +30% ・AGI5: +15% ・Weapon: 10% ・AB1: 15% Lowest-Highest: ・20%~122% |
Attack | Element
・AGI5: +20 Raw ・CS3: +25 Raw ・Crit.B3: +34% Crit Dmg. ・OG3: +34 (15%) Raw ・Weapon: 225 Raw Lowest-Highest:: ・225~304 Raw ・+34% Crit Dmg |
||
The skill summary above uses the specified Appraised Talisman.
This build maintains the important offensive skills of the Modified Critical Sleep GS build, namely Agitator, Weakness Exploit, Counterstrike, and Maximum Might.
What sets it apart is that it sacrifices one level of Super Recovery to make way for Earplugs and the new Azure Bolt Group Skill. Azure Bolt also helps make the build deal more damage, thanks to its additional affinity and extra thunder damage.
If you do not have the specified Appraised Charm, you can go ahead and use the Exploiter Charm II, although you will lose a level of Handicraft.
Ful-Gore Zoh Agitator Great Sword
Best Weapon
| Weapon | Rarity | ATK | DEF |
|---|---|---|---|
|
Varianza
|
8 | 1104 (230) |
0 |
| Slots | Element | Affinity | |
| ③③③ |
|
5% |
| Weapon Decorations |
|---|
| Production Bonus | Reinforcement Prioritization |
|---|---|
|
• Element +30 • Attack +5 • Attack +5 • Attack +5 Element Type: |
• Attack +5 • Attack +5 • Attack +5 • Attack +5 • Attack +5 |
For this build's Artian weapon, we recommend rolling into as much Attack bonuses as possible for the Varianza: 3x Attack with 3x Sleep for its element, then 5x Attack for its Reinforcement Bonuses to get the most out of raw damage.
Non-Artian Alternative
| Weapon | Rarity | ATK | DEF |
|---|---|---|---|
|
Blazing Veiah
|
8 | 1056 (220) |
0 |
| Slots | Element | Affinity | |
| ③②① |
|
5% | |
| Skills |
Whiteflame Torrent Lv. 1
|
||
| Weapon Decorations |
|---|
For a non-Artian alternative monster weapon, Zoh Shia's Blazing Veiah is a good choice for dealing raw damage. Its raw damage potential is further boosted by its skill Whiteflame Torrent.
Ful-Gore Zoh Great Sword Armor Loadout
| Armor | Slots | Skills |
|---|---|---|
|
|
Earplugs Lv. 1 ー ー |
Agitator Lv. 2
|
|
|
Agitator Lv. 1 ー ー |
Agitator Lv. 2
|
|
|
Maximum Might Lv. 1 Maximum Might Lv. 1 ー |
Maximum Might Lv. 1
|
|
|
Burst Lv. 1 Earplugs Lv. 1 ー |
Constitution Lv. 2
|
|
|
Weakness Exploit Lv. 1 Antivirus Lv. 1 Antivirus Lv. 1 |
Flinch Free Lv. 1
Antivirus Lv. 1
|
| Armor Decorations | ||
| Appraised Charm (HR 100+) |
Counterstrike Lv. 2 Attack Boost Lv. 2 |
|
| Alternate Charm (HR 50+) |
||
| DEF and RES Totals |
Defense: 285
|
|
Decorations are randomly obtained, so feel free to adjust with what is available.
This build uses 2 pieces of G. Fulgur β to activate Second Wind I, 2 pieces of Gore β for Black Eclipse and Antivirus, and lastly 1 piece of Zoh Shia β.
Skill Summary
| Weapon Skills | |||
|---|---|---|---|
| Critical Boost | 3 | Focus | 3 |
| Offensive Guard | 3 | Attack Boost | 2 |
| Handicraft | 2 | ー | |
| Armor Skills | |||
| Agitator | 5 | Antivirus | 3 |
| Counterstrike | 3 | Maximum Might | 3 |
| Constitution | 2 | Earplugs | 2 |
| Burst | 1 | Flinch Free | 1 |
| Weakness Exploit | 1 | ー | |
| Group / Set Skills | |||
| Ward of Wyveria | Second Wind I | ||
| Black Eclipse I | ー | ||
| Skill Buffs Breakdown | |||
|
Affinity
・MM3: +30% ・AV3: +25% ・AGI5: +15% ・WEX1: +5~8% ・Weapon: 5% Lowest-Highest: ・20%~83% |
Attack | Element
・OG3: +35 (15%) Raw ・AGI5: +20 Raw ・CS3: +25 Raw ・BST1: +5~10 Raw ・Crit.B3: +34% Crit Dmg. ・Weapon: 230 Raw Lowest-Highest:: ・235~320 Raw ・+34% Crit Dmg |
||
The skill summary above uses the specified Appraised Talisman.
This build focuses on a mix of comfort and offense. Its core offensive skills compose of Agitator an Counterstrike with affinity coming from Antivirus, Maximum Might, and Weakness Exploit.
On the comfort side, Second Wind I is present to allow for maximal uptime with Maximum Might through a secondary stamina gauge. Then, there is Earplugs 2 to get you through most strong roars — great for catching up on DPS windows with the Great Sword.
If you do not have the specified Appraised Charm, you can go ahead and use the Counter Charm III, although you will lose the Attack Boost.
GoreDuna Comfort GS
Best Weapon
| Weapon | Rarity | ATK | DEF |
|---|---|---|---|
|
Varianza
|
8 | 1080 (225) |
0 |
| Slots | Element | Affinity | |
| ③③③ |
|
10% |
| Weapon Decorations |
|---|
| Production Bonus | Reinforcement Prioritization |
|---|---|
|
• Element +30 • Attack +5 • Attack +5 • Affinity +5 Element Type: Sleep |
• Attack +5 • Attack +5 • Attack +5 • Attack +5 • Attack +5 |
Similar to the LAgiZoh Crit Sleep Varianza, get one Affinity Infusion and two Attack Infusions while building your Varianza, as well as five Attack Infusions when reinforcing.
For Decorations, use Critical Jewel III for increased Critical damage, as well as a Focus/Handicraft Jewel for faster charge speed. Guardian/Handicraft will round off your build providing Offensive Guard.
These two Decorations will also provide Handicraft for more sharpness. If you do not have the hybrid Decorations, it is okay to prioritize the main skills instead (Focus and Offensive Guard).
Non-Artian Alternative
| Weapon | Rarity | ATK | DEF |
|---|---|---|---|
|
Blazing Veiah
|
8 | 1056 (220) |
0 |
| Slots | Element | Affinity | |
| ③②① |
|
5% | |
| Skills |
Whiteflame Torrent Lv. 1
|
||
| Weapon Decorations |
|---|
For the alternative Blazing Veiah equip a Critical Jewel III, Focus Jewel II, and a Dragon Jewel.
GoreDuna Comfort GS Armor Loadout
| Armor | Slots | Skills |
|---|---|---|
|
|
Agitator Lv. 1 Recovery Up Lv. 1 ー |
Evade Window Lv. 1
Coalescence Lv. 1
|
|
|
Burst Lv. 1 ー ー |
Evade Window Lv. 2
Antivirus Lv. 1
|
|
|
Weakness Exploit Lv. 1 Weakness Exploit Lv. 1 ー |
Evade Extender Lv. 2
|
|
|
Weakness Exploit Lv. 1 Weakness Exploit Lv. 1 ー |
Tool Specialist Lv. 2
|
|
|
Weakness Exploit Lv. 1 Antivirus Lv. 1 Antivirus Lv. 1 |
Quick Sheathe Lv. 3
Agitator Lv. 1
|
| Armor Decorations | ||
| Appraised Charm (HR 100+) |
Maximum Might Lv. 2 Attack Boost Lv. 2 |
|
| Alternate Charm (HR 50+) |
||
| DEF and RES Totals |
Defense: 325
|
|
Decorations are randomly obtained, so feel free to adjust with what is available.
Skill Summary
| Weapon Skills | |||
|---|---|---|---|
| Critical Boost | 3 | Focus | 3 |
| Offensive Guard | 3 | Attack Boost | 2 |
| Handicraft | 2 | ー | |
| Armor Skills | |||
| Weakness Exploit | 5 | Antivirus | 3 |
| Evade Window | 3 | Maximum Might | 3 |
| Quick Sheathe | 3 | Agitator | 2 |
| Evade Extender | 2 | Tool Specialist | 2 |
| Burst | 1 | Coalescence | 1 |
| Recovery Up | 1 | ー | |
| Group / Set Skills | |||
| Protective Veil I | Guts (Tenacity) | ||
| Black Eclipse I | ー | ||
The skill summary above uses the specified Appraised Talisman.
The primary aim of this build is to provide comfort and make it easier and safer to hunt monsters. Evade Window and Evade Extender both help in improving your dodges, while Quick Sheathe lets you quickly sheathe your weapon and become more mobile. Additionally, Recovery Up will increase the amount of healing you receive. Tool Specialist is also present for your mantle needs.
For damage, the build has multiple affinity skills, such as Weakness Exploit, Antivirus, Maximum Might and Agitator, as well as damage skills like Agitator, Burst, and Guts. This, partnered with an attack-focused Varianza, will let you deal sizable damage to monsters.
If you do not have the specified Appraised Charm, you can go ahead and use the Mighty Charm III, although you will lose the Attack Boost.
High Rank Build (HR 36++)
Critical Sleep GS
Best Weapon
| Weapon | Rarity | ATK | DEF |
|---|---|---|---|
|
Varianza
|
8 | 1032 (215) |
0 |
| Slots | Element | Affinity | |
| ③③③ |
|
20% |
| Weapon Decorations |
|---|
| Production Bonus | Reinforcement Prioritization |
|---|---|
|
• Element +30 • Affinity +5 • Affinity +5 • Attack +5 Element Type: |
• Attack +5 • Attack +5 • Attack +5 • Attack +5 • Affinity +5 |
When building your Varianza, try to get two Affinity Infusions and one Attack Infusion so you have a good balance of damage and Affinity from the get-go. Also make sure that the Status of your parts align to maximize the Sleep bonus. Afterward, try to get at least one Affinity Infusion and Attack infusions for the rest.
As for the Decorations, try to equip Critical Jewel III to increase your Critical damage. Afterward, get a Focus/Handicraft Jewel and a Guardian/Handicraft Jewel to increase your charge speed, get attack buffs from Offensive Guard*, and increase your weapon's sharpness. If you do not have the correct hybrid jewels, it is okay to equip a Focus Jewel III and a Guardian Jewel III instead.
Non-Artian Alternative
| Weapon | Rarity | ATK | DEF |
|---|---|---|---|
 Düsterstolz Düsterstolz

|
8 | 1008 (210) |
0 |
| Slots | Element | Affinity | |
| ③②① |
|
20% | |
| Skills |
Critical Element Lv. 3
|
||
| Weapon Decorations |
|---|
Alternatively, the Gore Magala Great Sword Düsterstolz is a good alternative, thanks to its strong Raw, high Affinity, and White sharpness. Equipping a Critical Jewel III, Focus Jewel II, and a Dragon Jewel will further increase your damage output.
Critical Sleep GS Loadout
| Armor | Slots | Skills |
|---|---|---|
|
|
Constitution Lv. 1 ーー |
Weakness Exploit Lv. 1
Agitator Lv. 1
|
|
|
Weakness Exploit Lv. 1 Counterstrike Lv. 1 ー |
Weakness Exploit Lv. 1
|
|
|
Quick Sheathe Lv. 1 Quick Sheathe Lv. 1 Quick Sheathe Lv. 1 |
Weakness Exploit Lv. 2
|
|
|
Counterstrike Lv. 1 Constitution Lv. 1 ー |
Flayer Lv. 2
|
|
|
Counterstrike Lv. 1 ーー |
Agitator Lv. 2
|
| Charm | ||
| Armor Decorations | ||
Skill Summary
| Weapon Skills | |||
|---|---|---|---|
| Critical Boost | 3 | Focus | 3 |
| Offensive Guard | 3 | Handicraft | 2 |
| Armor Skills | |||
| Agitator | 5 | Weakness Exploit | 5 |
| Quick Sheathe | 3 | Constitution | 2 |
| Counterstrike | 3 | Flayer | 2 |
| Group / Set Skills | |||
| Decimator I | Binding Counter I | ||
| Skill Buffs Breakdown | |||
|
Affinity
・AGI5: +15% ・WEX5: +30~50% ・Weapon: 20% Lowest-Highest: ・20%~90% |
Attack | Element
・OG3: +32 (15%) Raw ・AGI5: +20 Raw ・CS3: +25 Raw ・BC1: +25 Raw ・Crit.B3: +34% Crit Dmg. ・Weapon: 215 Raw Lowest-Highest:: ・215~317 Raw ・+34% Crit Dmg |
||
The skill summary above takes note of all the skills if you use the Artian Weapon.
This build revolves around maximizing affinity and damage by using a variety of skills, partnered with the Sleep status to occasionally deal huge amounts of damage using the True Charged Slash combos listed in our Great Sword Weapon Guide. Weakness Exploit and Agitator will provide the bulk of the Affinity, with Agitator also providing some damage when the monster is enraged, which will happen often in High Rank.
Counter Strike will provide an additional 25 Raw attack whenever you get launched or when you Tackle through an attack that can launch you. Offensive Guard, on the other hand, will give 15% base Attack whenever you perform a perfectly timed block. These two skills will help boost your damage. Binding Counter will also give another 25 Raw Attack whenever you perform a Power Clash, so make sure to do one often.
Critical Boost will increase the Critical Damage that you deal, while Flayer makes it easier to make wounds, which will help give you additional affinity with Weakness Exploit. Additionally, Flayer works well with Decimator, which will heal 25 HP for each wound you destroy.
Quick Sheathe will help you when you are relocating to dodge enemy attacks, while Constitution will help reduce your Stamina consumption whenever you are evading.
Best Mantles to Use
| Best Mantles | Explanation |
|---|---|
|
|
• Negates knockback, allowing you to perform your charge attacks without getting interrupted • You will need to keep watch of your HP as it does not negate damage. |
For this build, we suggest using the Rocksteady Mantle to help you charge up your attacks without getting interrupted. This mantle can also help activate this build's Counterstrike with ease. While using this mantle, however, keep watch of your HP as you still take damage. Make sure to take note of its active period and the cooldown afterwards!
Best Secondary Weapons
| Weapon & Type | Explanation |
|---|---|
|
(Hunting Horn) |
• Can use Attack Up (L), Knockback Negated, and Restore Sharpness, which is great for both solo and multiplayer play. • Resounding Melody is a great source of damage for the Hunting Horn. |
|
(Light Bowgun) |
• Can Rapid Fire Level 2 Spread ammo, which synergizes well with Flayer and Weakness Exploit • Can also Rapid Fire Level 2 Flaming Ammo, which works with this Bowgun's Critical Element and the build's high Affinity. • Can use Poison, Recover, and Armor Ammo, which helps in both solo and multiplayer play. |
Build Playstyle and Combos
The recommended playstyle to maximize the build is as follows:
- Start hunts with a Sneak Attack, monster mount, or both (sneak attack then mount).
- Perform Fast TCS Combos to dish out damage quickly. Use Offset Attacks whenever possible to deal even more damage. Charge this attack to deal even more follow-up damage.
- Tackle through roars and attacks to continue combos undisturbed. Tackling through attacks that can send you flying will also activate Counterstrike 3, giving you +25 Raw attack.
- Perform Perfect Guards to activate Offensive Guard 3 for 15% Raw attack. Binding Counter I will also activate if you trigger a Power Clash, giving +25 Raw attack.
- If Wounds appear on the monster, perform a TCS-Perforate Loop to continuously deal massive damage with your TCS.
- If the monster falls asleep, plant Large Barrel Bombs or Mega Barrel Bombs and perform a wake-up True Charged Slash.
The best playstyle for this build is to take advantage of the Great Sword's many tools to quickly perform a True Charged Slash. This includes the Fast TCS combos, as well as the TCS-Perforate Loop. Additionally, you will need to perform Offset Attacks, as this gives you access to the powerful Follow-up Cross Slash.
Tackling through attacks and performing Perfect Blocks is essential, as you will receive attack buffs from various skills such as Counterstrike, Offensive Guard, and Binding Counter. Equipping the Rocksteady Mantle will be a huge help while you are still learning the playstyle.
Lastly, as this is a Sleep Great Sword Build, learning to Sleep Bomb properly is a must. Remember to plant the bombs in such a way that your attack will hit the monster first before the bomb, maximizing the damage you deal. Take advantage of Focus Mode to help redirect and aim your attack.
Great Sword Weapon Guide and Best Combos
High Rank Build (HR 21 to HR 35)
Agitated Max Might Exploiter
Best Weapon
| Weapon | Rarity | ATK | DEF |
|---|---|---|---|
Artian Blade I
|
6 | 960 (200) |
0 |
| Slots | Element | Affinity | |
| ②②② |
|
15% |
| Weapon Decorations |
|---|
| Production Bonus | Reinforcements |
|---|---|
|
• Element +30 • Attack +5 • Attack +5 • Attack +5 Element Type: |
• Attack +5 • Attack +5 • Attack +5 • Affinity +5 • Affinity +5 |
When building your Artian Blade I, try to get as much Attack Infusion as you can so that you can still deal a lot of damage even when not hitting critical attacks. Also make sure that the Elements of your parts align to maximize the Elemental bonus. Afterward, try to get as much Affinity and Sharpness as possible when Reinforcing your weapon.
| Weapon | Rarity | ATK | DEF |
|---|---|---|---|
 G. Veldian Gladius II G. Veldian Gladius II  | 6 | 1008 (210) | 0 |
| Slots | Element | Affinity | |
| ②②ー | | -10% | |
| Skills | Focus Lv. 2 | ||
| Weapon Decorations |
|---|
Alternatively, you can use the G. Veldian Gladius II instead, which has high Raw and decent Elemental damage at the expense of your Affinity. Thankfully, this will be countered by this build's variety of Affinity sources.
| Weapon | Rarity | ATK | DEF |
|---|---|---|---|
 Red Wing I Red Wing I  | 6 | 864 (180) | 0 |
| Slots | Element | Affinity | |
| ②①ー | | 10% | |
| Skills | Critical Boost Lv. 3 | ||
Red Wing I's Critical Boost makes it a great weapon builds with high Affinity builds, and this one is no exception. Its Blue sharpness also helps multiply its damage further.
Slotting a Focus Jewel II and Focus Jewel I will help increase the speed at which you perform Charge attacks.
| Weapon | Rarity | ATK | DEF |
|---|---|---|---|
 Smiting Fulgur I Smiting Fulgur I  | 6 | 864 (180) | 0 |
| Slots | Element | Affinity | |
| ②①ー | | 15% | |
| Skills | Critical Element Lv. 2 | ||
Smiting Fulgur I is similar to Red Wing I in that it relies on increased Critical damage. However, unlike Red Wing I, Smiting Fulgur instead increases the amount of Elemental damage you deal thanks to Critical Element. Its high Affinity and Blue sharpness also helps in this regard.
Similar to above, slot in a Focus Jewel II and Focus Jewel I for faster Charge attacks.
Agitated Max Might Exploiter Loadout
| Armor | Slots | Skills |
|---|---|---|
|
|
Partbreaker Lv. 1 ーー |
Agitator Lv. 2
|
|
|
Partbreaker Lv. 1 ーー |
Weakness Exploit Lv. 1
Intimidator Lv. 1
|
|
|
Constitution Lv. 1 ーー |
Maximum Might Lv. 1
Agitator Lv. 1
|
|
|
Constitution Lv. 1 Constitution Lv. 1 ー |
Stamina Surge Lv. 1
Maximum Might Lv. 1
|
|
|
Maximum Might Lv. 1 ーー |
Windproof Lv. 1
Weakness Exploit Lv. 1
|
| Charm | ||
| Armor Decorations | ||
Skill Summary
| Weapon Skills | |||
|---|---|---|---|
| Critical Boost | 4 | Focus | 2 |
| Armor Skills | |||
| Agitator | 3 | Constitution | 3 |
| Maximum Might | 3 | Partbreaker | 2 |
| Weakness Exploit | 2 | Flayer | 1 |
| Intimidator | 1 | Stamina Surge | 1 |
| Windproof | 1 | ー | |
| Group / Set Skills | |||
| Scorcher I | Second Wind I | ||
| Ward of Wyveria I | ー | ||
| Skill Buffs Breakdown | |||
|
Affinity
・AGI3: +7% ・WEX2: +10~15% ・MM3: +30% ・Weapon: 15% Lowest-Highest: ・15%~67% |
Attack | Element
・AGI3: +12 Raw ・Crit.B3: +37% Crit Dmg. ・Weapon: 200 Raw Lowest-Highest:: ・200~212 Raw ・+37% Crit Dmg |
||
The skill summary above takes note of all the skills if you use the Artian Weapon.
This High Rank Build combines a variety of skills to increase your Affinity, which will in turn increase your damage output. Maximum Might will provide a bulk of the Affinity as long as your Stamina remains full, which is possible thanks to Second Wind, Stamina Surge, and Constitution. As long as your Stamina usage stays within Second Wind's bonus Stamina, Maximum Might will remain active.
Agitator will provide both Attack and Affinity while the target monster is enraged, while Weakness Exploit will increase your Affinity when you attack a monster's weak spot, plus more if attacking a Wound. Flayer will help create wounds for Weakness Exploit to bounce off of, while Partbreaker will make breaking parts easier while also increasing the damage you deal to Wounds.
Best Secondary Weapons
| Weapon & Type | Explanation |
|---|---|
|
(Hunting Horn) |
• A great secondary weapon that can both provide buffs to you and your party while also dealing huge damage.. • Resounding Melody is a great source of damage for the Hunting Horn. |
|
(Heavy Bowgun) |
• Uses Thunder Ammo to deal huge amounts of Thunder damage to monsters. The weapon's Critical Element works well with the build's numerous sources of Affinity. • Can be slotted with Tetrad Shot 3, which syngergizes well with the Thunder Ammo's magazine size of 8. • Can use Paralysis Ammo, which helps in both solo and multiplayer play. |
High Rank Build (HR 9 to HR 20)
WEX Agitator
Best Weapon
| Weapon | Rarity | ATK | DEF |
|---|---|---|---|
 Chicken Decapitator I Chicken Decapitator I

|
5 | 864 (180) |
0 |
| Slots | Element | Affinity | |
| ②①ー |
|
0% | |
| Skills |
Focus Lv. 1
Charge Master Lv. 1
|
||
| Weapon Decorations |
|---|
Although the name seems like a joke, this Great Sword is anything but. Its high Raw and Elemental Damage, as well as its Focus and Charge Master skills synergizes well to make you deal huge amounts of damage, especially on monsters weak to Fire.
For Decorations, equipping a Focus Jewel II on the Level 2 slot and a Blaze Jewel on the Level 1 slot will help increase your damage further.
| Weapon | Rarity | ATK | DEF |
|---|---|---|---|
 Quematrice Espada III Quematrice Espada III  | 5 | 816 (170) | 0 |
| Slots | Element | Affinity | |
| ②①ー | | 5% | |
| Skills | Punishing Draw Lv. 2 | ||
Quematrice Espada III's Punishing Draw helps increase your initial attack's damage, while also dealing additional KO damage to potentially knock your enemies down. This Great Sword also has some Blue sharpness, which will help you deal more damage while also getting through some tough monster hides.
You can equip Focus Jewel II and a Handicraft Jewel I on this weapon to shorten your charge time and extend this weapon's Blue sharpness.
| Weapon | Rarity | ATK | DEF |
|---|---|---|---|
 Immane Blade II Immane Blade II  | 5 | 720 (150) | 0 |
| Slots | Element | Affinity | |
| ②①ー | | 15% | |
| Skills | Offensive Guard Lv. 1 Guard Lv. 1 | ||
Immane Blade II's has an even longer Blue sharpness bar, allowing you to fight longer without having to sharpen. Additionally, the sword's Offensive Guard and Guard becomes a source of both damage and protection.
Similar to the Quematrice Espada III, use Focus Jewel II and a Handicraft Jewel I to shorten your charge time and get more sharpness.
WEX Agitator Armor Loadout
| Armor | Slots | Skills |
|---|---|---|
|
|
ーーー
|
Entomologist Lv. 1
Weakness Exploit Lv. 1
|
|
|
ーーー |
Ambush Lv. 1
Weakness Exploit Lv. 1
|
|
|
Constitution Lv. 1 ーー |
Constitution Lv. 1
Agitator Lv. 1
|
|
|
Constitution Lv. 1 ーー |
Recovery Up Lv. 1
Agitator Lv. 1
|
|
|
Constitution Lv. 1 ーー |
Weakness Exploit Lv. 1
|
| Charm | ||
| Decorations List | ||
Skill Summary
| Weapon Skills | |||
|---|---|---|---|
| Focus | 3 | Fire Attack | 1 |
| Armor Skills | |||
| Weakness Exploit | 3 | Agitator | 2 |
| Ambush | 1 | Charge Master | 1 |
| Flayer | 1 | Entomologist | 1 |
| Recovery Up | 1 | Constitution | 4 |
| Skill Buffs Breakdown | |||
|
Affinity
・AGI2: +5% ・WEX3: +15~25% Lowest-Highest: ・0%~30% |
Attack | Element
・AGI3: +8 Raw ・Ambush: +9 (5%) Raw ・CM1: +79 (17.5%) Ele (on Charge Attack) ・Fire Atk1: +40 Fire ・Weapon: 180 Raw Lowest-Highest:: ・180~197 Raw ・+40~119 Fire Attack |
||
This early High Rank build focuses on dishing out as much damage as possible by performing fast charge attacks with Focus on the enemy's weak points and Wounds, which will have raised Affinity thanks to Weakness Exploit. Additionally, you will also receive additional Attack and Affinity from Agitator when the enemy is enraged.
Flayer will help create wounds that will synergize well with Weakness Exploit, while Charge Master will increase the Elemental Damage that your sword deals whenever you perform a charge attack.
Constitution will increase your survivability, as it will decrease your stamina consumption when blocking and evading.
Best Secondary Weapons
| Weapon & Type | Explanation |
|---|---|
|
(Heavy Bowgun) |
• A great secondary weapon that can shoot Level 3 Spread ammo, which can take advantage of the build's Weakness Exploit and Agitator. • Has access to Cluster Ammo, giving it strong damage output. |
|
(Light Bowgun) |
• Can Rapid Fire both Normal and Spread Ammo, both of which are strong when combined with Weakness Exploit • Has access to Poison, Recover, and Demon ammo, making it a strong support choice for solo and multiplayer play. |
Monster Hunter Wilds Related Guides

List of Builds for Each Weapon
All Weapon Builds in Monster Hunter Wilds
| All Weapon Builds & Guides | |
|---|---|
|
Low Rank | High Rank |
Low Rank | High Rank |
|
Low Rank | High Rank |
Low Rank | High Rank |
|
Low Rank | High Rank |
Low Rank | High Rank |
|
Low Rank | High Rank |
Low Rank | High Rank |
|
Low Rank | High Rank |
Low Rank | High Rank |
|
Low Rank | High Rank |
Low Rank | High Rank |
|
Low Rank | High Rank |
Low Rank | High Rank |
Non-Meta Builds in Monster Hunter Wilds
| Non-Meta Builds & Guides | |
|---|---|
| Immortal Build | Support Build |
| Best Gathering Sets | How to Make a Good Build |
| Rey Dau Gamma Builds | Uth Duna Gamma Builds |
Comment
I'm dumb. Crafted the Beta instead of the Alpha gloves.
Author

Best Great Sword Builds for High Rank
Premium Articles

Rankings
Gaming News


![Monster Hunter Stories 3 Review [First Impressions] | Simply Rejuvenating](https://img.game8.co/4438641/2a31b7702bd70e78ec8efd24661dacda.jpeg/thumb)
Popular Games

Genshin Impact Walkthrough & Guides Wiki
Honkai: Star Rail Walkthrough & Guides Wiki
Umamusume: Pretty Derby Walkthrough & Guides Wiki
Pokemon Pokopia Walkthrough & Guides Wiki
Resident Evil Requiem (RE9) Walkthrough & Guides Wiki
Monster Hunter Wilds Walkthrough & Guides Wiki
Wuthering Waves Walkthrough & Guides Wiki
Arknights: Endfield Walkthrough & Guides Wiki
Pokemon FireRed and LeafGreen (FRLG) Walkthrough & Guides Wiki
Pokemon TCG Pocket (PTCGP) Strategies & Guides Wiki


Recommended Games
Diablo 4: Vessel of Hatred Walkthrough & Guides Wiki
Cyberpunk 2077: Ultimate Edition Walkthrough & Guides Wiki
Fire Emblem Heroes (FEH) Walkthrough & Guides Wiki
Yu-Gi-Oh! Master Duel Walkthrough & Guides Wiki
Super Smash Bros. Ultimate Walkthrough & Guides Wiki
Pokemon Brilliant Diamond and Shining Pearl (BDSP) Walkthrough & Guides Wiki
Elden Ring Shadow of the Erdtree Walkthrough & Guides Wiki
Monster Hunter World Walkthrough & Guides Wiki
The Legend of Zelda: Tears of the Kingdom Walkthrough & Guides Wiki
Persona 3 Reload Walkthrough & Guides Wiki


All rights reserved
©CAPCOM
The copyrights of videos of games used in our content and other intellectual property rights belong to the provider of the game.
The contents we provide on this site were created personally by members of the Game8 editorial department.
We refuse the right to reuse or repost content taken without our permission such as data or images to other sites.
Is it possible for GogMax Agi Wex build to have a blast GS with both Zoh Shia Pulse and Lord’s Soul?