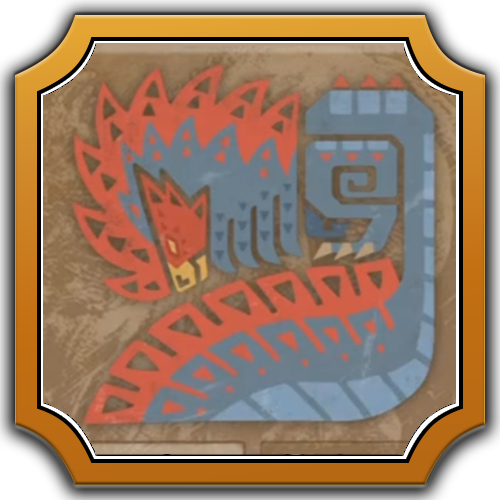
Arch-Tempered Rey Dau A-Rank: The Shining Storm Rages Event Guide
★ Arkveld Gamma Armor | MH Stories 3 Collab
☆ Version 1.041: Sororal α Armor | Shatterseal
★ How to Unlock Proof of a Hero Quest
☆ Omega Planetes | Savage Omega | Builds vs Omega
★ Armor Set Search updated for Ver 1.041
☆ HR50+ Builds | Tier List | Weapon Guides
This is a complete guide on the The Shining Storm Rages Free Challenge Quest for Monster Hunter: Wilds. Read on to see the full guide on how to beat Rey Dau in the Arena, how to get A Rank, and so much more!
How to Unlock The Shining Storm Rages Free Challenge Quest
Limited Free Challenge Quest
| Quest Availability |
|---|
| Event ended |
The Shining Storm Rages challenge quest has now ended. All unused Rey Dau Certificate γ may still be used to forge the Rey Dau γ Armor Set.
Free Challenge Quests Schedule and Rewards
Only Playable from HR 50 or Higher
To proceed with the The Shining Storm Rages quest, you'll need to be at least HR 50 to be able to take on the quest at the Grand Hub.
Walkthrough and List of Main Story Chapters
How to Get A Rank
| Tips to Get A Rank |
|---|
|
|
Use an Ice HBG or Paralysis CB Build
| Offensive Ice Heavy Bowgun Build | Comfort Paralysis Charge Blade Build |
For both solo and multiplayer runs, it is recommended to use any of the two following builds for a high chance at a sub-13 run:
- An Ice Heavy Bowgun build that uses 4 piecs of Gore Magala mixed with 1 piece of Zoh Shia armor. This build takes advantage of Coalescence 3 and Burst 1, which is useful for elemental Heavy Bowguns.
- A Paralysis Charge Blade build that uses 4 pieces of Zoh Shia armor with 1 piece of G. Arkveld armor. This is more comfort-oriented build that can still deliver a sub-13 time thanks to its immobilization options from Stun to Paralysis.
When using the Ice Heavy Bugun, stock up on lots of Freeze Ammo and Snow Herbs to exploit Arch-Tempered Rey Dau's weakness to Ice. Freeze Ammo can be bought from the Base Camp Provisioner or crafted from Snow Herbs.
Best Heavy Bowgun Builds and Armor
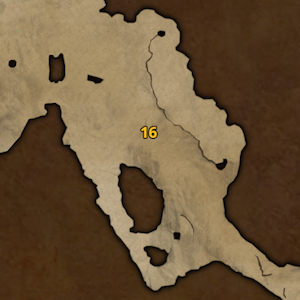
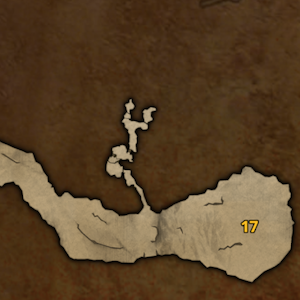
Start in Area 16 Camp
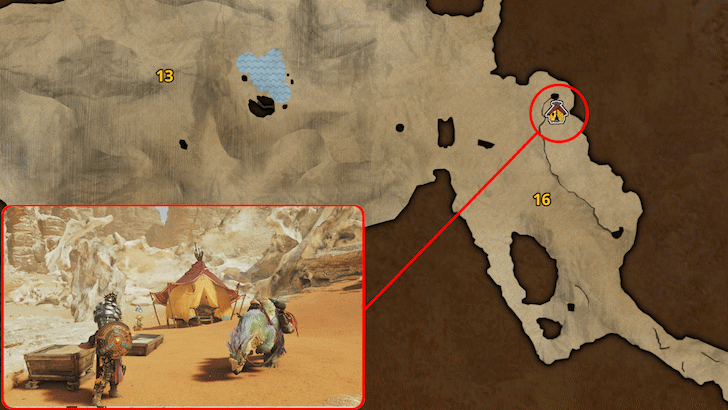
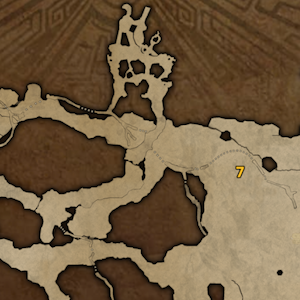
Arch-Tempered Rey Dau will always start in Area 17, at the far end of the map. You can save time running across Windward Plains if you start the quest in the Pop-up Camp in Area 16, which is right next to Arch-Tempered Rey Dau's initial place.
At Area 17, you'll want to take advantage of the Falling Grounding Pillar as soon as possible for around 1,700 damage and an immediate knockdown. Afterwards, deal as much damage as you can before it starts moving to Area 16.
Windward Plains Camps and Map Guide
Avoid New Lightning Beam Attack
Arch-Tempered Rey Dau has a new lightning beam attack where it aims directly below its head, which can be troublesome for those attacking this part of the monster.
If you get hit with this attack, there is a high chance that you will also get hit by a follow-up attack as you're recovering from the initial lightning beam. The follow-up attack can either be another lightning beam or a series of wing attacks.
It will take a few seconds before Arch-Tempered Rey Dau can use this attack, so use the time to run away from the area or prepare your guards and counters.
Use Flash Pod After Avoiding Attack
After the new lightning beam attack, Arch-Tempered Rey Dau will fly for its follow-up attack. If you're able to dodge the initial attack, you can fire a Flash Pod to not only cancel its follow-up, but also make it crash towards the ground which opens up a window of opportunity to unleash an onslaught of attacks!
Note that the first 3 Flash Pods will guarantee Rey Dau's knockdown. After that, all Flash Pods will only deal reduced affect against it. Blindsider has shown no improvement in increasing knockdowns, so you can opt for more comfortable skills such as Divine Blessing.
If you need to stock up on Flash Pods, you can craft them from Flashbug Phosphor obtained from Flashbugs in Windward Plains and other areas (the next best being Scarlet Forest.)
Aim for Horns After Supercharged Lightning Beam
Much like a regular Rey Dau's supercharged lightning beam attack, Arch-Tempered Rey Dau's horns will be open to Focus Strikes after this move. If you managed to avoid this move, try to run towards the monster and use your weapon's Focus Strike for a punish!
Keep in mind that successfully landing a Focus Strike on its horns will put this weak spot into a brief cooldown, where Rey Dau will still attack with the supercharged lightning beam attack, but the horns will not glow red. You can land a Focus Strike again on its horns once enough time has passed.
How to Use Focus Mode and Focus Strike
Use Falling Grounding Pillar in Area 17
Arch-Tempered Rey Dau starts in Area 17, which contains a Falling Grounding Pillar that you can hit with your Slinger to make it crash towards the target monster, deal about 1,700 damage, and knock it down.
Make sure to use this falling rock pillar before Rey Dau moves to another area, as you can easily deal some damage from the rock itself and attacking while it is still flailing on the ground.
Use Pitfall Traps
Though this Free Challenge Quest's main objective is to slay Rey Dau, do not skip out on using Pitfall Traps to immobilize it for a damage window.
Pitfall Trap Location: How to Get and Uses
Mind Rey Dau's Route for the Time Limit
| Region | AT Rey Dau's Initial Visiting Areas |
|---|---|
 Windward Plains Windward Plains |
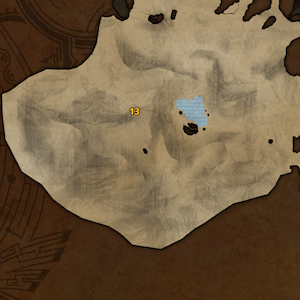
|
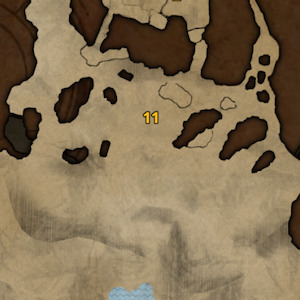
A good measure to check if you can make it to the quest's sub-13 minute A-rank requirement is by observing if Rey Dau has only moved between these 3 areas: 17, 16, and 13 (including the oasis).
If you have dealt enough damage by Area 13 to cause Rey Dau to return to its Area 17 nest, it should be much easier to slay him before you hit the A-rank timer.
Disable Support Hunters

If you are trying to get an A rank while hunting Arch-Tempered Rey Dau alone, remember to turn off the option to call for Support Hunters to avoid increasing the monster's HP. Even if you are playing alone and you have this option turned on, Olivia and the others will join the hunt and automatically increase Rey Dau's health as it is now a multi-hunter quest, making it take longer to kill.
This can be changed from Alma in the 'Post/Join Quest' settings, then changing Multiplayer Settings to Only Players.
If you are playing online, you don't need to worry about random players joining, as the quest will be locked once you start the hunt.
Best Build for The Shining Storm Rages Free Challenge Quest
| Best Builds for AT Rey Dau | ||
|---|---|---|
| Ice Heavy Bowgun | Paralysis Charge Blade | General Build |
Offensive Ice Heavy Bowgun Build
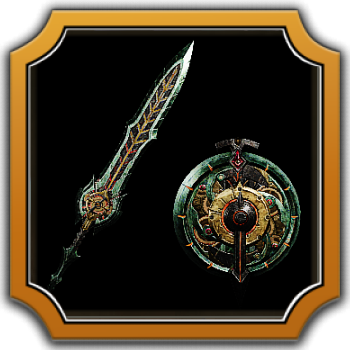
Artian Ice HBG
| Weapon | Mods/Decorations |
|---|---|
 Greifen Greifen
330 Attack 5% Affinity |
Mods: Elemental Ammo Powder Ignition Mod Decorations: Bandolier/Frost Jwl【3】 Opener/Frost Jewel【3】 Crit Elem/Frost Jwl【3】 |
| Production Bonus: Element Infusion, Attack Infusion x3 Reinforcement Bonus: Capacity Boost x2, Attack x3 |
|
This is a Heavy Bowgun build that uses four pieces of the Gore β armor set. The Artian Greifen is assembled with 3 Ice Artian parts to maximize Ice Element damage and exploit Arch-Tempered Rey Dau's Ice weakness.
4x Gore Armor Loadout
| Armor | Slots | Skills |
|---|---|---|
|
|
③①ー | |
|
|
③①ー | |
|
|
②②ー | |
|
|
②ーー | |
|
|
③①① | |
| Charm | ||
| Build Skill List | |||
|---|---|---|---|
| Agitator | 5 | Evade Window | 4 |
| Maximum Might | 3 | Coalescence | 3 |
| Antivirus | 3 | Burst | 1 |
| Constitution | 1 | Flinch Free | 1 |
| Divine Blessing | 1 | Adaptability | 1 |
| Group / Set Skills | |||
| Gore Magala's Tyranny Scale Layering |
|||
This build focuses on high damage output but offers low defense, so you need to be careful and watch out for lightning attacks that deal Thunderblight.
If you want to add some defensive options for this build, you can replace the Adapt and Protection decorations with two Thunder Res Jewels and grab a meal from the Canteen or from a Meal Invitation to get 20 Thunder Resistance and nullify any effects from lightning attacks.
Best Heavy Bowgun Builds and Armor
Comfy Paralysis Charge Blade Build
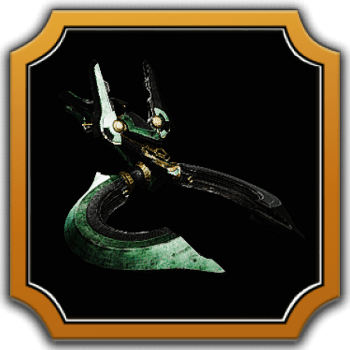
Artian Paralysis CB
| Weapon | Rarity | ATK | DEF |
|---|---|---|---|
 Chrono Gear Chrono Gear
|
8 | 810 (225) |
0 |
| Slots | Element | Affinity | |
| ③③③ |
|
5% | |
| Phial | Impact Phial | ||
| Weapon Decorations |
|---|
| Production Bonus | Artian Reinforcements |
|---|---|
| • Attack +5 • Attack +5 • Attack +5 • Elemental Attack + 30 Element Type: |
• Attack +5
• Attack +5 • Attack +5 • Attack +5 • Attack +5 |
The Artian Chrono Gear CB is the strict recommendation for this build. The CB in general is a great weapon for afflicting both Stun (thanks to its Impact Phials) and Paralysis, giving you a lot of opportunities to bring down Rey Dau for big Savage Axe Element Discharge windows.
Critical Boost 5 and Load Shells 2 are the needed skills to maximize the CB's damage. Offensive Guard is an option but not recommended due to its short uptime and Rey Dau's multiple follow-up attacks from aftershocks.
If you are looking for more speed out of the CB's morphs against Rey Dau's fast attacks, swapping out Critical Jewel II 【2】with Quickswitch/Handicraft Jwl【3】for Rapid Morph 3 and Handicraft 1 is also a viable option.
4x Zoh Shia Armor Loadout
| Armor | Slots | Skills |
|---|---|---|
|
|
Weakness Exploit Lv. 1 Maximum Might Lv. 1 Speed Eating Lv. 1 |
Recovery Speed Lv. 1
Agitator Lv. 1
|
|
|
Burst Lv. 1 ー ー |
Agitator Lv. 2
|
|
|
Divine Blessing Lv. 1 Divine Blessing Lv. 1 Divine Blessing Lv. 1 |
Weakness Exploit Lv. 2
|
|
|
Maximum Might Lv. 1 ー ー |
Agitator Lv. 2
Coalescence Lv. 1
|
|
|
Weakness Exploit Lv. 1 Maximum Might Lv. 1 ー |
Recovery Speed Lv. 1
Counterstrike Lv. 1
Elemental Absorption Lv. 1
|
| Charm | ||
| Armor Decorations | ||
| Build Skill List | |||
|---|---|---|---|
| Agitator | 5 | Critical Boost | 5 |
| Weakness Exploit | 4 | Divine Blessing | 3 |
| Maximum Might | 3 | Thunder Resistance | 3 |
| Load Shells | 2 | Recovery Speed | 2 |
| Burst | 1 | Coalescence | 1 |
| Counterstrike | 1 | Elemental Absorption | 1 | Counterstrike | 1 | ー |
| Group / Set Skills | |||
| Ward of Wyveria | Super Recovery II | ||
This is a Charge Blade build that focuses on comfort, using 4 pieces of Numinous β and 1 piece of G. Arkveld β. With Thunder Charm III (even with just the level II version), it will easily surpass the 20 Thunder Resistance required for preventing Thunderblight.
The game plan for this build is to activate Savage Axe as soon as you can and focus on using Element Discharges against Rey Dau's head (no need for SAEDs unless you are a bit far). Use Perfect Guards only when needed and use rolls in Axe mode for fast repositioning and immediate follow-ups of Element Discharges.
Whenever Rey Dau is in the air, you should be able to knock it down at 3 times with Flash Pods for some juicy Axe mode damage windows. Make sure to use all of these pods whenever possible.
Best Charge Blade Builds and Armor
General Build
Recommended Weapons
| Weapon | Reason |
|---|---|
|
|
・Easy to mix up guards and attacks with the use of mobile slashes. ・Easy to use for beginners. ▶︎Sword & Shield Builds |
|
|
・Mobile attacks can catch up with the nimble Rey Dau. ・May be difficult to use for beginners. ▶︎Insect Glaive Builds |
|
|
・Easy to launch follow up attacks after guarding with weapon. ・Shelling and Wyrmstake Shots are effective against Rey Dau. ▶︎Gunlance Builds |
|
|
・Deal constant damage with powerful attacks that use Freeze Ammo. ▶︎Heavy Bowgun Builds |
|
|
・Perfect dodges make it easy to launch follow up attacks. ・Time to dodge is the same when fighting a normal Rathalos. ▶︎Bow Builds |
Rey Dau γ and Gore β Loadout
| Armor | Slots | Skills |
|---|---|---|
|
|
③ーー | |
|
|
③①ー | |
|
|
③③ー | |
|
|
ーーー | None |
|
|
③①① | |
| Charm | ||
| Build Skill List | |||
|---|---|---|---|
| Agitator | 4 | Antivirus | 3 |
| Maximum Might | 3 | Latent Power | 2 |
| Evade Window | 2 | Evade Extender | 2 |
| Earplugs | 2 | Weakness Exploit | 1 |
| Burst | 1 | Stamina Surge | 1 |
| Flinch Free | 1 | Adaptability | 1 |
| Group / Set Skills | |||
| Rey Dau's Voltage Gore Magala's Tyranny Lord's Soul |
|||
This general build combines the damage boost from Lord's Soul with the Affinity boost from Gore Magala's Tyranny.
The Rey Dau γ armor pieces from this build will give you 10 Thunder Resistance, so you can grab a Canteen meal or a Meal Invitation buff to max it out to 20 and negate damage from Arch-Tempered Rey Dau's lightning attacks.
The equipped charm can be changed to Counterattack Charm II, if you want more boosts and if you are confident enough to dodge the monster's attacks.
To get the Rey Dau γ armor pieces, you can take on the Event Quest A Silent Flash which also features Arch-Tempered Rey Dau, but you are not required to set a time.
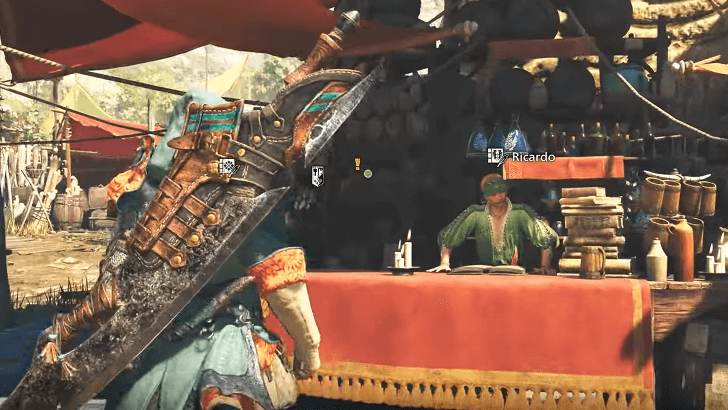
The Shining Storm Rages Free Challenge Quest Overview
Basic Information
| Monsters | |||
|---|---|---|---|
| Time | 50 mins. | Type | Slaying |
| Client | Ricardo | Reward | 30960 |
| Difficulty | H★8 | Region | Windward Plains |
| Objective | Slay the Arch-tempered Rey Dau | ||
| Conditions | ・HR 50 or higher ・Up to 4 players |
||
| Failure |
・Time expires ・Faint 3 times |
||
This quest will have you face an Arch-Tempered Rey Dau, but is only available for a limited time.
Cannot Be Captured
Unlike the Event Quest A Silent Flash, Arch-Tempered Rey Dau cannot be captured in this Free Challenge Quest and needs to be slain for the quest to be completed.
Active Monsters
 Rey Dau Rey Dau
|
 Balahara Balahara
|
 Doshaguma Doshaguma
|
 Chatacabra Chatacabra
|
 Quematrice Quematrice
|
Active Events
| ・Frequent Localized Lightning Strikes |
Rank Clear Times
| A Rank | 13'00"00 |
|---|---|
| B Rank | 20'00"00 |
| C Rank | 50'00"00 |
The Shining Storm Rages Free Challenge Quest Monsters
Rey Dau Details
Known Habitats
| Region | Starting Area | Visited Areas | Resting Area |
|---|---|---|---|
| Windward Plains |
|
|
|
Monster Weakness
| Rey Dau
|
||||||||||||||
|
|
|
|
||||||||||||
|
|
|
|
|
|
||||||||||
Rey Dau can be difficult to deal with when it is flying in the air, so make sure to bring Flash Pods to knock it to the ground whenever it takes flight. Use Focus Strike on its Horns after it performs a lightning beam attack, to gain a free topple!
Grounding Rey Dau's resting spot will also make the fight easier if it makes its way back, so make sure to use Grounding Pods you see lying around!
The Shining Storm Rages Free Challenge Quest Rewards
Exclusive Decorative Pendants
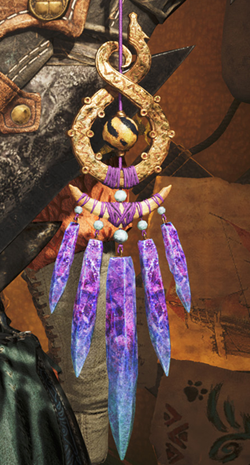 Rey Dau: Mark of Contest (Participation) |
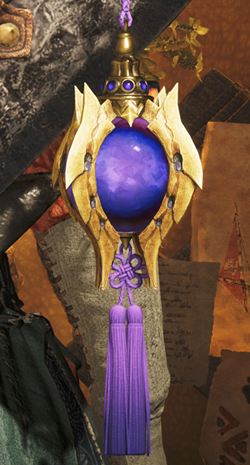 Rey Dau: Mark of Bravery (Participation) |
 Rey Dau: Mark of Mastery (A Rank) |
All 3 Pendants are now available to claim up until 00:00 AM 09/02/2025 UTC (September 2, 2025). To claim them, head over to any Support Desks and select on Claim Content. Select 'Receive' on the Time Attack Participation Prize and Time Attack A Rank Prize notifications.
A notification to claim both the Mark of Contest and Mark of Bravery will be avilable if you participated in the time attack event, and Mark of Mastery if you got Rank A on it. You can then attach this Pendant on your weapon or Seikret.
Rey Dau Certificate γ
You can also get Rey Dau Certificate γ for completing this Free Challenge Quest.
You can use this to craft the Rey Dau γ, Felyne Rey Dau γ armor sets, as well as the Defense Charm V and Power Charm III.
Rey Dau Certificate γ Location: How to Get and Uses
Quest Rewards
| Rewards |
|---|
List of All Items and Materials
Monster Hunter Wilds Related Guides

Quest Guides by Type
 Assignment Quests Assignment Quests |
 Optional Quests Optional Quests |
 Event Quests Event Quests |
 Field Survey History Field Survey History |
 Investigation Quests Investigation Quests |
 Arena Quests Arena Quests |
 Challenge Quests Challenge Quests |
 Free Challenge Quests Free Challenge Quests |
List of Free Challenge Quests
|
|
|
Comment
Author

Arch-Tempered Rey Dau A-Rank: The Shining Storm Rages Event Guide
Premium Articles

Rankings
Gaming News

![Monster Hunter Stories 3 Review [First Impressions] | Simply Rejuvenating](https://img.game8.co/4438641/2a31b7702bd70e78ec8efd24661dacda.jpeg/show)


![Monster Hunter Stories 3 Review [First Impressions] | Simply Rejuvenating](https://img.game8.co/4438641/2a31b7702bd70e78ec8efd24661dacda.jpeg/thumb)
Popular Games

Genshin Impact Walkthrough & Guides Wiki
Honkai: Star Rail Walkthrough & Guides Wiki
Umamusume: Pretty Derby Walkthrough & Guides Wiki
Pokemon Pokopia Walkthrough & Guides Wiki
Resident Evil Requiem (RE9) Walkthrough & Guides Wiki
Monster Hunter Wilds Walkthrough & Guides Wiki
Wuthering Waves Walkthrough & Guides Wiki
Arknights: Endfield Walkthrough & Guides Wiki
Pokemon FireRed and LeafGreen (FRLG) Walkthrough & Guides Wiki
Pokemon TCG Pocket (PTCGP) Strategies & Guides Wiki


Recommended Games
Diablo 4: Vessel of Hatred Walkthrough & Guides Wiki
Cyberpunk 2077: Ultimate Edition Walkthrough & Guides Wiki
Fire Emblem Heroes (FEH) Walkthrough & Guides Wiki
Yu-Gi-Oh! Master Duel Walkthrough & Guides Wiki
Super Smash Bros. Ultimate Walkthrough & Guides Wiki
Pokemon Brilliant Diamond and Shining Pearl (BDSP) Walkthrough & Guides Wiki
Elden Ring Shadow of the Erdtree Walkthrough & Guides Wiki
Monster Hunter World Walkthrough & Guides Wiki
The Legend of Zelda: Tears of the Kingdom Walkthrough & Guides Wiki
Persona 3 Reload Walkthrough & Guides Wiki


All rights reserved
©CAPCOM
The copyrights of videos of games used in our content and other intellectual property rights belong to the provider of the game.
The contents we provide on this site were created personally by members of the Game8 editorial department.
We refuse the right to reuse or repost content taken without our permission such as data or images to other sites.