Recovery Speed Skill Effects
★ Arkveld Gamma Armor | MH Stories 3 Collab
☆ Version 1.041: Sororal α Armor | Shatterseal
★ How to Unlock Proof of a Hero Quest
☆ Omega Planetes | Savage Omega | Builds vs Omega
★ Armor Set Search updated for Ver 1.041
☆ HR50+ Builds | Tier List | Weapon Guides
Recovery Speed is an Armor Skill in Monster Hunter Wilds. Learn the effects of Recovery Speed and see a list of armor, decorations, and talismans with the Recovery Speed skill.
List of Contents
Recovery Speed Skill Effect
Skill Effects Per Level
| Recovery Speed Skill | |||||||||||
|---|---|---|---|---|---|---|---|---|---|---|---|
| Speeds healing of recoverable damage (the red portion of the Health Gauge). | |||||||||||
| Level | Effect | ||||||||||
| 1 | Doubles the speed at which you heal recoverable damage. | ||||||||||
| 2 | Triples the speed at which you heal recoverable damage. | ||||||||||
| 3 | Quadruples the speed at which you heal recoverable damage. | ||||||||||
Recovers Red HP
Recovery Speed speeds up the recovery of red HP. Whenever you take damage, a part of the damage you take will be converted to red HP. This will regenerate over time at a base rate of 1 HP per second, with Recovery Speed helping it regenerate faster.
Stacks with Immunizer
Using an Immunizer alongside having high levels of Recovery Speed will help you recover your red HP extremely fast, to the point that you can recover the red HP by the time you stand up from an attack's knockback.
Does Not Affect Super Recovery or Negate Heat Damage
While Super Recovery involves recovering lost HP, Recovery Speed does not stack with Super Recovery. The most that Recovery Speed can do is recover the current red HP faster so that Super Recovery can kick in.
Recovery Speed also does not negate damage you take from hot areas. You will only start recovering your red HP once you have left the hot area, or once you drink a Cool Drink.
Equipment with Recovery Speed Skill
Armor With Recovery Speed
| Armor | Rank | Def | Skills |
|---|---|---|---|
|
|
High Rank | 44 |
Recovery Speed Lv. 3
Paralysis Resistance Lv. 2
|
|
|
High Rank | 68 |
Recovery Speed Lv. 2
Agitator Lv. 1
|
|
|
High Rank | 66 |
Recovery Speed Lv. 2
Weakness Exploit Lv. 2
|
|
|
High Rank | 52 |
Recovery Speed Lv. 2
Peak Performance Lv. 1
|
|
|
High Rank | 38 |
Recovery Speed Lv. 2
Foray Lv. 1
|
|
|
High Rank | 36 |
Recovery Speed Lv. 2
Poison Resistance Lv. 1
|
|
|
High Rank | 68 |
Recovery Speed Lv. 1
Counterstrike Lv. 2
Elemental Absorption Lv. 1
|
|
|
High Rank | 68 |
Recovery Speed Lv. 1
Agitator Lv. 1
|
|
|
High Rank | 68 |
Recovery Speed Lv. 1
Counterstrike Lv. 1
Elemental Absorption Lv. 1
|
|
|
High Rank | 66 |
Recovery Speed Lv. 1
Weakness Exploit Lv. 2
|
|
|
High Rank | 66 |
Recovery Speed Lv. 1
Convert Element Lv. 1
|
|
|
High Rank | 52 |
Recovery Speed Lv. 1
Tremor Resistance Lv. 1
|
|
|
High Rank | 52 |
Recovery Speed Lv. 1
Peak Performance Lv. 1
|
|
|
High Rank | 52 |
Recovery Speed Lv. 1
Tremor Resistance Lv. 2
|
|
|
High Rank | 44 |
Recovery Speed Lv. 1
Evade Window Lv. 1
Constitution Lv. 1
|
|
|
High Rank | 38 |
Recovery Speed Lv. 1
Foray Lv. 1
|
|
|
High Rank | 38 |
Divine Blessing Lv. 1
Recovery Speed Lv. 1
|
|
|
High Rank | 36 |
Recovery Speed Lv. 1
Entomologist Lv. 1
|
|
|
High Rank | 26 |
Recovery Speed Lv. 1
|
|
|
High Rank | 26 |
Recovery Speed Lv. 1
Ice Resistance Lv. 1
|
|
|
High Rank | 26 |
Recovery Speed Lv. 1
Geologist Lv. 1
|
|
|
Low Rank | 22 |
Recovery Speed Lv. 1
Evade Window Lv. 1
|
|
|
Low Rank | 22 |
Recovery Speed Lv. 1
Evade Window Lv. 1
|
|
|
Low Rank | 2 |
Recovery Speed Lv. 1
|
|
|
Low Rank | 2 |
Recovery Speed Lv. 1
|
|
|
Low Rank | 16 |
Recovery Speed Lv. 1
|
Decorations With Recovery Speed
| List of Decorations | ||
|---|---|---|
|
|
||
Talismans With Recovery Speed
| List of Talismans | ||
|---|---|---|
|
|
|
|
Skill Can Also Be Obtained from Appraised Talismans
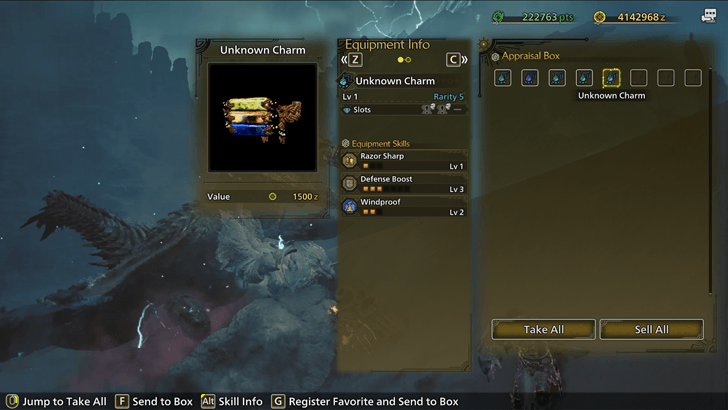
The Recovery Speed skill also has a chance to be included in an appraised talisman. These talismans are appraised from 9-star hunts.
Appraised Talismans were released in the Version 1.021 update.
Appraised Talismans (RNG Talismans) Rolls Guide
Monster Hunter Wilds Related Guides

| List of Skill Types | |
|---|---|
| Weapon Skills | Armor Skills |
| Group Skills | Set Bonus Skills |
| Food Skills | |
All Armor Skills
Comment
Author

Recovery Speed Skill Effects
Premium Articles

Rankings
- We could not find the message board you were looking for.
Gaming News


![Monster Hunter Stories 3 Review [First Impressions] | Simply Rejuvenating](https://img.game8.co/4438641/2a31b7702bd70e78ec8efd24661dacda.jpeg/thumb)
Popular Games

Genshin Impact Walkthrough & Guides Wiki
Honkai: Star Rail Walkthrough & Guides Wiki
Umamusume: Pretty Derby Walkthrough & Guides Wiki
Pokemon Pokopia Walkthrough & Guides Wiki
Resident Evil Requiem (RE9) Walkthrough & Guides Wiki
Monster Hunter Wilds Walkthrough & Guides Wiki
Wuthering Waves Walkthrough & Guides Wiki
Arknights: Endfield Walkthrough & Guides Wiki
Pokemon FireRed and LeafGreen (FRLG) Walkthrough & Guides Wiki
Pokemon TCG Pocket (PTCGP) Strategies & Guides Wiki


Recommended Games
Diablo 4: Vessel of Hatred Walkthrough & Guides Wiki
Cyberpunk 2077: Ultimate Edition Walkthrough & Guides Wiki
Fire Emblem Heroes (FEH) Walkthrough & Guides Wiki
Yu-Gi-Oh! Master Duel Walkthrough & Guides Wiki
Super Smash Bros. Ultimate Walkthrough & Guides Wiki
Pokemon Brilliant Diamond and Shining Pearl (BDSP) Walkthrough & Guides Wiki
Elden Ring Shadow of the Erdtree Walkthrough & Guides Wiki
Monster Hunter World Walkthrough & Guides Wiki
The Legend of Zelda: Tears of the Kingdom Walkthrough & Guides Wiki
Persona 3 Reload Walkthrough & Guides Wiki


All rights reserved
©CAPCOM
The copyrights of videos of games used in our content and other intellectual property rights belong to the provider of the game.
The contents we provide on this site were created personally by members of the Game8 editorial department.
We refuse the right to reuse or repost content taken without our permission such as data or images to other sites.