How to Use the Slinger
★ Arkveld Gamma Armor | MH Stories 3 Collab
☆ Version 1.041: Sororal α Armor | Shatterseal
★ How to Unlock Proof of a Hero Quest
☆ Omega Planetes | Savage Omega | Builds vs Omega
★ Armor Set Search updated for Ver 1.041
☆ HR50+ Builds | Tier List | Weapon Guides
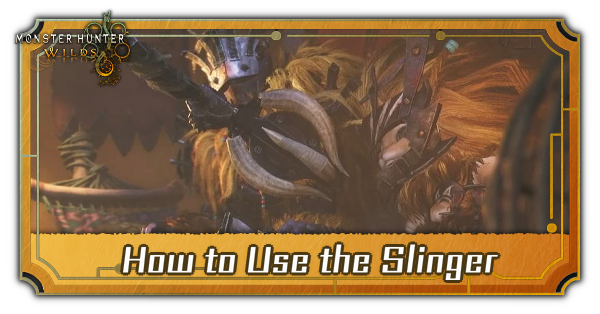
The Slinger is an important piece of equipment Hunters can use in Monster Hunter Wilds. See how you can use the slinger to pull and shoot items, pull environmental hazards, and swing from one place to another.
List of Contents
How to Use the Slinger
Press L2 to Aim and R2 to Shoot
| Action | Button |
|---|---|
| Aim Slinger | |
| Shoot Slinger | |
| Interact Using Slinger |
| Action | Button |
|---|---|
| Aim Slinger | Press and Hold |
| Shoot Slinger | |
| Interact Using Slinger |
| Action | Button |
|---|---|
| Aim Slinger | |
| Shoot Slinger | |
| Interact Using Slinger |
Press and hold the L2 Button to ready your Slinger. This puts a crosshair on your screen where your Slinger's shots will go. Adjust your aim using the Right Analog Stick. Press the R2 Button to shoot whatever ammo is equipped on your slinger,and press Circle to use your Slinger to interact with gatherable items and the environment.
If you are using a Xbox or Keyboard, check the controls in the table above!
What Can the Slinger Do?
| Slinger Functions |
|---|
|
|
Gather Items
You can use the slinger to gather items from afar. This means you no longer need to walk up to items to get them. You also don't need to stop to gather materials as you can use your slinger to gather items while on your Seikret.
This is useful if you are in a hurry to get from one point of the map to another without much interruption.
Aid in Fights
You can use your slinger to shoot a variety of projectiles at monsters. Examples include the Paint Pod for tracking monsters, the Flash Pod for interrupting enemies, and more.
You Can Use Your Slinger While Your Weapon is Unsheathed
| How to Shoot While Unsheathing |
|---|
| How to Shoot While Unsheathing |
|---|
Press and Hold |
| How to Shoot While Unsheathing |
|---|
| Press and Hold |
Players have the option to shoot the slinger while the weapon is unsheathed. To do this, go to Focus Mode through L2 , and shoot using L3! Check the controls for Xbox and Keyboard above!
While this can be done with every weapon, note that you can only do this with Dung Pod, Paint Pod, and Flash Pod.
Shoot Slinger Ammo
You will be able to find Slinger ammo scattered throughout the map. You can pick these up and load them to your Slinger while exploring.
Interactive Map and List of Locations
All Slinger Ammo Types
| Ammo | Effect |
|---|---|
| Slinger ammo that can be used to hit faraway plant life and bombs. | |
| Slinger ammo that lodges into a target. Attacking where it's lodged deals extra damage. | |
| Slinger ammo that detonates on impact. Use it to stagger a monster when you're in a pinch. | |
| Slinger ammo imbued with the ice element. | |
| Slinger ammo imbued with dragon element. | |
| Slinger ammo that can be used to scare away creatures that don't like fire and draw in those that do. | |
| Slinger ammo imbued with the thunder element. | |
| Slinger ammo imbued with water element. Can remove some statuses on monsters. | |
| Slinger ammo that illuminates dark areas when fired and can dazzle flying monsters. | |
| Slinger ammo that can dissipate electricity from the area it lands. | |
| Slinger ammo that can be used to inflict massive damage on monster wounds. | |
| Slinger ammo that explodes on impact. | |
| Slinger ammo that releases a strong odor on impact. Causes certain monsters to flee. | |
| Slinger ammo that emits a harsh, high-frequency sound that can disrupt sensitive monsters. | |
| Slinger ammo that inflicts poison on a target upon impact. | |
| Slinger ammo that causes a violent flash on impact. Will temporarily blind monsters if used in front of them. | |
| Slinger ammo that can be used to lure monsters toward yourself. |
Alternatively, you can also craft your own Stinger Ammo, like the Flash Pods which are crafted from Flash Bugs.
Pull Environmental Hazards
Various environmental hazards such as rock formations, boulders, and vinetraps are scattered throughout the map. When a monster is underneath these hazards, you can use your Slinger to pull them down on the monster. This can deal a lot of damage to the monster, or prevent them from moving for a while.
Swing Around
Wedge Beetles are scattered all over the environment, especially in hanging rocks and ledges. When you see one of them, you can use your Slinger to swing across gaps, or over monsters.
You can also use these Wedge Beetles while in a fight to quickly reposition, or to perform a drop attack on a monster.
Monster Hunter WIlds Related Guides
All Game Mechanics Guides
Comment
Author

How to Use the Slinger
Premium Articles

Rankings
- We could not find the message board you were looking for.
Gaming News


![Monster Hunter Stories 3 Review [First Impressions] | Simply Rejuvenating](https://img.game8.co/4438641/2a31b7702bd70e78ec8efd24661dacda.jpeg/thumb)
Popular Games

Genshin Impact Walkthrough & Guides Wiki
Honkai: Star Rail Walkthrough & Guides Wiki
Umamusume: Pretty Derby Walkthrough & Guides Wiki
Pokemon Pokopia Walkthrough & Guides Wiki
Resident Evil Requiem (RE9) Walkthrough & Guides Wiki
Monster Hunter Wilds Walkthrough & Guides Wiki
Wuthering Waves Walkthrough & Guides Wiki
Arknights: Endfield Walkthrough & Guides Wiki
Pokemon FireRed and LeafGreen (FRLG) Walkthrough & Guides Wiki
Pokemon TCG Pocket (PTCGP) Strategies & Guides Wiki


Recommended Games
Diablo 4: Vessel of Hatred Walkthrough & Guides Wiki
Cyberpunk 2077: Ultimate Edition Walkthrough & Guides Wiki
Fire Emblem Heroes (FEH) Walkthrough & Guides Wiki
Yu-Gi-Oh! Master Duel Walkthrough & Guides Wiki
Super Smash Bros. Ultimate Walkthrough & Guides Wiki
Pokemon Brilliant Diamond and Shining Pearl (BDSP) Walkthrough & Guides Wiki
Elden Ring Shadow of the Erdtree Walkthrough & Guides Wiki
Monster Hunter World Walkthrough & Guides Wiki
The Legend of Zelda: Tears of the Kingdom Walkthrough & Guides Wiki
Persona 3 Reload Walkthrough & Guides Wiki


All rights reserved
©CAPCOM
The copyrights of videos of games used in our content and other intellectual property rights belong to the provider of the game.
The contents we provide on this site were created personally by members of the Game8 editorial department.
We refuse the right to reuse or repost content taken without our permission such as data or images to other sites.