Sakuratide α Armor Set Skills and Materials
★ Arkveld Gamma Armor | MH Stories 3 Collab
☆ Version 1.041: Sororal α Armor | Shatterseal
★ How to Unlock Proof of a Hero Quest
☆ Omega Planetes | Savage Omega | Builds vs Omega
★ Armor Set Search updated for Ver 1.041
☆ HR50+ Builds | Tier List | Weapon Guides
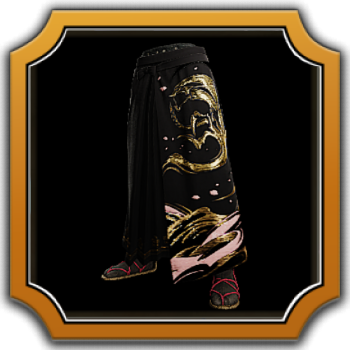
The Sakuratide α Armor Set is a High Rank armor available in the Festival of Accord: Blossomdance event in Monster Hunter Wilds (MH Wilds). See the skills of the Sakuratide α armor set, its defense, resistances, and forging materials here.
How to Get Sakuratide α
Craft with Blossomdance Ticket
You can craft Sakuratide α armor pieces with the use of the Blossomdance Ticket item, which is obtainable during the Festival of Accord: Blossomdance event. You can get this ticket from Login Bonuses and Limited Bounties from the support desk while the event is active.
Equipping at least 2 pieces of this armor set for the set bonus skill Blossomdance Boon and completing quests with it will also give you a chance to get more tickets.
You will need Carbalite Ore to craft these equipment, which is easily obtainable by mining ores. By completing all the available limited bounties, it should be possible to forge a whole set on the same day.
Blossomdance Ticket Location: How to Get and Uses
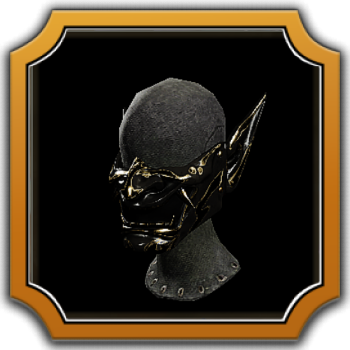
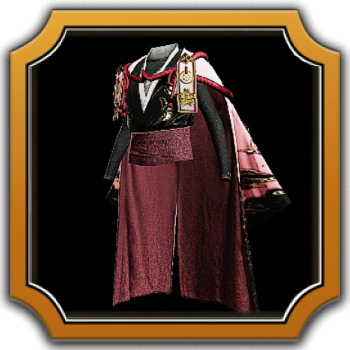
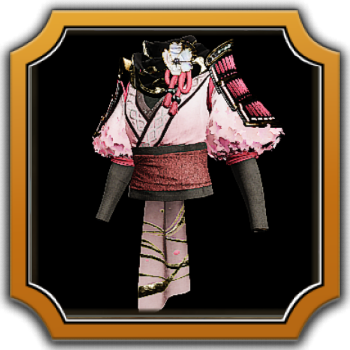
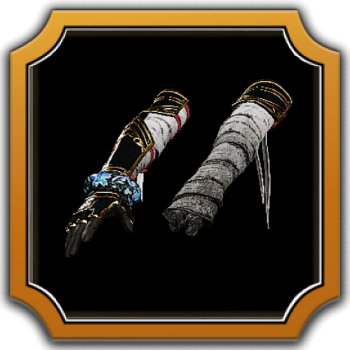
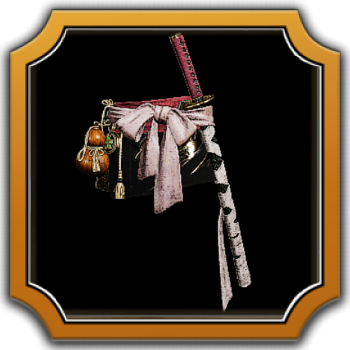
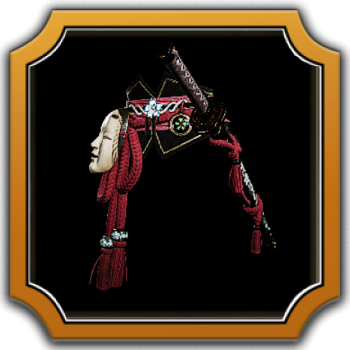
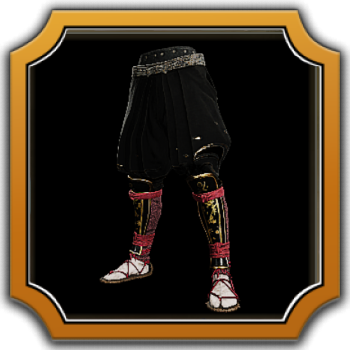
Sakuratide α Armor Set Preview
| Type 1 (Male) | Type 2 (Female) |
|---|---|
 |
 |
Sakuratide α Armor Set Skills
Skills and Slots
| Armor | Slots | Skills |
|---|---|---|
  |
ーーー
①①① |
|
  |
②ーー
③①① |
|
  |
②①ー
③②① |
|
  |
②①ー
③②① |
|
  |
②ーー
③①① |
|
Decoration slots highlighted in red (if present) indicate additional slots gained through Armor Transcending.
Group Skills and Set Bonuses
Blossomdance Prayer Set Bonus
| Skill | Required Pieces |
|---|---|
| Blossomdance Boon I | 2 |
| Blossomdance Boon II | 4 |
Festival Spirit Group Skill
| Skill | Required Pieces |
|---|---|
| Carving Master | 3 |
Sakuratide α Armor Set Defense and Resistances
| Armor | Def | |||||
|---|---|---|---|---|---|---|
|
|
36
(90) |
2 | 2 | -3 | 2 | 2 |
|
|
36
(90) |
2 | 2 | -3 | 2 | 2 |
|
|
36
(90) |
2 | 2 | -3 | 2 | 2 |
|
|
36
(90) |
2 | 2 | -3 | 2 | 2 |
|
|
36
(90) |
2 | 2 | -3 | 2 | 2 |
| Total | 180
(450) |
10 | 10 | -15 | 10 | 10 |
Sakuratide α Armor Set Forging Materials
| Armor | Required Materials |
|---|---|
| Sakuratide Headgear α |
Cost:
|
| Sakuratide Robe α |
Cost:
|
| Sakuratide Bracers α |
Cost:
|
| Sakuratide Obi α |
Cost:
|
| Sakuratide Hakama α |
Cost:
|
Sakruatide α Armor Builds
Builds above are recommended to made at HR50++
These builds are focused on utilizing 2-4 armor pieces of Sakuratide for the following goal: farming the related special items (such as Blossomdance Tickets) for the Blossomdance Event.
Its 2nd level effect is optional (+9% Attack and +50 Defense) but is so far alright to use for general use. Feel free to switch out the Sakuratide build for another or a personal one once you have finished farming enough special items from the event.
Builds and Best Armor for Each Weapon
Best Mantle for Sakuratide Builds
| Best Mantle | Explanation |
|---|---|
|
|
• The Corrupted Mantle is essential for its 4.5% percentage increase attack buff stacking with Blossomdance Boon II, on top of its 10% affinity bonus. |
For Sakuratide builds, we recommend you use the Corrupted Mantle to stack additional 4.5% Attack on top of your armor's attack buffs. You will also be able to build 10% more affinity while wearing this mantle once you get enough hits in on the monster.
4x Sakuratide Agitator General Build
Sakuratide Agitator Armor Loadout
| Armor | Slots | Skills |
|---|---|---|
|
|
ー
ー
ー
|
Foray Lv. 2
Adaptability Lv. 1
|
|
|
Agitator Lv. 1 ー ー |
Agitator Lv. 2
|
|
|
Maximum Might Lv. 1 Quick Sheathe Lv. 1 ー |
Item Prolonger Lv. 1
Foray Lv. 1
|
|
|
Maximum Might Lv. 1 Shock Absorber Lv. 1 ー |
Quick Sheathe Lv. 2
Adaptability Lv. 1
|
|
|
Maximum Might Lv. 1 ー ー |
Item Prolonger Lv. 2
Foray Lv. 1
|
| Charm | ||
| Armor Decorations | ||
Decorations are randomly obtained, so feel free to adjust with what is available.
This is a general Agitator-based set that uses 4 pieces of Sakuratide to activate Blossomdance Boon II, granting extra quest rewards related to the Blossomdance event, and additional 9% Attack and +50 Defense. For the chest, Numinous Shroud β from the Numinous β set is chosen to maximize Agitator with Challenger Charm II.
Skill Summary
| Build Skill List | |||
|---|---|---|---|
| Agitator | 5 | Foray | 4 |
| Maximum Might | 3 | Quick Sheathe | 3 |
| Item Prolonger | 3 | Adaptability | 2 |
| Shock Absorber | 1 | ー | |
| Group / Set Skills | |||
| Carving Master I | Blossomdance Boon II | ||
The skills of this build are simple but straightforward; Agitator 5, Blossomdance Boon II, and the Corrupted Mantle contribute most of the raw attack. Take advantage of Foray with a Poison or Paralysis weapon afterwards.
For supplying affinity, you will have Maximum Might 3 (+30% Affinity) in this build. Though not providing as much affinity as other setups such as 2 pc. Gore with Antivirus 3, or WEX 5, due to decoration slot limitations, it is still a viable raw damage general set.
For more damage buff uptime, you can make use of Item Prolonger 3 which extends the duration of items like Might Seed by 50%.
Weapon Recommendation for Gravios Blockade Event Quest
| Weapon | Rarity | ATK | DEF |
|---|---|---|---|
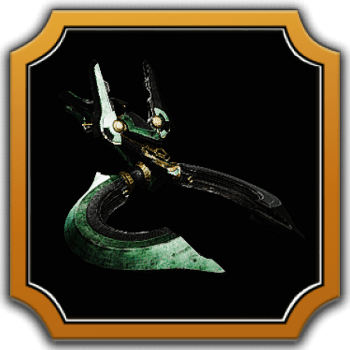 Greifen Greifen
|
8 | 259 | 5% |
| Slots | Element | Affinity | |
| ③③③ | ー | 5% | |
| Special Ammo | Wyvernpiercer Ignition Wyvernblast Ignition |
||
The 259 Attack noted above covers Blossomdance Boon II's buff with active Agitator 5. If computing with Foray, add 12.
| Weapon Decorations |
|---|
| Production Bonus | Reinforcement Prioritization |
|---|---|
| • Attack +5 • Attack +5 • Attack +5 Element Type: | • Capacity Boost +1 • Capacity Boost +1 • Attack +5 • Attack +5 • Attack +5 |
The choice weapon for this build is the Artian Greifen specced into maximizing Water elemental damage for farming Gravios in the Gravios Blockade event quest.
Gravios Blockade Quest and Rewards
4x Sakuratide Burst General Build
Sakuratide Burst Armor Loadout
| Armor | Slots | Skills |
|---|---|---|
|
|
ー
ー
ー
|
Foray Lv. 2
Adaptability Lv. 1
|
|
|
Counterstrike Lv. 1 ー ー |
Quick Sheathe Lv. 1
Foray Lv. 1
|
|
|
Counterstrike Lv. 1 Constitution Lv. 1 ー |
Item Prolonger Lv. 1
Foray Lv. 1
|
|
|
Counterstrike Lv. 1 Constitution Lv. 1 ー |
Quick Sheathe Lv. 2
Adaptability Lv. 1
|
|
|
Burst Lv. 1 ー ー |
Burst Lv. 2
|
| Charm | ||
| Armor Decorations | ||
Decorations are randomly obtained, so feel free to adjust with what is available.
This is a general Burst-based set that uses 4 pieces of Sakuratide to activate Blossomdance Boon II, granting extra quest rewards related to the Blossomdance event, and additional 9% Attack and +50 Defense. For the greaves, Mizutsune Greaves β from the Mizutsune β set is chosen to maximize Agitator with Chain Charm II.
Burst can be a preferable alternative to Agitator on weapons that rely less on affinity such as the Gunlance due to keeping uptime outside of enraged monster states.
Skill Summary
| Build Skill List | |||
|---|---|---|---|
| Burst | 5 | Foray | 4 |
| Counterstrike | 3 | Quick Sheathe | 3 |
| Constitution | 2 | Adaptability | 2 |
| Item Prolonger | 1 | ー | |
| Group / Set Skills | |||
| Carving Master I | Blossomdance Boon II | ||
The build takes advantage of Burst 5, Blossomdance Boon II, and the Corrupted Mantle contribute most of the raw attack. Take advantage of Foray with a Poison or Paralysis weapon afterwards.
This build will be lacking in affinity, so it's best used for weapons that depend on moves that cannot crit such as shelling from the Gunlance. Counterstrike 3 is added as an additional raw option in this build in case you get sent flying by a monster.
2x Sakuratide Agitator General Build
Preferable Weapon Types
| ー | |||||
Weapons that are not stamina-intensive are good fits for this build due to the affinity provided by Maximum Might. Agitator is also easier to build into compared to Weakness Exploit (WEX), as mixing the pieces for WEX can be limiting for utility skills.
This build should be able to provide you an affinity of ceiling of 75% with all buffs activated, not yet including a weapon.
Sakuratide Agitator Armor Loadout
| Armor | Slots | Skills |
|---|---|---|
|
|
Agitator Lv. 1 Quick Sheathe Lv. 1 ー |
Evade Window Lv. 1
Coalescence Lv. 1
|
|
|
Maximum Might Lv. 1 ー ー |
Quick Sheathe Lv. 1
Foray Lv. 1
|
|
|
Maximum Might Lv. 1 Quick Sheathe Lv. 1 ー |
Item Prolonger Lv. 1
Foray Lv. 1
|
|
|
Maximum Might Lv. 1 ー ー |
Agitator Lv. 2
Coalescence Lv. 1
|
|
|
Burst Lv. 1 Antivirus Lv. 1 Antivirus Lv. 1 |
Flinch Free Lv. 1
Antivirus Lv. 1
|
| Charm | ||
| Armor Decorations | ||
Decorations are randomly obtained, so feel free to adjust with what is available.
Skill Summary
| Build Skill List | |||
|---|---|---|---|
| Agitator | 5 | Maximum Might | 3 |
| Antivirus | 3 | Quick Sheathe | 3 |
| Foray | 2 | Coalescence | 2 |
| Burst | 1 | Evade Window | 1 |
| Flinch Free | 1 | Item Prolonger | 1 |
| Group / Set Skills | |||
| Black Eclipse I | Blossomdance Boon I | ||
2x Sakuratide Second Wind Build
Preferable Weapon Types
(Recommended) |
|
The Hammer fits best with Second Wind for comfort to maintain affinity during Charge attacks, especially Mighty Charge.
Weapons capable of Offset Attacks can also make use of this build for Counterstrike 3. For Great Sword or Switch Axe, feel free to swap Fitness Charm V with Exploiter Charm II for more affinity with Weakness Exploit 2.
Sakuratide Second Wind Armor Loadout
| Armor | Slots | Skills |
|---|---|---|
|
|
Counterstrike Lv. 1 ー ー |
Agitator Lv. 2
|
|
|
Agitator Lv. 1 ー ー |
Agitator Lv. 2
|
|
|
Maximum Might Lv. 1 Maximum Might Lv. 1 ー |
Maximum Might Lv. 1
|
|
|
Counterstrike Lv. 1 Marathon Runner Lv. 1 ー |
Quick Sheathe Lv. 2
Adaptability Lv. 1
|
|
|
Counterstrike Lv. 1 ー ー |
Item Prolonger Lv. 2
Foray Lv. 1
|
| Charm | ||
| Armor Decorations | ||
Decorations are randomly obtained, so feel free to adjust with what is available.
Skill Summary
| Build Skill List | |||
|---|---|---|---|
| Agitator | 5 | Constitution | 5 |
| Counterstrike | 3 | Maximum Might | 3 |
| Quick Sheathe | 3 | Item Prolonger | 2 |
| Foray | 1 | Adaptability | 1 |
| Group / Set Skills | |||
| Second Wind I | Blossomdance Boon I | ||
2x Sakuratide Agitator Bow Build
Preferable Weapon Type
| Bow Suggestions |
|---|
| Artian: Angelbein
Coating: Power or Close-range |
The Bow demands a large amount of stamina management to be used comfortably. In making this general bow build, we focused on as much Stamina Surge and Constitution possible, then we focused on Agitator as its core damage skill.
Sakuratide Agitator Bow Armor Loadout
| Armor | Slots | Skills |
|---|---|---|
|
|
Agitator Lv. 1 Coalescence Lv. 1 Constitution Lv. 1 |
Recovery Speed Lv. 1
Agitator Lv. 1
|
|
|
Stamina Surge Lv. 1 ー ー |
Quick Sheathe Lv. 1
Foray Lv. 1
|
|
|
Stamina Surge Lv. 1 Constitution Lv. 1 ー |
Item Prolonger Lv. 1
Foray Lv. 1
|
|
|
Agitator Lv. 1 Stamina Surge Lv. 1 ー |
Constitution Lv. 2
|
|
|
Burst Lv. 1 Antivirus Lv. 1 Antivirus Lv. 1 |
Flinch Free Lv. 1
Antivirus Lv. 1
|
| Charm | ||
| Armor Decorations | ||
Decorations are randomly obtained, so feel free to adjust with what is available.
Skill Summary
| Build Skill List | |||
|---|---|---|---|
| Agitator | 5 | Constitution | 4 |
| Stamina Surge | 3 | Antivirus | 3 |
| Foray | 3 | Burst | 2 |
| Coalescence | 1 | Recovery Speed | 1 |
| Quick Sheathe | 1 | Flinch Free | 1 |
| Item Prolonger | 1 | ー | |
| Group / Set Skills | |||
| Black Eclipse I | Blossomdance Boon I | ||
2x Sakuratide Burst Dual Blades Build
Preferable Weapon Type
| DB Suggestions |
|---|
| Artian: Tiltkreise (Any Element)
|
For Dual Blades, we suggest the usual High Rank options for both Artian and non-Artian elemental DBs. This build makes use of Burst 5, so going with an elemental option and exploiting monster elemental weaknesses is highly recommended.
Best Dual Blades Builds for High Rank
Sakuratide Burst Dual Blades Armor Loadout
| Armor | Slots | Skills |
|---|---|---|
|
|
Burst Lv. 1 Marathon Runner Lv. 1 ー |
Evade Window Lv. 1
Coalescence Lv. 1
|
|
|
Burst Lv. 1 Antivirus Lv. 1 ー |
Evade Window Lv. 2
|
|
|
Stamina Surge Lv. 1 Antivirus Lv. 1 ー |
Item Prolonger Lv. 1
Foray Lv. 1
|
|
|
Coalescence Lv. 1 Antivirus Lv. 1 ー |
Quick Sheathe Lv. 2
Adaptability Lv. 1
|
|
|
Burst Lv. 1 ー ー |
Burst Lv. 2
|
| Charm | ||
| Armor Decorations | ||
Decorations are randomly obtained, so feel free to adjust with what is available.
Skill Summary
| Build Skill List | |||
|---|---|---|---|
| Burst | 5 | Constitution | 5 |
| Evade Window | 3 | Antivirus | 3 |
| Coalescence | 2 | Quick Sheathe | 2 |
| Foray | 1 | Stamina Surge | 1 |
| Marathon Runner | 1 | Item Prolonger | 1 |
| Adaptability | 1 | ー | |
| Group / Set Skills | |||
| Black Eclipse I | Blossomdance Boon I | ||
Monster Hunter Wilds Related Guides
All Armor Parts Lists
 Head Head |
 Chest Chest |
||||
 Arms Arms |
 Waist Waist |
 Legs Legs |
|||
All Armor by Rank
| Low Rank Armor Sets | High Rank Armor Sets |
All High Rank Armor Sets
Comment
Author

Sakuratide α Armor Set Skills and Materials
Premium Articles

Rankings
Gaming News


![Monster Hunter Stories 3 Review [First Impressions] | Simply Rejuvenating](https://img.game8.co/4438641/2a31b7702bd70e78ec8efd24661dacda.jpeg/thumb)
Popular Games

Genshin Impact Walkthrough & Guides Wiki
Honkai: Star Rail Walkthrough & Guides Wiki
Umamusume: Pretty Derby Walkthrough & Guides Wiki
Pokemon Pokopia Walkthrough & Guides Wiki
Resident Evil Requiem (RE9) Walkthrough & Guides Wiki
Monster Hunter Wilds Walkthrough & Guides Wiki
Wuthering Waves Walkthrough & Guides Wiki
Arknights: Endfield Walkthrough & Guides Wiki
Pokemon FireRed and LeafGreen (FRLG) Walkthrough & Guides Wiki
Pokemon TCG Pocket (PTCGP) Strategies & Guides Wiki


Recommended Games
Diablo 4: Vessel of Hatred Walkthrough & Guides Wiki
Cyberpunk 2077: Ultimate Edition Walkthrough & Guides Wiki
Fire Emblem Heroes (FEH) Walkthrough & Guides Wiki
Yu-Gi-Oh! Master Duel Walkthrough & Guides Wiki
Super Smash Bros. Ultimate Walkthrough & Guides Wiki
Pokemon Brilliant Diamond and Shining Pearl (BDSP) Walkthrough & Guides Wiki
Elden Ring Shadow of the Erdtree Walkthrough & Guides Wiki
Monster Hunter World Walkthrough & Guides Wiki
The Legend of Zelda: Tears of the Kingdom Walkthrough & Guides Wiki
Persona 3 Reload Walkthrough & Guides Wiki


All rights reserved
©CAPCOM
The copyrights of videos of games used in our content and other intellectual property rights belong to the provider of the game.
The contents we provide on this site were created personally by members of the Game8 editorial department.
We refuse the right to reuse or repost content taken without our permission such as data or images to other sites.