Rey Dau Weakness and Drops
★ Arkveld Gamma Armor | MH Stories 3 Collab
☆ Version 1.041: Sororal α Armor | Shatterseal
★ How to Unlock Proof of a Hero Quest
☆ Omega Planetes | Savage Omega | Builds vs Omega
★ Armor Set Search updated for Ver 1.041
☆ HR50+ Builds | Tier List | Weapon Guides
Rey Dau is a Flying Wyvern and the Windward Plains’s apex predator in Monster Hunter Wilds. In this guide, you will find general information about Rey Dau, its weakness, moveset, and how to beat it!
| All Related Rey Dau Articles | ||
|---|---|---|
 Rey Dau Rey Dau
|
 Weapons Weapons
|
 Armor Sets Armor Sets
|
| List of All Apex Monsters | |||
|---|---|---|---|
List of Contents
Rey Dau Weakness
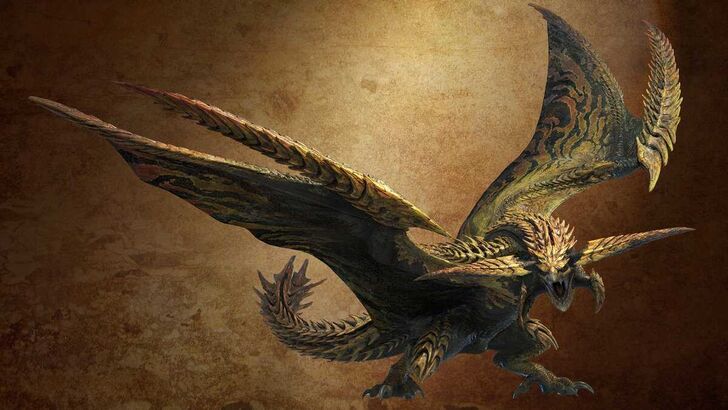
Basic Information
 |
||
| Type | Roar | Wind Pressure |
|---|---|---|
| Flying Wyvern | Weak | None |
| Tremor | Status Effect | Element |
| None | Thunderblight | Thunder |
| Gold Crown Sizes | ||
|
|
||
Note: Gold Crown Sizes have ranges and may vary between hunters.
Damage Type Weakness
Hitzone Values and Weakness Breakdown
※ Click the tabs to switch between Damage Type and Elemental Damage Hitzone effectiveness.
| Part | |||
|---|---|---|---|
| Head | |||
| Torso | |||
| Left Wing | |||
| Right Wing | |||
| Left Leg | |||
| Right Leg | |||
| Tail | |||
| Overall |
| Part | |||||
|---|---|---|---|---|---|
| Head | |||||
| Torso | |||||
| Left Wing | |||||
| Right Wing | |||||
| Left Leg | |||||
| Right Leg | |||||
| Tail | |||||
| Overall |
The numbers shown above showcase the effectiveness of damage types against the monster's hitzones. Parts with higher numbers mean the damage type is more effective, with 1 being the lowest and 20 as the highest.
Hitzone DPS Summary
| Ice is the best element to use against Rey Dau. Try to aim for its Head to deal the most amount of Ice damage. |
Kinsect Extract From Parts
| Head | Torso | ||
|---|---|---|---|
| Left wing | Right Wing | ||
| Left Leg | Right Leg | ||
| Tail | - | - |
Best Kinsects and All Kinsect Trees
Status Ailment and Item Weakness
| Status Ailment | Items | ||
|---|---|---|---|
| |
|
||
| |
|
||
| |
|
||
| |
|
||
| |
|
||
| |
|
||
Breakable Parts
| Breakable |
・Horns ・Wings ・Tail (Severable) |
|---|
Rey Dau Item Loadout
Recommend Items to Bring
|
|
|
|
|
|
|
|
|
|
|
It is recommended to bring Nulberry to counter Thunderblight. You can also use Pitfall Traps, Shock Traps, and Flash Pods to gain an offensive advantage during the hunt.
List of All Items and Materials
Rey Dau Locations and Quests
Known Habitats
| Region | Starting Area | Visited Areas | Resting Area |
|---|---|---|---|
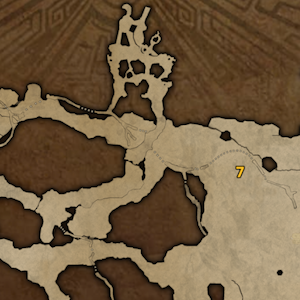
 Windward Plains Windward Plains |

|

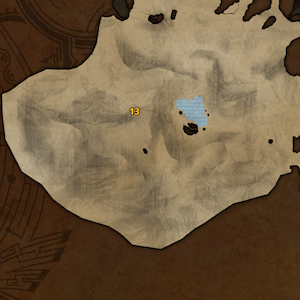
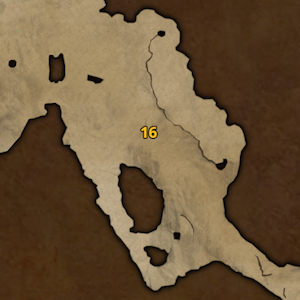
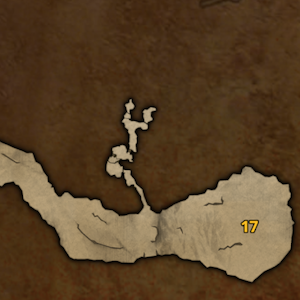
|

|
Rey Dau can also appear in the Wounded Hollow. When hunting for Gold Crowns, that locale is a good place to scout and reroll for monster sizes.
Interactive Map and List of Locations
Quest Appearances
| Quest Type | Lvl. | Quest Name |
|---|---|---|
| Assignments | 2★ | A Merciless Glare |
| Optional | 2★ | Sultan of the Sand |
| Assignments | 6★ | Roaring Rey Dau |
| Optional | 6★ | When the Dust Settles |
Rey Dau is first encountered in Low Rank in the main quest A Merciless Glare, then becomes part of an optional available quest after. It is also encountered again once you reach High Rank, mainly in the Roaring Rey Dau assignment.
How to Beat Rey Dau
| Rey Dau Monster Fight Tips |
|---|
|
|
Use Flash and Frostburst Pods
Flash Pods can interrupt Rey Dau’s attacks or bring it down during flight. Rey Dau will fall and will be toppled if you flash it while flying, making a damage opening for your team to hit his weak spots. Keep an eye out for Rime Beetles as well to acquire Frostburst Pods – ammo that Rey Dau is elementally weak against.
Remember that Rey Dau will develop a certain resistance to flash pods when used frequently. This resistance is a recurring mechanic across all monsters.
Use Focus Strike When Its Horns Overheat
Use Focus Strike when Rey Dau's horns overheat after a lightning beam attack. After a successful Focus Strike, Rey Dau will be toppled and is open for a damage phase.
When in Focus Mode, Rey Dau's horns will glow red similar to wounds when it overheats. This indicates that the horns are currently a weakness you can exploit through Focus Strikes.
Look Out for Its Lightning Beams
Rey Dau can release a Lightning Discharge from its horns, this attack can either be quickfire beams that deal low damage, or it can be a supercharged beam that can cart you in one shot if you do not have enough elemental resistance.
Watch out for Rey Dau's horns as the telegraph for his beam attacks are its horns pointing forward. Once you see this telegraph, start running away in a diagonal direction to avoid the beam, or ready a shield to take it head on.
Be Extra Careful in Rey Dau's Resting Spot
Fighting Rey Dau in his resting spot (Area 17) can be surprising as his attacks now have follow-up lightning explosions. Be careful in committing to your combos since these follow-up attacks can hit hard and possibly cause Thunderblight.
Take Advantage of Environmental Traps
Rey Dau will fly and move to different parts of the map, so it's a good idea to look out for environmental traps that you can use against it to speed up the hunt.
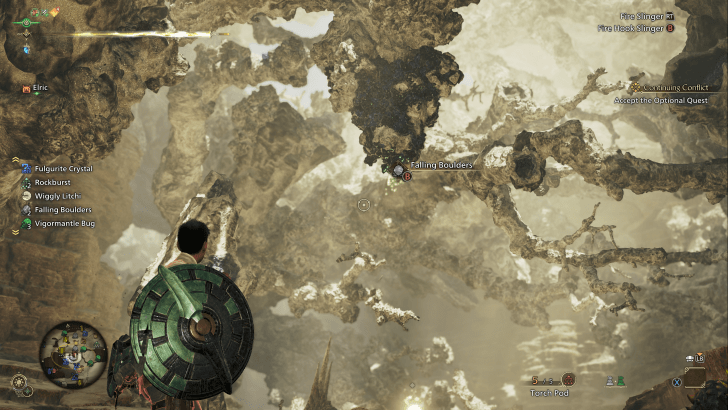
Falling Boulders, Windward Plains
 |
|
| Locale | Area |
|---|---|

|
|
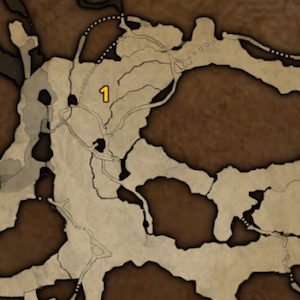
There are several Falling Boulders in Area 1 and 7 of Windward Plains that you can use during your hunt. Rey Dau rarely ventures in Area 1, but you can lure it with Luring Pods to this area.
Position Rey Dau carefully underneath the boulders and use your Slinger to pull down the boulder and knock it off its feet!
Vine Traps, Windward Plains
 |
|
| Locale | Area |
|---|---|

|
|
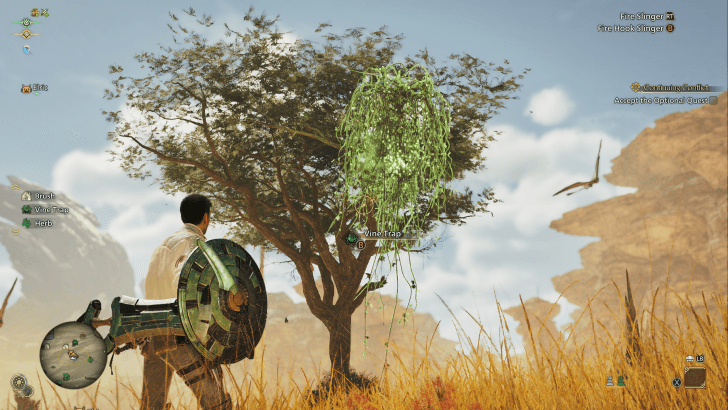
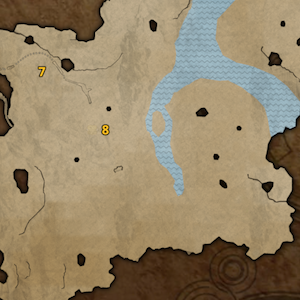
There are overgrown trees in Area 7 and Area 8 of Windward Plains where you can pull down the vines to set a Vine Trap. Lure Rey Dau towards the trap so you can get a few hits!
Keep in mind that the trap won't hold Rey Dau for long, so stay close to it as it approaches the trap!
Sharp Crystal Pillar, Windward Plains
 |
|
| Locale | Area |
|---|---|

|
|
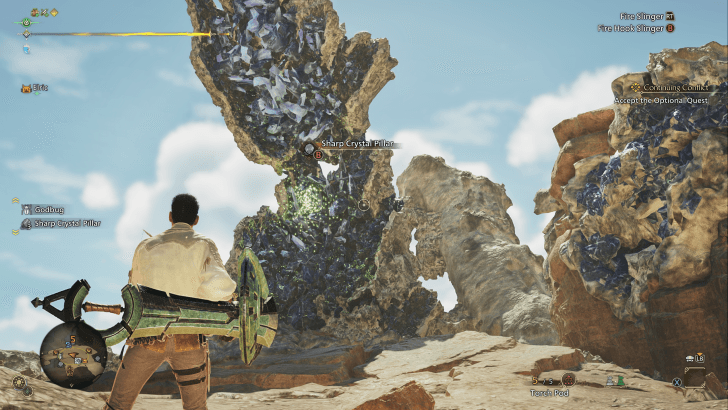
A Rey Dau hunt can can start in or move to Area 5 of Windward Plains where there are 3 Sharp Crystal Pillars that you can bring down to knock it off its feet.
This area is very small so you'll need to be careful positioning Rey Dau as its chain attacks can cover the entire area.
Falling Grounding Pillar, Windward Plains
 |
|
| Locale | Area |
|---|---|

|
|
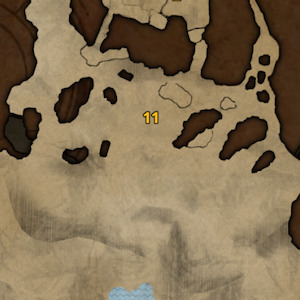
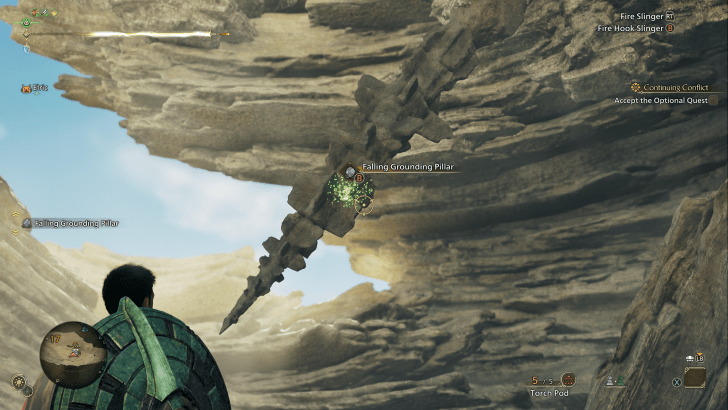
Near the end of the hunt Rey Dau flies to Area 17 of Windward Plains to rest. This area has a large Grounding Pillar that you can bring down on Rey Dau to do massive damage.
Positioning Rey Dau beneath the pillar though is a bit tricky as the area is very large. We recommend putting a Pitfall Trap below the Grounding Pillar and luring Rey Dau onto the trap first, then bringing down the pillar when it's stunned!
Stack on Elemental Resistance
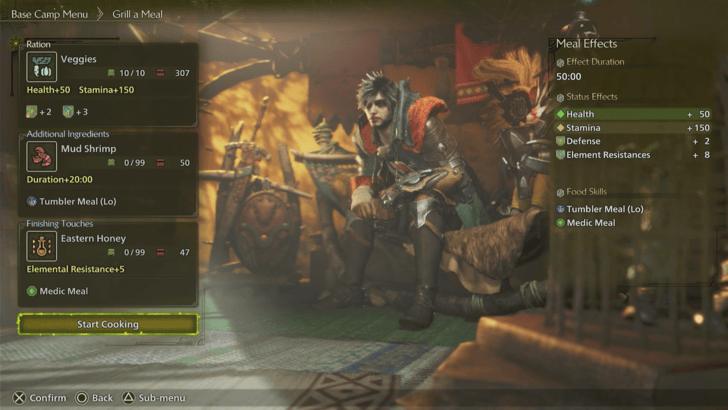
The majority of Rey Dau's attacks are infused with Thunder Element. It is best to have high Thunder Resistance when needed, since having no proper resistance will have its elemental attacks deplete your health fast.
When fighting Rey Dau for the first time, we recommend equipping the Ingot Armor set for Divine Blessing and Thunder Resistance as well as eating vegetables to increase Elemental Resistance.
Rey Dau Attack Patterns
Moveset and Openings
| Attack | Description |
|---|---|
| Supercharged Lightning Beam | Extra appendages appear on Rey Dau's neck and bright bolts of lightning gather on its spine, then it fires one devastating lightning beam. Dodge this attack by running to the side, then prepare your Focus Strike for Rey Dau’s horns. |
| Flip Slam | Rey Dau performs a backflip and then quickly slams its wing on the ground. Take advantage of this attack as it gives brief damage window after the flip. |
| Lightning Beam | Rey Dau plants his wings on the ground or takes to the air and fires one lightning beam. Run towards Rey Dau in a diagonal direction to avoid getting hit. In High Rank, Rey Dau can do this move twice consecutively, with a varying delay on the second beam. |
| Quickfire Beam | Rey Dau plants his wings on the ground and fires lightning beams in quick succession. Continuously roll in Ray Dau's direction in a diagonal pattern to dodge the beams. |
| Flying Wing Drag | From a flying state, Rey Dau drags his wing toward a target. Dodge away from the direction of the wing drag or use a Flash Pod to topple Rey Dau. |
| Heavy Tail Slam | Rey Dau raises its tail high and slams it on the ground. Roll to the side or run towards Rey Dau's legs before the tail hits you. |
| Double Tail Slam | Rey Dau winds his tail either to the left or right, then slams it in both directions. Depending how near you are, roll towards Rey Dau's legs or away from the tail to avoid this attack. |
| Wing Slam | Rey Dau raises either one of his wings and then slams it on the ground. Roll backward or forward once you see it raise its wing. |
| Grounded Wing Drag | Rey Dau burrows its wing on the ground and then drags it forward. Roll towards Rey Dau's legs if you're near enough, or dodge away if you're farther off from the monster. |
| Horn Thrust | Rey Dau points his horns forward and thrusts toward a target. Roll sideways to avoid the hitbox from the front and back. |
Alternatively, all of Rey Dau's attacks can be guarded with a Shield.
Rey Dau Variants
| All Rey Dau Variants | ||
|---|---|---|
| Tempered | Frenzied | Arch-Tempered |
Tempered Rey Dau
| Monster | Basic Information |
|---|---|
 Tempered Rey Dau Tempered Rey Dau |
Habitat: First Encounter: Unlocked after finishing the Awaking from a Dream quest. |
The Tempered Rey Dau variant can be hunted as a Field Survey Investigation after clearing the objectives of What Lies Ahead in Chapter 6, which includes slaying Arkveld in Awaking from a Dream. Completing these objectives will allow you to raise your Hunter Rank beyond HR40 and allow you to take 7★+ quests.
The Tempered Rey Dau can also be hunted in 9★ difficulty quests. These quests are only available for players who are HR 100+ and will randomly appear throughout the map. Saving these quests as investigations are recommended to maximize the reward potential.
Tempered Rey Dau Appearance
Tempered Rey Dau are stronger and covered in large scars across their bodies which you can damage and open into Tempered Wounds which you can break with a Focus Strike to deal increased damaged and even knock them down to the ground!
Tempered Rey Dau Rewards
| Difficulty | Possible Rewards |
|---|---|
| 7★ | Hunt Completion Breaking Tempered Wounds |
| 8★ | Hunt Completion Breaking Tempered Wounds |
| 9★ | Hunt Completion |
7★ and 8★ difficulty quests reward Ancient Weapon Fragments and Hunter Symbol III. Destroying a Tempered Rey Dau's tempered wound will also reward various Wyverian Bloodstones that are used for Relic Melding.
On the other hand, 9★ difficulty quests offer unique rewards including Glowing Stones, Armor Spheres, and Artian Reinforcement Materials. Take note that 9★ hunts do not reward Ancient Weapon Fragments, Hunter Symbols, or Decorations.
Is There A Frenzied Rey Dau?
There is currently no Frenzied Rey Dau available in the game as it is only a variant for monsters who are in the Iceshard Cliffs.
Arch-Tempered Rey Dau
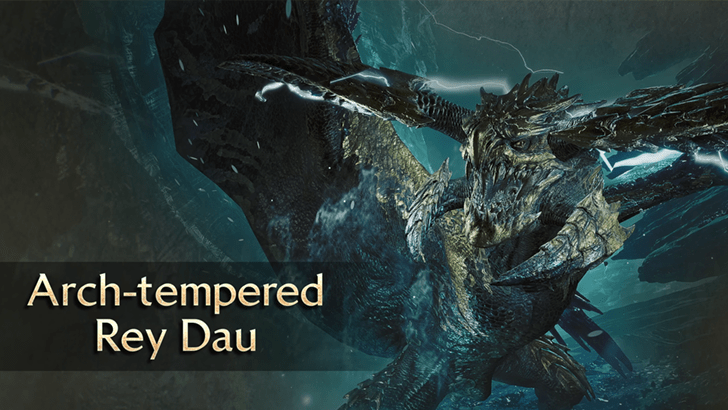
The Event Quest A Silent Flash, featuring Arch-Tempered Rey Dau, is currently having a rerun from July 1 (8:00 PM EDT) to July 15, 2025 (7:59 PM EDT). It's accessible for hunters at Hunter Rank 50 and above. The quest will become permanently available once it goes live again on July 22, 2025 (ET). This will make AT Rey Dau permanently accessible!
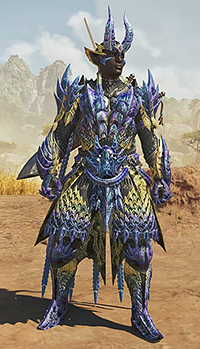
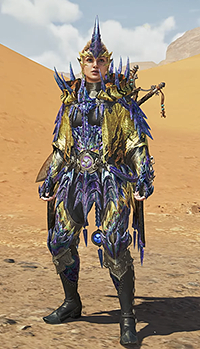
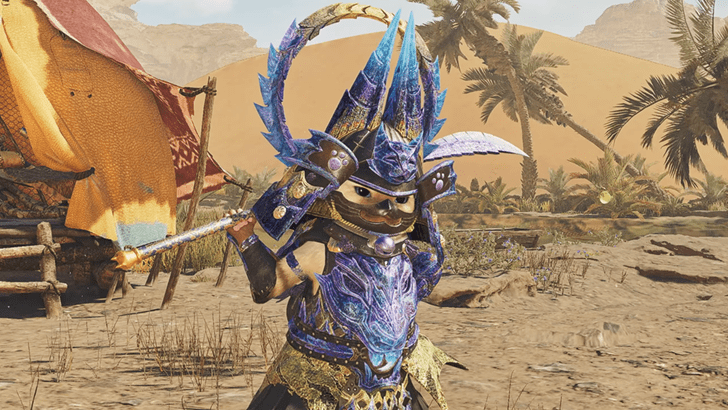
Completing this quest will allow you to craft the Rey Dau γ armor set and the Felyne Rey Dau γ set for your Palico.
A Free Challenge Quest for Arch-Tempered Rey Dau, titled The Shining Storm Rages was previously available during May 6 to May 20, 2025 ET.
Arch-Tempered Rey Dau Rewards
| Type A Armor | Type B Armor |
|---|---|
 |
 |
| Palico Armor | |
 |
|
Rewards from the Arch-Tempered Rey Dau will be materials that can be used to craft its unique Gamma (γ) version of the Rey Dau armor sets. These have better armor skills, decoration slots, and defense than Alpha (α) and Beta (β) sets.
Title Updates Roadmap and Schedule
Rey Dau Drops and Rewards
Low Rank Materials
| |
| |
| |
| |
Specific parts, such as the Rey Dau Tail, are much easier to obtain upon breaking parts of a monster. Part breaks will be easier to do with the Partbreaker skill. Most parts will take part break damage from any weapon, but tails in particular will only be cut with the Sever damage type.
High Rank Materials
| |
| |
| |
| |
In High Rank, the Rey Dau Boltgem is the hardest and rarest drop to obtain from Rey Dau. It will be much easier to get from Investigations that include it as a guaranteed reward. These may be found in your own map or can be spotted from quests online such as in SOS quests.
Monster Hunter Wilds Related Guides
All Monsters Guides
Arch-Tempered Monsters
| Arch-Tempered Monster Guides | |
|---|---|
 AT Rey Dau AT Rey Dau |
 AT Uth Duna AT Uth Duna |
 AT Nu Udra AT Nu Udra |
 AT Jin Dahaad AT Jin Dahaad |
 AT Arkveld AT Arkveld |
|
All Large Monsters
Comment
"Rey Dau Weakness and How to Spawn" tried to find info about how to spawn this monster in the guide, but I cannot see this information
Author
Rey Dau Weakness and Drops
Premium Articles
Rankings
Gaming News
Popular Games

Genshin Impact Walkthrough & Guides Wiki

Honkai: Star Rail Walkthrough & Guides Wiki

Umamusume: Pretty Derby Walkthrough & Guides Wiki

Pokemon Pokopia Walkthrough & Guides Wiki

Resident Evil Requiem (RE9) Walkthrough & Guides Wiki

Monster Hunter Wilds Walkthrough & Guides Wiki

Wuthering Waves Walkthrough & Guides Wiki

Arknights: Endfield Walkthrough & Guides Wiki

Pokemon FireRed and LeafGreen (FRLG) Walkthrough & Guides Wiki

Pokemon TCG Pocket (PTCGP) Strategies & Guides Wiki
Recommended Games

Diablo 4: Vessel of Hatred Walkthrough & Guides Wiki

Cyberpunk 2077: Ultimate Edition Walkthrough & Guides Wiki

Fire Emblem Heroes (FEH) Walkthrough & Guides Wiki

Yu-Gi-Oh! Master Duel Walkthrough & Guides Wiki

Super Smash Bros. Ultimate Walkthrough & Guides Wiki

Pokemon Brilliant Diamond and Shining Pearl (BDSP) Walkthrough & Guides Wiki

Elden Ring Shadow of the Erdtree Walkthrough & Guides Wiki

Monster Hunter World Walkthrough & Guides Wiki

The Legend of Zelda: Tears of the Kingdom Walkthrough & Guides Wiki

Persona 3 Reload Walkthrough & Guides Wiki
All rights reserved
©CAPCOM
The copyrights of videos of games used in our content and other intellectual property rights belong to the provider of the game.
The contents we provide on this site were created personally by members of the Game8 editorial department.
We refuse the right to reuse or repost content taken without our permission such as data or images to other sites.

 Arkveld
 Nu Udra
 Balahara
 Doshaguma
 Chatacabra
 Uth Duna
 Lala Barina
 Quematrice
 Rompopolo
 Ajarakan
 Yian Kut-Ku
 Congalala
 Rathalos
 Gypceros
 Rathian
 Gravios
 Nerscylla
 Gore Magala
 Hirabami
 Mizutsune
 Jin Dahaad
 Blangonga
 Guardian Arkveld
 Guardian Doshaguma
 Guardian Rathalos
 Guardian Ebony Odogaron
 Xu Wu
Xu Wu Zoh Shia
 Guardian Fulgur Anjanath
 Lagiacrus
 Seregios
 Omega Planetes


![Monster Hunter Stories 3 Review [First Impressions] | Simply Rejuvenating](https://img.game8.co/4438641/2a31b7702bd70e78ec8efd24661dacda.jpeg/thumb)


Yeah, spawning information does not exist.