Blangonga Weakness and Drops
★ Arkveld Gamma Armor | MH Stories 3 Collab
☆ Version 1.041: Sororal α Armor | Shatterseal
★ How to Unlock Proof of a Hero Quest
☆ Omega Planetes | Savage Omega | Builds vs Omega
★ Armor Set Search updated for Ver 1.041
☆ HR50+ Builds | Tier List | Weapon Guides
Blangonga is a Fanged Beast in Monster Hunter Wilds. Learn how to beat Blangonga, its weaknesses, drops, locations, attack patterns and more!
| All Related Blangonga Articles | ||
|---|---|---|
 Blangonga Blangonga
|
 Weapons Weapons
|
 Armor Sets Armor Sets
|
List of Contents
Blangonga Weakness
Basic Information
 |
||
| Type | Roar | Wind Pressure |
|---|---|---|
| Fanged Beast | Weak | None |
| Tremor | Status Effect | Element |
| None | Iceblight, Frostblight | Ice |
| Gold Crown Sizes | ||
|
|
||
Note: Gold Crown Sizes have ranges and may vary between hunters.
Damage Type Weakness
Hitzone Values and Weakness Breakdown
※ Click the tabs to switch between Damage Type and Elemental Damage Hitzone effectiveness.
| Part | |||
|---|---|---|---|
| Head | |||
| Torso | |||
| Left Foreleg | |||
| Right Foreleg | |||
| Left Hind Leg | |||
| Right Hind Leg | |||
| Tail | |||
| Overall |
| Part | |||||
|---|---|---|---|---|---|
| Head | |||||
| Torso | |||||
| Left Foreleg | |||||
| Right Foreleg | |||||
| Left Hind Leg | |||||
| Right Hind Leg | |||||
| Tail | |||||
| Overall |
The numbers shown above showcase the effectiveness of damage types against the monster's hitzones. Parts with higher numbers mean the damage type is more effective, with 1 being the lowest and 20 as the highest.
Hitzone DPS Summary
| Sever | Charge Blade Charge Blade is a transforming weapon that stores energy in Sword Mode and delivers an elemental slash in Axe Mode. Dual Blades The Dual Blades that excels at rapid successive attacks and lets you transform into a demon to enhance your attack power. Great Sword The Great Sword uses slow but powerful swings to attack. Gunlance The Gunlance is a weapon that offensive and defensive weapon that uses artillery fire as its main attack. Insect Glaive The Insect Glaive is a weapon that specializes in aerial combat and strengthens itself using monster extracts from hunting insects. Lance The Lance is a weapon that boasts extremely high defensive performance. It can be used to charge and guard against enemy attacks. Long Sword The Long Sword uses quick continuous attacks and allows you to perform a parry slash when avoiding a monster's attack. Switch Axe Switch Axe is a transforming weapon that switches between Axe Mode and Sword Mode. Axe Mode allows you to perform all kinds of attacks while Sword Mode lets you perform high speed attacks. Sword and Shield The Sword and Shield is a versatile weapon with balanced attack and defense. |
|---|---|
| | |
| Blunt | Hammer The Hammer is a weapon that delivers powerful ranged attacks and is especially good at aiming at a monster's head to stun it. Hunting Horn The Hunting Horn is a support weapon that plays a melody that strengthens allies. It is best used in multiplayer. Sword and Shield The Sword and Shield is a versatile weapon with balanced attack and defense. |
|---|---|
| | |
| Shot | Bow The Bow is a weapon that can be used from a distance with a large number of shots and can be used to deal more damage using charged shots or special arrows. Heavy Bowgun Heavy Bowguns can aim for great damage by releasing powerful bullets, and can be equipped with shields for added defense. Light Bowgun The Light Bowgun is long-range weapon with excellent mobility and a variety of agendas using status inflicting ammunition and support ammunition! |
|---|---|
| | |
| Fire is the best element to use against Blangonga. Try to aim for its Head to deal the most amount of Fire damage. |
Kinsect Extract From Parts
| Head | Torso | ||
|---|---|---|---|
| Left Foreleg | Right Foreleg | ||
| Left Hind Leg | Right Hind Leg | ||
| Tail | - | - |
Best Kinsects and All Kinsect Trees
Status Ailment and Item Weakness
| Status Ailment | Items | ||
|---|---|---|---|
| |
|
||
| |
|
||
| |
|
||
| |
|
||
| |
|
||
| |
|
||
Breakable Parts
| Breakable |
・Head ・Tail |
|---|
Blangonga Locations and Quests
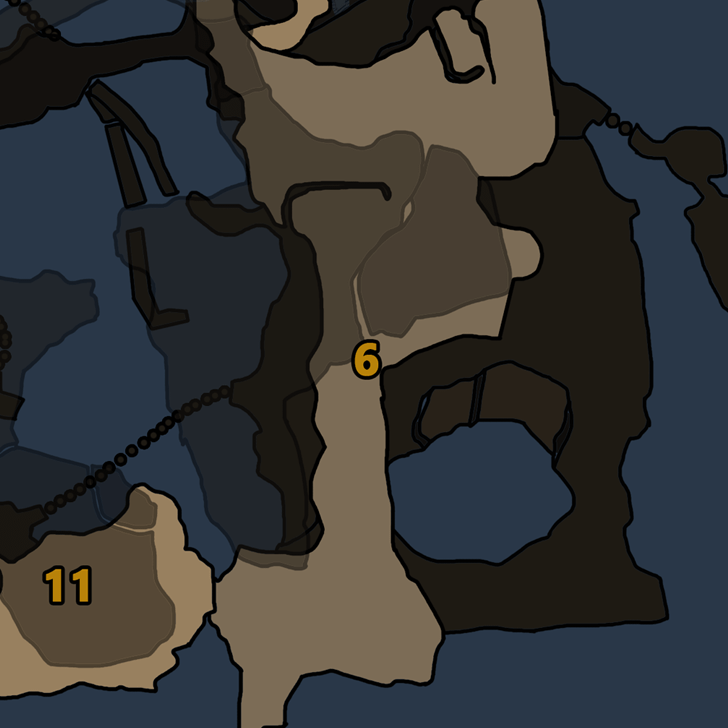
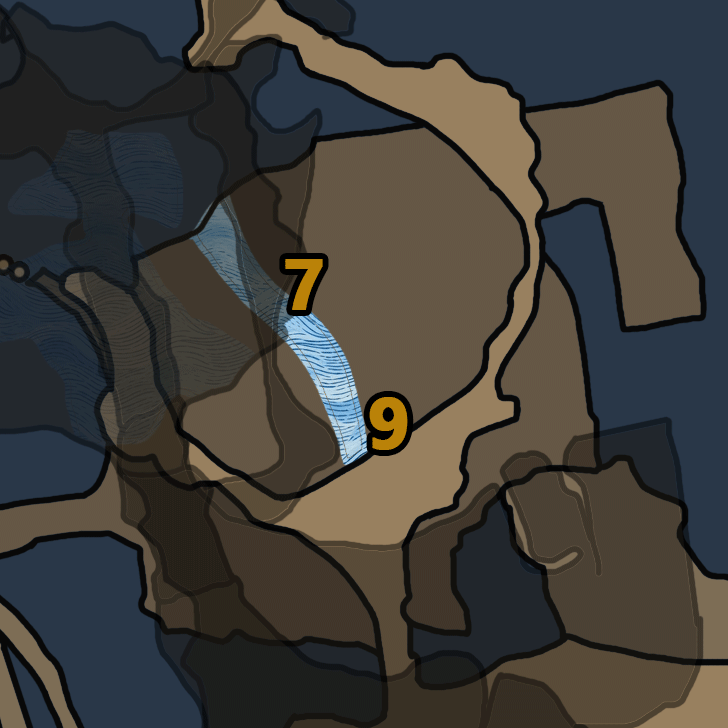
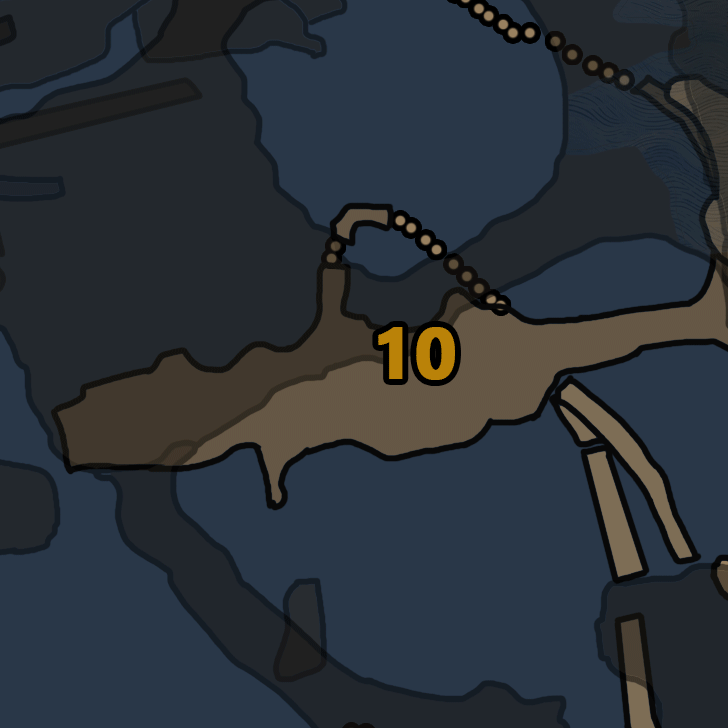
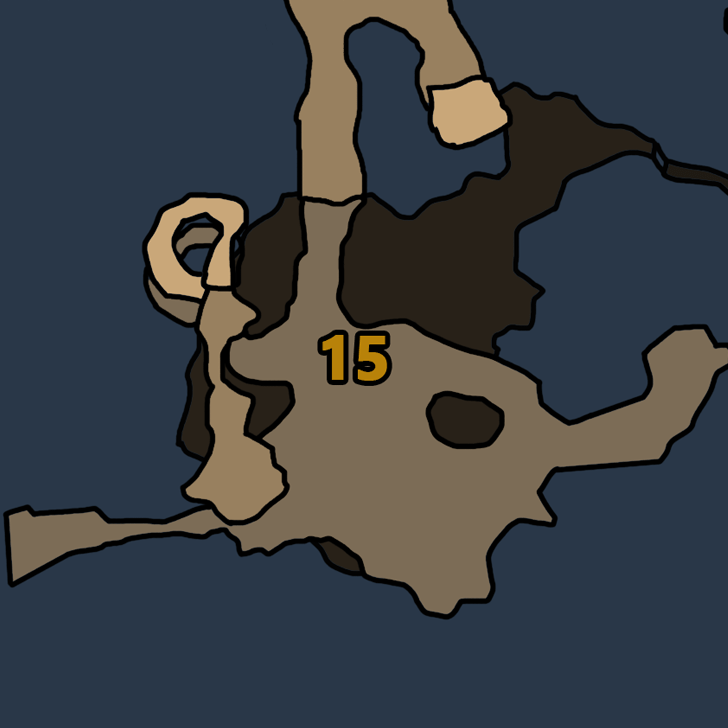
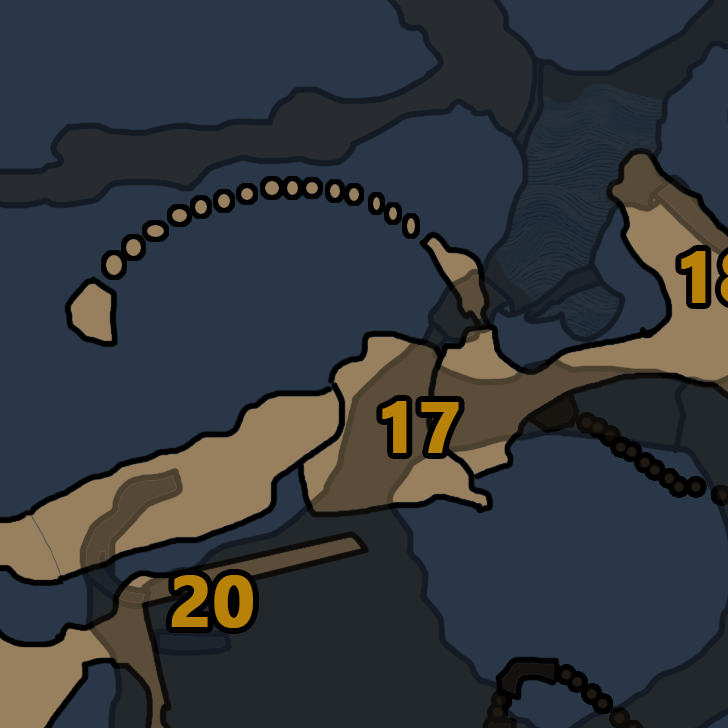
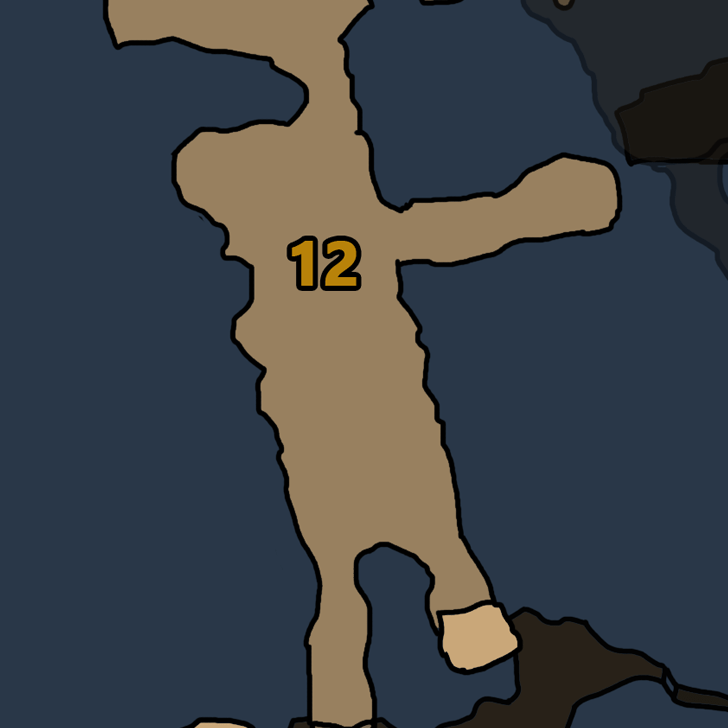
Known Habitats
| Region | Starting Area | Visited Areas | Resting Area |
|---|---|---|---|
 Iceshard Cliffs Iceshard Cliffs |

|
|
|
Quest Appearances
| Quest Type | Lvl. | Quest Name |
|---|---|---|
| Optional Quest | 4★ | Blangonga Excursion |
| Optional Quest | 5★ | What We Protect |
| Optional Quest | 6★ | Echoing from the Cliffs |
| Assignment Quest | 6★ | Shrouded in Black |
| Event Quest | 9★ | The White Wonder |
Blangonga Item Loadout
Recommended Items to Bring
|
|
|
|
|
|
|
|
|
|
|
|
|
|
|
|
The most notable items to bring are Nulberries and Cleansers. These will combat Blangonga's Breath attack effects that can inflict Iceblight which can be dealt with Nulberries, and Frostblight, which can be cured by using Cleansers.
For Mantles, we recommend taking Mending Mantle as it can heal you even when you get inflicted by Frostblight, while the Rocksteady Mantle allows you to keep executing combos without any interruption.
Before hunting Blangonga, make sure to bring healing items such as Potions, Mega Potions, and Max Potions. Keep in mind to bring Flash Pods to blind the monster and Large Dung Pods to get rid of the small Blangos that get in your way. If Blangonga's swipe attacks keep getting in the way of your moves, try to utilize Pitfall Traps and Shock Traps to open up damage windows for you and your team.
List of All Items and Materials
How to Beat Blangonga
| Blangonga Monster Fight Tips |
|---|
|
|
Nulberry and Cleanser Cures Ailments
Blangonga's breath attacks can inflict Frostblight ailments that can hinder the player from moving, while the Blangos can inflict Iceblight with their ranged attacks. We recommended bringing Cleanser to remove Frostblight immediately and Nulberries to recover from the Iceblight.
Keep in mind that these can also be dealt with by equipping certain armor skills such as Blight Resistance or Ice Resistance.
Kill the Blangos First
The Blangos that accompany the Blangonga may be a nuisance in swarms and can disrupt your hunt for the Blangonga. It is recommended to either take down the Blangos first before focusing on the Blangonga or use a Large Dung Pod to have most of the Blango pack disperse.
Use Luring Pods to Start Turf Wars
You can also using Luring Pods to lure other monsters like Hirabami and Gypceros to engage in a turf war with Blangonga.
Both Monsters will deal heavy damage towards each other, so take advantage of their scuffle and attack Blangonga when its occupied!
How to Start Monster Fights and Turf Wars
Aim for the Blangonga's Head and Tail
The Blangonga's head and tail is its weakest part, so make sure to focus all of your attacks on these parts to deal the highest amount of damage you can against it. Additionally, breaking these parts will yield more rewards that can help you craft the Blangonga set if you wish to do so.
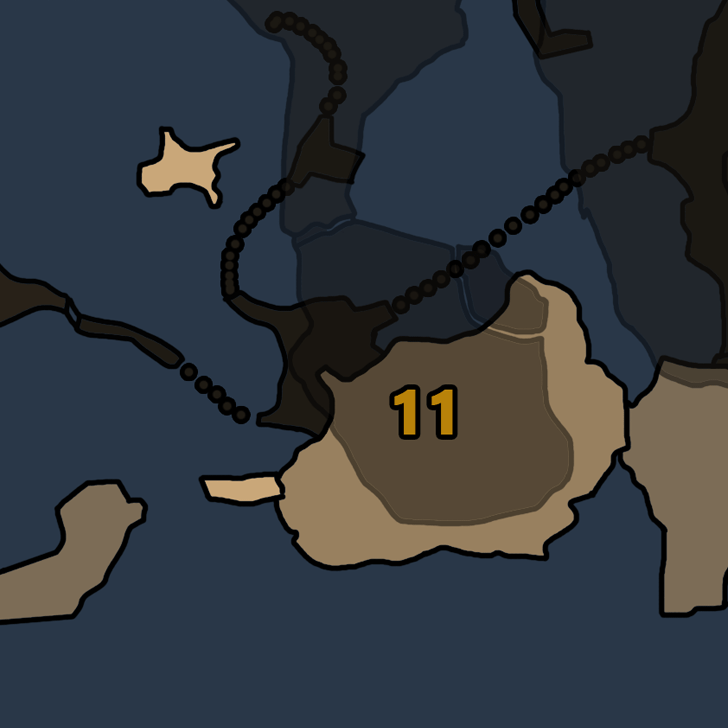
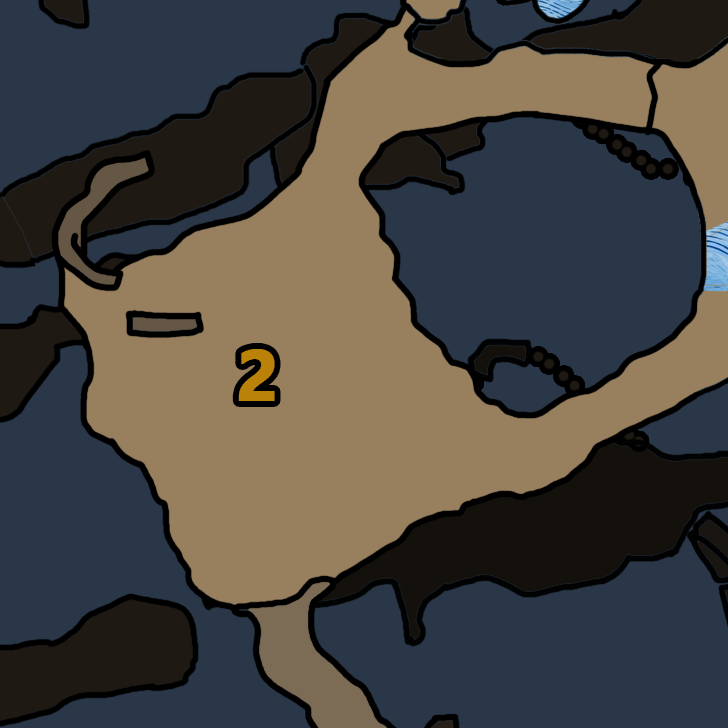
Use the Environment to Gain Advantage
| Environmental Traps | Locations |
|---|---|
| Crumbling Terrain |
|
| Floating Rubble |
|
| Brittle Ice Pillar |
|
There are plenty of environmental traps you can find through Iceshard Cliffs that you use to disrupt the Blangonga and gain advantage during the hunt. One thing to keep a look out for are the floating rubble and brittle ice pillars you can find through the area that can deal huge amounts of damage to the monster. This can make your hunts much easier and finish up faster to help you reach endgame.
Blangonga Attack Patterns
Moveset and Openings
| Attack | Description |
|---|---|
| Heavy Punch | A basic attack where the Blangonga punches with its fist. Dodge or block the attack by timing the movement of its arms. |
| Lariat | The Blangonga leaps back before fully attacking with one of its arms. Avoid taking damage by blocking or dodging backwards. |
| Leaping Strike | The Blangonga lunges forward with a vicious attack, knocking you down when hit. Dodge sideways to avoid taking damage. |
| Reverse Leap | The Blangonga usually leaps back to create distance and gain momentum for its attacks. Avoid standing behind to not take any damage when the Blangonga leaps backwards. |
| Boulder Hurl | The Blangonga digs and throws a large boulder aimed towards you. Simply dodge or run towards the Blangonga to avoid getting hit. |
| Ground Smash | The Blangonga stands and raises both arms for a moment before slamming it down to the ground. Dodge in any direction before it slams its arms down. |
| Raging Smashes | The Blangonga acts enraged before jumping and trashing itself forward and finally performing an uppercut that raises rocks from the ground. Do a dive-evade to ensure safety from this attack. |
| Frost Breath | The Blangonga raises its body goes on all fours to release a chilling breath that applies frost ailments. Dodge sideways to avoid getting hit by this move. |
| Frost Roar | A variant of the Frost Breath. The Blangonga releases its icy breath for a longer time, scattering it to its front. Run behind the Blangonga to avoid damage and attack it at the same time. |
| Dig | Blangonga will start digging in place and burrow underground for a few seconds until it leaps out to deal damage. Make sure to sprint around to help avoid this since it tracks your location. |
Blangonga Variants
| All Blangonga Variants | |
|---|---|
| Tempered | Frenzied |
Tempered Blangonga
| Monster | Basic Information |
|---|---|
 Tempered Blangonga Tempered Blangonga |
Habitat: First Encountered After: Wyvern Sparks and Rose Thorns |
Tempered Blangonga will only appear after you have first encountered a tempered monster in Chapter 4: Wyvern Sparks and Rose Thorns. You will have to wait for a Tempered Blangonga to spawn in the Iceshard Cliffs and start a Field Survey or save as Investigation as there is no optional quest for Tempered Blangonga.
Tempered Blangonga Appearance
Tempered Blangonga are stronger and covered in large scars across their bodies which you can damage and open into Tempered Wounds. You can break these special types of wounds with a Focus Strike to deal increase damaged and even knock them down to the ground!
Tempered Blangonga Rewards
| Difficulty | Possible Rewards |
|---|---|
| 6★ | Hunt Completion Breaking Tempered Wounds |
| 9★ | Hunt Completion |
As a 6★ difficulty monster, hunting Tempered Blangonga will reward Rusted Weapon Shard and Hunter Symbol 1. Destroying a Tempered Blangonga's tempered wound will also reward Wyverian Bloodstone used for Relic Melding.
In a 9★ hunt (specifically The White Wonder, Tempered Blangonga will begin dropping Glowing Stones like other 9★ Monsters. Glowing Stones are used to get Appraised Talismans.
Frenzied Blangonga
| Monster | Basic Information |
|---|---|
 Frenzied Blangonga Frenzied Blangonga |
Habitat: First Encountered After: Lurking Shadows |
Frenzied Blangonga will only appear after you have first encountered a frenzied monster in Chapter 4: Lurking Shadows. You will have to wait for a Frenzied Blangonga to spawn in the Iceshard Cliffs and start a Field Survey or save as Investigation as there is no optional quest for Frenzied Blangonga.
Frenzied Blangonga Rewards
| Difficulty | Possible Rewards |
|---|---|
| 5★ | Hunt Completion |
As a 5★ difficulty monster, hunting Frenzied Blangonga will reward you with Frenzy Shards and Frenzy Crystals used to craft Gore Magala weapons and equipment.
Blangonga Drops
High Rank Materials
| |
| |
| |
The best possible way to acquire a Beast Gem from Blangonga is by slaying it and carving off its body as it provides a higher chance of obtaining one compared to target rewards. You can also look for open world Investigations that can 100% drop a Beast Gem on completion.
Monster Hunter Wilds Related Guides

All Monsters Guides
Arch-Tempered Monsters
| Arch-Tempered Monster Guides | |
|---|---|
 AT Rey Dau AT Rey Dau |
 AT Uth Duna AT Uth Duna |
 AT Nu Udra AT Nu Udra |
 AT Jin Dahaad AT Jin Dahaad |
 AT Arkveld AT Arkveld |
|
All Large Monsters
 Arkveld
 Rey Dau
 Nu Udra
 Balahara
 Doshaguma
 Chatacabra
 Uth Duna
 Lala Barina
 Quematrice
 Rompopolo
 Ajarakan
 Yian Kut-Ku
 Congalala
 Rathalos
 Gypceros
 Rathian
 Gravios
 Nerscylla
 Gore Magala
 Hirabami
 Mizutsune
 Jin Dahaad
 Guardian Arkveld
 Guardian Doshaguma
 Guardian Rathalos
 Guardian Ebony Odogaron
 Xu Wu
Xu Wu Zoh Shia
 Guardian Fulgur Anjanath
 Lagiacrus
 Seregios
 Omega Planetes
 Gogmazios
Comment
Hmm interesting drops from blangonga (it has gravios drops) :D
Author

Blangonga Weakness and Drops
Premium Articles

Rankings
Gaming News


![Monster Hunter Stories 3 Review [First Impressions] | Simply Rejuvenating](https://img.game8.co/4438641/2a31b7702bd70e78ec8efd24661dacda.jpeg/thumb)
Popular Games

Genshin Impact Walkthrough & Guides Wiki
Honkai: Star Rail Walkthrough & Guides Wiki
Umamusume: Pretty Derby Walkthrough & Guides Wiki
Pokemon Pokopia Walkthrough & Guides Wiki
Resident Evil Requiem (RE9) Walkthrough & Guides Wiki
Monster Hunter Wilds Walkthrough & Guides Wiki
Wuthering Waves Walkthrough & Guides Wiki
Arknights: Endfield Walkthrough & Guides Wiki
Pokemon FireRed and LeafGreen (FRLG) Walkthrough & Guides Wiki
Pokemon TCG Pocket (PTCGP) Strategies & Guides Wiki


Recommended Games
Diablo 4: Vessel of Hatred Walkthrough & Guides Wiki
Cyberpunk 2077: Ultimate Edition Walkthrough & Guides Wiki
Fire Emblem Heroes (FEH) Walkthrough & Guides Wiki
Yu-Gi-Oh! Master Duel Walkthrough & Guides Wiki
Super Smash Bros. Ultimate Walkthrough & Guides Wiki
Pokemon Brilliant Diamond and Shining Pearl (BDSP) Walkthrough & Guides Wiki
Elden Ring Shadow of the Erdtree Walkthrough & Guides Wiki
Monster Hunter World Walkthrough & Guides Wiki
The Legend of Zelda: Tears of the Kingdom Walkthrough & Guides Wiki
Persona 3 Reload Walkthrough & Guides Wiki


All rights reserved
©CAPCOM
The copyrights of videos of games used in our content and other intellectual property rights belong to the provider of the game.
The contents we provide on this site were created personally by members of the Game8 editorial department.
We refuse the right to reuse or repost content taken without our permission such as data or images to other sites.
Thank you for pointing out this error on the page! We've updated it to reflect the correct drops for Blangonga. Appreciate the help! :)