Best Gathering Sets and Builds
★ Arkveld Gamma Armor | MH Stories 3 Collab
☆ Version 1.041: Sororal α Armor | Shatterseal
★ How to Unlock Proof of a Hero Quest
☆ Omega Planetes | Savage Omega | Builds vs Omega
★ Armor Set Search updated for Ver 1.041
☆ HR50+ Builds | Tier List | Weapon Guides
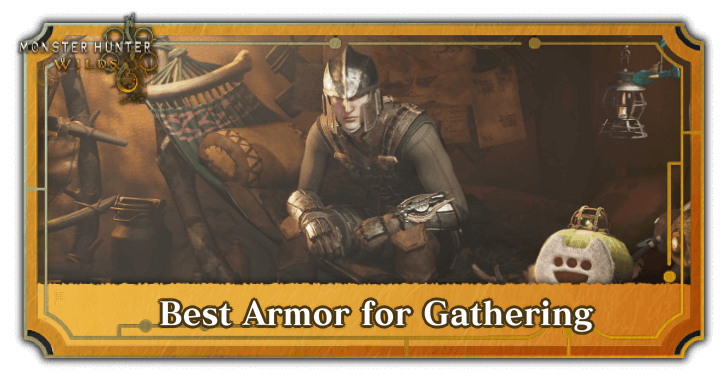
Here are the best gathering sets and builds in Monster Hunter Wilds (MH Wilds). See all the best gathering equipment for High Rank and Low Rank, as well as the recommended skills for gathering here!
List of Contents
Best High Rank Gathering Set
Best Equipment for Gathering and Exploration
| Armor | Slots | Skills |
|---|---|---|
|
|
Earplugs Lv. 1 Adaptability Lv. 1 Botanist Lv. 1 |
Botanist Lv. 3
|
|
|
Earplugs Lv. 1 ー ー |
Tool Specialist Lv. 3
|
|
|
Earplugs Lv. 1 Intimidator Lv. 1 Outdoorsman Lv. 1 |
Constitution Lv. 1
|
|
|
Tool Specialist Lv. 1 Adaptability Lv. 1 ー |
Resentment Lv. 1
Intimidator Lv. 2
|
|
|
Tool Specialist Lv. 1 Entomologist Lv. 1 Marathon Runner Lv. 1 |
Geologist Lv. 3
|
| Charm | ||
| Armor Decorations | ||
| DEF and RES Totals | Defense: 213
|
|
Decorations are randomly obtained, so feel free to adjust with what is available.
Skill Summary
| Armor Skills | |||
|---|---|---|---|
| Tool Specialist | 5 | Botanist | 4 |
| Earplugs | 3 | Geologist | 3 |
| Hunger Resistance | 3 | Intimidator | 3 |
| Adaptability | 2 | Constitution | 1 |
| Entomologist | 1 | Marathon Runner | 1 |
| Outdoorsman | 1 | Resentment | 1 |
| Group / Set Skills | |||
| Forager's Luck | ー | ||
This High Rank gathering build is optimized by having the Forager's Luck Group Skill, along with max levels in Botanist and Geologist. This maximizes yield and increase the chances of obtaining rare materials. The other Jewels in this build focus on providing situational benefits for monster encounters and terrain navigation.
The Specimen Jewel, for example, provides Entomologist, which makes carving insects like the Vespoid possible.
Some Armor Pieces Need Special Crafting Materials
| Armor | Required Material |
|---|---|
|
|
|
|
|
|
|
|
|
|
|
|
The four armor pieces Sild Hood α, Melahoa Jacket α, Death Stench Bowels α, and Azuz Pants α all use special materials that can be obtained through Item Trading or Material Retrieval. Talk to Nata at the Windward Plains Base Camp to regulary check if any of your gatherers have collected these materials!
Best Equipment for Honey Farming
Armor Loadout
| Armor | Slots | Skills |
|---|---|---|
|
|
Earplugs Lv. 1 Earplugs Lv. 1 ー |
Tool Specialist Lv. 1
Earplugs Lv. 1
|
|
|
Bind Resistance Lv. 1 Bind Resistance Lv. 1 Bind Resistance Lv. 1 |
Intimidator Lv. 2
|
|
|
Outdoorsman Lv. 1 ー ー |
Poison Resistance Lv. 1
Ambush Lv. 1
|
|
|
Tool Specialist Lv. 1 ー ー |
Paralysis Resistance Lv. 2
|
|
|
Adaptability Lv. 1 Intimidator Lv. 1 ー |
Survival Expert Lv. 1
Paralysis Resistance Lv. 1
|
| Charm | ||
| Armor Decorations | ||
| DEF and RES Totals | Defense: 203
|
|
Decorations are randomly obtained, so feel free to adjust with what is available.
Skill Summary
| Armor Skills | |||
|---|---|---|---|
| Tool Specialist | 5 | Bind Resistance | 3 |
| Earplugs | 3 | Intimidator | 3 |
| Paralysis Resistance | 3 | Adaptability | 1 |
| Ambush | 1 | Outdoorsman | 1 |
| Poison Resistance | 1 | Survival Expert | 1 |
| Group / Set Skills | |||
| Honey Hunter | ー | ||
This build is designed for efficient Honey farming, with the Honey Hunter Group Skill as its core feature. Slotted armor decorations enhance exploration comfort, making the set ideal for areas with frequent large monster encounters or hazardous terrain.
In addition to gathering Honey in the open world, you can use the Material Retrieval system to passively collect Honey and other valuable materials with the help of gatherers.
Best Low Rank Gathering Set
Leather and Chainmail Armor Set
| Armor | Slots | Skills |
|---|---|---|
|
|
ー
ー
ー
|
Geologist Lv. 1
|
|
|
ー
ー
ー
|
Geologist Lv. 1
|
|
|
ー
ー
ー
|
Geologist Lv. 1
|
|
|
ー
ー
ー
|
Botanist Lv. 1
|
|
|
ー
ー
ー
|
Botanist Lv. 1
|
| Charm | ||
| DEF and RES Totals | Defense: 11
|
|
Skill Summary
| Armor Skills | |||
|---|---|---|---|
| Botanist | 4 | Geologist | 3 |
For early gathering equipment, a mix of Leather and Chainmail armor is ideal, as all Low Rank armor lacks decoration slots for enhancements. Sticking to these basics grants access to key gathering skills like Botanist and Geologist early on.
Additionally, upgrade your Botany Charm Talisman to Level 2 as soon as it becomes available in the Low Rank story to boost Botanist to Level 4 for increased gathering efficiency!
Recommended Weapon for Gathering
Hunting Horn is the Best
| Weapon | Rarity | ATK | DEF |
|---|---|---|---|
 Nihil Chord II Nihil Chord II

|
6 | 798 (190) |
0 |
| Slots | Element | Affinity | |
| ②①ー |
|
0% | |
| Skills |
Stamina Thief Lv. 3
Horn Maestro Lv. 1
|
||
| Melodies |
Self-Improvement
Health Recovery (S)
Health Recovery (M) + Antidote
Stamina Use Reduced (L)
Defense Up (L)
Wind Pressure Negated
Echo Wave
Melody of Life
|
||
| Echo Wave Type | Blunt | ||
| Echo Bubble | Stamina Regeneration | ||
Hunting Horn is the beast weapon to bring along when gathering thanks to its ability to provide buffs. Nihil Chord II is the best Hunting Horn to bring as it can play the Health Recovery (M) + Antidote song, removing the need to bring Potions and Antidotes along, which will free up your bag for gathering.
Additionally, Nihil Chord II can also play the Stamina Use Reduced (L) song. Although you will likely be staying on your Seikret while gathering, having a way to reduce your Stamina consumption is a plus whenever you have to proceed on foot.
Recommended Skills for Gathering
Recommended Group Skills
| Group Skill | Skill Effect |
|---|---|
| Imparted Wisdom (Forager's Luck) |
★★★ - Very Good Increases the chance of finding rare gathering points. |
| Neopteron Alert (Honey Hunter) |
★★ - Good Increases the amount of honey you gain from gathering points. |
| Flexible Leathercraft (Hunter Gatherer) |
★★ - Good Increases gathering speed, and prevents knock back when gathering or carving. |
Prioritize the Imparted Wisdom Group Skill
The Group Skill for your gathering equipment should suit your needs depending on what you're looking to farm, but we highly recommend prioritizing Imparted Wisdom for generalized material gathering.
This skill boosts rare item acquisition from gathering points and increases overall yield, making it invaluable for your gathering excursions.
Recommended Armor Skills
| Skill | Effect |
|---|---|
| Geologist | ★★★ - Very Good Increases the number of times you gain at gathering points. |
| Botanist | ★★★ - Very Good Increases the quantity of herbs and other consumable items you gather. |
| Adaptability | ★★★ - Very Good Grants protection against environmental damage, such as from heat or cold. |
| Intimidator | ★★ - Good Reduces the chance small monsters will attack after spotting you. (Has no effect on certain monsters.) |
| Tool Specialist | ★★ - Good Reduces the recharge time for specialized tools. |
| Earplugs | ★★ - Good Grants protection from large monsters' roars. |
| Hunger Resistance | ★ - Okay Reduces maximum stamina depetion over time. |
| Paralysis Resistance | ★ - Okay Reduces the duration of paralysis. |
| Outdoorsman | ★ - Okay Improves fishing, grilling, and transporting abilities. |
Always Have Geologist, Botanist, and Adaptability
The top three Armor Skills we recommend always having are Geologist, Botanist, and Adaptability, as they enhance gathering by increasing item yield and providing resistances for navigating hazardous terrain.
Skills like Intimidator, Hunger Resistance, Outdoorsman, and the like can further improve exploration comfort but are not essential.
Monster Hunter Wilds Related Guides
List of Builds for Each Weapon
All Weapon Builds in Monster Hunter Wilds
| All Weapon Builds & Guides | |
|---|---|
Low Rank | High Rank |
Low Rank | High Rank |
Low Rank | High Rank |
Low Rank | High Rank |
Low Rank | High Rank |
Low Rank | High Rank |
Low Rank | High Rank |
Low Rank | High Rank |
Low Rank | High Rank |
Low Rank | High Rank |
Low Rank | High Rank |
Low Rank | High Rank |
Low Rank | High Rank |
Low Rank | High Rank |
Non-Meta Builds in Monster Hunter Wilds
| Non-Meta Builds & Guides | |
|---|---|
| Immortal Build | Support Build |
| Best Gathering Sets | How to Make a Good Build |
| Rey Dau Gamma Builds | Uth Duna Gamma Builds |
Comment
has Forager's Luck been fixed? it was previously bugged.
Author

Best Gathering Sets and Builds
Premium Articles

Rankings
Gaming News


![Monster Hunter Stories 3 Review [First Impressions] | Simply Rejuvenating](https://img.game8.co/4438641/2a31b7702bd70e78ec8efd24661dacda.jpeg/thumb)
Popular Games

Genshin Impact Walkthrough & Guides Wiki
Honkai: Star Rail Walkthrough & Guides Wiki
Umamusume: Pretty Derby Walkthrough & Guides Wiki
Pokemon Pokopia Walkthrough & Guides Wiki
Resident Evil Requiem (RE9) Walkthrough & Guides Wiki
Monster Hunter Wilds Walkthrough & Guides Wiki
Wuthering Waves Walkthrough & Guides Wiki
Arknights: Endfield Walkthrough & Guides Wiki
Pokemon FireRed and LeafGreen (FRLG) Walkthrough & Guides Wiki
Pokemon TCG Pocket (PTCGP) Strategies & Guides Wiki


Recommended Games
Diablo 4: Vessel of Hatred Walkthrough & Guides Wiki
Cyberpunk 2077: Ultimate Edition Walkthrough & Guides Wiki
Fire Emblem Heroes (FEH) Walkthrough & Guides Wiki
Yu-Gi-Oh! Master Duel Walkthrough & Guides Wiki
Super Smash Bros. Ultimate Walkthrough & Guides Wiki
Pokemon Brilliant Diamond and Shining Pearl (BDSP) Walkthrough & Guides Wiki
Elden Ring Shadow of the Erdtree Walkthrough & Guides Wiki
Monster Hunter World Walkthrough & Guides Wiki
The Legend of Zelda: Tears of the Kingdom Walkthrough & Guides Wiki
Persona 3 Reload Walkthrough & Guides Wiki


All rights reserved
©CAPCOM
The copyrights of videos of games used in our content and other intellectual property rights belong to the provider of the game.
The contents we provide on this site were created personally by members of the Game8 editorial department.
We refuse the right to reuse or repost content taken without our permission such as data or images to other sites.
Please update the builds to Update 4.5 with everything we have now