Hammer Weapon Guide and Best Combos
★ Arkveld Gamma Armor | MH Stories 3 Collab
☆ Version 1.041: Sororal α Armor | Shatterseal
★ How to Unlock Proof of a Hero Quest
☆ Omega Planetes | Savage Omega | Builds vs Omega
★ Armor Set Search updated for Ver 1.041
☆ HR50+ Builds | Tier List | Weapon Guides
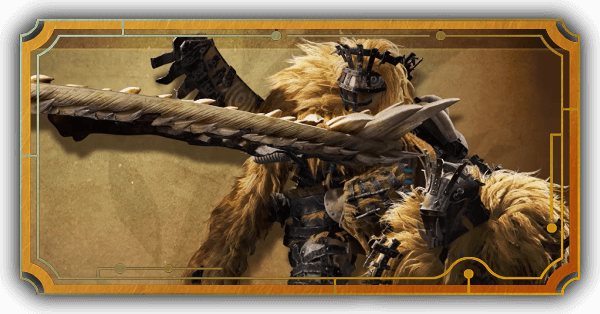
The Hammer is a blunt weapon with satisfying destructive power on top of its mobility in Monster Hunter Wilds. See all the mechanics for the Hammer, its controls, best combos, advanced tips, and how good it is!
| Hammer Guides | ||
|---|---|---|
| Weapon Guide | Builds | Tree |
Hammer Mechanics
| Hammer Mechanics |
|---|
|
|
Use Offset and Follow-up Attacks
In Title Update 2, the moves Charged Upswing and Mighty Charge Upswing are now considered offset attacks. Timing it just before an attack hits will have the offset effect and you will be able to follow up with a series of spin moves and a Spinslam.
Aim for the Head
As a general rule, any Hammer player should know that they should always aim for the monster's head. Even with other contenders that deal blunt damage, the Hammer can consistently accumulate stun values due to its move-set's mobility, meaning it should be given priority with head positioning.
Use the Different Charge Attacks
| Lv. | Attack | Description Situational Uses |
|---|---|---|
| 1 | Charged Side Blow | Quickly swings the hammer from the side while traveling a minimal distance.
・When you need to quickly extend your combos. ・When you are out of position during a combo and you need movement. |
| 2 | Charged Upswing | Swings the hammer in an uppercut-like motion while traveling a short distance.
・Often used as a punish for quick monster attacks. ・Best move to stun monsters with. ・Is an Offset Attack. |
| 3 | Charged Big Bang | Swings the hammer upwards then ends with a crushing slam while stationary.
・Used as a punish for monster attacks with medium recovery. ・Used to quickly exhaust monsters. |
| 4 | Mighty Charge Upswing | Wildly wind up the hammer for a devastating multi-hit slam.
・Best punish for when the monster uses a long recovery attack. ・Combo starter for max damage. ・Is an Offset Attack. |
While the Hammer is famous for its easy-to-use charge mechanic, using the right Charge Level depending on the situation is key to mastering the Hammer. You can charge it up to four levels, each having unique properties and different damage values!
Make Use of Stuns
Players can deal ludicrous amounts of damage on a monster once they are stunned, and that goes exceptionally hard for Hammer players. Thanks to the Hammer's ability to stun monsters, all players in the team will have multiple windows of opportunity to deal devastating attacks.
Access the Mighty Charge
| Input |
|---|
| |
| Input |
|---|
| |
| Input |
|---|
| |
The Hammer now has a move called the Mighty Charge that either can be let go. It is a move that, if accessed through initial charging, requires a lot of time and charge. However, once it hits the monster's head it would deal massive stun damage, making the preparations worth it.
As a shortcut, you can also access the Mighty Charge everytime you finish a Upswing, so keep that in mind whenever you swing for the fences!
Keep Charges Using Charged Step
Better known as the Keeping Sway from the Rise title, the Charged Step is now a staple move for the Hammer! Successfully doing so will allow the Hunter to retain their charge levels while having invulnerability frames akin to a dodge.
To use the Charged Dash, input the circle button while charging for an attack to sling your hunter a small distance.
Extend Combos With Spinning Bludgeon
Ever since the first iteration of Monster Hunter, the Hammer has always had the Spinning Bludgeon as their Running Charged Lv. 3. The Spinning Bludgeon is now an extension after finishing any Charge Attack, opening up multiple combo possibilities depending on the situation!
Use the Newly Improved Upswing
| Use | Video |
|---|---|
| Timed Swings | |
| Freedom of Movement | |
| Spinning Bludgeon Upswing |
Timed Swings
Reminiscent of the Hammer's signature charge, you can now time the Upswing by holding down its input and letting go at the opportune time.
The delayed swing is considered an Offset Attack, meaning it will stagger monsters during their attack animations when hit by this variant of the Upswing as a counter-attack.
Freedom of Movement
Furthermore, Hammer players can move between attacks before reaching the Upswing. This freedom of movement is best used as an offensive maneuver through repositioning so that the Upswing can now consistently hit monster heads!
Upswing After Move Can Be Held
The upswing at the end of a Spinning Bludgeon is an Offset Attack that can be held, which is useful to time the move against a monster attack to trigger a stagger.
Hammer No Longer Launches People
The Hammer's Upswing no longer launches people into the air, lowering the chance of friendly fire. This change also applies to other weapons, such as the Gunlance's Wyvern's Fire.
Hammer Controls
Hammer Action and Inputs
| Action | |
|---|---|
| Overhead Smash ↓ Upswing | |
| Side Smash | |
| Big Bang | |
| Spinning Bludgeon | After any charge attack |
| Charge | Hold (Can move while charging) |
| Charge Step | |
| Mighty Charge | |
| Mighty Charge Slam | |
| Focus Blow: Earthquake | Hold |
| Action | |
|---|---|
| Overhead Smash ↓ Upswing | |
| Side Smash | |
| Big Bang | |
| Spinning Bludgeon | After any charge attack |
| Charge | Hold (Can move while charging) |
| Charge Step | |
| Mighty Charge | |
| Mighty Charge Slam | |
| Focus Blow: Earthquake | Hold |
| Action | |
|---|---|
| Overhead Smash ↓ Upswing | |
| Side Smash | |
| Big Bang | |
| Spinning Bludgeon | After any charge attack |
| Charge | Hold (Can move while charging)) |
| Charge Step | |
| Mighty Charge | |
| Mighty Charge Slam | |
| Focus Blow: Earthquake | Hold |
Hammer Best Combos
| Best Hammer Combos |
|---|
|
|
Side Smash to Mighty Charge
| Combo Input |
|---|
( |
| Input |
|---|
| ( |
| Input |
|---|
| ( |
Currently, this is the best bread-n'-butter combo of the Hammer in Monster Hunter Wilds due to its ability to access Mighty Charge quickly, only needing about 6.5 seconds to complete. This combo is used to promptly set up an offset attack with the Upswing or as a high-damaging quick punish.
Depending on the position or length of a monster's downtime, adjust whether or not to proceed with the Mighty Charge Upswing or Slam. After the attack, you can reposition with a dodge, repeat the combo, or transition into different attack branches.
Big Bang to Mighty Charge
| Combo Input |
|---|
| Input |
|---|
| |
| Input |
|---|
| |
This combo has you do the Big Bang Combo until the fourth hit, and then transition into Mighty Charge to deal the highest amount of damage the Hammer can dish out.
However, this combo takes a significant amount of time to perform, so it is best used when the monster is toppled down or stunned.
Charged Upswing Poke Combo
| Combo Input |
|---|
( Hold |
| Input |
|---|
| (Hold |
| Input |
|---|
| (Hold |
This combo is best used for generally poking the monster or when you need to close the distance and quickly punish them. This combo also deals more damage than the generic Charged Big Bang and can be used to transition into the Overhead Slam, meaning you can access the Upswing if given enough time!
Focus Blow Combo
| Input |
|---|
| |
| Input |
|---|
| Input |
|---|
When the opponent is wounded and you are able to stagger during Focus Blow: Earthquake, utilize the time you get to charge and transition to Mighty Charge to deal massive amounts of damage to the monster.
Hammer Advanced Tips
| Hammer Advanced Tips |
|---|
|
|
Use Offset Upswings and Mighty Charge Upswings
Offset Attacks are one of the best ways to have fast monster clears due to their ability to stagger monsters and set off Counterstrike. The Hammer, while a little unconventional, has access to this as the Upswing and Mighty Charge Upswing obtains these properties by delaying its release.
The quickest way to access the Upswing is by doing a Side Smash to transition into a Overhead Smash II. After that, you can move a short distance and then hold the primary attack button to do an Offset Upswing!
All Offset Attacks and How to Use
Offset Follow-up Variations
| Follow-up Variations | Video |
|---|---|
| Press Follow-up Immediately | When you immediately press the Follow-up attack upon a successful offset, your hunter will immediately perform the Follow-up Spinslam. |
| Press Follow-up During 4th Hit | You can wait until the 4th spinning hit before you press the follow-up attack to deal the most damage when following up. |
| No Follow-up Input | If you don't input the follow-up attack, your hunter will spin for 5 times and immediately stop without performing the Follow-up Spinslam. |
If you want the highest damage possible, wait until the 4th spinning hit before performing the Follow-up Spinslam. This will add more hits to the overall follow-up attack and will net the most damage. However, be mindful of the long attack animation and be sure to have enough time to pull this off!
Transition Upswings to a Mighty Charge
The highest damage a Hammer can do in Monster Hunter Wilds is hitting the final swing of the new Mighty Charge. The challenge with the Mighty Charge, however, is the amount of time to set it up with the conventional charge.
The best way to currently access this new move is to use the Upswing as it can seamlessly transition into Mighty Charge. Do note that applying this strategy needs getting used to as you will need to know most of the monster's moveset!
Utilize Charged Dash in Creative Ways
Charged Step, while a simple move itself, has multiple uses that open the Hammer up for different strings depending on what the Hunter wants to achieve:
- Quickly reposition to the head while remaining full charge as a starter.
- Dodge attacks while keeping full charge levels.
- Combo extender when a monster gets knocked down.
Dodge Out of Charges
You always have the option to dodge out of both your Charge and Charge attacks when you are far away or you think you cannot safely damage a monster. Knowing when to dodge-cancel your charges is a solid indicator for an exceptional Hammer user!
Aim Mighty Charge Slam With Focus Mode
When you are aiming for specific parts to break or just to make aiming for the head easier, you can use Focus Mode to aim your Mighty Charge Slams.
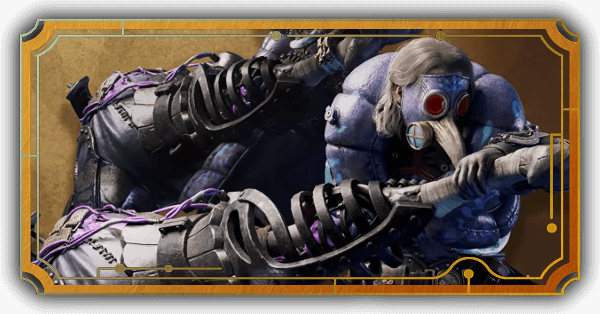
For example, it is paramount to stack your damage on Arkveld's chains when it is glowing so that it will get staggered or topple over. In that scenario, Arkveld's head takes priority of the damage when you are near it, so use Focus Mode to aim your last swing!
How Good is the Hammer?
Tier List Ranking
| Weapon Ranking | ||
|---|---|---|
| Damage Type | Entry Barrier | Difficulty to Master |
| Low | ★★★★☆ | |
| Weaknesses and Strengths | ||
|
|
||
Entry Barrier pertains to how easy it is to learn the weapon from scratch, while Difficulty to Master is a rating on how difficult it is to perfectly execute the weapon mechanics.
The Hammer is at A Tier because while it has the potential to deal absurd amounts of damage, the effort it takes to produce those numbers when compared to the other weapons is significantly high. Furthermore, while it has an offset attack, it is barred by difficulty, unlike other weapons!
The Hammer is considered one of the easiest weapons to pick up due to its simple mechanics and ability to move while charging its attacks.
However, this weapon is challenging to master since you must learn most of a monster's move set and timings to punish its openings properly. In short, this weapon requires you to always be at the right place and time, the opportune moment to bonk!
Monster Hunter Wilds Related Guides
All Weapon Guides
| All Weapon Tutorials | |||||
|---|---|---|---|---|---|
 Great Sword Great Sword |
 Long Sword Long Sword |
 Sword & Shield Sword & Shield |
|||
 Dual Blades Dual Blades |
 Hammer Hammer |
 Hunting Horn Hunting Horn |
|||
 Lance Lance |
 Gunlance Gunlance |
 Switch Axe Switch Axe |
|||
 Charge Blade Charge Blade |
 Insect Glaive Insect Glaive |
 Light Bowgun Light Bowgun |
|||
 Heavy Bowgun Heavy Bowgun |
 Bow Bow |
||||
All Weapon Trees
| All Weapon Trees | |||||
|---|---|---|---|---|---|
 Great Sword Great Sword |
 Long Sword Long Sword |
 Sword & Shield Sword & Shield |
|||
 Dual Blades Dual Blades |
 Hammer Hammer |
 Hunting Horn Hunting Horn |
|||
 Lance Lance |
 Gunlance Gunlance |
 Switch Axe Switch Axe |
|||
 Charge Blade Charge Blade |
 Insect Glaive Insect Glaive |
 Kinsects Kinsects |
|||
 Light Bowgun Light Bowgun |
 Heavy Bowgun Heavy Bowgun |
 Bow Bow |
|||
Comment
you guys really just copy and pasted his entire comment in
Author

Hammer Weapon Guide and Best Combos
Premium Articles

Rankings
Gaming News


![Monster Hunter Stories 3 Review [First Impressions] | Simply Rejuvenating](https://img.game8.co/4438641/2a31b7702bd70e78ec8efd24661dacda.jpeg/thumb)
Popular Games

Genshin Impact Walkthrough & Guides Wiki
Honkai: Star Rail Walkthrough & Guides Wiki
Umamusume: Pretty Derby Walkthrough & Guides Wiki
Pokemon Pokopia Walkthrough & Guides Wiki
Resident Evil Requiem (RE9) Walkthrough & Guides Wiki
Monster Hunter Wilds Walkthrough & Guides Wiki
Wuthering Waves Walkthrough & Guides Wiki
Arknights: Endfield Walkthrough & Guides Wiki
Pokemon FireRed and LeafGreen (FRLG) Walkthrough & Guides Wiki
Pokemon TCG Pocket (PTCGP) Strategies & Guides Wiki


Recommended Games
Diablo 4: Vessel of Hatred Walkthrough & Guides Wiki
Cyberpunk 2077: Ultimate Edition Walkthrough & Guides Wiki
Fire Emblem Heroes (FEH) Walkthrough & Guides Wiki
Yu-Gi-Oh! Master Duel Walkthrough & Guides Wiki
Super Smash Bros. Ultimate Walkthrough & Guides Wiki
Pokemon Brilliant Diamond and Shining Pearl (BDSP) Walkthrough & Guides Wiki
Elden Ring Shadow of the Erdtree Walkthrough & Guides Wiki
Monster Hunter World Walkthrough & Guides Wiki
The Legend of Zelda: Tears of the Kingdom Walkthrough & Guides Wiki
Persona 3 Reload Walkthrough & Guides Wiki


All rights reserved
©CAPCOM
The copyrights of videos of games used in our content and other intellectual property rights belong to the provider of the game.
The contents we provide on this site were created personally by members of the Game8 editorial department.
We refuse the right to reuse or repost content taken without our permission such as data or images to other sites.
We apologize for this oversight. We have replaced the copied comment.