This survey will take about 1 minute.
Your answers will help us to improve our website.
Monster Hunter Wilds
I-Frame Guide: How to Dodge Attacks
★ Arkveld Gamma Armor | MH Stories 3 Collab
☆ Version 1.041: Sororal α Armor | Shatterseal
★ How to Unlock Proof of a Hero Quest
☆ Omega Planetes | Savage Omega | Builds vs Omega
★ Armor Set Search updated for Ver 1.041
☆ HR50+ Builds | Tier List | Weapon Guides
The best way to avoid attacks is by making use of i-frames from your dodge roll in Monster Hunter Wilds (MH Wilds). Read on to learn more about how to dodge roll and perfect dodge, what i-frames are, and how to take advantage of them here!
List of Contents
How to Dodge Attacks
Dodge Roll
In order to dodge attacks, you have to time your dodge roll just before the attack hits you. We recommend learning the monster's attack patterns as this can be different for each monster you face. Ideally, it is best to dodge roll towards the opposite direction of the monster attack so that your player can land outside the attack range.
Keep in mind that some attacks can hit multiple times which can render your dodge roll useless. For these types of attacks, it is best to position yourself at a safe distance so you can avoid getting hit without needing to rely on dodge rolling.
Dive-Evading (Superman Dive)
The Dive-Evade, most commonly known as the Superman Dive, can be performed by dodge rolling away from the monster while you are sprinting. The i-frames for this move are much longer compared to the regular dodge roll at the cost of having a longer recovery animation.
How to Dive Evade (Superman Dive)
Perfect Dodge
Perfect Dodges require you to time your dodge exactly when the monster attack lands and are exclusive to the Dual Blades and Bow. You can identify if you have done a perfect dodge when a white visual cue appears on your player together with a bell audio cue, while your screen is briefly distorted.
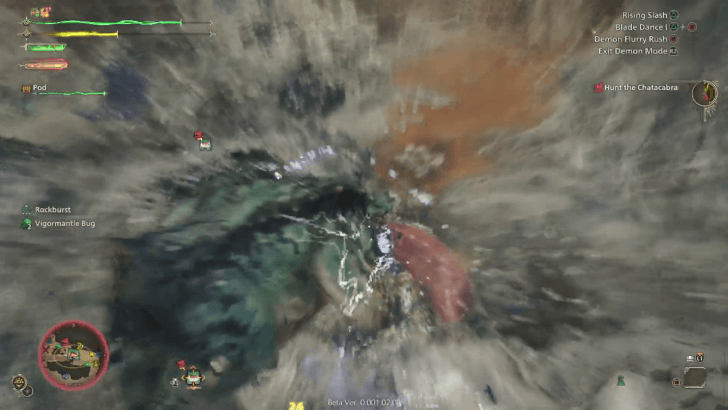
In order to execute a Perfect Dodge for the Dual Blades, you first have to enter Demon Mode so that your standard Dodge Roll will be replaced with a short dash. Once you are in Demon Mode, time your dodge as soon as the monster attack lands on the last second and you will perform a spinning dash that deals damage and gives you a damage buff for a few seconds.
As for the Bow, you will need to perform a Charging Sidestep just before the monster attack hits you. This allows the Bow to regain a portion of their Trick Arrow gauge while also repositioning farther than the usual Charging Sidestep.
List of Moves with I-Frames
All Weapon Moves with I-Frames
| Name | Move Button Input |
|---|---|
| Demon Dodge (Dual Blades) |
(Enter Demon Mode) |
| Foresight Slash (Long Sword) |
|
| Iai Spirit Slash (Long Sword) |
|
| Crimson Whirl Slash (Long Sword) |
|
| Descerning Dodge (Bow) |
(Hold) |
| Backstep (Sword and Shield) |
|
| Dash Step (Lance/Gunlance) |
|
| Charged Step (Hammer) |
(Press and Hold) |
Advantages of I-Frames
| List of I-Frame Advantages |
|---|
|
|
Avoid Flinching and Interruptions
Typical monster attacks tend to have flinching and interrupting effects when landing near a player so we recommend dodge rolling away even if the monster attack is a bit off from your position to avoid getting interrupted.
Keep in mind that not all monster attacks can flinch and interrupt so it is best to study the monster's attack patterns to learn when to dodge and when not to.
Dodge Monster Roars
Aside from the usual monster attacks, Monster Roars can also be dodged with i-frames as long as you time it right. These roars are hard to telegraph but with a good amount of practice and timing, you can pull it off so you have more time to dish out damage.
Evade Large AoE Hits
For situations where it seems impossible to dodge a large hit, i-frames will be your best friend as they are capable of avoiding any instance of damage. There are various moves that can quickly give i-frames in tight situations such as the Long Sword's Foresight Slash and the Dual Blades' Demon Dodge.
Better Positioning for Trading Hits
The real advantage of i-frames, especially for veteran players, is being able to position yourself for attacking after dodging the monster attacks. This means you can trade hits with the monster as long as you are perfectly dodging their attacks, allowing you to dish out damage without any problems.
What are I-Frames?
Brief Invincibility from Damage
I-Frames are a small window of invincibility that allows you to avoid any damage that a monster attack deals within that window. Certain actions within the game have i-frames at the beginning of their animation such as dodge rolling, the Demon Dodge of Dual Blades, and the Foresight Slash of Long Sword.
Keep in mind that this does not include damage over time effects such as Poison, Bleeding, or Burning as they are a completely different damage type.
Increase I-Frames Through Evade Window
| Skill Level | I-Frame Duration | |
|---|---|---|
| 30 FPS | MS | 60 FPS | MS | |
| 0 | 9 | 300ms | 15 | 250ms |
| 1 | 10 | 333ms +1 (+11.1%) |
17 | 283ms +2 (+13.3%) |
| 2 | 11 | 366ms +2 (+22.2%) |
19 | 316ms +4 (+26.6%) |
| 3 | 12 | 400ms +3 (+33.3%) |
21 | 350ms +6 (+40%) |
| 4 | 13 | 433ms +4 (+44.4%) |
23 | 383ms +8 (+53.3%) |
| 5 | 15 | 500ms +6 (+66.7%) |
28 | 466.7ms +13 (+86.6%) |
Notes:
・Tests are done at 30 and 60FPS on a Paratoad near the Pop-Up Camp site at Area 10: Southeast of the Windward Plains. ・Paratoads are shown to be the easiest way to visually display these windows compared to Training Dummy attacks which are momentary. ・Measurements are done at the beginning of the dodge roll animation up until the beginning of the Paralysis animation. Frame test results may differ per system performance, but the skill's improvement should still be noticeable regardless. |
||
I-Frames can be increased by the skill Evade Window. Evade window also increases the I-Frames of certain weapon attacks, such as the Long Sword's Foresight Slash and the Bow's sidestep, to name a few.
Monster Hunter Wilds Related Guides
All Game Mechanics Guides
Comment
Author

I-Frame Guide: How to Dodge Attacks
Please participate in our site
improvement survey
03/2026
improvement survey
03/2026
Would you assist in
improving Game8's site?
improving Game8's site?

×
We are listening to our users' valuable opinions and discussing how to act on them.
The information collected through this survey will be used for the purpose of improving our services. In addition, the information will only be disclosed a part of a statistic in a format that will not allow identification of personal information.
Begin Survey
Not Now
×
Please rate each item regarding Game8.co's Advertisements.
Amount of Ads
Very Dissatisfied
Somewhat Dissatisfied
Fine
Somewhat Satisfied
Highly Satisfied
Placement of Ads
Timing of Ad Display
Ad Loading Speed
Safeness of Ads
Content of Ads
×
Please rate each item regarding Game8.co's Quality of Articles.
Amount of information
Very Dissatisfied
Somewhat Dissatisfied
Fine
Somewhat Satisfied
Highly Satisfied
Frequency of updates
Speed of new information
Accuracy of articles
Understandibility of articles
Readability of sentences
×
Please rate each item regarding Game8.co's Usability of the Site.
Ease of finding information
Very Dissatisfied
Somewhat Dissatisfied
Fine
Somewhat Satisfied
Highly Satisfied
Loading Speed
Use of Color
Font Size
Visibility of Images
Easy to Understand Layout
×
Please rate each item regarding Game8.co's Message Boards, Comments.
Ease of Writing
Very Dissatisfied
Somewhat Dissatisfied
Fine
Somewhat Satisfied
Highly Satisfied
Readability
Ease in Finding Information
Comment Quality
Comment Quantity
Admin Response
×
Please rate each item regarding Game8.co's Site's new design.
Please rate our site's new design
Very Dissatisfied
Somewhat Dissatisfied
Fine
Somewhat Satisfied
Highly Satisfied
Do you think that the website's design change makes the site easier to use?
Has the new design made it easier for you to find information on the site?
Has the new design improved the overall visual appeal of the site?
How would you rate your overall satisfaction with the new design of the site?
×
How likely are you to recommend Game8 to someone you know?
Very Unlikely
0
1
2
3
4
5
6
7
8
9
10
Very Likely
If you have other opinions regarding potential improvement to the website, please share them with us. We would appreciate your honest opinion.
Note: This is a free response section, so you can proceed without entering anything.
Note: Please be sure not to enter any kind of personal information into your response.
Note: Please be sure not to enter any kind of personal information into your response.
×
Thank You
×
Thank you for participating in our survey! Your answers will help us to improve the quality of our website and services.
We hope you continue to make use of Game8.
We hope you continue to make use of Game8.
Close
Premium Articles

Rankings
- We could not find the message board you were looking for.
Gaming News


![Everwind Review [Early Access] | The Shaky First Step to A Very Long Journey](https://img.game8.co/4440226/ab079b1153298a042633dd1ef51e878e.png/thumb)

![Monster Hunter Stories 3 Review [First Impressions] | Simply Rejuvenating](https://img.game8.co/4438641/2a31b7702bd70e78ec8efd24661dacda.jpeg/thumb)
Popular Games

Genshin Impact Walkthrough & Guides Wiki
Honkai: Star Rail Walkthrough & Guides Wiki
Umamusume: Pretty Derby Walkthrough & Guides Wiki
Pokemon Pokopia Walkthrough & Guides Wiki
Resident Evil Requiem (RE9) Walkthrough & Guides Wiki
Monster Hunter Wilds Walkthrough & Guides Wiki
Wuthering Waves Walkthrough & Guides Wiki
Arknights: Endfield Walkthrough & Guides Wiki
Pokemon FireRed and LeafGreen (FRLG) Walkthrough & Guides Wiki
Pokemon TCG Pocket (PTCGP) Strategies & Guides Wiki


Recommended Games
Diablo 4: Vessel of Hatred Walkthrough & Guides Wiki
Fire Emblem Heroes (FEH) Walkthrough & Guides Wiki
Yu-Gi-Oh! Master Duel Walkthrough & Guides Wiki
Super Smash Bros. Ultimate Walkthrough & Guides Wiki
Pokemon Brilliant Diamond and Shining Pearl (BDSP) Walkthrough & Guides Wiki
Elden Ring Shadow of the Erdtree Walkthrough & Guides Wiki
Monster Hunter World Walkthrough & Guides Wiki
The Legend of Zelda: Tears of the Kingdom Walkthrough & Guides Wiki
Persona 3 Reload Walkthrough & Guides Wiki
Cyberpunk 2077: Ultimate Edition Walkthrough & Guides Wiki


All rights reserved
©CAPCOM
The copyrights of videos of games used in our content and other intellectual property rights belong to the provider of the game.
The contents we provide on this site were created personally by members of the Game8 editorial department.
We refuse the right to reuse or repost content taken without our permission such as data or images to other sites.