Best Weapon Tier List
★ Arkveld Gamma Armor | MH Stories 3 Collab
☆ Version 1.041: Sororal α Armor | Shatterseal
★ How to Unlock Proof of a Hero Quest
☆ Omega Planetes | Savage Omega | Builds vs Omega
★ Armor Set Search updated for Ver 1.041
☆ HR50+ Builds | Tier List | Weapon Guides
This is our best weapon tier list for Monster Hunter Wilds (MH Wilds) with the best weapon types being the Gunlance, Great Sword, Long Sword, and Bow. Discover the best weapon to unleash your full hunting potential and stay on top of every hunt here!
| Weapon Guides | ||
|---|---|---|
| Weapon Tier List | List of All Weapons | Beginner Weapons |
| Secondary Weapons | Weapon Combinations | Weapons Quiz |
List of Contents
Best Weapon Tier List
 Attention! Attention!
|
NEW This Weapon Tier List has been updated as of Title Update 4. |
|---|---|
| Before Reading! | |
| ⓘ Weapon Tier Lists merely inform the general effectiveness of a weapon type based on player experience. Knowledge is power, but more importantly: Hunt as you would! | |
Weapon Tier List
| Tier | Weapon |
|---|---|


|
|


|
|


|
|

|
|
| NEW Recent Tier Changes (January 12, 2026) | |
|
ⓘ Title Update 4 brings plenty of buffs for all 14 weapons, with the Light Bowgun and Dual Blades shooting up to SS Tier. Most weapons retain their positions weapon changes. ↑ Light Bowgun: A to SS Tier ・Received the most buffs and changes, gaining massive boosts to most offensive options. ↑ Dual Blades: A to SS Tier ・QoL updates to Demon Boost Mode make it easier to stick to monsters and stay aggressive. Gogma Artian Weapons and the increased elemental cap turn Dual Blades into an elemental damage powerhouse. ↑ Hunting Horn: B to A Tier ・Songs from Gogma Artian Weapons make Sharpness and Divine Blessing easier to manage. Both raw and elemental Hunting Horns have decent damage. ↓ Gunlance: SS to S Tier ・Only received minor QoL changes in TU4 and has been overtaken by other weapons receiving significant buffs. ⓘ This Best Weapon Tier List is updated with the team's insights up until the current High Rank endgame using this set of criteria. |
|
| Date | Change |
|---|---|
| January 12, 2026 | Tier List updated for Title Update 4 release. ↑ Light Bowgun: A to SS Tier ↑ Dual Blades: A to SS Tier ↑ Hunting Horn: AB to A Tier ↓ Gunlance: SS to S Tier |
| July 2, 2025 | Tier List updated for Title Update 2 release. Also revised other write-ups, both in content and structure for better delivery of explanations. ↑ Great Sword: S to SS Tier ↑ Hammer: B to A Tier ↓ Heavy Bowgun: SS to S Tier ↓ Lance: A to B Tier |
| June 6, 2025 | Placements maintained. Write-ups and linking are improved in the context of the May 28 Patch Notes 1.011. |
| May 14, 2025 |
↑ Heavy Bowgun: S to SS Tier ↑ Lance: B to A Tier ↑ Charge Blade: A to S Tier |
| March 20, 2025 |
↑ Insect Glaive: B to S Tier ↑ Lance: Slight increase in ranking ↑ Sword and Shield: Slight increase in ranking ↓ Switch Axe: Slight decrease in ranking |
| March 7, 2025 | • SS Tier added to emphasize the strongest weapons. ↑ Gunlance: S to SS Tier ↑ Long Sword: S to SS Tier ↑ Bow: S to SS Tier ↑ Heavy Bowgun: A to S Tier ↑ Sword and Shield: B to S Tier ↑ Light Bowgun: B to A Tier ↓ Hunting Horn: A to B Tier |
| March 1, 2025 |
↑ Great Sword: A to S Tier ↑ Dual Blades: B to A Tier ↑ Heavy Bowgun: C to A Tier ↑ Switch Axe: C to A Tier ↓ Hammer: C to B Tier ↓ Light Bowgun: C to B Tier |
The most effective weapons to use in Monster Hunter Wilds are the Light Bowgun, Dual Blades, Bow, Long Sword, and Great Sword. These weapons are capable of dishing out the highest DPS while being relatively easy to use.
- The Light Bowgun is now a strong contender for the best weapon after receiving several buffs. It is easy to use, delivers consistent damage, safe, and mobile.
- The Dual Blades have received multiple buffs over the past title updates, making it easier to stay aggressive and maintain consistent damage while sticking to monsters.
- The Bow remains a top-tier weapon, offering incredibly high damage uptime thanks to Discerning Dodge.
- The Long Sword maintains a top spot on the list due to its strong counter options and large arrray of hyper armor moves, making it easy to benefit from Counterstrike and sustain high DPS.
- The Great Sword has earned its place as a strong maintainer weapon since release, having already the powerful ability to perform an offset attack and guard.
Best Weapon Tier List Criteria
| Damage Output | Considers the weapon's potential damage output and DPS (raw, element, and affinity). This determines the average monster clear time and is the main determinant of this tier list. |
|---|---|
| Defense Options | Considers if there are defensive options for the weapon to improve survivability. This includes counters like offsets, weapon dodges, guard capability, and even super and hyper armor moves. |
| Entry Barrier | Considers how hard the weapon's mechanics is to pick up and learn. |
| Difficulty to Master | Considers how hard it is to master the weapon and bring out its latent potential. |
| NEW Mechanical Changes | Considers important weapon changes and balance adjustments over the course of the game's Patch Notes and Title Updates. |
All weapons have strengths and weaknesses, but it is possible to have fast and optimal clear speed by playing lower-tier weapons through mastering their mechanics. This does, however, require more time and effort when in comparison to the higher tier weapons.
Tier Ranking Legends
| Tier | Description |
|---|---|
| High damage output, useful quick-access defensive options, and low entry barrier. | |
| High damage output, but requires more mastery for optimal use of combos and defense. | |
| High-average damage output, barrier to entry varies, but being competitive with higher tiers requires more mastery than usual. | |
| Average damage output, either requires a steep learning curve or high mastery to use effectively, may also be heavily dependent on comfort skills. |
Does the Weapon Meta Matter?
The Meta for weapon types emerge not because of the weapons themselves, but because of general experience by players. This is not to discourage anyone from playing their favorite weapon; this only serves to inform the landscape of what weapon types are most often effective in a lot of cases, especially in a competitive environment.
Prioritize Your Favorite Weapon Over the Meta
A great hunter resonates well with a weapon in style. This is beyond considerations of whatever weapon is 'meta' or 'deals more damage than the other'. If you wish to play with a preferred weapon. Then by all means, do not think; just hunt! At the end of the day, all weapons can do well at the hands of an experienced player.
Best Weapon Rankings Explained
SS Tier Weapons
| Jump to a Tier! | |||
|---|---|---|---|
Light Bowgun
 Light Bowgun Light Bowgun
|
Damage Output | |
|---|---|---|
| Entry Barrier | Difficulty to Master | |
| Low | ★☆☆☆☆ | |
The Light Bowgun, is among the top of the SS tier as it's easy to use and capable of dealing heavy, sustained damage. With access to the new Rapid Fire Mode, you get to dish out a barrage of hits from medium range while weaving in small dashes for mobility. The basic strategy of the Light Bowgun is to hone in on a monster's weak points using either the base or elemental ammunition with rapid fire and then using Focus Shot: Eagle Strike Shot to destroy multiple wounds.
This weapon is recommended for beginners because its mobility allows any hunter to safely deal good damage. Compared to past titles, the Critical Distance has shortened, and the number of Special Ammo has been reduced, so it is no longer the end-all-be-all weapon.
| Light Bowgun Guides | |
|---|---|
| Weapon Guide | Best Builds |
Best Weapon Build for Light Bowgun
|
(Light Bowgun) |
|
| This build utilizes the Mutual Hostility II and Guts (Tenacity) skills as strong offensive and defensive options. | |
Gogmapocalypse Guts Elemental LBG Build Details
Dual Blades
 Dual Blades Dual Blades
|
Damage Output | |
|---|---|---|
| Entry Barrier | Difficulty to Master | |
| Low | ★★★☆☆ | |
Dual Blades, placed at SS Tier, is one of the fastest weapons in the game that can hit multiple times with a focus on evasive maneuvers, making it easy to use. In Demon Boost Mode, the dodge roll is replaced with a spinning attack that can be chained into a secondary spinning attack. This lets you reposition and dodge attacks while keeping up the aggression.
The Blade Dance combos are now divided into 3 separate moves with the addition of the Demon Flurry combos you can weave in between. This allows the Dual Blades to have less commitment to your most powerful combos, making you extremely mobile without any damage fall-offs.
| Dual Blades Guides | |
|---|---|
| Weapon Guide | Best Builds |
Best Weapon Build for Dual Blades
|
|
|
| High damage elemental build using Gogmazios pieces and Gogma Dual Blades to activate Gogmapocalypse | |
Gogmapocalypse Burst DB Build Details
Bow
 Bow Bow
|
Damage Output | |
|---|---|---|
| Entry Barrier | Difficulty to Master | |
| Medium | ★★★★☆ | |
The Bow, placed at SS Tier, has changed considerably since its previous incarnations. Coatings are now applied by expending the new Trick Arrow Gauge, which is also used to fire Tracer Arrows that can cause further shots to home in on the Tracer's impacted location.
These changes have only served to amp up the Bow's damage further, but also increase its complexity somewhat. Mastering the Bow will now require the management of both Stamina and the Trick Arrow Gauge, but those who put in the effort will be rewarded with a powerful and satisfying weapon that can go toe to toe with the strongest foes.
| Bow Guides | |
|---|---|
| Weapon Guide | Best Builds |
Best Weapon Build for Bow
|
(Bow) |
|
| High raw and elemental damage build with Lord's Soul and Gore pieces for Black Eclipse II | |
Gore Lord's Soul Bow Build Details
Long Sword
 Long Sword Long Sword
|
Damage Output | |
|---|---|---|
| Entry Barrier | Difficulty to Master | |
| Low | ★★★★★ | |
The Long Sword is rated as one of the best weapons in SS Tier due to its amazing counters, Foresight Slash and Iai Slash, along with the rest of its moveset.
The newly-added Spirit Charge makes it easier to level up the weapon's Spirit Gauge and the Long Sword's new move Crimson Slash becomes available to the player when the Spirit Gauge level is at its max. This provides even more damage for the Long Sword.
The Long Sword also inherits the moves Spirit Thrust from Iceborne and Iai Spirit Slash from Sunbreak.
| Long Sword Guides | |
|---|---|
| Weapon Guide | Best Builds |
Best Weapon Build for Long Sword
|
|
|
| An AGI-WEX Long Sword build using a Gogma Artian weapon and Armor Transcendence. Has Second Wind, Azure Bolt, and Guts (Tenacity). | |
Fulgur-Lagi Guts Long Sword Build Details
Great Sword
 Great Sword Great Sword
|
Damage Output | |
|---|---|---|
| Entry Barrier | Difficulty to Master | |
| Low | ★★★☆☆ | |
The Great Sword sits at the SS Tier rating due to its quality-of-life improvements with Focus Mode and the True Charged Slash.
This is because instead of using the old tackle combo, you can perform multiple True Charged Slashes as long as you have Wounds to destroy using Focus Slash: Perforate. Not only that, but you can also redirect your True Charged Slash using Focus Mode, so you no longer have to worry about missing!
Additionally, the Great Sword's ability to perform Offset Attacks and Power Clashes should not be overlooked. These abilities allow you to create openings that you can then use to perform a True Charged Slash combo, dealing massive amounts of damage.
| Great Sword Guides | |
|---|---|
| Weapon Guide | Best Builds |
Best Weapon Build for Great Sword
|
|
|
| A high damage build that takes advantage of the Bale, Gore, and Dahaad set bonuses. | |
Bale Dahaad Gore GS Build Details
S Tier Weapons
| Jump to a Tier! | |||
|---|---|---|---|
Heavy Bowgun
 Heavy Bowgun Heavy Bowgun
|
Damage Output | |
|---|---|---|
| Entry Barrier | Difficulty to Master | |
| Low | ★★☆☆☆ | |
The Heavy Bowgun, placed at S Tier, can dish out decent damage, especially with the Wounding mechanic and the powerful Ignition Mode, while still having strong defensive capabilities. With the right elemental ammo and build, the Heavy Bowgun excels in constant DPS.
They also have access to numerous support ammos like Paralysis or Demon Ammo, making them perfect for multiplayer play. Once you get used to the weapon's slow movement and spacing requirements, you will be able to deal large amounts of damage to monsters.
| Heavy Bowgun Guides | |
|---|---|
| Weapon Guide | Best Builds |
Best Weapon Build for Heavy Bowgun
|
(Heavy Bowgun) |
|
| This build utilizes the Mutual Hostility II and Guts (Tenacity) skills as strong offensive and defensive options. | |
Gogmapocalypse Guts Elemental HBG Build Details
Gunlance
 Gunlance Gunlance
|
Damage Output | |
|---|---|---|
| Entry Barrier | Difficulty to Master | |
| Medium | ★★★☆☆ | |
The Gunlance is in the S Tier , still offering both incredible offensive and defensive options, with its attacks incorporated in its guard and explosive moves. It is also now possible to counter attacks just from simply guarding.
Even though shelling was nerfed, the Gunlance received buffs in other aspects such as its elemental scaling and Wyrmstake damage, giving it offensive flexibility.
| Gunlance Guides | |
|---|---|
| Weapon Guide | Best Builds |
Best Weapon Build for Gunlance
|
|
|
| A build that uses Dahaad gamma armor to enable Burst Boost II, Binding Counter I, and Guts (Tenacity) in a single set. | |
Max Burst Boost Dahaad Guts Gunlance Build Details
Sword and Shield
 Sword and Shield Sword and Shield
|
Damage Output | |
|---|---|---|
| Entry Barrier | Difficulty to Master | |
| Low | ★★★☆☆ | |
The Sword and Shield returns as an S Tier weapon, having more invincibility frames during its Backstep. It can now use Perfect Guards to nullify most attacks with little penalty, making it a very safe weapon to play.
The new Charged Chop is a great move to use, and Perfect Rush still remains a powerful tool for lots of damage during windows of opportunity.
Though it is not as flashy as its contemporaries, the Sword and Shield can still hold its own as the jack-of-all-trades weapon. It can cut tails, stun monsters, block attacks, and use items while unsheathed, providing it unique utility on top of its good damage.
| Sword and Shield Guides | |
|---|---|
| Weapon Guide | Best Builds |
Best Weapon Build for Sword and Shield
|
|
|
| An endgame elemental SnS build that focuses on Mutual Hostility II and Guts (Tenacity). | |
Gog-Guts Elemental SNS Build Details
Insect Glaive
 Insect Glaive Insect Glaive
|
Damage Output | |
|---|---|---|
| Entry Barrier | Difficulty to Master | |
| High | ★★★☆☆ | |
The Insect Glaive, placed at S Tier, is a versatile weapon that focuses on a mix of aerial and charged attacks while also utilizing Kinsects to obtain buffs.
This makes it a bit difficult to control, as it requires you to hold down certain buttons and aim your attacks during combat; however, if used correctly, you can deal great damage when you follow up with the new Spiral Slash move in exchange for losing all your extracts.
The fact that the Insect Glaive is the best weapon for aerial attacks remains unchanged from previous titles. The Jumping Advancing Slash combo has been revived on release, allowing you to continuously perform aerial attacks that can mount monsters effectively.
| Insect Glaive Guides | |
|---|---|
| Weapon Guide | Best Builds |
Best Weapon Build for Insect Glaive
|
|
|
| An endgame Insect Glaive build that focuses on raw damage with the use of Agitator and Attack Boost. | |
Max Raw Insect Glaive Build Details
Charge Blade
 Charge Blade Charge Blade
|
Damage Output | |
|---|---|---|
| Entry Barrier | Difficulty to Master | |
| High | ★★★☆☆ | |
The Charge Blade, placed at S Tier delivers outstanding damage with phial explosions from Element Discharges and pure raw multi-hits with Savage Axe. But it is definitely not the easiest weapon to play with.
You will need to put in a lot of work to deal damage. It inherits much of its mechanics from World, but now one of its most damaging options, Savage Axe, is locked behind Perfect Guards, Monster Mounts, and Focus Strikes.
It is a strictly methodological weapon. Making mistakes in its cycle of charging and attacking will cost you valuable damage loss, or worse, an attack deflection. Using it as an effective guarding weapon also requires study, needing to keep in mind Guard Points. Such mechanic is high risk and high reward, giving you access to a powerful counterattack options.
| Charge Blade Guides | |
|---|---|
| Weapon Guide | Best Builds |
Best Weapon Build for Charge Blade
|
|
|
| High elemental damage build using Gogmapocalypse and Lord's Soul | |
Gog Lord's Soul CB Build Details
A Tier Weapons
| Jump to a Tier! | |||
|---|---|---|---|
Hunting Horn
 Hunting Horn Hunting Horn
|
Damage Output | |
|---|---|---|
| Entry Barrier | Difficulty to Master | |
| High | ★★★★★ | |
The Hunting Horn, has gone up to A Tier due to the introduction of Gogmazios Artian Weapons which offer a good selection of songs. It needs a ton of work to deal optimal damage on its own, but it's a fun and rewarding weapon to play (especially in Multiplayer) due to its support capabilities.
It is able to grant buffs to Hunters such as Attack Up, Earplugs, and Stamina Use Reduction depending on the type of horn, and it also comes with more diverse support mechanics such as Echo Bubble.
The Hunting Horn allows you to stack successive notes within certain moves along with a perfect input mechanic. Though it cannot promise as much damage as other faster and harder-hitting weapons due to its speed and complexity, its value for comfort for its user and everyone in a team is unmatched in the hands of a maestro.
| Hunting Horn Guides | |
|---|---|
| Weapon Guide | Best Builds |
Best Weapon Build for Hunting Horn
|
|
|
| An endgame raw-stacking Gogma Artian HH build that uses Burst Boost II and Guts. Maximizes both AGI and Burst. | |
Gog Burst-Guts HH Build Details
Hammer
 Hammer Hammer
|
Damage Output | |
|---|---|---|
| Entry Barrier | Difficulty to Master | |
| Low | ★★★★☆ | |
The Hammer, placed at A Tier, is a rugged weapon capable of knocking down any monster with its chunky hits in exchange for having a time commitment with its charges.
The Hammer has seen a couple of positive adjustments over the course of the previous Title Updates, allowing offset attacks not just on Upswings, but also on Charged Upswing and Mighty Charge Upswing! This weapon makes it better for knockouts, letting other hunters get their window to deal damage.
However, the Hammer has one of the shortest ranges out of all the weapon types. It also takes significantly more effort to deal the same amount of damage other high-tier weapons are capable of, on top of requiring skills for managing Charged Step stamina and Mighty Charge attacks.
| Hammer Guides | |
|---|---|
| Weapon Guide | Best Builds |
Best Weapon Build for Hammer
 TBA
TBA
Switch Axe
 Switch Axe Switch Axe
|
Damage Output | |
|---|---|---|
| Entry Barrier | Difficulty to Master | |
| Medium | ★★☆☆☆ | |
The Switch Axe, placed at A Tier, uses powerful attacks that takes advantage of its long reach and access to knockback immunity. It can take a while to grasp the mechanics of the Switch Axe though, mostly due to the need to manage multiple gauges all at once, but you will get better with more practice.
The Switch Axe is also suitable for a dodge-based playstyle due to its sidesteps which can be improved with Evade Extender or Evade Window. It is also now capable of using an Offset Attack, giving it a powerful countermove in its arsenal.
| Switch Axe Guides | |
|---|---|
| Weapon Guide | Best Builds |
Best Weapon Build for Switch Axe
|
|
|
| Endgame set with the 4pc Set Bonus of Gogmapocalypse | |
Mutual Hostility II Lord's Soul SA Build Details
B Tier Weapons
| Jump to a Tier! | |||
|---|---|---|---|
Lance
 Lance Lance
|
Damage Output | |
|---|---|---|
| Entry Barrier | Difficulty to Master | |
| Low | ★★★★☆ | |
The Lance, stays at B Tier, has access to more mobility options compared to previous titles, as it can now incorporate more guard and counterattacks in its combos. This makes the weapon more fluid and reliable when reacting to monster movements. While not flashy, the Lance's strongest suit is its capability to stick and deal consistent damage!
With the addition of the Triple Thrust, Payback Thrust, and the Charge Counter, the Lance also has access to higher damage moves so it can play catch-up with the other 13 weapons. However, most of the other weapons have also upped their game, so the Lance is still in that limbo of moving goalposts.
It is still a good weapon to pick up, however, and is currently in its best form with Wilds, so try this weapon out and see if you like it!
| Lance Guides | |
|---|---|
| Weapon Guide | Best Builds |
Best Weapon Build for Lance
|
|
|
| A high damage build that utilizes AT Jin Dahaad's set bonus skill Binding Counter to further increase the build's damage output. | |
Fulgur-Dahaad Lance Build Details
Best Weapons for Each Type
| Jump to a Weapon! | |||
|---|---|---|---|
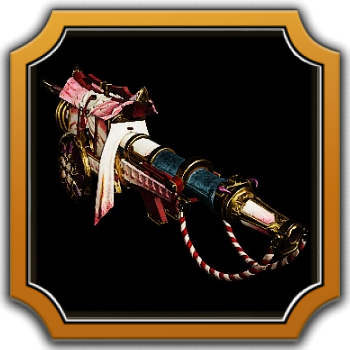
Best Gunlances
| Weapon | Reason |
|---|---|
 Auguring Omen Auguring Omen
|
・Gogma Artian Weapon with high stats, three level 3 decoration slots, and can be rolled with Set Bonus and Group Skill to fit various builds. |
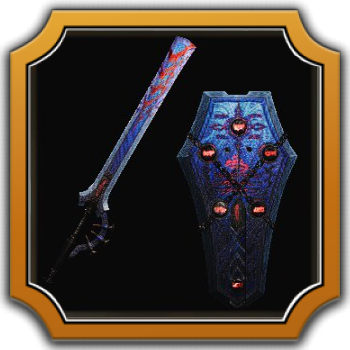
 G. Lawful Bors G. Lawful Bors G. Lawful Bors Attack: 552 Affinity: -10% Element: 250 Dragon Decorations: 3,3,1  |
・Has one of the highest attacks among Gunlances. ・ Has Slightly Strong Wide Shelling which helps it deal even more damage, especially when partnered with the skill Load Shells. |
 Argenesis Argenesis Argenesis Attack: 437 Affinity: 5% Element: 370 Any Decorations: 3,3,3  (Sleep) |
・Raw attack with boosts tops out at 230, 10 short of G. Lawful Bors's 240. ・Element can be modified, but take note of its Shelling type. ・Shelling customization covers Long, Normal, and Wide, but Shelling Power is limited to Normal. |
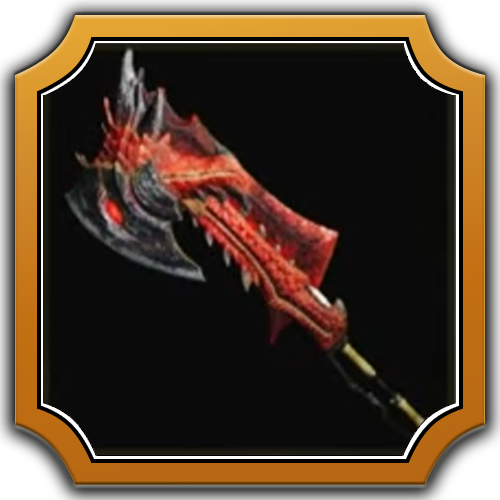
 Blazing Lael Blazing Lael Blazing Lael Attack: 506 Affinity: 5% Element: 250 Dragon Decorations: 3,2,1  |
・A good alternative to Argenesis following G. Lawful Bors, has added raw damage through Whiteflame Torrent. ・Has Slightly Strong Shelling but is limited to a Normal Shelling Type. |
The best weapons for Gunlance are those with high raw attack, as most of your damage will come from your Shelling.
Best Long Swords
| Weapon | Reason |
|---|---|
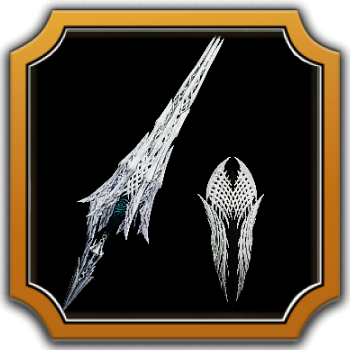
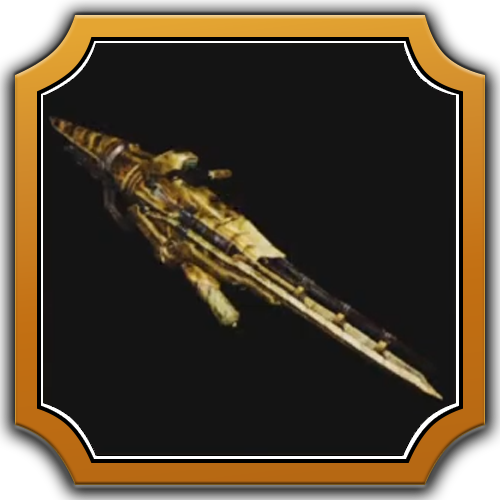
 Headman's Hamus Headman's Hamus
|
・Gogma Artian Weapon with high stats, three level 3 decoration slots, and can be rolled with Set Bonus and Group Skill to fit various builds. ・Can be customized with production bonuses. Focus and Reinforcements further boost its stats. |
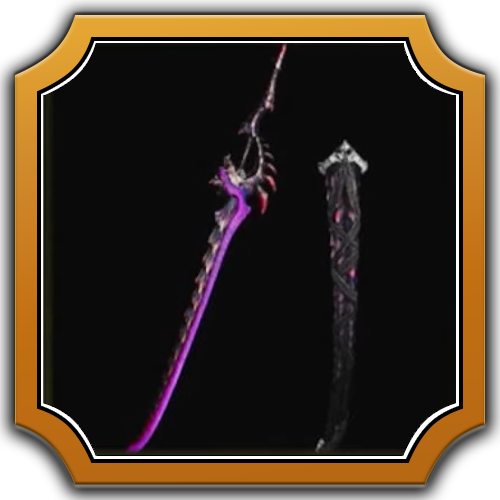
 Dimensius Dimensius Dimensius Attack: 627 Affinity: 5% Element: 270 Any Decorations: 3,3,3 (Any Element) |
・Artian Long Sword with variable infusion and reinforcement stats that you can customize however you like it. |
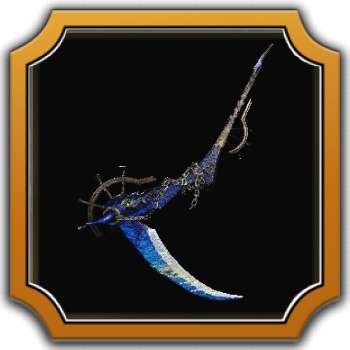
 Wyvern Blade "Maple" Wyvern Blade "Maple" Wyvern Blade "Maple" Attack: 660 Affinity: 10% Element: 350 Fire Decorations: 3,2,1  |
・Offers a good starting point to the players who just entered the endgame with its innate Level 3 Critical Boost. |
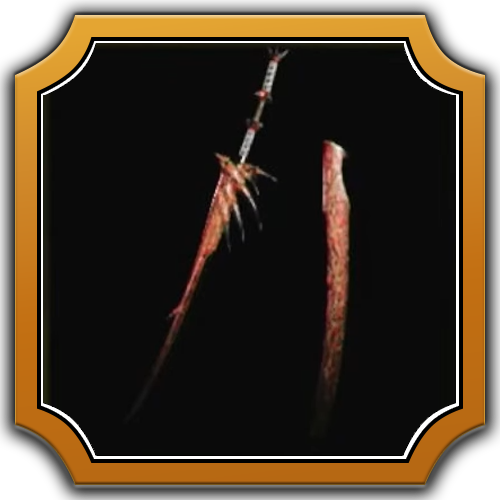
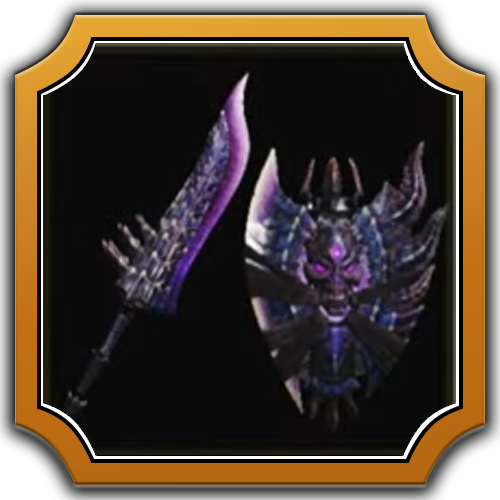
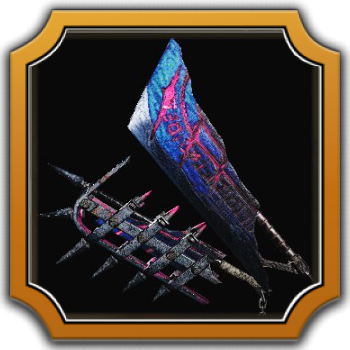
 Stahlrecht Stahlrecht Stahlrecht Attack: 693 Affinity: 20% Element: 300 Dragon Decorations: 3,2,1  |
・Has high Dragon element attack. ・Has maxed-out Critical Element skill. |
The Long Sword's top weapons all feature high attack ratings with each individual skill that can be tailored to the player's build.
Best Bows
| Weapon | Reason |
|---|---|
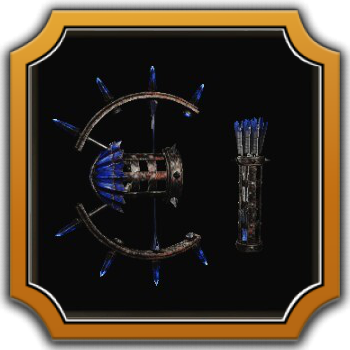 Calamitous Angel Calamitous Angel
|
・Gogma Artian Weapon with high stats, three level 3 decoration slots, and can be rolled with Set Bonus and Group Skill to fit various builds. ・Can be customized with production bonuses. Focus and Reinforcements further boost its stats. |
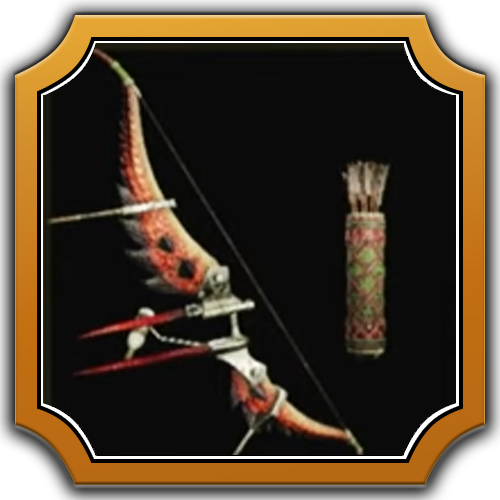 Dark Filament Dark Filament Dark Filament Attack: 240 Affinity: 10% Element: 200 Fire Decorations: 3,2,1 |
・Innate Critical Boost 3 helps it dish out high damage via critical hits. |
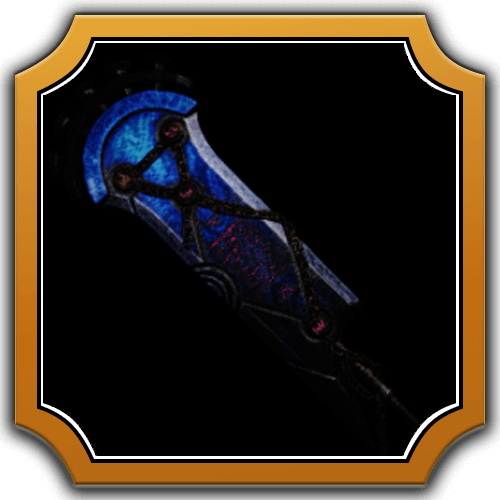
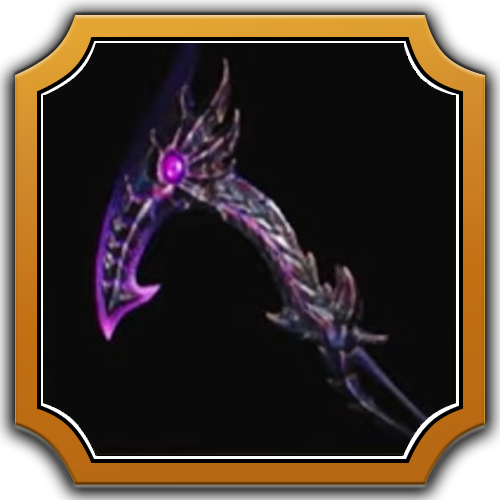
 Verzweiflung Verzweiflung Verzweiflung Attack: 252 Affinity: 20% Element: 150 Dragon Decorations: 3,2,1 |
・Carries great affinity at 20%. ・Has access to Critical Element 3, making it a good weapon for elemental builds. |
The Bow's best weapons are those that carry high elemental Attack, as well as good affinity.
Best Great Swords
| Weapon | Reason |
|---|---|
 Ostrak Oblivion Ostrak Oblivion
|
・Gogma Artian Weapon with high stats, three level 3 decoration slots, and can be rolled with Set Bonus and Group Skill to fit various builds. ・Can be customized with production bonuses. Focus and Reinforcements further boost its stats. |
 Düsterstolz Düsterstolz Düsterstolz Attack: 1008 Affinity: 20% Element: 400 Dragon Decorations: 3,2,1  |
・Dragon element Great Sword with great affinity and raw damage. ・Innate Critical Element allows you to deal more elemental damage on crits. |
 Stalwart Lamorak Stalwart Lamorak Stalwart Lamorak Attack: 1056 Affinity: 0% Element: 500 Dragon Decorations: 3,2,1  |
・Dragon element Great Sword with great affinity and attack. ・Innate Focus helps you perform charge attacks faster |
The top weapons for Great Sword focus on their high raw damage, as well as their functionality and elements.
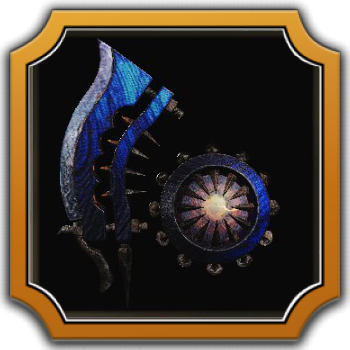
Best Heavy Bowguns
| Weapon | Reason |
|---|---|
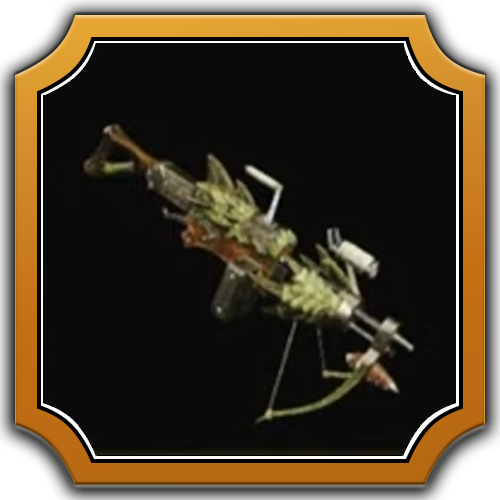
 Trembling Hels Trembling Hels
|
・Gogma Artian Weapon with high stats, three level 3 decoration slots, and can be rolled with Set Bonus and Group Skill to fit various builds. ・Can be customized with production bonuses. Focus and Reinforcements further boost its stats. |
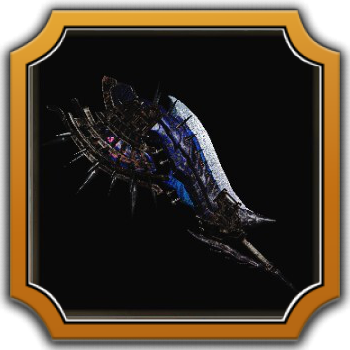
 Mountainous Roar Mountainous Roar Mountainous Roar Attack: 315 Affinity: 15% Decorations: 3,2,1 |
・A great raw-damage option focusing on Pierce Ammo and will benefit most raw-focused HBG builds. ・Can get increased affinity through Slicked Blade. |
 Ableben Abzug Ableben Abzug Ableben Abzug Attack: 300 Affinity: 20% Decorations: 3,2,1 |
・Has high attack and affinity ・Innate Critical Element mixes well with Freeze and Dragon Ammo. ・Has access to Slicing Ammo, which is great for cutting tails. |
The best weapons for Heavy Bowgun include those with high attack and affinity, as well as those with good functionality. Additionally, these bowguns run Pierce Ammo, which is currently the best base ammo in the game.
Best Sword and Shields
| Weapon | Reason |
|---|---|
 Kyrie Verd Kyrie Verd
|
・Gogma Artian Weapon with high stats, three level 3 decoration slots, and can be rolled with Set Bonus and Group Skill to fit various builds. ・Can be customized with production bonuses. Focus and Reinforcements further boost its stats. |
 Precipice Mateptro Precipice Mateptro Precipice Mateptro Attack: 294 Affinity: 0% Element: 350 Ice Decorations: 3,2,1  |
・A great elemental Sword and Shield with 350 Ice. |
 Corona Corona Corona Attack: 280 Affinity: 10% Element: 250 Fire Decorations: 3,2,1  |
・Has innate Critical Boost 3 to increase crit damage. |
The Sword and Shield benefits off of having high raw and elemental attack, as it can make use of both in its gameplay, as well as good affinity to boot.
Best Charge Blades
| Weapon | Reason |
|---|---|
 Promised Abyss Promised Abyss
|
・Gogma Artian Weapon with high stats, three level 3 decoration slots, and can be rolled with Set Bonus and Group Skill to fit various builds. ・Can be customized with production bonuses. Focus and Reinforcements further boost its stats. |
 Dear Lutemia Dear Lutemia Dear Lutemia Attack: 756 Affinity: 15% Element: 200 Poison Decorations: 3,2,1  |
・A high damage and high affinity Poison weapon with Offensive Guard 2 and Guard 1. |
 Leidenskraft Leidenskraft Leidenskraft Attack: 756 Affinity: 20% Element: 250 Dragon Decorations: 3,2,1  |
・Has high affinity of 20%. ・Has high white sharpness. |
The best weapons for the Charge Blade involve those with high affinity values, status effects such as Paralysis, and lots of available deco slots. It also matters that Charge Blades uses Impact Phials, which is easier to boost overall compared to Element Phials.
Best Switch Axes
| Weapon | Reason |
|---|---|
 Wicked Regnum Wicked Regnum
|
・Gogma Artian Weapon with high stats, three level 3 decoration slots, and can be rolled with Set Bonus and Group Skill to fit various builds. |
 Eisengeist Eisengeist Eisengeist Attack: 700 Affinity: 20% Element: 200 Dragon Decorations: 3,2,1  |
・Has Critical Element for element-focused builds. |
 Rath Blaze Splitter Rath Blaze Splitter Rath Blaze Splitter Attack: 700 Affinity: 10% Element: 250 Fire Decorations: 3,2,1  |
・Has Critical Boost to increase crit damage. |
Top Switch Axe weapons all feature good slots to put necessary skills for the weapon. They are also all featuring Power Phials, which is currently great in general.
Best Dual Blades
| Weapon | Reason |
|---|---|
 Eternal Cusp Eternal Cusp
|
・Gogma Artian Weapon with high stats, three level 3 decoration slots, and can be rolled with Set Bonus and Group Skill to fit various builds. ・Can be customized with production bonuses. Focus and Reinforcements further boost its stats. |
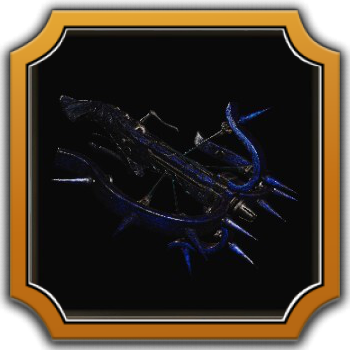
 Precipice Ulokiem Precipice Ulokiem Precipice Ulokiem Attack: 294 Affinity: 0% Element: 300 Ice Decorations: 3,2,1  |
・A great elemental Dual Blade with 300 Ice. |
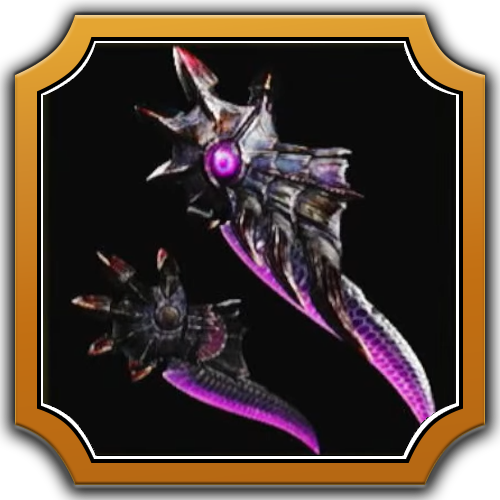 Hungerklauen Hungerklauen Hungerklauen Attack: 280 Affinity: 20% Element: 150 Dragon Decorations: 3,2,1  |
・Has a good 20% affinity paired with Critical Element 3, which makes it perfect for elemental builds. |
The top Dual Blades make use of high elemental damage to take advantage of the quick attack speed of the weapon.
Best Light Bowguns
| Weapon | Reason |
|---|---|
 Bethorned Agony Bethorned Agony
|
・Gogma Artian Weapon with high stats, three level 3 decoration slots, and can be rolled with Set Bonus and Group Skill to fit various builds. ・Can be customized with production bonuses. Focus and Reinforcements further boost its stats. |
 Szelatya Clairgun Szelatya Clairgun Szelatya Clairgun Attack: 286 Affinity: 0% Decorations: 3,2,1 |
・Has high raw damage in conjunction with a highly-leveled Pierce and additional levels to Opening Shot. |
 Animilater Animilater Animilater Attack: 247 Affinity: 5% Decorations: 3,3,3 |
・Artian LBG with high customizability ・Has three 3rd-level decoration slots which helps with maximizing elemental damage output. |
 Valkyrie Flame Valkyrie Flame Valkyrie Flame Attack: 273 Affinity: 15% Decorations: 3,2,1 |
・Has access to Pierce and 15% affinity ・Possesses the option to use Foray as a consistent skill due to its innate Poison Duration Up. |
The Light Bowgun's best weapons are the bowguns that heavily utilize Pierce Ammo's damage output and elemental prowess, and to also take advantage of the new Rapid Fire Mode.
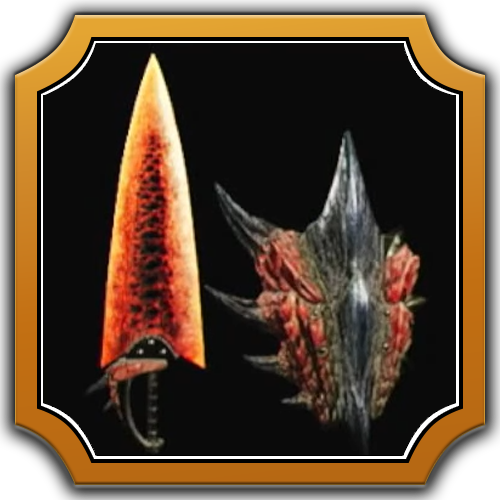
Best Insect Glaives
| Weapon | Reason |
|---|---|
 Limbo Llor Limbo Llor
|
・Gogma Artian Weapon with high stats, three level 3 decoration slots, and can be rolled with Set Bonus and Group Skill to fit various builds. ・Can be customized with production bonuses. Focus and Reinforcements further boost its stats. |
 Gravordius Gravordius Gravordius Attack: 775 Affinity: -15% Element: 250 Blast Decorations: 3,3,1  |
・High raw damage. ・Damage output can be improved with Blast. ・Has negative affinity but can be alleviated with Critical Eye and Weakness Exploit. |
 Queen Regalia Queen Regalia Queen Regalia Attack: 651 Affinity: 15% Element: 180 Poison Decorations: 3,2,1  |
・Has Poison which is used for status buildup. ・Has innate Critical Status 3 and Poison Duration Up. ・Can work for a Foray build. |
The best Insect Glaives provide hybrid stats that can benefit from raw attack, elemental damage, and status buildup weapons.
Best Hunting Horns
| Weapon | Reason |
|---|---|
|
Limbo Llor
|
・Gogma Artian Weapon with high stats, three level 3 decoration slots, and can be rolled with Set Bonus and Group Skill to fit various builds. ・Can be customized to have a specific element or status ailment for the improving the weapon's DPS and utility. ・Songs are determined by whether the Hunting Horn commits to either an element or ailment. |
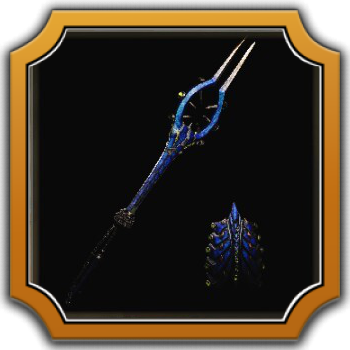
 Resounding Galahad Resounding Galahad Resounding Galahad Attack: 882 Affinity: 0% Element: 400 Dragon Decorations: 3,2,1  |
・Has high raw damage. ・Has a useful set of songs, including Restore Sharpness, All Melodies Extended, and Resounding Melody. ・Has innate Slugger 2 and Horn Maestro 2. ・All Melodies Extended song allows it to combo with other present melodies (even from a secondary Hunting Horn). |
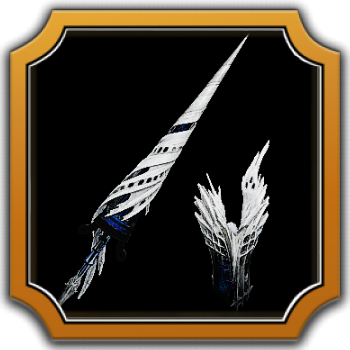
 Ajara-Jivaka Ajara-Jivaka Ajara-Jivaka Attack: 882 Affinity: 10% Element: 250 Blast Decorations: 3,2,1  |
・Has access to Blast which improves the weapon's knockdown potential along with Slugger 3. ・Can output Earplugs to help against monster roars. |
For the Hunting Horn, its best weapons cover affinity and raw damage on top of useful Hunting Horn songs.
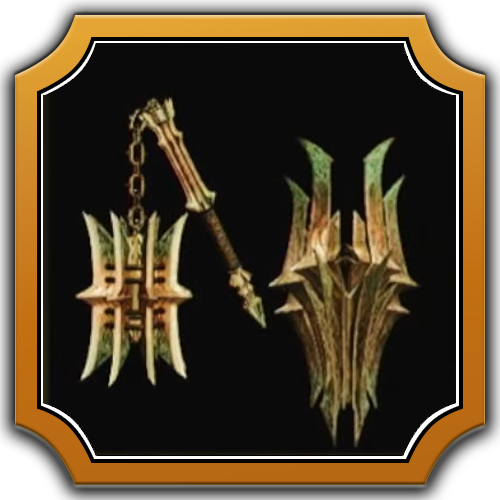
Best Hammers
| Weapon | Reason |
|---|---|
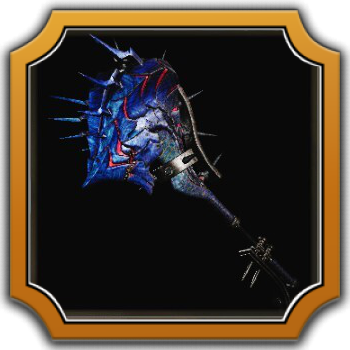 Bound Admonition Bound Admonition
|
・Gogma Artian Weapon with high stats, three level 3 decoration slots, and can be rolled with Set Bonus and Group Skill to fit various builds. ・Can be infused with any ailment, preferrably Paralysis |
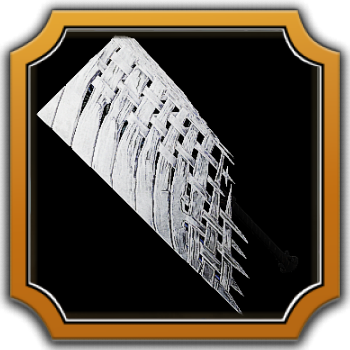
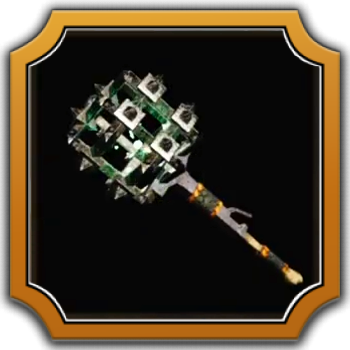 Binder Mace Binder Mace Binder Mace Attack: 1144 Affinity: 0% Element: 250 Paralysis Decorations: 3,3,1  |
・Has exceptional white sharpness and raw damage. ・Uses the useful status ailment Paralysis which can immobilize monsters for big damage opportunities. |
 Blazing Uria Blazing Uria Blazing Uria Attack: 1144 Affinity: 5% Element: 250 Dragon Decorations: 3,2,1  |
・A viable raw hammer that uses the skill Whiteflame Torrent to inflict additiona damage on some combos. |
The Hammer's best weapons have one thing in common, which is the ability to inflict status ailments thanks to their fast multi-hit strings alongside the weapon's stun potential.
Best Lances
| Weapon | Reason |
|---|---|
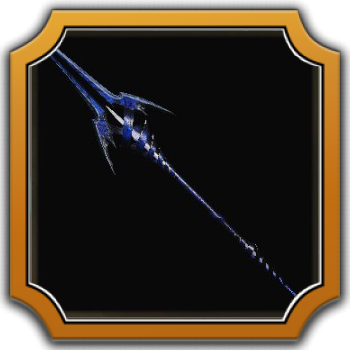
 Aether Pike Aether Pike
|
・Gogma Artian Weapon with high stats, three level 3 decoration slots, and can be rolled with Set Bonus and Group Skill to fit various builds. ・Can be customized with production bonuses. Focus and Reinforcements further boost its stats. |
 Blazing Sital Blazing Sital Blazing Sital Attack: 506 Affinity: 5% Element: 200 Dragon Decorations: 3,2,1  |
・Has Whiteflame Torrent which adds additional damage to most of the Lance's normal combos. |
 Spear of Prominence Spear of Prominence Spear of Prominence Attack: 483 Affinity: 10% Element: 350 Fire Decorations: 3,2,1  |
・Has Critical Boost which fits affinity-centric builds. |
The best Lance weapons rely on their high affinity, and their decoration slots can be slotted Offensive Guard, Guard, or Guard Up, which are essential Lance skills.
Weapon Balance Changes
Weapon Changes from Title Update 4
| Jump to a Weapon | |||||
|---|---|---|---|---|---|
| Great Sword | Long Sword | Sword & Shield | |||
| Dual Blades | Hammer | Hunting Horn | |||
| Lance | Gunlance | Switch Axe | |||
| Charge Blade | Insect Glaive | Light Bowgun | |||
| Heavy Bowgun | Bow | - | |||
Great Sword
| – Raw damage and elemental scaling for Charged Slash, Strong Charged Slash, and True Charged Slash have been increased. - Fixed an issue preventing the player from guarding again for a while depending on whether any directional inputs occurred after a Perfect Guard. |
Long Sword
| - Special Sheathes will now take longer to be automatically deactivated if the player is waiting during a Special Sheathe. – Spirit Release Slash will no longer hit captured monsters. - Fixed an issue preventing the player from unsheathing their weapon for a while if there is no directional input after a Spirit Release Slash. |
Sword & Shield
| - Adjusted the hitbox of Perfect Rush to make it easier for some inputs to land. – Forward Slash raw damage has been increased. - Forward Slash now combos into Lateral Slash more smoothly than before. - Perfect Guard now transitions into a regular Guard slightly more quickly. - Perfect Guard now combos into a Lateral Slash slightly more quickly. – Fixed an issue where the Sidestep Slash behavior during Focus Mode differed depending on the control type settings. – Fixed an issue that prevents you from performing basic actions after drawing your weapon from a stationary position. |
Dual Blades
| – The amount of weapon sharpness consumed while performing Focus Strike: Turning Tide or Turning Tidedrill has been reduced. – Made adjustments to keep Demon Boost Mode active even after sheathing your weapon. – You can now exit Demon Mode mid-movement after performing a Demon Dodge in Demon Boost Mode. – Fixed an issue where the Focus Strike: Turning Tide action was canceled after deflecting off certain monster parts. – Fixed an issue with Type 2 Directional Controls that prevented you from moving in the intended direction after dodging in Demon Mode. |
Hammer
| – During a Follow-up Spinslam, you can now use movement inputs to extend your movement distance during the attack. – Fixed an issue where portions of Focus Blow: Earthquake were dealing fixed raw damage. – Fixed an issue with Type 2 Directional Controls where moving in certain directions after an Overhead Smash would cancel the movement. |
Hunting Horn
| – Performance Beat raw damage has been increased slightly. – Fixed a bug where the performance effects and attack timings were misaligned with player actions during certain performances. |
Lance
| – High Thrust III and Mid-Thrust I, II, and III raw damage has been increased. – Grand Retribution Thrust and Double Counter-thrust raw damage has been increased. – Triple Thrust raw damage and elemental scaling have been increased. – Perfect Guard now chains into other actions more quickly. – The damage reduction rate for large guard reactions during a guard or Perfect Guard has been increased. Note: The Guard Up damage reduction rate will apply for attacks that become blockable due to the skill effect. – Fixed an issue with Type 2 Directional Controls where Leaping Thrust could not be performed in the intended direction from a stationary position. |
Gunlance
| – The Wyrmstake Cannon was adjusted to make it easier to hit monsters. – Wyrmstake Cannon attacks in Focus Mode have been adjusted to make it easier to fire in the direction of the reticle. – The damage reduction rate for large guard reactions during a guard or Perfect Guard has been increased. Note: The Guard Up damage reduction rate will apply for attacks that become blockable due to the skill effect. – Fixed an issue where Wyrmstake Shots would disappear if a Wyrmstake Cannon attack hit another player. |
Switch Axe
| – Sword: Counter Rising Slash can now be chained into a sidestep. - Sword: Counter Rising Slash has increased invulnerability to knockback, and can be quickly chained into an evade. - You can now evade while charging Unbridled Slash and Full Release Slash. - You can now quickly chain into an evade when landing after performing a Zero Sum Discharge Finisher. – Focus Assault: Morph Combination was adjusted to make it easier to hit wounds and weak points. – Focus Assault: Morph Combination raw damage has been increased. - Raw damage has been increased for Sword: Overhead Slash, Sword: Right Rising Slash, Sword: Left Rising Slash, and Sword: Heavenward Flurry. – Unbridled Slash raw damage has been increased. - Element scaling for multi-hit attacks and raw damage has been increased for Element Discharge and Zero Sum Discharge. – Axe: Spiral Burst Slash raw damage has been increased. - Raw damage has been increased for Sword: Downward Fade Slash, Sword: Morph Double Slash, and Axe: Morph Rising Double Slash. – Sword: Morph Slash raw damage has been increased when chaining from an evade in Sword Mode. - Fixed an issue where the values on the status screen for Dragon Phial, Poison Phial, Paralysis Phial, and Exhaust Phial would show a higher number than the maximum possible value. *This does not change the actual functionality, just the numbers that are displayed. |
Charge Blade
| – Hit stops that occur during multi-hit attacks in Power Axe Mode have been reduced. Note: "Hit stops" are visual effects where your movement temporarily freezes or slows down when an attack connects with a monster. – During Axe: Morph Slash, the window for utilizing guard points or executing a Perfect Guard has been extended, and the actions will now trigger sooner. – Savage Axe Slash raw damage has been increased. – Axe: Element Discharge and other attacks now chain into moves like Axe: Morph Slash more quickly. – The first hit of Axe: Element Discharge II now chains into Axe: Morph Slash. – Focus Slash: Double Rend can now chain into Axe: Morph Slash. – Focus Slash: Double Rend can now chain into other actions more quickly. – Fixed an issue where Axe: Element Discharge II couldn't chain into Axe: Amped Element Discharge when certain inputs were used. – Fixed an issue when initiating a guard where there was a delay before turning in the intended direction. – Fixed an issue where the button guide display differed from the actual inputs during certain Sword: Morph Slash combos. |
Insect Glaive
| – You can now chain into a Descending Slash using short button inputs. The Charge Level will increase depending on the preceding attacks. Note: With the right timing, you can use △+○ (PS5) / Y+B (Xbox) / Default Left + Right Click (PC) to chain into a Descending Slash. – Sidestep Slash and Sidestep Slash Combo raw damage has been increased, and attack speed after harvesting all three extracts has been raised. – The player will no longer be knocked back after initiating a Rising Spiral Slash. – Jumping Slash/Strong Jumping Slash can now chain into a Descending Slash/Strong Descending Slash. – Fixed an issue where certain charged attacks would not chain into a Descending Slash during Focus Mode, even after releasing the charge. – Fixed an issue where the Kinsect behaved abnormally while performing a Focus Strike: Leaping Thrust on certain monsters, such as Nu Udra. – Fixed an issue where the Kinsect stopped moving after encountering ledges in certain terrain. |
Light Bowgun
| – Focus Blast: Eagle Strike Rapid Fire Gauge recovery amount has been greatly increased. – Chaser Shot responsiveness has been improved, and it is now easier to chain into evades or other shots after firing. – Rapid Chaser Shot responsiveness has been improved, and it is now easier to chain into evades or other shots after firing. – Burst Step now chains more easily into Rapid Chaser Shot. – Adhesive Ammo explosions now restore the Rapid Fire Gauge. – Wyvernblast raw damage has been increased, and the cooldown time has been greatly reduced. – It is now easier to chain into basic actions after setting up a Wyvernblast. – Normal Ammo raw damage has been increased. – Normal Ammo Chaser Shot raw damage has been increased. – Normal Ammo Rapid Chaser Shot firing rate has been increased. – The raw damage of the final shot of Normal Ammo Rapid Chaser Shot has been increased. – The number of shots from Pierce Ammo Rapid Chaser Shot has been increased. – Spread Ammo Rapid Chaser Shot firing rate has been increased. – The raw damage and elemental values of elemental ammo Rapid Chaser Shot (excluding Dragon Ammo) has been increased. – Elemental ammo Rapid Chaser Shot (excluding Dragon Ammo) firing rate has been increased. – Dragon Ammo Rapid Chaser Shot firing rate has been increased. – Dragon Ammo has shorter time between hits and is more likely to hit monsters. – Dragon Ammo max effective range has been increased. – Rapid Chaser Shot firing rate has been increased when using Poison Ammo, Paralysis Ammo, and Sleep Ammo. – Reduced the amount of Rapid Fire Gauge consumed by ammo that can be used for rapid fire. – Fixed an issue where moving diagonally while aiming could cause you to move much slower than intended. |
Heavy Bowgun
| – Wyverncounter Ignition now restores Ignition Gauge upon a successful offset. – The player is no longer knocked back when firing Wyverncounter Ignition. – The responsiveness of Wyverncounter Ignition between loading and firing the attack has been improved. – Wyverncounter Ignition now chains more easily into other actions after firing. – You can now chain into guarding or sidestepping when readying Wyvernblast Ignition or Focus Blast: Wyvern Howl. The evade performed when readying or after firing these moves has also been changed to a sidestep. – Reduced the amount of Ignition Gauge that Wyvernblast Ignition consumes. – Wyvernblast Ignition raw damage and Fire damage has been increased. – Wyvernblast Ignition now chains more quickly into guards, evades, and other actions after firing. – Wyvernpiercer Ignition raw damage and max number of hits has been increased. – Wyvernheart Ignition raw damage has been increased. – Focus Blast: Wyvern Howl now restores Ignition Gauge when hitting weak points or destroying wounds. – The responsiveness of Focus Blast: Wyvern Howl between loading and firing the attack has been improved. – Focus Blast: Wyvern Howl now chains more easily into other actions after firing. – Focus Blast: Wyvern Howl raw damage has been increased. – Dragon Ammo has shorter time between hits and is more likely to hit monsters. – Dragon Ammo max effective range has been increased. – Ignition Mode ST I and II damage multiplier scaling has been increased. (Affects Wyvernpiercer Ignition, Wyvernheart Ignition, and Focus Blast: Wyvern Howl.) – Fixed an issue where, under certain conditions, player actions would become erratic while performing Stalwart Guard. |
Bow
| – Dragon Piercer and Arc Shot raw damage has been increased. – Increased the raw damage of Tracer arrows and Fuse arrows. – Charged Shot, Power Shot, Power Volley, and Thousand Dragons raw damage and elemental scaling has been increased. – Power Coating and Piercing Coating raw damage scaling has been increased. – Coating application speed has been increased. – You can now chain from a Charging Sidestep into loading a Tracer arrow. – Fixed an issue where damage scaling and the effects of the Partbreaker skill were not reflected properly when destroying multiple wounds or weak points at the same time with Focus Fire: Hailstorm. – Fixed an issue where stamina would not naturally recover under certain conditions when performing a backward Discerning Dodge. |
Title Update 4 Patch Notes Ver.1.040.00.00
Weapon Poll
Which Do You Think Is the Best Weapon?
Monster Hunter Wilds Related Guides

Monster Hunter Wilds Walkthrough Wiki
 Weapons
 Armor Sets
 Monsters
 Builds
 Story Walkthrough
 Artian Weapons
 Maps and Locations
 Items and Materials
 Tips and Tricks
 Game Mechanics
 Endemic Life
 Skills
 Decorations
 Talismans
 Characters
 Quests
 Palico
 Trophies
 Cosmetics
 Furniture
 Festivals
 News and Game Info
 Message Boards
Recommended Guides
 State of the Meta
 Secondary Weapons
 Weapon Combos
 Best Items to Bring
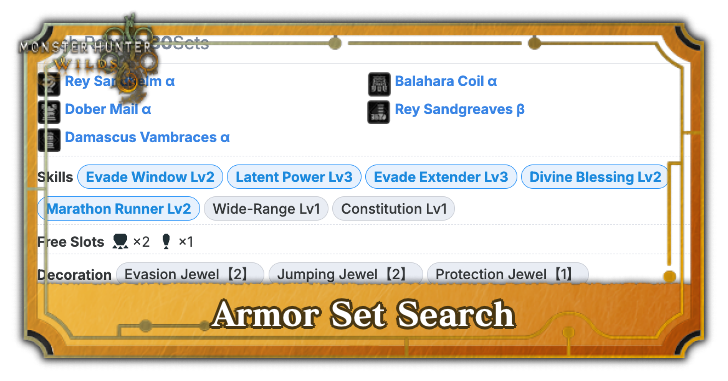 Armor Set Search
 Endgame Guide
 Unchangeable Features and Missables
 Best Skills
 Best Beginner Weapons
 Easter Eggs and Secrets
 Respawn Timers
 Is MH Wilds Too Easy?
 Best Meals and Food Effects
 Best Status Effect
 List of All Bugged Skills
 Best Co-op Strategies
 Weapon Popularity Tier List
 How to Prepare for Title Update 1
 Weapon Changes from the Beta
 Weapon Changes from Rise and World
 List of All DLC and Prices
 Talisman Rating Tool
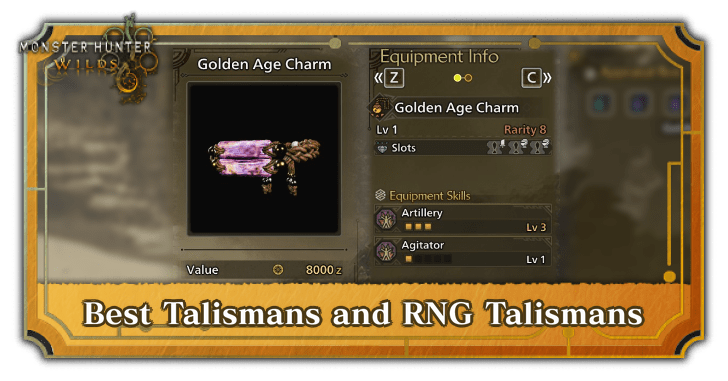 Best Talismans
 Armor Transcending Guide
Comment
IG in B despite having one of the fastest times in speedruns?????????
Author

Best Weapon Tier List
Premium Articles
Rankings
Gaming News


![Monster Hunter Stories 3 Review [First Impressions] | Simply Rejuvenating](https://img.game8.co/4438641/2a31b7702bd70e78ec8efd24661dacda.jpeg/thumb)
Popular Games

Genshin Impact Walkthrough & Guides Wiki
Honkai: Star Rail Walkthrough & Guides Wiki
Umamusume: Pretty Derby Walkthrough & Guides Wiki
Pokemon Pokopia Walkthrough & Guides Wiki
Resident Evil Requiem (RE9) Walkthrough & Guides Wiki
Monster Hunter Wilds Walkthrough & Guides Wiki
Wuthering Waves Walkthrough & Guides Wiki
Arknights: Endfield Walkthrough & Guides Wiki
Pokemon FireRed and LeafGreen (FRLG) Walkthrough & Guides Wiki
Pokemon TCG Pocket (PTCGP) Strategies & Guides Wiki


Recommended Games
Diablo 4: Vessel of Hatred Walkthrough & Guides Wiki
Cyberpunk 2077: Ultimate Edition Walkthrough & Guides Wiki
Fire Emblem Heroes (FEH) Walkthrough & Guides Wiki
Yu-Gi-Oh! Master Duel Walkthrough & Guides Wiki
Super Smash Bros. Ultimate Walkthrough & Guides Wiki
Pokemon Brilliant Diamond and Shining Pearl (BDSP) Walkthrough & Guides Wiki
Elden Ring Shadow of the Erdtree Walkthrough & Guides Wiki
Monster Hunter World Walkthrough & Guides Wiki
The Legend of Zelda: Tears of the Kingdom Walkthrough & Guides Wiki
Persona 3 Reload Walkthrough & Guides Wiki


All rights reserved
©CAPCOM
The copyrights of videos of games used in our content and other intellectual property rights belong to the provider of the game.
The contents we provide on this site were created personally by members of the Game8 editorial department.
We refuse the right to reuse or repost content taken without our permission such as data or images to other sites.
this stupid ass tier list gets funnier as time goes by hunting horn having the fastest solo times for omega wants to have a word with you