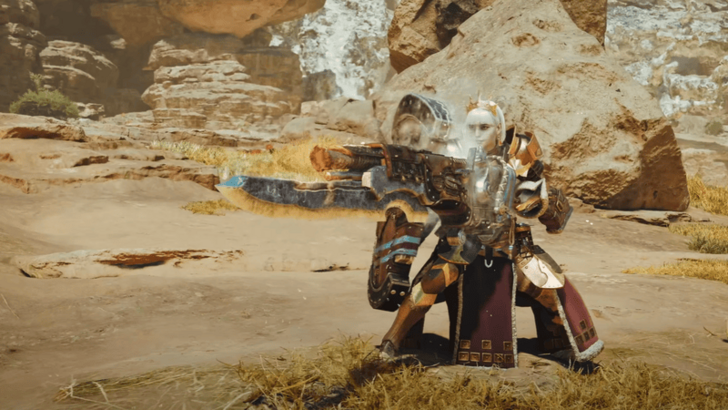
Gunlance Weapon Guide and Best Combos
★ Arkveld Gamma Armor | MH Stories 3 Collab
☆ Version 1.041: Sororal α Armor | Shatterseal
★ How to Unlock Proof of a Hero Quest
☆ Omega Planetes | Savage Omega | Builds vs Omega
★ Armor Set Search updated for Ver 1.041
☆ HR50+ Builds | Tier List | Weapon Guides
Monster Hunter Wilds' Gunlance is a defensive weapon that utilizes Shells to fire shots alongside standard thrust attacks. See all the new moves for the Gunlance, its mechanics, controls, best ammo, advanced tips, and how good it is!
| Gunlance Guides | ||
|---|---|---|
| Weapon Guide | Builds | Tree |
List of Contents
Gunlance Balance Adjustment
Gunlance Update in Version 1.021
| Gunlance Changes (Version 1.021) |
|---|
| ・(Fixed) Fixed an issue where, under certain conditions, performing Burst Fire while the skill Load Shells Lv 2 was active would result in fewer hits than intended. |
The Gunlance received a bug fix with the interaction of Burst Fire and Load Shells in Version 1.021 which released on August 12, 2025.
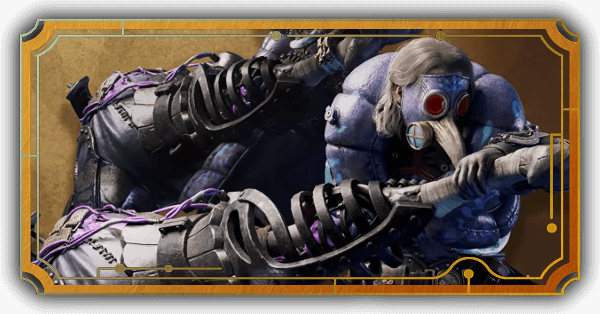
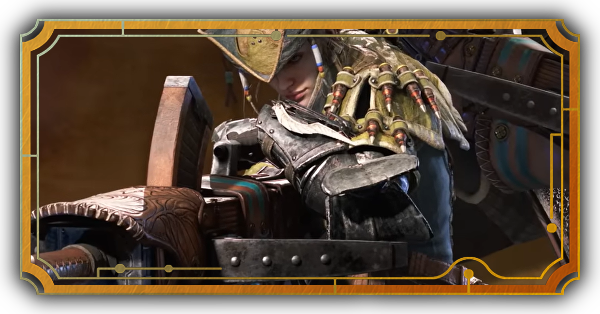
Gunlance Mechanics
| Gunlance Mechanics |
|---|
|
|
A Weapon that Combines Slashes and Explosions
Unlike most weapons, the Gunlance has two different damage types which are its severing lance moves and its gun components that deals true and Fire damage. With its ammo system, you won't be a weapon that outputs attacks incredibly fast, but with more focus on being a weapon that paces itself with regular huge bursts of damage by combining your Shelling, Wyrmstakes, and Wyvern Fires into your combos.
Shelling Deals Fire Damage
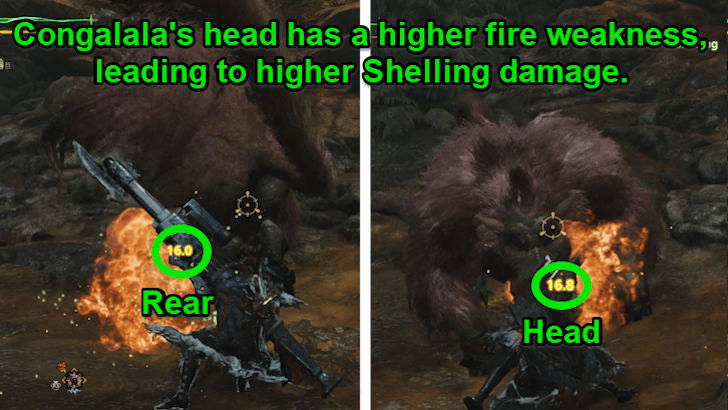
As mentioned above, Shelling deals both true and Fire damage. This means that monsters who are weak to fire, like the Congalala, will receive slightly more Shelling damage, especially to the head. In the same way, monsters who are immune to fire, like the Gravios, will take slightly less Shelling damage. This also means that Shelling can interact with flammable objects, such as grass or oil and set them on fire.
It is important to note, however, that a majority of Shelling's damage is still true damage, and as such should not impact your hunts that much.
Learn What Each Gauge is Used For
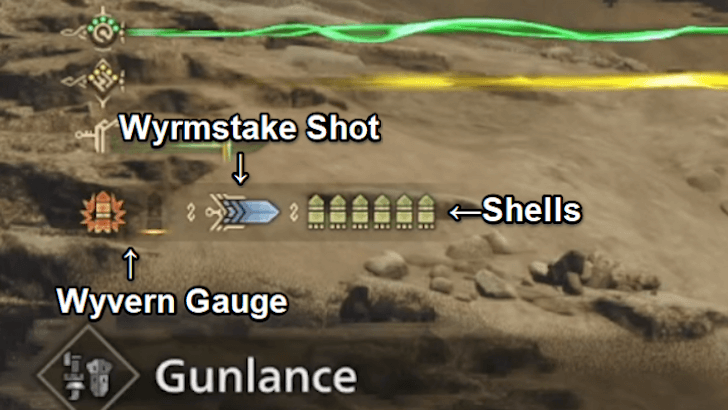
| Gauge | Explanation |
|---|---|
| Shells | Ammo required to use Shelling. Deals damage that cuts through the thickness of the monster's hide. They can be recovered by using Reload or Quick Reload. |
| Wyrmstake Shot | Ammo required to use Wyrmstake Cannon. Consumed each time Wyrmstake Cannon is fired and can be recovered with Reload. |
| Wyvern Gauge | A gauge used to unleash Wyvern's Fire, which is a powerful attack that deals damage that cuts through the monster's hide. The gauge will recover whenever you land attacks. Each attack consumes one segment of the gauge and up to two can be stored. |
Compared to other weapons, Gunlance has a bunch of gauges that you need to keep track of. It's best to familiarize yourself with the gauges so you know which one does what.
Utilize the Different Shelling Types
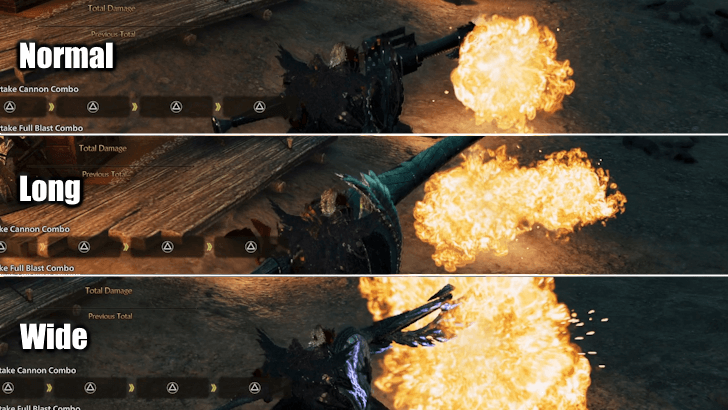
| Type | Information |
|---|---|
| Normal | ・Can hold a large number of Shells |
| Long |
・Can use Shelling from a distance ・Strong Wyrmstake Cannon attacks |
| Wide |
・Can hold a small number of Shells ・Short but wide range ・Strong Shelling and Wyvern's Fire attacks |
The Gunlance has different Shelling types depending on the exact weapon you're using. It's best to familiarize yourself with the different Sheling types since each one has its own strengths and weaknesses.
Shelling Type and Power Dictates Its Damage
| Slightly Weak | Normal | Slightly Strong | |
|---|---|---|---|
| Normal | ~0.75x | 1x | ~1.16x |
| Long | ー | ~1.5x | ~1.67x |
| Wide | ー | ~2x | ~2.5x |
After testing similarly powered Gunlances on the Target Dummy in the Training Area, it is possible to estimate the damage difference of each type of shelling, as well as the different shelling powers.
Slightly Strong Wide Shelling is the strongest possible Shelling type, with damage that is roughly 2.5 times of Normal Shelling from a Gunlance with a similar Attack. Slightly Weak Normal Shelling, on the other hand, offers the weakest Shelling damage, sitting at roughly 0.75 times of Normal Shelling from a Gunlance with a similar Attack.
Block and Counterattack Playstyle
Similar to the Lance, the Gunlance excels at defending attacks using its large shield. This means you want to take on a more defensive playstyle that relies on guarding and counterattacking when there's an opening to do so.
Deal Huge Damage with Wyrmstake Full Blast
The Wyrmstake Full Blast allows you to shoot all of your shells at the same time, dealing massive damage to monsters. Additionally, the attack ends with you stabbing a Wyrmstake Shot into the enemy, dealing even more damage. This can be done twice in a row, resulting ini a Multi Wyrmstake Full Blast.
Destroy Wounds with Focus Strike: Drake Auger
Once wounds appear on a monster, you can destroy them using a Focus Strike: Drake Auger. This will deal continuous damage to a wound until it gets destroyed, dealing even more damage.
Gunlance Controls
Basic Actions
| Input | |||
|---|---|---|---|
| Lateral Thrust | | ||
| Lunging Upthrust ▼ Overhead Smash ▼ Wide Sweep / Burst Fire | | ||
| Wyrmstake Cannon | Wide Sweep ▼ | ||
| Wyrmstake Full Blast | Wide Sweep ▼ | ||
| Shelling ▼ Moving Widesweep | ▼ | ||
| Charged Shelling | (Hold) | ||
| Burst Fire | Overhead Smash ▼ | ||
| Rising Slash | |||
| Guard | |||
| Reload | |||
| Quick Reload | During Combo ▼ | ||
| Guard Thrust | |||
| Wyvern's Fire | | ||
| Focus Strike: Drake Auger | | ||
| Input | |||
|---|---|---|---|
| Lateral Thrust | | ||
| Lunging Upthrust ▼ Overhead Smash ▼ Wide Sweep / Burst Fire | | ||
| Wyrmstake Cannon | Wide Sweep ▼ | ||
| Wyrmstake Full Blast | Wide Sweep ▼ | ||
| Shelling ▼ Moving Widesweep | ▼ | ||
| Charged Shelling | (Hold) | ||
| Burst Fire | Overhead Smash ▼ | ||
| Rising Slash | |||
| Guard | |||
| Reload | |||
| Quick Reload | During Combo ▼ | ||
| Guard Thrust | | ||
| Wyvern's Fire | |||
| Focus Strike: Drake Auger | |||
| Input | |||
|---|---|---|---|
| Lateral Thrust | | ||
| Lunging Upthrust ▼ Overhead Smash ▼ Wide Sweep / Burst Fire | | ||
| Wyrmstake Cannon | Wide Sweep ▼ | ||
| Wyrmstake Full Blast | Wide Sweep ▼ | ||
| Shelling ▼ Moving Widesweep | ▼ | ||
| Charged Shelling | (Hold) | ||
| Burst Fire | Overhead Smash ▼ | ||
| Rising Slash | | ||
| Guard | | ||
| Reload | | ||
| Quick Reload | During Combo ▼ | ||
| Guard Thrust | | ||
| Wyvern's Fire | |||
| Focus Strike: Drake Auger | |||
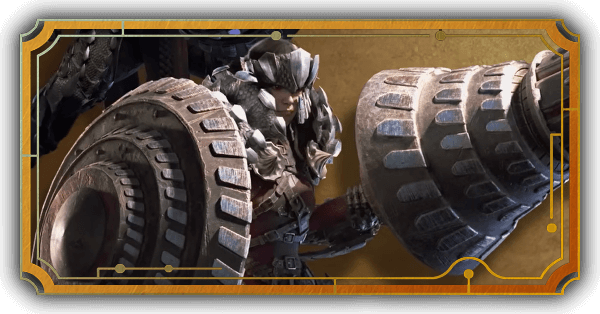
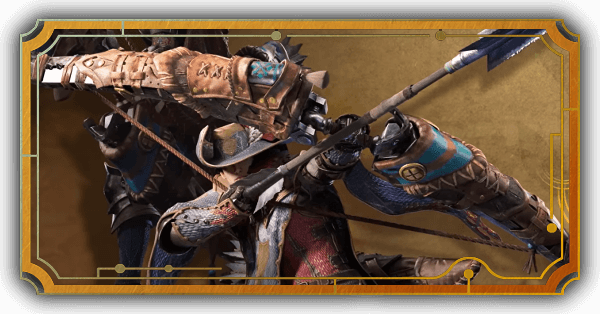
Gunlance Best Combos
| Gunlance Combos |
|---|
|
|
Multi Wyrmstake Full Blast into Wyvern's Fire
| Combo Input |
|---|
| Combo Input |
|---|
| Combo Input |
|---|
This combo is the best combo on Gunlance as it fires off all your Shells in one hit and sticks two Wyrmstakes into the monster in one combo. Make sure to Reload afterwards so you can replenish your ammo and Wyrmstake Shot.
You can also choose to fire your Wyvern's Fire after this combo, as the Wyvern Fire attack animation will be sped up.
Initial Shots can be Charged
You can also start off this combo by charging up all your Shells instead of shooting just one. This is best used when your Wyverns Fire charges are depleted, as this combo will quickly prepare one charge of Wyvern's Fire.
You must equip at least Focus 1 and Load Shells 2 on a Wide Shelling Gunlance and at least Focus 2 and Load Shells 2 on a Normal Shelling Gunlance for this combo to work. On a Long Shelling Gunlance, you will need at least Focus 3 and Load Shells 2, as well as a little bit of extra Wyvern's Fire charge to kick-off the combo.
Wyvern's Fire Charge and Release
| Combo Input |
|---|
| Combo Input |
|---|
| Combo Input |
|---|
If you have around half a Wyvern's Fire charge, you can use this combo to charge up the remaining half to quickly release a sped up Wyvern's Fire. This combo's charging effectiveness is better with Load Shells 2 at least 1 level of Focus on your Gunlance.
Poke Combo
| Combo Input |
|---|
| Combo Input |
|---|
| Combo Input |
|---|
The Poke Combo allows you to alternate between your melee attack and shelling, dealing amage without having to commit to any long attack animations. You can use this combo until your Gunlance runs out of Shells, or you can stop midway if you feel like committing to a different combo.
Burst Fire Combo
| Combo Input |
|---|
| Combo Input |
|---|
| Combo Input |
|---|
The Burstfire is normally performed by using a Rising Slash into an Overhead Smash then shooting to unleash all Shells. However, to truly maximize this string, we'll skip the Rising Slash and instead use a Perfect Guard into an Overhead Smash immediately. You can then perform a Wide Sweep after the Burstfire before performing a Reload. This is perfect against aggressive monsters, especially since the Reload can potentially also block monster attacks, leading to a quicker reload.
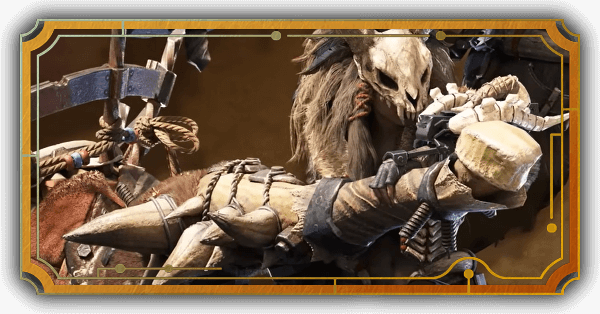
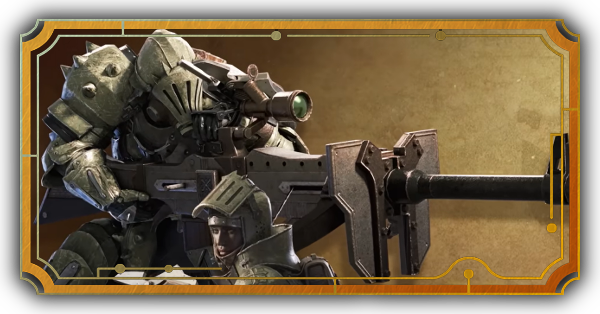
Gunlance Advanced Tips
| Gunlance Advanced Tips |
|---|
|
|
You Can Perfect Guard while Reloading
Other than guarding right before an enemy's attack hits, you can also perform a Perfect Guard by reloading right before an enemy attack hits. Other than performing the Perfect Guard, you will also reload all of your bullets.
Wyvern's Fire Animation can be Sped Up
The Wyvern's Fire is one of the Gunlance's strongest attacks, but also its slowest. It is, however, possible to speed up the attack animation of the Wyvern's Fire through various means.
This includes performing a Perfect Guard, finishing a Wyrmstake Cannon or Wyrmstake Full Blast combo, or firing a second Wyvern's Fire shot. Firing a second Wyvern's Fire shot also increases its range to make up for the first shot's extreme recoil.
Charged Shelling Charges Wyvern's Fire Fast
Instead of charging over time like in previous games, the Wyvern's Fire gauge now charges up whenever you hit the enemy with your Gunlance. The fastest way to charge up your Wyvern's Fire gauge is by performing Charged Shelling. The more bullets you hit a monster with while performing Charged Shelling, the faster Wyvern's Fire charges up.
Use Shelling and Wide Slash to Gap Close
In previous games, the fastest way to get closer to a monster with your Gunlance drawn was by turning away and backstepping. Now, the fastest way to close the gap is by performing one or two Shellings followed by a Moving Wide Sweep.
This allows you to quickly approach the enemy, and can even be used as the starting point of a Wyrmstake Full Blast combo.
Shelling Damage Scales with Attack
Unlike previous installations, this game looks to scale the damage of your Shells with your Attack. Before, the damage used to be fixed, meaning it was strong early but weaker later. However, the Gunlance's Shelling now scales with your Attack stat allowing it to deal significantly more damage in the later stages of the game than it did in previous Monster Hunter games.
Is Gunlance Good?
Tier List Ranking
| Weapon Ranking | ||
|---|---|---|
| Damage Type | Entry Skill Requirement | Difficulty to Master |
| Medium | ★★★☆☆ | |
| Weaknesses and Strengths | ||
|
|
||
Entry Skill Requirement pertains to how easy it is to learn the weapon from scratch, while Difficulty to Master is a rating on how difficult it is to perfectly execute the weapon mechanics.
While Gunlance is not the easiest weapon to get into, it is also not the hardest to master. Its great defensive capabilities and excelent damage makes it a great weapon for both new and veteran hunters. Not only that, but adding the ability to move while performing Shelling has increased the weapon's overall mobility.
Although the Gunlance's mobility is still lacking compared to other hard hitting weapons like the Long Sword or the Hammer, it is still capable of dishing out large amounts of damage. You will just need to get used to some of the Gunlance's long attack animations.
Monster Hunter Wilds Related Guides
All Weapon Guides
| All Weapon Tutorials | |||||
|---|---|---|---|---|---|
 Great Sword Great Sword |
 Long Sword Long Sword |
 Sword & Shield Sword & Shield |
|||
 Dual Blades Dual Blades |
 Hammer Hammer |
 Hunting Horn Hunting Horn |
|||
 Lance Lance |
 Gunlance Gunlance |
 Switch Axe Switch Axe |
|||
 Charge Blade Charge Blade |
 Insect Glaive Insect Glaive |
 Light Bowgun Light Bowgun |
|||
 Heavy Bowgun Heavy Bowgun |
 Bow Bow |
||||
All Weapon Trees
| All Weapon Trees | |||||
|---|---|---|---|---|---|
 Great Sword Great Sword |
 Long Sword Long Sword |
 Sword & Shield Sword & Shield |
|||
 Dual Blades Dual Blades |
 Hammer Hammer |
 Hunting Horn Hunting Horn |
|||
 Lance Lance |
 Gunlance Gunlance |
 Switch Axe Switch Axe |
|||
 Charge Blade Charge Blade |
 Insect Glaive Insect Glaive |
 Kinsects Kinsects |
|||
 Light Bowgun Light Bowgun |
 Heavy Bowgun Heavy Bowgun |
 Bow Bow |
|||
Comment
Author

Gunlance Weapon Guide and Best Combos
Premium Articles

Rankings
Gaming News


![Monster Hunter Stories 3 Review [First Impressions] | Simply Rejuvenating](https://img.game8.co/4438641/2a31b7702bd70e78ec8efd24661dacda.jpeg/thumb)
Popular Games

Genshin Impact Walkthrough & Guides Wiki
Honkai: Star Rail Walkthrough & Guides Wiki
Umamusume: Pretty Derby Walkthrough & Guides Wiki
Pokemon Pokopia Walkthrough & Guides Wiki
Resident Evil Requiem (RE9) Walkthrough & Guides Wiki
Monster Hunter Wilds Walkthrough & Guides Wiki
Wuthering Waves Walkthrough & Guides Wiki
Arknights: Endfield Walkthrough & Guides Wiki
Pokemon FireRed and LeafGreen (FRLG) Walkthrough & Guides Wiki
Pokemon TCG Pocket (PTCGP) Strategies & Guides Wiki


Recommended Games
Diablo 4: Vessel of Hatred Walkthrough & Guides Wiki
Cyberpunk 2077: Ultimate Edition Walkthrough & Guides Wiki
Fire Emblem Heroes (FEH) Walkthrough & Guides Wiki
Yu-Gi-Oh! Master Duel Walkthrough & Guides Wiki
Super Smash Bros. Ultimate Walkthrough & Guides Wiki
Pokemon Brilliant Diamond and Shining Pearl (BDSP) Walkthrough & Guides Wiki
Elden Ring Shadow of the Erdtree Walkthrough & Guides Wiki
Monster Hunter World Walkthrough & Guides Wiki
The Legend of Zelda: Tears of the Kingdom Walkthrough & Guides Wiki
Persona 3 Reload Walkthrough & Guides Wiki


All rights reserved
©CAPCOM
The copyrights of videos of games used in our content and other intellectual property rights belong to the provider of the game.
The contents we provide on this site were created personally by members of the Game8 editorial department.
We refuse the right to reuse or repost content taken without our permission such as data or images to other sites.