Support Ship Guide
★ Arkveld Gamma Armor | MH Stories 3 Collab
☆ Version 1.041: Sororal α Armor | Shatterseal
★ How to Unlock Proof of a Hero Quest
☆ Omega Planetes | Savage Omega | Builds vs Omega
★ Armor Set Search updated for Ver 1.041
☆ HR50+ Builds | Tier List | Weapon Guides
Support Ship is a feature in Monster Hunter Wilds (MH Wilds) that allows you to request items from Santiago at the Windward Plains Base Camp. See how to unlock the Support Ship, a list of available goods, the location of the Support Ship, how to request items, and the items you can request.
List of Contents
How to Unlock Support Ship
Complete Chapter 3-5

The Support Ship will be unlocked once you complete Chapter 3-5, titled Monster Hunter, which is also the last story chapter of the campaign.
Once the credits roll and you are placed back to Windward Plains' base camp, the Support Ship will become available.
List of Available Goods
| Support Ship Goods by Type | ||
|---|---|---|
| Hunting Items | Equipment Materials | Trade-in Materials |
| Facility Items | Melee Weapons | Ranged Weapons |
Hunting Items
|
5 Pts |
5 Pts |
5 Pts |
5 Pts |
|
5 Pts |
5 Pts |
5 Pts |
8 Pts |
|
8 Pts |
8 Pts |
8 Pts |
8 Pts |
|
10 Pts |
10 Pts |
10 Pts |
10 Pts |
|
10 Pts |
10 Pts |
12 Pts |
12 Pts |
|
20 Pts |
20 Pts |
20 Pts |
20 Pts |
|
20 Pts |
Equipment Materials
|
15 Pts |
15 Pts |
15 Pts |
20 Pts |
|
25 Pts |
25 Pts |
25 Pts |
25 Pts |
|
25 Pts |
30 Pts |
30 Pts |
30 Pts |
|
30 Pts |
30 Pts |
40 Pts |
40 Pts |
|
40 Pts |
40 Pts |
50 Pts |
60 Pts |
|
60 Pts |
60 Pts |
60 Pts |
70 Pts |
|
70 Pts |
70 Pts |
70 Pts |
70 Pts |
|
80 Pts |
80 Pts |
Trade-in Materials
|
30 Pts |
300 Pts |
600 Pts |
Facility Items
|
50 Pts |
Melee Weapons
|
150 Pts |
150 Pts |
150 Pts |
|
200 Pts |
200 Pts |
200 Pts |
|
200 Pts |
200 Pts |
200 Pts |
|
200 Pts |
200 Pts |
200 Pts |
|
200 Pts |
400 Pts |
400 Pts |
|
400 Pts |
400 Pts |
400 Pts |
|
400 Pts |
400 Pts |
400 Pts |
|
400 Pts |
400 Pts |
400 Pts |
|
400 Pts |
400 Pts |
500 Pts |
|
500 Pts |
500 Pts |
500 Pts |
|
500 Pts |
500 Pts |
500 Pts |
|
500 Pts |
Ranged Weapons
|
150 Pts |
150 Pts |
150 Pts |
|
200 Pts |
200 Pts |
400 Pts |
|
400 Pts |
400 Pts |
400 Pts |
|
500 Pts |
500 Pts |
500 Pts |
Weapons purchased from the Support Ship will not appear again in future stock. A good way to get rare items like Golden Eggs and Commission Tickets to appear more frequently is to buy all the available weapons so the ship has fewer items to cycle through.
Support Ship Location
Base Camp in Windward Plains
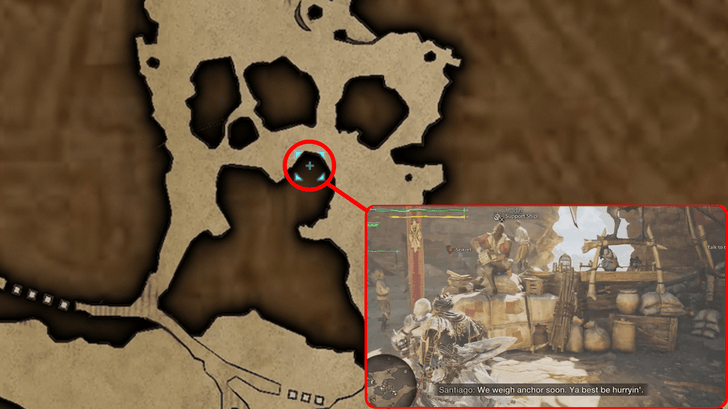
The Support Ship feature is run by Santiago, who can be found at the base camp in Windward Plains. Simply interact with him to request or purchase items from his service.
Windward Plains Location Guide
Available Every Three Days
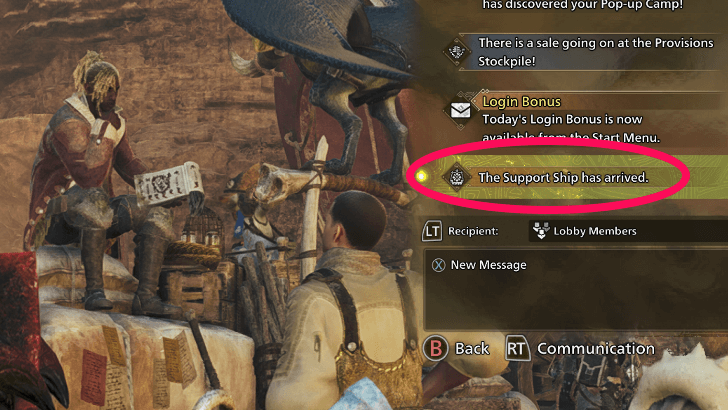
The Support Ship will be available in the base camp every three in-game days, and will disappear for another three days as it gathers items to sell. You will get a prompt of the Support Ship's status when you are not in a hunt.
If you want to quickly access the Support Ship, you can try advancing the time in your tent, just like how you can change the weather.
How to Request Items from Support Ship
- Talk to Santiago
- Request Any Items of Your Choice
- Wait for the Items to Arrive
- Use Guild Points to Purchase Items
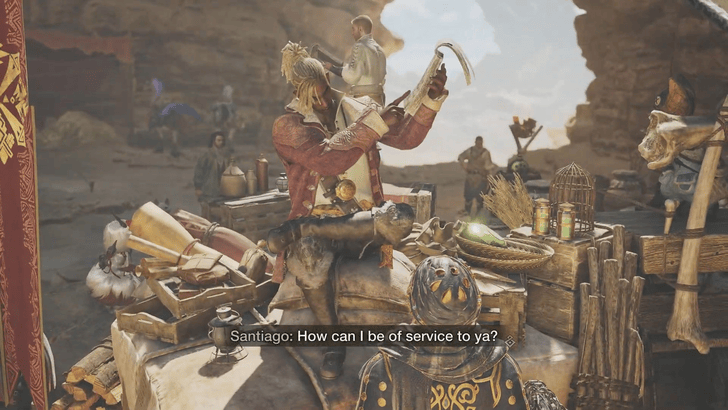
Talk to Santiago
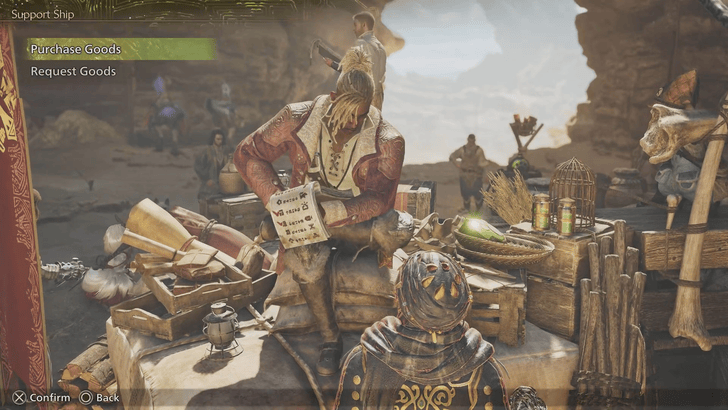
To access the Support Ship feature, simply talk to Santiago in the camp. He offers two services: one allows you to request items, and the other lets you buy the requested items using Guild Points. Choose Request Goods to start.
Request Any Items of Your Choice
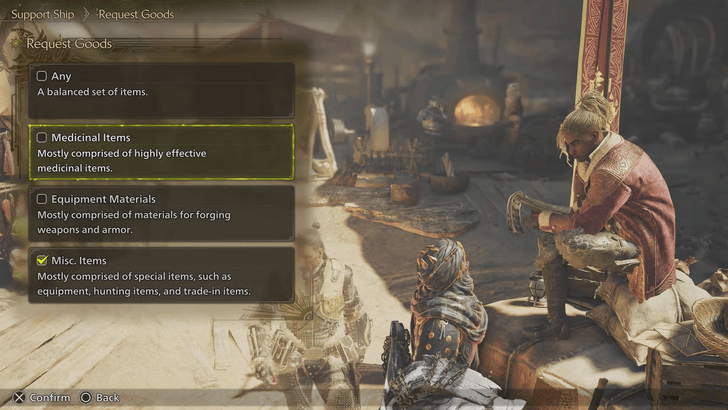
You can request four different types of items from the Support Ship feature. These include a balanced set of items, medicinal items, equipment items, or miscellaneous items for a varied selection.
List of All Items and Materials
Wait for the Items to Arrive
After selecting which items to set in the Support Ship, wait for a while. Santiago will then refresh his shop eventually with the new items or restocks you've ordered.
Use Guild Points to Purchase Items
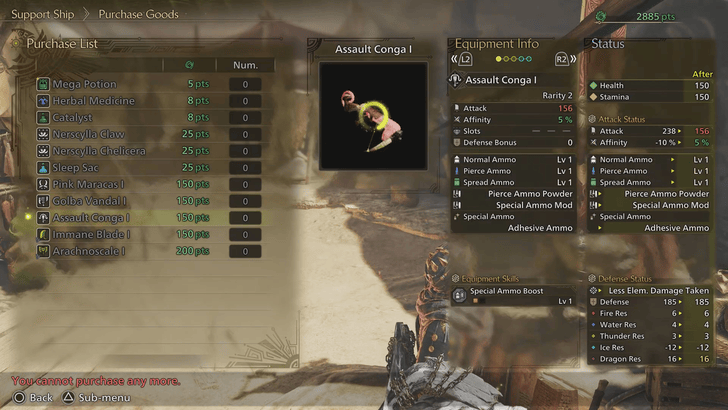
Talk to Santiago again after waiting for a while to see his new offerings or restocks. Since you'll be using Guild Points to purchase items, make sure you have enough, as items can reach 150–200 pts, especially for weapons!
How to Reset the Support Ship
- Talk to Santiago
- Request for your desired goods
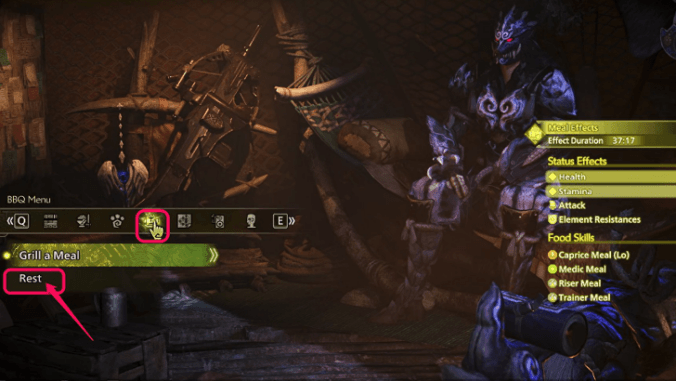
- Rest until the day before the Support Ship arrives
- Check Santiago's goods
- You can reset his goods inventory by returning to title screen without saving
- You can continuously reset his goods inventory until you get your desired items/goods
Due to the recent change wherein resting in tent autosaves your progress, resetting by returning to title screen without saving is the new way to reset the Support Ship's inventory.
Support Ship Wares Can be Updated by Advancing Time in Camp
The Support Ship will stay in the base camp for three days and disappear for another three, so you need to rest in the camp for a total of six times to change wares after purchase. You also need up to 3000 Guild Points for this if you want to refresh the stock after purchasing.
List of Support Ship Item Requests
Medicinal Items
Medicinal Items are consumables that help recover health, remove status ailments, and enhance certain effects from materials. These are also the cheapest items you can purchase with Guild Points. If you need quick stock, the Support Ship can be one of your options.
Equipment Materials
Equipment Materials are a set of monster materials used for crafting. If you're looking for materials, simply request these goods in the Support Ship to get more.
Miscellaneous Items
Miscellaneous items are typically a more expensive set of weapons. Only request them if you have enough Guild Points to spend!
Monster Hunter Wilds Related Guides
All Game Mechanics Guides
Comment
Author

Support Ship Guide
Premium Articles

Rankings
Gaming News


![Monster Hunter Stories 3 Review [First Impressions] | Simply Rejuvenating](https://img.game8.co/4438641/2a31b7702bd70e78ec8efd24661dacda.jpeg/thumb)
Popular Games

Genshin Impact Walkthrough & Guides Wiki
Honkai: Star Rail Walkthrough & Guides Wiki
Umamusume: Pretty Derby Walkthrough & Guides Wiki
Pokemon Pokopia Walkthrough & Guides Wiki
Resident Evil Requiem (RE9) Walkthrough & Guides Wiki
Monster Hunter Wilds Walkthrough & Guides Wiki
Wuthering Waves Walkthrough & Guides Wiki
Arknights: Endfield Walkthrough & Guides Wiki
Pokemon FireRed and LeafGreen (FRLG) Walkthrough & Guides Wiki
Pokemon TCG Pocket (PTCGP) Strategies & Guides Wiki


Recommended Games
Diablo 4: Vessel of Hatred Walkthrough & Guides Wiki
Cyberpunk 2077: Ultimate Edition Walkthrough & Guides Wiki
Fire Emblem Heroes (FEH) Walkthrough & Guides Wiki
Yu-Gi-Oh! Master Duel Walkthrough & Guides Wiki
Super Smash Bros. Ultimate Walkthrough & Guides Wiki
Pokemon Brilliant Diamond and Shining Pearl (BDSP) Walkthrough & Guides Wiki
Elden Ring Shadow of the Erdtree Walkthrough & Guides Wiki
Monster Hunter World Walkthrough & Guides Wiki
The Legend of Zelda: Tears of the Kingdom Walkthrough & Guides Wiki
Persona 3 Reload Walkthrough & Guides Wiki


All rights reserved
©CAPCOM
The copyrights of videos of games used in our content and other intellectual property rights belong to the provider of the game.
The contents we provide on this site were created personally by members of the Game8 editorial department.
We refuse the right to reuse or repost content taken without our permission such as data or images to other sites.