Gogmazios Weakness and How to Unlock
★ Arkveld Gamma Armor | MH Stories 3 Collab
☆ Version 1.041: Sororal α Armor | Shatterseal
★ How to Unlock Proof of a Hero Quest
☆ Omega Planetes | Savage Omega | Builds vs Omega
★ Armor Set Search updated for Ver 1.041
☆ HR50+ Builds | Tier List | Weapon Guides
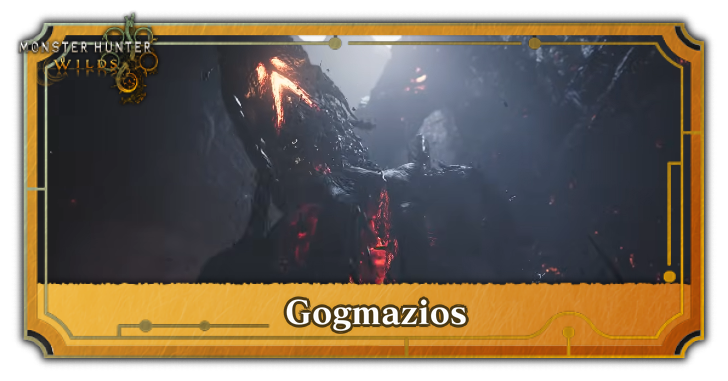
Gogmazios is an Elder Dragon who arrived during Title Update 4 of Monster Hunter Wilds. See how to unlock Gogmazios, its weaknesses, drops, and how to beat it here!
| All Related Gogmazios Articles | ||
|---|---|---|
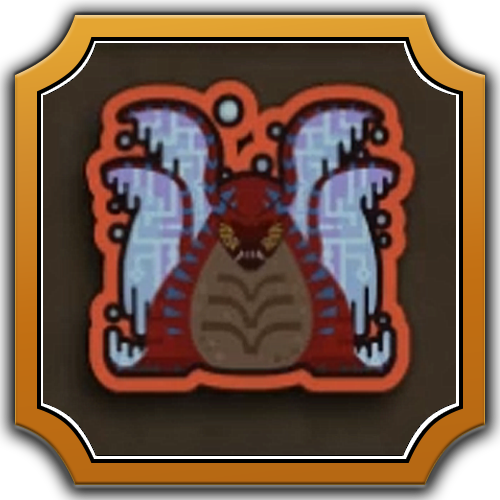
 Gogmazios Gogmazios
|
 Weapons Weapons
|
 Armor Sets Armor Sets
|
List of Contents
How to Unlock Gogmazios
Reach HR100 and Complete Extra Missions 6 and 7
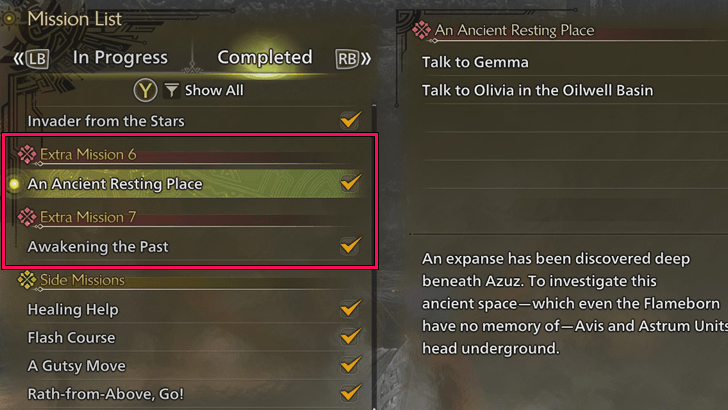
Gogmazios is unlocked once you're at least HR100 and have completed the Extra Missions An Ancient Resting Place and Ghosts Pay No Heed To Tomorrow. Simply speak to Olivia at the Oilwell Basin to begin the quest chain, which will lead to the Gogmazios hunt.
Rematch in Specter of Their Sins Event Quest
You can rematch Gogmazios by doing the Specter of Their Sins Event Quest. This time you'll only have 3 carts unlike the Assignment.
Note: Players must first complete the main mission: A First Cry to take on Gogmazios.
Gogmazios Weakness
Basic Information
 |
||
| Type | Roar | Wind Pressure |
|---|---|---|
| Elder Dragon | Strong | None |
| Tremor | Status Effect | Element |
| Minor | Fireblight | Fire |
Damage Type Weakness
Hitzone Values and Weakness Breakdown
※ Click the tabs to switch between Damage Type and Elemental Damage Hitzone effectiveness.
| Part | |||
|---|---|---|---|
| Head | |||
| Chest | |||
| Left Foreleg | |||
| Right Foreleg | |||
| Belly | |||
| Back | |||
| Left Wingarm | |||
| Right Wingarm | |||
| Left Hind Leg | |||
| Right Hind Leg | |||
| Tail | |||
| Tail Tip |
| Part | |||||
|---|---|---|---|---|---|
| Head | |||||
| Chest | |||||
| Left Foreleg | |||||
| Right Foreleg | |||||
| Belly | |||||
| Back | |||||
| Left Wingarm | |||||
| Right Wingarm | |||||
| Left Hind Leg | |||||
| Right Hind Leg | |||||
| Tail | |||||
| Tail Tip |
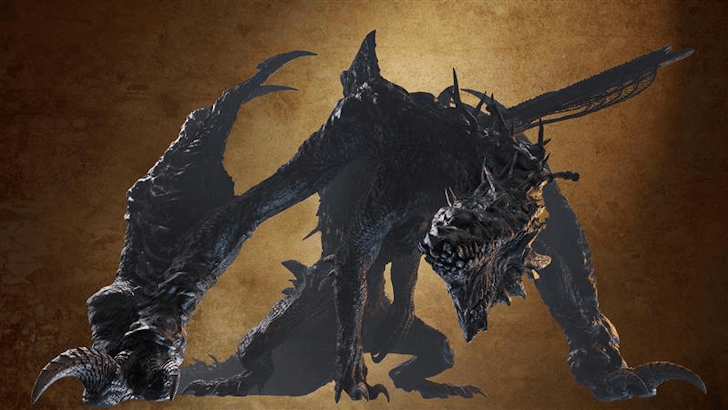
First Elder Dragon in Wilds
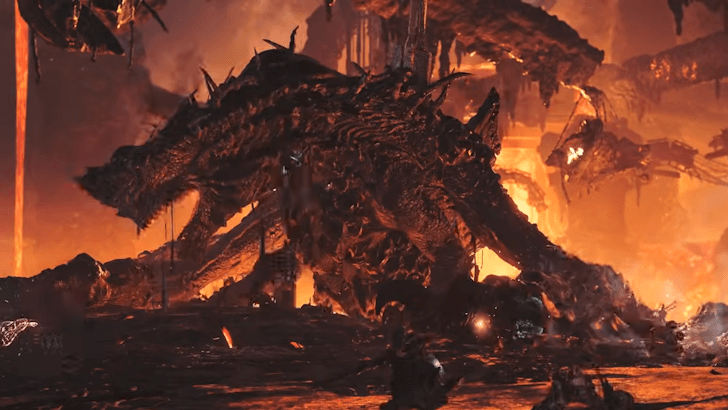
Gogmazios first appeared in Monster Hunter 4 Ultimate as the final boss of that game. It will be making its return in Monster Hunter Wilds as its first Elder Dragon. It fights by using sticky and explosive oil and has a railgun-like weapon lodged in its back. Dealing enough damage to its back allows you to break the weapon loose and use it against the monster.
It appears in the Forgotten Machineworks, an arena located underneath the Oilwell Basin. Inside it are numerous Environmental Traps that can be used during the Gogmazios fight, including the Ancient Forge.
How to Beat Gogmazios
Phase 1
| Gogmazios Phase 1 Tips |
|---|
|
|
Use Fire Weapons to Soften Oil
Fire weapons are a must when fighting Gogmazios, as they can turn the oil on its body from solid to liquid. Once it becomes fluid, you can then swap to a dragon weapon to deal more damage.
Equip Guard Up on Applicable Weapons
If your weapon is capable of blocking, such as the Great Sword or Lance, make sure to equip Guard Up on them. This allows you to block some of Gogmazios' attacks, such as his oil spit.
Fire Resistance is a Must
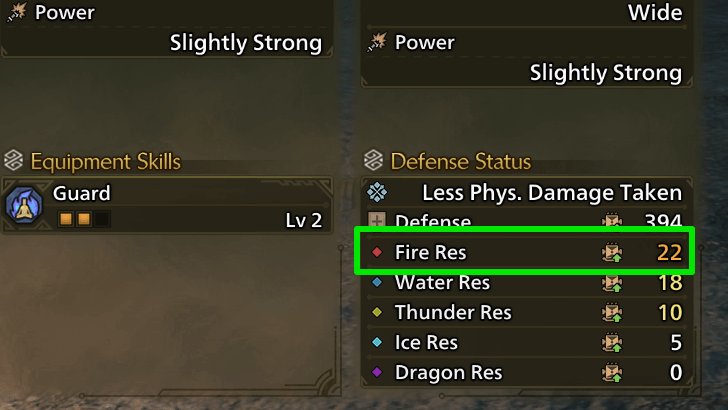
As Gogmazios deals primarily Fire damage, it is important to get at least 20 Fire Resistance to negate Fireblight. This can come in the form of the Fire Resistance Skill, or via food.
Aquatic/Oilsilt Mobility Can Help Reduce Slowdown
If you are having trouble with the slowdown caused by the oil pools that Gogmazios places in the arena, taking Level 1 Aquatic/Oilsilt Mobility can help reduce the slowdown effects. There is no need to take Level 2 as that only protects you against waves.
Attack Its Wingarms and Head
Attacking Gogmazios' wingarms is the easiest way to bring them down. As such, focus your attacks on it while it is still standing. Once Gogmazios falls to the ground, focus your attacks on its head.
Alternatively, you can also attack its tail to help cut it off down the line.
Use the Environment to Deal Damage
There is a clump of Deteriorated Scrap Metal hanging from the ceiling of the first area. This can be pulled down onto Gogmazios to deal damage to it and potentially knock it down. Make sure to wait for Gogmazios to be under the Deteriorated Scrap Metal before pulling it down.
Use the Compact Anti-Wyvern Gun
Once the oil on Gogmazios' body softens, you will be able to get Slinger ammo from it, namely the Compact Anti-Wyvern Gun. This slinger ammo can be charged up, and shoots a laser at the target. Try to aim for Gogmazios' head or wings to deal a lot of damage.
Get and Use Supply ltems
Make sure to also get the supply items provided by the quest you should find EZ Lifepowders and EZ Dust of Life to help keep you and your companions alive.
Phase 2
| Gogmazios Phase 2 Tips |
|---|
|
|
Climb Up The Raised Area
After dealing enough damage to Gogmazios, he will breathe fire onto the arena and make the entire lower area a burning zone. You will constantly take damage while in the lower area, even with terrain resistance skills, so make sure to get on your Seikret and climb up the raised area. Once you are there, Gogmazios will prop himself up onto the raised area, leaving his arms and chest open to attack.
Use Fire and Dragon Weapons
If parts of Gogmazios still have solidified oil on them, make sure to attack them using Fire weapons until they turn liquid. Once they turn liquid, start attacking it with dragon weapons.
How to Switch and Change Weapons
Use the Environment to Deal Damage
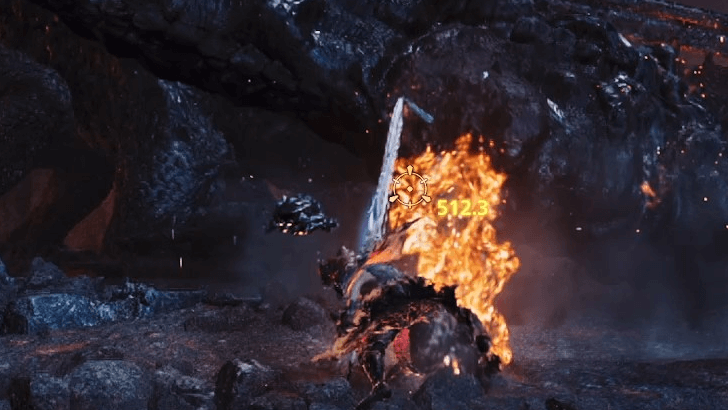
While on the platform, you will have access to numerous Environmental Traps that you can use to deal damage to Gogmazios. This includes the Ancient Forge, another clump of Deteriorated Scrap Metal, as well as large Hunks of Blastcoal that you can throw at Gogmazios, similar to Barrel Bowling. Take advantage of these traps to quickly stagger Gogmazios and leave him vulnerable to attacks.
You can also use these Environmental traps (the Ancient Forge and Deteriorated Scrap Metal specifically) to stop Gogmazios from performing its powerful laser attack. This is especially helpful when trying to connect the three Loose Nexus to the Elderbreaker.
Focus on its Back When it is Down
Once Gogmazios is knocked down, you must focus on attacking his back. Dealing enough damage to his back will dislodge the Elderbreaker, which will drop in the direction his back was facing.
Connect All Loose Nexus to the Elderbreaker
Once the Elderbreaker has been removed from Gogmazios' back, you must then connect the Loose Nexus onto it. There are a total of 3 Loose Nexus that you can connect to the Elderbreaker to charge it up.
It is important to note that you are vulnerable to attack while pulling a Loose Nexus. As such, players who are not pulling on a Loose Nexus must continue attacking Gogmazios to draw its fire away from the vulnerable players. It's important to remember that you can drop the Loose Nexus to dodge attacks, as staying alive is a higher priority.
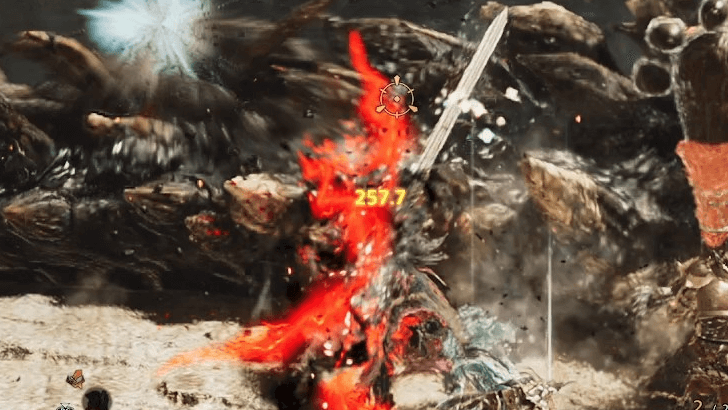
Let the Elderbreaker Charge Before Firing
Once all three Loose Nexus are attached to the Elder Breaker, you can then fire it at Gogmazios. To maximize your damage, make sure to charge the Elderbreaker to 100%. Once it is fully charged, aim it at Gogmazios and fire. Alternatively, you can also wait for Gogmazios to approach the Elderbreaker before firing. You should deal 67,650 damage with a fully-charged Elderbreaker.
Shooting the Elderbreaker will knock Gogmazios down for a short amount of time, opening it to more attacks. Once you deal enough damage, Gogmazios will leave the area. Follow it with your Seikret.
Phase 3
| Gogmazios Phase 3 Tips |
|---|
|
|
Use Dragon Weapons
During Phase 3, Gogmazios' will be in its gaseous state. As such, switch over to your dragon weapon to maximize your damage output. The Compact Anti-Wyvern Gun also deals dragon damage, so make sure to use them.
Use the Compact Anti-Wyvern Gun While It Is Airborne
Gogmazios will mostly be flying during this phase of the fight. To deal damage to Gogmazios, as well as knock him down on the ground, use the Compact Anti-Wyvern Gun to shoot its weakpoints. This includes its wings, tail, and head. Dealing enough damage to Gogmazios this way will knock him down from the sky. Make sure to charge the slinger ammo by holding down on the input then releasing it to maximize damage. You'll know you're hitting good spots if you deal 400 damage or more.
Use the Environment to Deal Damage
There are two Falling Chimney Pillars in the area that you can pull down to deal damage to Gogmazios. You can also use these to knock Gogmazios down from the sky. Make sure that Gogmazios is near the pillars to ensure that it gets hit.
Make Sure to Succeed the DPS Check
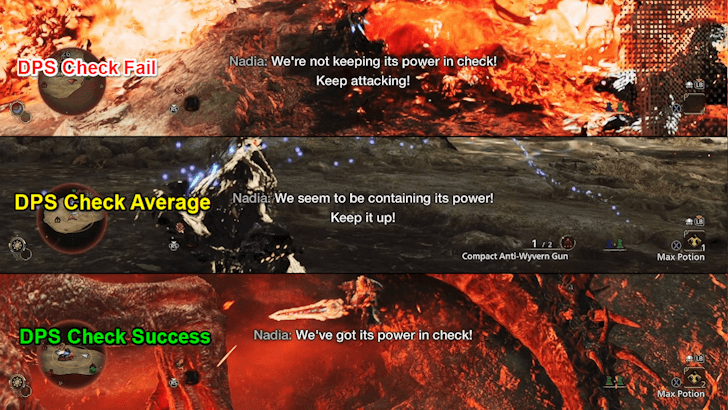
| Nadia's Voice Lines in Response to DPS Check | |
|---|---|
| Failing | "We're not keeping its power in check! Keep attacking!" |
| Average | "We seem to be containing its power! Keep it up!" |
| Success | "We've got its power in check!" |
After some time, Gogmazios will start charging up a powerful attack. Take this moment to deal as much dragon damage as you can to it. Dealing enough dragon damage to Gogmazios, both during the charge-up and before, will decrease the damage of its special attack.
You can tell how well you are doing in the DPS check by listening to Nadia's voice lines throughout the fight. As long as your DPS is average or above, you should be able to survive Gogmazios' special attack.
Defend Against Gogmazios' Powerful Attack
After decreasing the damage of Gogmazios' special attack, Fabius will tell you to get behind him and his shield. This will cancel out the damage of Gogmazios' special attack once he lands. If you fail the DPS check, Fabius won't be able to properly block the damage.
Alternatively, you can either block the attack yourself if you have a weapon that can guard, or climb any high-ground areas that are still standing.
Gogmazios Item Loadout
Recommend Items to Bring
|
|
|
|
|
|
|
|
|
|
|
|
|
|
Bring all healing and buffing items like Mega Armorskin and Mega Demondrug to increase your damage and defense. You'll also want to bring Cool Drinks to avoid HP depletion over time.
Bring Dust of Life and Lifepowder to help heal your allies, as well as Ancient Potions and Max Potions to quickly heal up if ever you get hit by Gogmazios' powerful attacks.
List of All Items and Materials
Gogmazios Locations and Quests
Known Habitats
| Region |
|---|
 Oilwell Basin, Forgotten Machineworks Oilwell Basin, Forgotten Machineworks |
Interactive Map and List of Locations
Quest Appearances
| Quest Type | Lvl. | Quest Name |
|---|---|---|
| Assignments | 9★ | Ghosts Pay No Heed To Tomorrow |
| Event | 9★ | Specter of Their Sins |
Gogma Artian Weapons
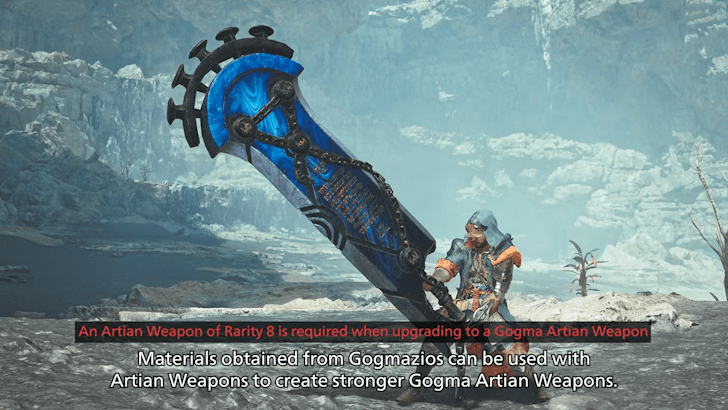
Instead of Gogmazios weapons, the materials will instead be used for Gogma Artian Weapons, an upgraded version of the Artian Weapon system that has increased bonus stats, and can now have one random Set Bonus Skill and one random Group Skill.
Players can also choose a stat focus for their Gogma Artian Weapons, and can decide whether the weapon will focus on Attack, Affinity, or Elemental Damage.
Gogmazios Weapons Guide (Gogma Artian Weapons)
Reinforcement Bonuses Can Be Amended or Rerolled

Players can amend or reroll the Reinforcement Bonuses of their Gogma Artian Weapons. Amending will upgrade the weapon's current Reinforcement Bonuses, while rerolling will reset the Reinforcement Bonuses before upgrading them.
Set Bonus and Group Skills can be Rerolled

The Set Bonus and Group Skill of the Gogma Artian weapon can also be rerolled by spending some Gogmazios materials, allowing you to potentially replace unneeded skills with better ones.
Gogmazios Drops
High Rank Materials
| |
| |
| |
| |
Mutated Armaments can be obtained by breaking parts from Gogmazios. Note that you can't get these if you fail to slay Gogmazios.
Gogmazios Release Date
Released on December 16, 2025
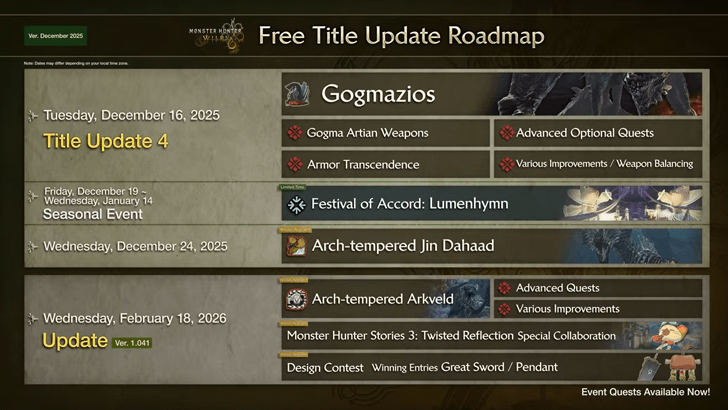
Gogmazios is now available to hunt as part of Title Update 4. Title Update 4 also includes an expansion upon the endgame with Gogma Artian Weapons, weapon buffs, and plenty of new content
Title Updates Roadmap and Schedule
Monster Hunter Wilds Related Guides

All Monsters Guides
Arch-Tempered Monsters
| Arch-Tempered Monster Guides | |
|---|---|
 AT Rey Dau AT Rey Dau |
 AT Uth Duna AT Uth Duna |
 AT Nu Udra AT Nu Udra |
 AT Jin Dahaad AT Jin Dahaad |
 AT Arkveld AT Arkveld |
|
All Large Monsters
 Arkveld
 Rey Dau
 Nu Udra
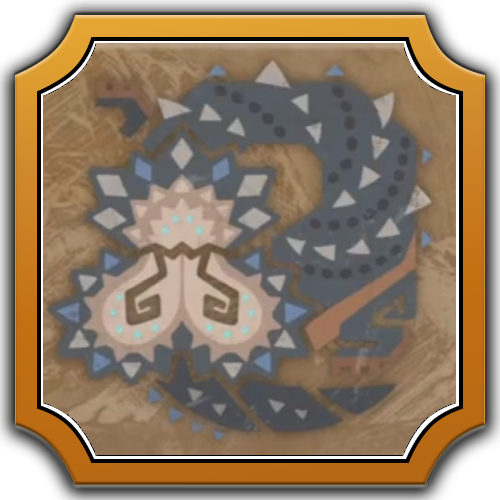 Balahara
 Doshaguma
 Chatacabra
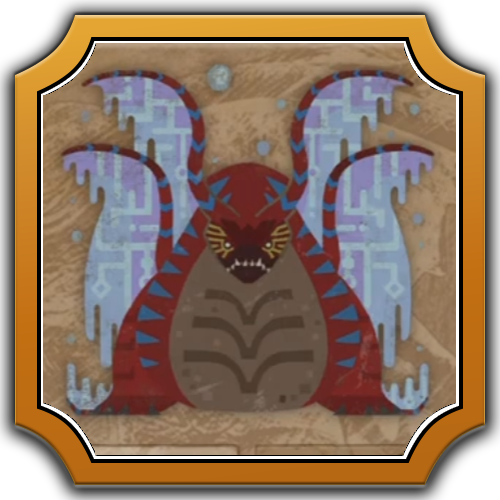 Uth Duna
 Lala Barina
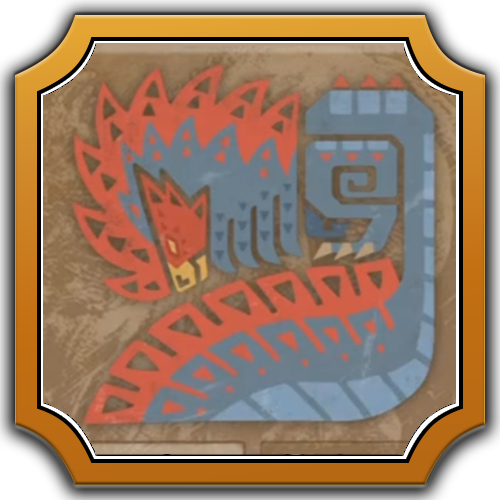 Quematrice
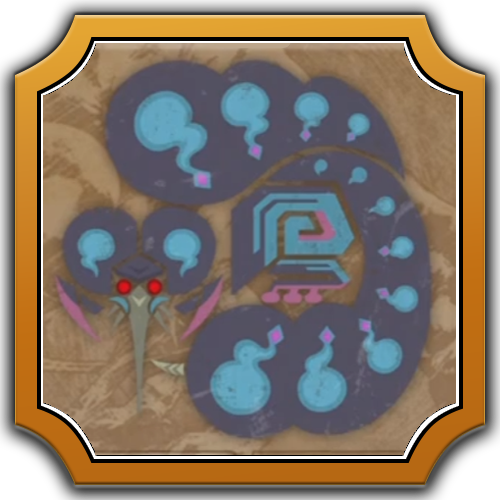 Rompopolo
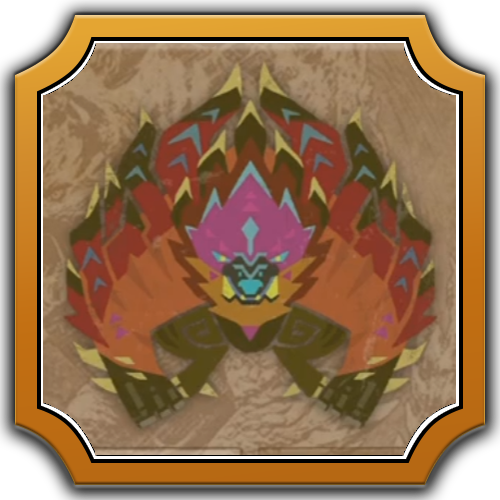 Ajarakan
 Yian Kut-Ku
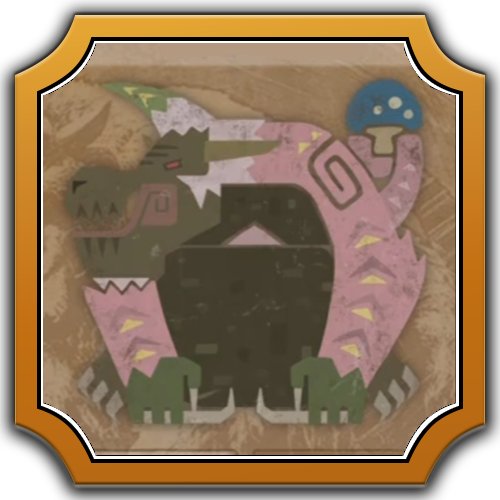 Congalala
 Rathalos
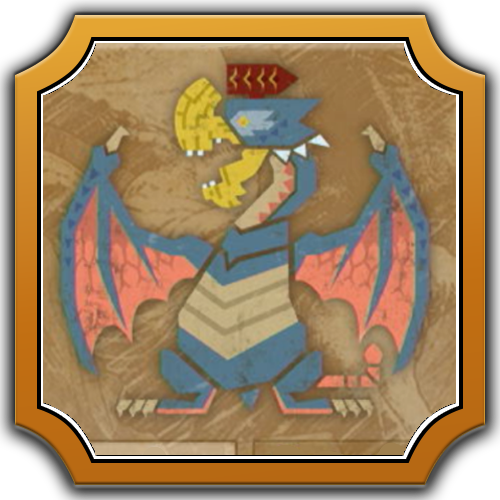 Gypceros
 Rathian
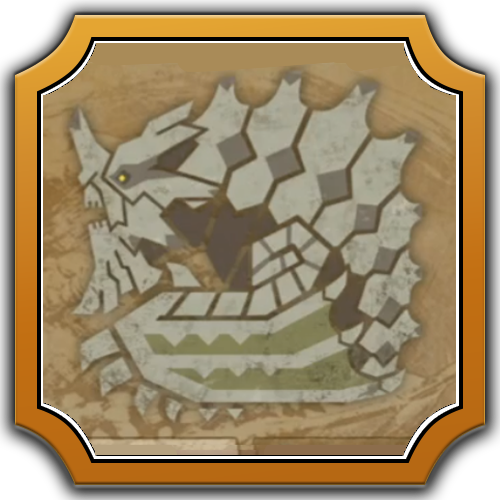 Gravios
 Nerscylla
 Gore Magala
 Hirabami
 Mizutsune
 Jin Dahaad
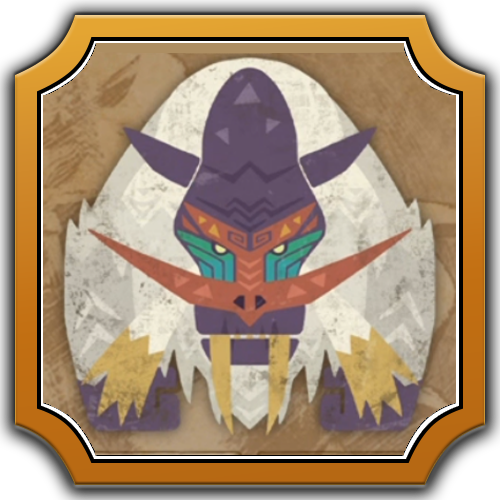 Blangonga
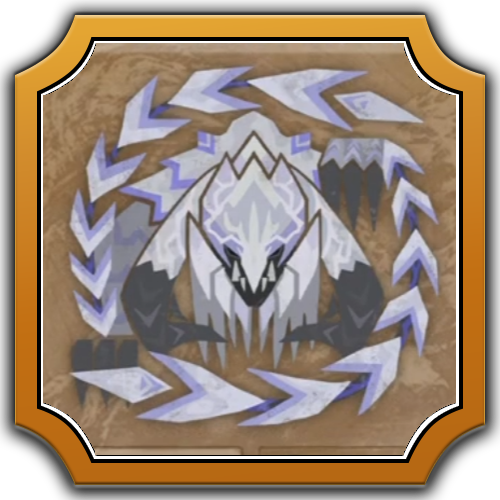 Guardian Arkveld
 Guardian Doshaguma
 Guardian Rathalos
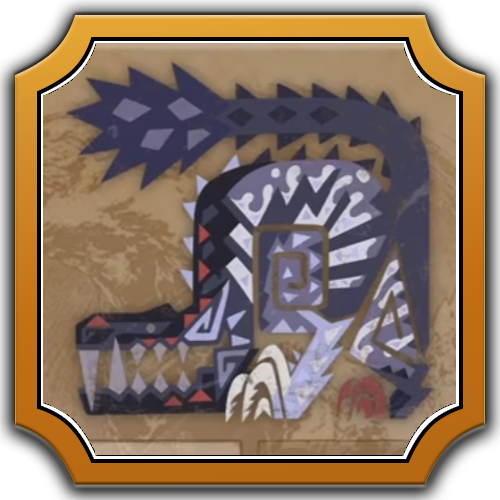 Guardian Ebony Odogaron
 Xu Wu
Xu Wu Zoh Shia
 Guardian Fulgur Anjanath
 Lagiacrus
 Seregios
 Omega Planetes
Comment
will be very good if you include recommended builds for every weapon for Gog fight
Author

Gogmazios Weakness and How to Unlock
Premium Articles

Rankings
Gaming News


Popular Games

Genshin Impact Walkthrough & Guides Wiki
Umamusume: Pretty Derby Walkthrough & Guides Wiki
Pokemon Pokopia Walkthrough & Guides Wiki
Honkai: Star Rail Walkthrough & Guides Wiki
Monster Hunter Stories 3: Twisted Reflection Walkthrough & Guides Wiki
Arknights: Endfield Walkthrough & Guides Wiki
Wuthering Waves Walkthrough & Guides Wiki
Zenless Zone Zero Walkthrough & Guides Wiki
Pokemon TCG Pocket (PTCGP) Strategies & Guides Wiki
Monster Hunter Wilds Walkthrough & Guides Wiki


Recommended Games
Fire Emblem Heroes (FEH) Walkthrough & Guides Wiki
Diablo 4: Vessel of Hatred Walkthrough & Guides Wiki
Cyberpunk 2077: Ultimate Edition Walkthrough & Guides Wiki
Yu-Gi-Oh! Master Duel Walkthrough & Guides Wiki
Super Smash Bros. Ultimate Walkthrough & Guides Wiki
Pokemon Brilliant Diamond and Shining Pearl (BDSP) Walkthrough & Guides Wiki
Elden Ring Shadow of the Erdtree Walkthrough & Guides Wiki
Monster Hunter World Walkthrough & Guides Wiki
The Legend of Zelda: Tears of the Kingdom Walkthrough & Guides Wiki
Persona 3 Reload Walkthrough & Guides Wiki


All rights reserved
©CAPCOM
The copyrights of videos of games used in our content and other intellectual property rights belong to the provider of the game.
The contents we provide on this site were created personally by members of the Game8 editorial department.
We refuse the right to reuse or repost content taken without our permission such as data or images to other sites.
Oh, so you're talking about the DPS check. Even in a fight where I never passed the DPS check, I still killed Gogmazios. It's a stupid mechanic.