Tips to Hunt Better
★ Arkveld Gamma Armor | MH Stories 3 Collab
☆ Version 1.041: Sororal α Armor | Shatterseal
★ How to Unlock Proof of a Hero Quest
☆ Omega Planetes | Savage Omega | Builds vs Omega
★ Armor Set Search updated for Ver 1.041
☆ HR50+ Builds | Tier List | Weapon Guides
This is a guide on tips for hunting better and the best tips for Monster Hunter: Wilds. Learn about the best tips for combat and hunting, and what to prepare in advance before a hunt.
List of Contents
Tips to Hunt Better
| General Hunting Tips |
|---|
|
|
Attack Wounds and Weakpoints

| Focus Mode | Press and Hold |
|---|---|
| Focus Strike | Press and Hold |
| Focus Mode | Press and Hold |
|---|---|
| Focus Strike | Press and Hold |
| Focus Mode | Press and Hold |
|---|---|
| Focus Strike | Press and Hold |
Wounds manifest as visible reddish marks on a monster and will glow red when using Focus Mode. Wounds on Tempered Monsters will glow purple.
A good first tip for hunting better is to take advantage of the new wound mechanic and weakpoints of monsters in your hunts!
Monster wounds are created by dealing enough damage on a specific body part. When wounds are hit, extra damage is dealt to the monster. Using Focus Strikes on them also will cause you to perform special actions that cause short topples and extra damage. When dealing just regular attacks, wounds will pop when dealt enough damage.
Weakpoints are points on a monster that share the same glow as a wound but already exist instead of being produced by attacks. Example of these are the open horns of Rey Dau after a laser attack and the glowing chains of Arkveld after its slams. Unlike wounds, these are best attacked with Focus Strikes for a stun, since regular attacks deal no additional damage.
How to Use Focus Mode and Focus Strike
Mount Monsters for Topples
| How to Mount Monsters |
|---|
| ① Perform enough jump attacks for the next jump attack to cause you to mount the monster.
┗ This can be easily done by doing repeated jump attacks or Dismount Attacks onto the monster from your Seikret. |
| ② While mounting the monster, create wounds through repeated Light Knife Attack or Strong Knife Attack. Prevent the monster's attempts to knock you off by using Brace or moving onto another part wih your directional input as it attacks. |
| ③ After creating a wound, you can send the monster into a short topple by using your Weapon Attack. |
Mounting monsters is an important skill in hunts since it allows you a safer way to topple them for the benefit of yourself and other hunters.
Monsters will still flail around with their attacks during this time, but they will be distracted enough from targeting other hunters in this state.
Use Traps and Items
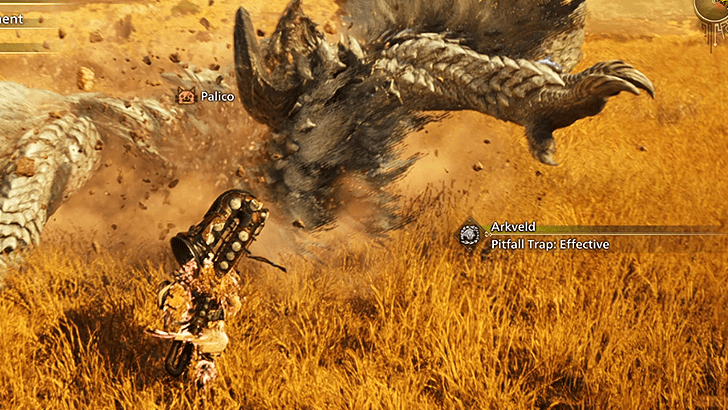
Item traps such as Pitfall Traps and Shock Traps are essential since they are very useful in keeping monsters still for a short period of time. Traps are also the only means of capturing a monster once it is weak.
Other useful items include the Flash Pod, which can stun monsters out of their attacks and blind them for a short time, and Dung Pods which can isolate multiple monsters from each other.
Use Offset Attacks and Power Clashes
| Weapons with Offset Attacks | ||
|---|---|---|
| - | ||
| Weapons that Can Power Clash | ||
Some weapons have Offset Attacks, which are counter moves that act as short topples. You'll want to learn how to use this against monster attacks, not only because they cause topples, but because they also negate damage dealt by the monster's attack.
Note that, while Offsets are technically spammable, each Offset will require more uses after each one to cause another short topple. While you have not caused the next topple, your Offsets will only reduce damage instead of negating it.
Power Clashes, on the other hand, are events that can occur after a Perfect Guard. During this time, the monster in locked in animation with you, and will give you some time to retaliate after or for your fellow hunters to deal some damage.
Use Vine Traps and Falling Boulders
Another tip for better hunting is using environmental traps such as Vine Traps, which act similarly to Pitfall Traps, and Falling Boulders, which deal significant damage to monsters (up to 1000+). These can be activated by either being hit by monsters themselves or by using your Slinger.
The items you have on hand are limited, so these traps can be very helpful in keeping monsters at bay. Make sure to keep a look out for them!
Prepare Barrel Bombs on Sleeping Monsters

Barrel Bombs, especially Mega Barrel Bombs, deal a lot of damage and are best used on sleeping monsters. The initial hit done on a sleeping monster has increased damage. You and your fellow hunters can trigger their explosion by hitting them, or by picking up another barrel bomb and throwing it into them!
If you're quick enough, these Barrel Bombs may also be used while monsters are trapped. Make sure to have barrel bombs on every hunt and use them as a opportunity to deal lots of damage before a fight.
Advanced Hunting Tips
| Advanced Hunting Tips |
|---|
|
|
Use Sneak Attacks
Sneak Attacks deal a lot of damage and are great starters to a hunt with better clear times. To do this, simply approach behind an unsuspecting monster then press the corresponding to for the Sneak Attack. To remain undetected before a Sneak Attack, you can use a Ghillie Mantle beforehand.
Use Weapon Buffs
| Weapons that Self-Buff | |
|---|---|
| Hunting Horn | ・Self Improvement: Increases speed (yellow level), and damage dealt (purple level) by 20%. |
| Charge Blade | ・Element Boost (Shield): Guard Boost/Phial damage on Perfect Guards/Guard Points
・Sword Mode Boost: Phial damage on Sword hits ・Power Axe Mode: Savage Axe on Element Discharges |
| Insect Glaive |
・Red Extract: Allows charged attacks
・White Extract: Increased movement speed and jump height ・Orange Extract: Grants Flinch Free |
| Weapons that Buff Teams | |
| Hunting Horn | ・Echo Bubble: Increases Movement Speed and Evasion Window
・Songs: Song buffs will vary (ex. Attack Up). |
| Light Bowgun | ・Recover Ammo: Releases a cloud on hit that recovers Health.
・Armor Ammo: Releases a cloud on hit that grants temporary Defense Up. |
| Heavy Bowgun | ・Demon Ammo: Releases a cloud on hit that grants temporary Attack Up. |
※ Self-buffs exempt weapon mechanics such as Charging and Gauges.
※ Data above is based on the Open Beta Test.
Certain weapons are capable of self-buffs (such as the Charge Blade) and team buffs (such as the Hunting Horn). Learning these buffs are essential to maximizing the effectiveness of the weapon in a fight and having a better hunting experience!
Buffs Explained: Which Buffs Stack?
Use and Customize Item Shortcuts

Item shortcuts may be in the form of a Radial Menu for players with a controller or a Hotbar for keyboard users.
For better hunting clear times, you'll want to be familiarized with item as shortcuts already so that you won't have to fidget through them during a hunt. This is especially important in cases where you want to use potions right away after being hit.
Your best item shortcut is your Radial Menu. This can be accessed via the Customize Radial Menu button under Items & Equipment in the in-game menu.
For console users, the Radial Menu is the quickest option for item shortcuts. But for Keyboard users, they will have extra access to a more hotbar-style menu items utilizing their key line of 'F1'-'F12' and '1'-'=' keys for item shortcuts.
How to Use and Customize the Radial Menu
There are Weapon-Specific Jump Attacks
Depending on your weapon, some jump attacks may have variations for them, such as Note inputs with the Hunting Horn, a stronger attack with the Long Sword, and Heavenly Blade Dance with the Dual Blades (in Demon Mode).
Take advantage of these jump attacks by looking for steps, slopes, or cliff edges you can jump from. If none are available, you can try jumping off from Seikret instead.
Weapons that have Jumping Focus Strikes
| ・Jump from Seikret
・From Ledge |
|
| ・From Ledge Only | |
| ・From Ledge Only |
Of all 14 weapons, only the above 3 are known to be able to perform Focus Strikes in mid-air after jumping off a ledge.
The Great Sword has a special case where its Focus Strike can be performed after jumping off a Seikret (from a Jumping Charge Slash → Focus Slash: Perforate).
Weapon Types Guide: All 14 Weapons Explained
Recover from Knockdown with a Seikret
Whenever you get knocked off your feat by a monster's attack, you can call your Seikret immediately to pick you up while you are still rolling on the ground. This will be very helpful if you need to escape any follow ups or large area-of-effect attacks.
Seikret Mount Features and Abilities
Tips if You're Struggling in Hunts
| Tips for the Struggling Hunter |
|---|
|
|
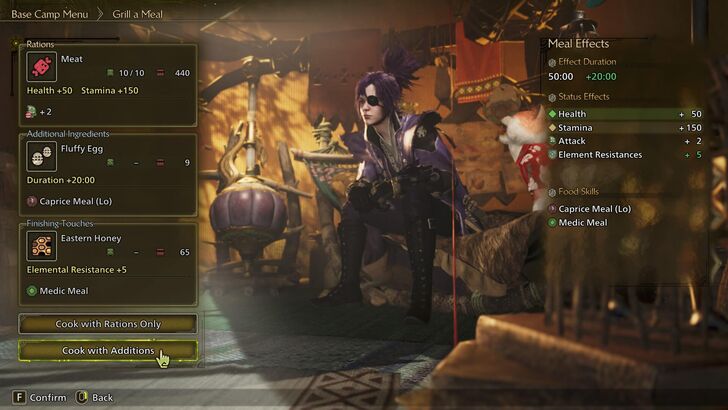
Eat Food and Meals
| Meal | Buffs Durration |
|---|---|
| DIY Grilled Meal | 50 min 70 min (w/ Additional Ingredient) |
| Canteen Meal | 70 min |
| Invited Meal | 90 min |
Eating a meal grants you Food Skills, which buff you in different ways. You could cook your own meal, either in the tent or using a Portable BBQ Grill, or eat at the Grand Hub Canteen, or get invited to a meal by certain villagers.
Read up on the descriptions of each food skill and customize your meals with the buffs you want for a hunt!
In addition, you can carry other consumables, such as Well-done Steak for restoring the max gauges of your health and stamina, and Energy Drink for increased stamina recovery.
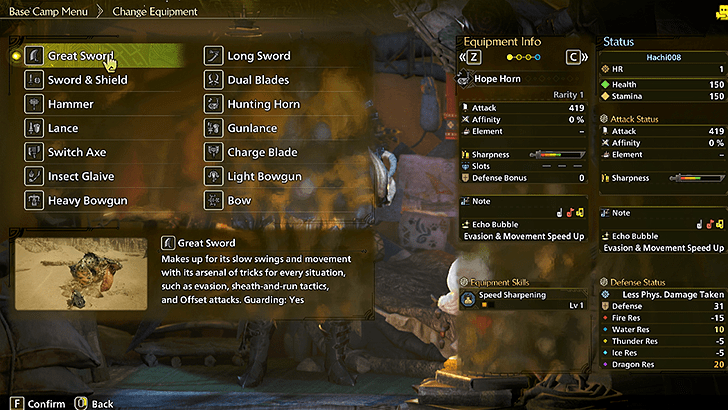
Try Changing Armor
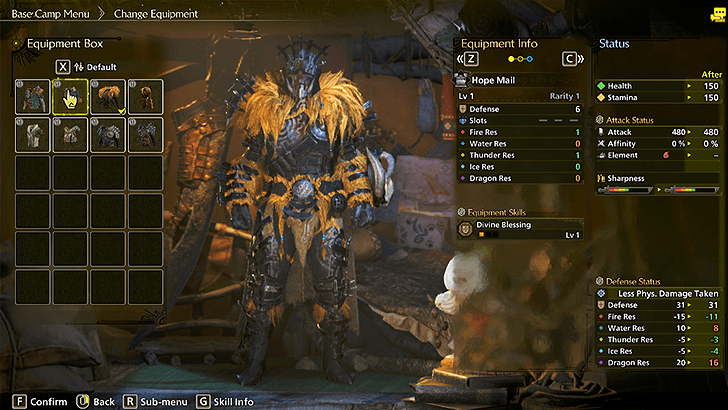
Some playstyles or weapon types may benefit more from having a different set of skills than, say, the default Hope Set armor. Experiment with each set and see which provide you both the most comfort and damage for a hunt!
Use SOS or Join Lobbies for Help

Know that monster hunting isn't just a solo endeavor; it's also a team journey! If you feel like you are stuck at a certain point, don't hesitate to try asking for help from other Hunters with the SOS feature via an item shortcut or through the Quest Counter of Alma.
Alternatively, you can also look for others to play with in Lobbies online. Make sure to join a Recommended Lobby or search for one manually!
Not only will you have another teammate fighting by your side, but you might also learn a thing or two from how others play! Just do note that playing with one or more hunter in multiplayer will scale monster health up, so playing well with your team is a must.
Multiplayer Guide: How to Play Co-Op
Try Other Weapons
There are a total of 14 weapons in Monster Hunter: Wilds, so there is a lot of weapons to choose from if you are looking for another weapon that suits your style.
Practice and Familiarize with Monsters
You will eventually encounter fights that take more than simple tricks. Every monster has its own moveset and gimmick, so spend as much time as you can fighting them even if you end up using all your carts.
The more you fight, the more you get better and realize that defeating them comes down to mostly getting around high-damage and difficult to evade moves, and using a proper armor/skill setup. Don't be discouraged; hunt again and experiment with other tactics when needed.
Optional Quests are readily available even after being completed, so feel free to use them as practice until you're more comfortable!
Monster Hunter Wilds Related Guides
All Tips and Tricks Guides
Comment
Author

Tips to Hunt Better
Premium Articles

Rankings
Gaming News


![Monster Hunter Stories 3 Review [First Impressions] | Simply Rejuvenating](https://img.game8.co/4438641/2a31b7702bd70e78ec8efd24661dacda.jpeg/thumb)
Popular Games

Genshin Impact Walkthrough & Guides Wiki
Honkai: Star Rail Walkthrough & Guides Wiki
Umamusume: Pretty Derby Walkthrough & Guides Wiki
Pokemon Pokopia Walkthrough & Guides Wiki
Resident Evil Requiem (RE9) Walkthrough & Guides Wiki
Monster Hunter Wilds Walkthrough & Guides Wiki
Wuthering Waves Walkthrough & Guides Wiki
Arknights: Endfield Walkthrough & Guides Wiki
Pokemon FireRed and LeafGreen (FRLG) Walkthrough & Guides Wiki
Pokemon TCG Pocket (PTCGP) Strategies & Guides Wiki


Recommended Games
Diablo 4: Vessel of Hatred Walkthrough & Guides Wiki
Cyberpunk 2077: Ultimate Edition Walkthrough & Guides Wiki
Fire Emblem Heroes (FEH) Walkthrough & Guides Wiki
Yu-Gi-Oh! Master Duel Walkthrough & Guides Wiki
Super Smash Bros. Ultimate Walkthrough & Guides Wiki
Pokemon Brilliant Diamond and Shining Pearl (BDSP) Walkthrough & Guides Wiki
Elden Ring Shadow of the Erdtree Walkthrough & Guides Wiki
Monster Hunter World Walkthrough & Guides Wiki
The Legend of Zelda: Tears of the Kingdom Walkthrough & Guides Wiki
Persona 3 Reload Walkthrough & Guides Wiki


All rights reserved
©CAPCOM
The copyrights of videos of games used in our content and other intellectual property rights belong to the provider of the game.
The contents we provide on this site were created personally by members of the Game8 editorial department.
We refuse the right to reuse or repost content taken without our permission such as data or images to other sites.