 Weapons
 Armor Sets
 Monsters
 Builds
 Story Walkthrough
 Artian Weapons
 Maps and Locations
 Items and Materials
 Tips and Tricks
 Game Mechanics
 Endemic Life
 Skills
 Decorations
 Talismans
 Characters
 Quests
 Palico
 Trophies
 Cosmetics
 Furniture
 Festivals
 News and Game Info
 Message Boards
 State of the Meta
 Best Weapons Tier List
 Secondary Weapons
 Weapon Combos
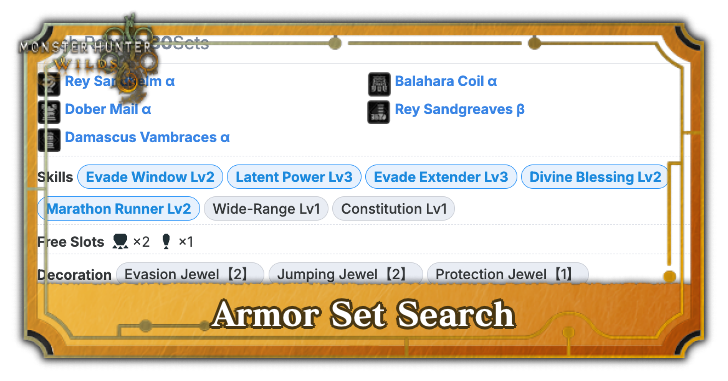 Armor Set Search
 Endgame Guide
 Unchangeable Features and Missables
 Best Skills
 Best Beginner Weapons
 Easter Eggs and Secrets
 Respawn Timers
 Is MH Wilds Too Easy?
 Best Meals and Food Effects
 Best Status Effect
 List of All Bugged Skills
 Best Co-op Strategies
 Weapon Popularity Tier List
 How to Prepare for Title Update 1
 Weapon Changes from the Beta
 Weapon Changes from Rise and World
 List of All DLC and Prices
 Talisman Rating Tool
 Best Talismans
 Armor Transcending Guide
This survey will take about 1 minute.
Your answers will help us to improve our website.
Monster Hunter Wilds
Best Items to Bring on Hunts
★ Arkveld Gamma Armor | MH Stories 3 Collab
☆ Version 1.041: Sororal α Armor | Shatterseal
★ How to Unlock Proof of a Hero Quest
☆ Omega Planetes | Savage Omega | Builds vs Omega
★ Armor Set Search updated for Ver 1.041
☆ HR50+ Builds | Tier List | Weapon Guides

Bringing the best items can make your hunts less challenging in Monster Hunter Wilds. Learn the best items to bring on quests and see item management tips here!
List of Contents
Best Items to Bring
Numerous items can assist you in Monster Hunter Wilds. These are some of the best items and item types you should always consider bringing before heading out on a quest:
1. Healing Items
| Item | Description |
|---|---|
| Max Potion | Fully restores health and temporarily maximizes the size of your Health Gauge. |
| Mega Potion | Restores a moderate amount of health. |
| Potion | Restores a small amount of health. |
|
Lifepowder (For co-op) |
Produces a cloud that heals you and anyone nearby. |
Healing Items are one of the most important items you should bring on any hunt, as health management is crucial to a successful hunt. As long as your hunter is alive, you can continue fighting until you eventually achieve victory.
Max Potions are great for when you need to heal in a pinch, as its fast animation and full HP recovery helps you get back in the fight quickly. In general, however, your Mega Potions and Potions will still be your bread and butter healing source. Lifepowder is good for when you also want to heal your party members in multiplayer.
2. Cleansing Items
| Items | Description |
|---|---|
| Nulberry | A mysterious berry that cures various blights. |
| Herbal Medicine/Powder | Produces a cloud that cures poison and heals you a bit. |
Cleansing items are great to have when fighting enemies that can inflict status ailments such as Poison, blights, and more.
For example, monsters with Dragon element attacks like Arkveld can inflict Dragonblight which temporarily negate any Elemental Damage you deal. You can use a Nulberry to remove the Dragonblight status, allowing you to deal Elemental Damage again.
3. Energy Items
| Items | Description |
|---|---|
| Dash Juice | Recovers stamina and also temporarily reduces stamina depletion when performing actions. |
| Energy Drink | A Guild-approved beverage that boosts your stamina. |
| Ration | Food that restores a bit of stamina. |
| Well-Done Steak | A hearty roast that restores health and stamina and boosts both their max gauges. |
It’s also recommended bringing Stamina boosting items because you would need stamina to dodge, block attacks, prolong weapon charges, and even execute combos for some weapons. Draining your stamina during intense fights can be the difference between a successful hunt and a failed quest.
For weapons that constantly use Stamina, such as Dual Blades and Bow, bringing a Dash Juice is recommended, as it makes your Stamina last longer when performing your Demon or Charged attacks.
How to Restore and Increase Stamina
4. Buffing Items
| Items | Description |
|---|---|
| Mega / Armorskin | Temporarily boosts your defense |
| Mega / Demondrug | Temporarily boosts your attack |
| Demon Powder | A mysterious powder that produces a cloud around the area that temporarily strengthens attacks. |
| Hardshell Powder | A mysterious powder; when dispersed, temporarily strengthens defense. |
Buffing items strengthens your character by increasing your defense and attack values. This will allow you to take more hits and deal more damage, which can contribute to how smooth a quest can go or how fast you can finish it.
Additionally, bringing the Powder items (Demon Powder and Hardshell Powder), allows you to apply Attack and Defense buffs on all your teammates, as it creates a cloud that buffs anyone who enters it. This makes it perfect for when you are playing in multiplayer.
5. Pods
| Items | Description |
|---|---|
| Flash Pod | Slinger ammo that causes a violent flash on impact. Will temporarily blind monsters if used in front of them. |
| Dung Pod | Slinger ammo that releases a strong odor on impact. Causes certain monsters to flee. |
| Large Dung Pod | Slinger ammo that releases a strong odor on impact, causing any surrounding monsters to flee. |
Certain pods are useful to either drive monsters away or immobilize them. Flash Pods will allow you to blind and take down flying monsters, while Dung Pods can separate herds.
6. Traps
| Items | Description |
|---|---|
| Shock Trap | A trap for catching large monsters. It is tripped by heavy weight. |
| Pitfall Trap | A trap that immobilizes a target. Use it to capture monsters. |
| Tranq Bomb | A hand grenade used to capture monsters ensnared in traps. Can be slammed against the ground. |
Traps can immobilize monsters and create opportunities to deal high damage to them. These are essential tools for capturing monsters alongside the Tranq Bomb, which will increase your hunt rewards while reducing your clear time.
It’s also best to bring trap crafting items such as Nets, Thunderbug Capacitors, and Trap Tools so you can use multiple traps before resupplying. This also opens the freedom to use your first traps for damage and the second ones for capture.
It's impoortant to remember, however, that monsters gain a resistance to traps with every use. That means the time they spend trapped will lessen with each consecutive trap use.
7. Powercharm and Armorcharms
| Items | Description |
|---|---|
| Powercharm | An amulet that strengthens attacks. Just carrying this gives you demonic strength. |
| Armorcharm | An amulet that increases defense. Just carrying this makes your skin stone hard. |
The Armorcharm and Powercharms are key items that passively increases your attack and defense just by having it in your inventory. These are great free stat boosts and will only take away 2 slots on your pouch so be sure to always have these in your pockets to maximize your stats!
The Powercharm is a quest reward from the As Gatekeepers while the Armorcharm is obtained from the Secure Wounded Hollow quest.
Armorcharm and Powercharm Guide
Best Loadouts
| Best Loadout Samples | |
|---|---|
| Standard Loadout | Conditional Item Loadout |
| Balanced Loadout | Maximized Loadout |
Standard Loadout
|
|
|
|
|
|
|
|
|
|
|
|
This is a basic loadout that will cover your basic recovery needs as well as the essential pods and traps for hunting large monsters. This is an easy to go setup especially if you’re just hunting casually or fighting weaker large monsters.
Conditional Item Loadout
|
|
|
|
|
|
|
|
|
|
|
|
|
|
|
|
|
|
|
|
This is a basic setup to bring if you’re going to hunt a monster with pesky status ailments. It’s imperative to know what status ailment your target monster can inflict (if it deals poison, bring antidote, else, bring a Nulberry, etc).
Additionally, understand which locale you’re going to be hunting on. If it’s an area with a low temperature like the Iceshard Cliff, it’s imperative to bring a Hot Drink to counteract the environment’s energy sapping effect.
This loadout is highly customizable and you can remove other items and tailor it for specific ailments such as when fighting a monster with poison, remove the other restoratives and keep Antidote alone for poison hunts.
Balanced Loadout
|
|
|
|
|
|
|
|
|
|
|
|
|
|
|
|
|
|
This is a balanced loadout that you can use for most hunts at the latter stages of the game and even until the endgame. Of course, you’ll still want to add conditional items for status ailments and terrains but this central loadout will suffice in the majority of hunts you’ll need to complete.
Maximized Loadout
This is a full blown loadout focused on maximizing your consumables to make the hunt much easier to complete. Use this Loadout when tackling difficult content. Additionally, you can include other status recovery loadouts again, depending on terrain and monster ailments.
You likely won’t need to use such a Loadout until encountering the hardest content of the game but it’s a maximized loadout for possible new content in future updates.
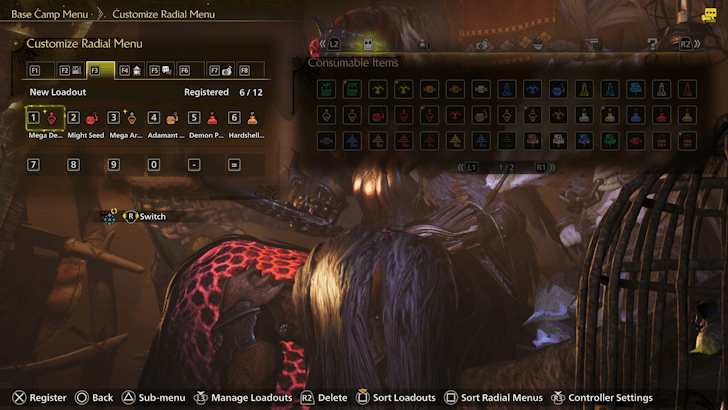
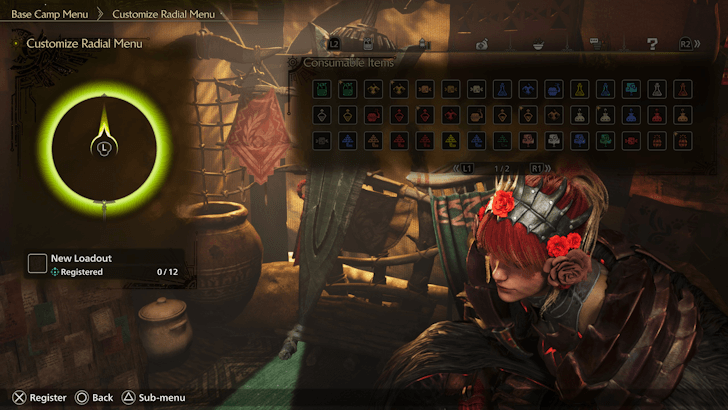
Recommended Radial Menu Setup
Best Items to include in the Radial Menu
|
|
|
|
|
|
|
|
|
|
These are a list of items that are generally always good to have as shortcuts in your Radial Menu. These items are items you’ll always want to be able to use on the spot given the scenarios where you’ll need them such as needing an immediate heal (either to yourself via potions or other hunters via dust).
Pods are some of the most important items to be able to use as soon as possible as they are combat items that can shift the flow of the hunt with the right usage. Additionally, Tranq Bombs are great to be on the shortcut as well if your team decides to do a capture as you may potentially miss the Tranq Bomb on your menu while the monster’s immobilized from the trap.
Keep All Item Types in One Section
It’s best to keep each item type in one such as all recovery items are in one menu, all buffs in another, pods in one, etc.
This allows you to choose the items you need at each situation without switcing all your items one by one mid-combat.
Avoid Overstocking a Radial Menu Shortcut
It may be tempting to just use a few number of Radial menu and call it quits for easy accessibility but having several items in one shortcut may cause you to use a different item than the one intended. It’s best to keep each Radial menu focused and low in quantity as much as possible.
Compile Non-Combat Items in One Radial Menu
Items you would rarely use mid-fight like Whetstones or Buff Items that take a while to consume such as Demondrugs and Well-Done Steak are best kept in a separate Radial menu to avoid accidental uses mid-fight.
Item Management Tips
|
|
Take Only What’s Necessary
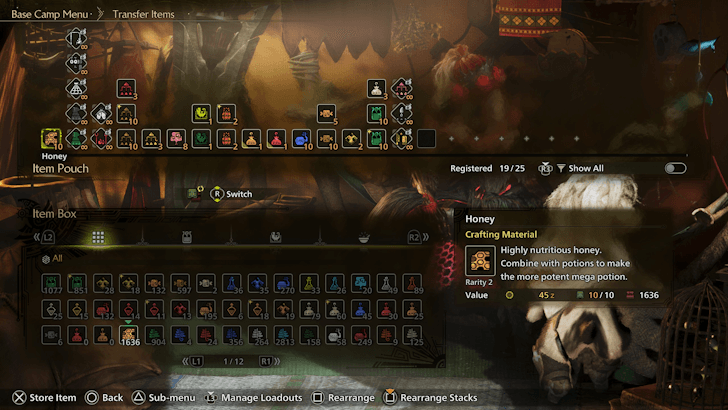
There are plenty of items you could bring during hunts. However, it is also important to bring only the necessary ones due to the clutter it may cause in your inventory. Items should be accesible as you need to use them as fast as possible so you could go back to defeating the monster.
List of All Items and Materials
Use the Radial Menu
Make sure to customize your Radial Menu before a fight, so you could easily access your favourite items in the middle of combat.
Set Your Item Use Controls to Type 2 on Controller

We recommend changing your Item Use Controls from the default to Type 2, as it makes the radial menu more intuitive. With this setting, you confirm item usage by pressing R3 on a controller instead of simply pushing and releasing the analog stick, reducing the chance of accidentally consuming unintended items.
Regularly Restock Items
Now that you can continue with hunting monsters without returning to the base camp, it may be tempting to hunt continuously to maximize your playtime and this is not a bad thing. However, be sure to always set a routine to restock your items in the base camps or pop-up camps every now and then to avoid going into a hunt and not having enough consumables that you need for that specific hunt.
Monster Hunter Wilds Related Guides
Monster Hunter Wilds Walkthrough Wiki
Recommended Guides
Comment
Author

Best Items to Bring on Hunts
Please participate in our site
improvement survey
03/2026
improvement survey
03/2026
Would you assist in
improving Game8's site?
improving Game8's site?

×
We are listening to our users' valuable opinions and discussing how to act on them.
The information collected through this survey will be used for the purpose of improving our services. In addition, the information will only be disclosed a part of a statistic in a format that will not allow identification of personal information.
Begin Survey
Not Now
×
Please rate each item regarding Game8.co's Advertisements.
Amount of Ads
Very Dissatisfied
Somewhat Dissatisfied
Fine
Somewhat Satisfied
Highly Satisfied
Placement of Ads
Timing of Ad Display
Ad Loading Speed
Safeness of Ads
Content of Ads
×
Please rate each item regarding Game8.co's Quality of Articles.
Amount of information
Very Dissatisfied
Somewhat Dissatisfied
Fine
Somewhat Satisfied
Highly Satisfied
Frequency of updates
Speed of new information
Accuracy of articles
Understandibility of articles
Readability of sentences
×
Please rate each item regarding Game8.co's Usability of the Site.
Ease of finding information
Very Dissatisfied
Somewhat Dissatisfied
Fine
Somewhat Satisfied
Highly Satisfied
Loading Speed
Use of Color
Font Size
Visibility of Images
Easy to Understand Layout
×
Please rate each item regarding Game8.co's Message Boards, Comments.
Ease of Writing
Very Dissatisfied
Somewhat Dissatisfied
Fine
Somewhat Satisfied
Highly Satisfied
Readability
Ease in Finding Information
Comment Quality
Comment Quantity
Admin Response
×
Please rate each item regarding Game8.co's Site's new design.
Please rate our site's new design
Very Dissatisfied
Somewhat Dissatisfied
Fine
Somewhat Satisfied
Highly Satisfied
Do you think that the website's design change makes the site easier to use?
Has the new design made it easier for you to find information on the site?
Has the new design improved the overall visual appeal of the site?
How would you rate your overall satisfaction with the new design of the site?
×
How likely are you to recommend Game8 to someone you know?
Very Unlikely
0
1
2
3
4
5
6
7
8
9
10
Very Likely
If you have other opinions regarding potential improvement to the website, please share them with us. We would appreciate your honest opinion.
Note: This is a free response section, so you can proceed without entering anything.
Note: Please be sure not to enter any kind of personal information into your response.
Note: Please be sure not to enter any kind of personal information into your response.
×
Thank You
×
Thank you for participating in our survey! Your answers will help us to improve the quality of our website and services.
We hope you continue to make use of Game8.
We hope you continue to make use of Game8.
Close
Premium Articles
Rankings
- We could not find the message board you were looking for.
Gaming News


![Everwind Review [Early Access] | The Shaky First Step to A Very Long Journey](https://img.game8.co/4440226/ab079b1153298a042633dd1ef51e878e.png/thumb)

![Monster Hunter Stories 3 Review [First Impressions] | Simply Rejuvenating](https://img.game8.co/4438641/2a31b7702bd70e78ec8efd24661dacda.jpeg/thumb)
Popular Games

Genshin Impact Walkthrough & Guides Wiki
Honkai: Star Rail Walkthrough & Guides Wiki
Umamusume: Pretty Derby Walkthrough & Guides Wiki
Pokemon Pokopia Walkthrough & Guides Wiki
Resident Evil Requiem (RE9) Walkthrough & Guides Wiki
Monster Hunter Wilds Walkthrough & Guides Wiki
Wuthering Waves Walkthrough & Guides Wiki
Arknights: Endfield Walkthrough & Guides Wiki
Pokemon FireRed and LeafGreen (FRLG) Walkthrough & Guides Wiki
Pokemon TCG Pocket (PTCGP) Strategies & Guides Wiki


Recommended Games
Diablo 4: Vessel of Hatred Walkthrough & Guides Wiki
Fire Emblem Heroes (FEH) Walkthrough & Guides Wiki
Yu-Gi-Oh! Master Duel Walkthrough & Guides Wiki
Super Smash Bros. Ultimate Walkthrough & Guides Wiki
Pokemon Brilliant Diamond and Shining Pearl (BDSP) Walkthrough & Guides Wiki
Elden Ring Shadow of the Erdtree Walkthrough & Guides Wiki
Monster Hunter World Walkthrough & Guides Wiki
The Legend of Zelda: Tears of the Kingdom Walkthrough & Guides Wiki
Persona 3 Reload Walkthrough & Guides Wiki
Cyberpunk 2077: Ultimate Edition Walkthrough & Guides Wiki


All rights reserved
©CAPCOM
The copyrights of videos of games used in our content and other intellectual property rights belong to the provider of the game.
The contents we provide on this site were created personally by members of the Game8 editorial department.
We refuse the right to reuse or repost content taken without our permission such as data or images to other sites.