Weapon Combinations
★ Arkveld Gamma Armor | MH Stories 3 Collab
☆ Version 1.041: Sororal α Armor | Shatterseal
★ How to Unlock Proof of a Hero Quest
☆ Omega Planetes | Savage Omega | Builds vs Omega
★ Armor Set Search updated for Ver 1.041
☆ HR50+ Builds | Tier List | Weapon Guides
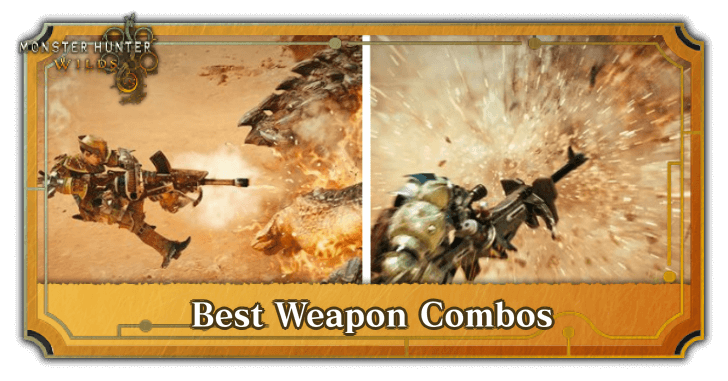
These are some of the best weapon combos in Monster Hunter Wilds. Check out all of the primary and secondary weapons you can combine to create the ultimate hunting setup that fits your playstyle!
| Weapon Guides | ||
|---|---|---|
| Weapon Tier List | List of All Weapons | Beginner Weapons |
| Secondary Weapons | Weapon Combinations | Weapons Quiz |
List of Contents
Weapon Combos
Best Weapon Combos
- Great Sword + Hunting Horn
- Long Sword + Sword and Shield
- Gunlance + Charge Blade
- Heavy Bowgun + Light Bowgun
- Dual Blades + Bow
- Insect Glaive + Hammer
- Switch Axe + Lance
Bowguns are a Good Secondary Weapon Choice
If you're still unsure about which secondary weapon to pair with your primary, the Light or Heavy Bowgun is an excellent choice for support fire.
With Demon and Armor Ammo, it enhances your team’s attack and defense in a multiplayer scenario, while also addressing range limitations, since most weapons in Wilds are melee-focused.
Weapon Combos Explained
Great Sword and Hunting Horn
| Primary Weapon | Secondary Weapon |
|---|---|
 Great Sword Great Sword |
 Hunting Horn Hunting Horn |
With the Great Sword’s already devastating damage output, the ideal pairing for this powerhouse is the Hunting Horn, which enhances its raw strength even further.
The Hunting Horn provides attack buffs and stuns monsters with its blunt attacks, creating larger openings for the Great Sword to land True Charged Slashes while the monster is incapacitated.This combination also synergizes well with armor builds featuring Maximum Might or Flayer, which increases Affinity and wounding respectively for even greater damage potential.
While both weapons lean toward slower, deliberate attacks, their mix of utility, crowd control, and overwhelming power makes them a devastating duo capable of dealing both blunt and slashing damage.
Long Sword and Sword and Shield
| Primary Weapon | Secondary Weapon |
|---|---|
 Long Sword Long Sword |
 Sword and Shield Sword and Shield |
The Long Sword and Sword and Shield make for an excellent combo, balancing fluid, continuous offense with defensive versatility. The Long Sword’s Spirit Gauge enables relentless, high-damage combos, while the Sword and Shield serves as a reliable secondary weapon, offering defensive utility and the ability to use items without sheathing, minimizing downtime.
This duo truly shines when paired with status-inflicting weapons. The Sword and Shield’s rapid attacks allow it to efficiently build up Paralysis, immobilizing the monster. Once stunned, the Long Sword steps in, applying Poison through its relentless strikes, stacking damage over time on top of its already devastating Spirit Gauge combos.
To maximize this synergy, an armor set with Foray can further boost attack power against status-affected monsters, making this pairing even more potent.
Gunlance and Charge Blade
| Primary Weapon | Secondary Weapon |
|---|---|
 Gunlance Gunlance |
 Charge Blade Charge Blade |
A Gunlance and Charge Blade make for an explosive weapon duo, capable of applying constant pressure and delivering consistent bursts of damage.
The Charge Blade serves as the finisher with its Super Amped Elemental Discharge, while the Gunlance offers a balanced defensive-offensive playstyle, keeping up the assault with Shelling while maintaining strong defenses with its guarding capabilities.
While this pairing can be challenging to manage, especially with the Charge Blade’s complex mechanics, it proves devastating when mastered.
Heavy Bowgun and Light Bowgun
| Primary Weapon | Secondary Weapon |
|---|---|
 Heavy Bowgun Heavy Bowgun |
 Light Bowgun Light Bowgun |
If you prefer dishing out attacks at a distance, consider pairing the Heavy Bowgun and Light Bowgun for a well-rounded ranged approach to combat.
The Light Bowgun excels at mid-range combat with rapid-fire attacks, while the Heavy Bowgun provides superior long-range firepower, making it especially useful against airborne monsters. This pairing also expands your ammo options, creating a highly synergized loadout.
The Light Bowgun can efficiently apply status effects like Paralysis with its fast firing rate, setting up the perfect opportunity for the Heavy Bowgun to unleash Spread shots and overwhelm enemies with sheer firepower. Additionally, the Heavy Bowgun offers more defensive capabilities, balancing out the Light Bowgun’s agility-focused gameplay.
Bow and Dual Blades
| Primary Weapon | Secondary Weapon |
|---|---|
 Dual Blades Dual Blades |
 Bow Bow |
A speed-oriented and status-focused combination, the Dual Blades and Bow work together seamlessly to apply consistent pressure on enemies. The Dual Blades' rapid, close-range attacks pair well with the Bow’s long-range versatility, allowing for repositioning and safer engagements.
Both weapons excel at applying status effects, especially with the Bow’s convenient access to Coatings, making this duo highly effective for poison, paralysis, or exhaust builds.
To optimize this synergy, consider an armor setup with Foray to amplify the Poison and Paralysis application. Alternatively, if stamina management is a concern, an armor build featuring Stamina Surge can help offset the stamina drain that comes with both weapons.
Insect Glaive and Hammer
| Primary Weapon | Secondary Weapon |
|---|---|
 Insect Glaive Insect Glaive |
 Hammer Hammer |
Insect Glaive and Hammer are a great combination thanks to their synergy. Using the Hammer, you can go for the enemy's head and stun them, leaving them vulnerable to attack. Once the monster is down, swap over to the Insect Glaive to deal large amounts of damage with fast combos. When the monster gets back up, swap back to the hammer and repeat.
To optimize this synergy, equipping builds with Agitator, Weakness Exploit, and Antivirus will help, as well as some Stamina management skills such as Marathon Runner and Constitution.
Switch Axe and Lance
| Primary Weapon | Secondary Weapon |
|---|---|
 Switch Axe Switch Axe |
 Lance Lance |
The Switch Axe and Lance weapon combo excels in both offense and defense, as both weapons are capable of defending against attacks while also dealing decent damage. Most of your damage output will come from the Switch Axe, which has great offensive capabilities, and a defensive move in the form of the Offset RIsing Slash. Lance, on the other hand, will help defend against monster attacks while still dealing damage with its counters.
To strengthen both weapons, go for builds that have Burst as both weapons can continuously attack the enemy to stack it. Additionally, get Stamina skills like Constitution to help with blocking and dodging.
Monster Hunter Wilds Related Guides

Monster Hunter Wilds Walkthrough Wiki
 Weapons
 Armor Sets
 Monsters
 Builds
 Story Walkthrough
 Artian Weapons
 Maps and Locations
 Items and Materials
 Tips and Tricks
 Game Mechanics
 Endemic Life
 Skills
 Decorations
 Talismans
 Characters
 Quests
 Palico
 Trophies
 Cosmetics
 Furniture
 Festivals
 News and Game Info
 Message Boards
Recommended Guides
 State of the Meta
 Best Weapons Tier List
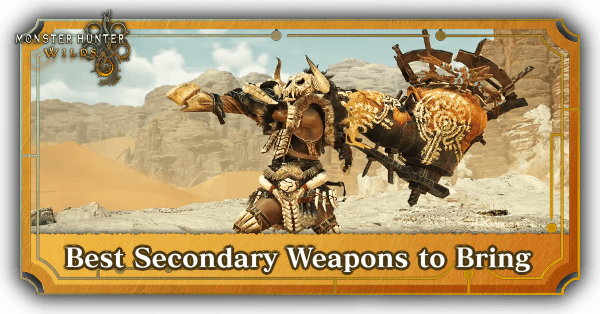 Secondary Weapons
 Best Items to Bring
 Armor Set Search
 Endgame Guide
 Unchangeable Features and Missables
 Best Skills
 Best Beginner Weapons
 Easter Eggs and Secrets
 Respawn Timers
 Is MH Wilds Too Easy?
 Best Meals and Food Effects
 Best Status Effect
 List of All Bugged Skills
 Best Co-op Strategies
 Weapon Popularity Tier List
 How to Prepare for Title Update 1
 Weapon Changes from the Beta
 Weapon Changes from Rise and World
 List of All DLC and Prices
 Talisman Rating Tool
 Best Talismans
 Armor Transcending Guide
Author

Weapon Combinations
Premium Articles
Rankings
Gaming News


![Monster Hunter Stories 3 Review [First Impressions] | Simply Rejuvenating](https://img.game8.co/4438641/2a31b7702bd70e78ec8efd24661dacda.jpeg/thumb)
Popular Games

Genshin Impact Walkthrough & Guides Wiki
Honkai: Star Rail Walkthrough & Guides Wiki
Umamusume: Pretty Derby Walkthrough & Guides Wiki
Pokemon Pokopia Walkthrough & Guides Wiki
Resident Evil Requiem (RE9) Walkthrough & Guides Wiki
Monster Hunter Wilds Walkthrough & Guides Wiki
Wuthering Waves Walkthrough & Guides Wiki
Arknights: Endfield Walkthrough & Guides Wiki
Pokemon FireRed and LeafGreen (FRLG) Walkthrough & Guides Wiki
Pokemon TCG Pocket (PTCGP) Strategies & Guides Wiki


Recommended Games
Diablo 4: Vessel of Hatred Walkthrough & Guides Wiki
Cyberpunk 2077: Ultimate Edition Walkthrough & Guides Wiki
Fire Emblem Heroes (FEH) Walkthrough & Guides Wiki
Yu-Gi-Oh! Master Duel Walkthrough & Guides Wiki
Super Smash Bros. Ultimate Walkthrough & Guides Wiki
Pokemon Brilliant Diamond and Shining Pearl (BDSP) Walkthrough & Guides Wiki
Elden Ring Shadow of the Erdtree Walkthrough & Guides Wiki
Monster Hunter World Walkthrough & Guides Wiki
The Legend of Zelda: Tears of the Kingdom Walkthrough & Guides Wiki
Persona 3 Reload Walkthrough & Guides Wiki


All rights reserved
©CAPCOM
The copyrights of videos of games used in our content and other intellectual property rights belong to the provider of the game.
The contents we provide on this site were created personally by members of the Game8 editorial department.
We refuse the right to reuse or repost content taken without our permission such as data or images to other sites.
Switching weapons after inflicting ailments (mainly Paralysis) is pointless since the time spent switching can be done doing damage intead. You could argue that with Sleep as being the exeception, but hardly anyone (currently) bother to set up for one big attack when, for the sake of time, you're still better off attacking during the monster's animations of falling asleep and waking. Weapon combinations should take into account of covering for each other's weaknesses instead of gimmicks.