Balahara Weakness and Drops
★ Arkveld Gamma Armor | MH Stories 3 Collab
☆ Version 1.041: Sororal α Armor | Shatterseal
★ How to Unlock Proof of a Hero Quest
☆ Omega Planetes | Savage Omega | Builds vs Omega
★ Armor Set Search updated for Ver 1.041
☆ HR50+ Builds | Tier List | Weapon Guides
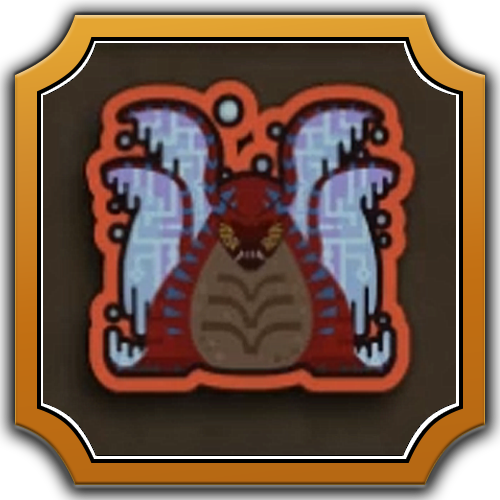
Balahara is a Leviathan in Monster Hunter Wilds. Learn how to beat Balahara, its weaknesses, drops, locations, quests, attack patterns and more!
| All Related Balahara Articles | ||
|---|---|---|
 Balahara Balahara
|
 Weapons Weapons
|
 Armor Sets Armor Sets
|
List of Contents
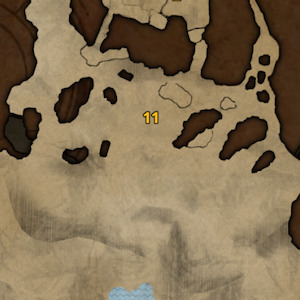
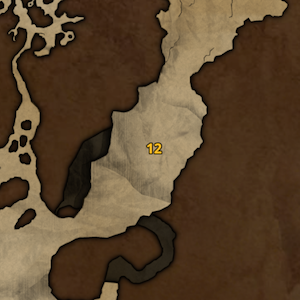
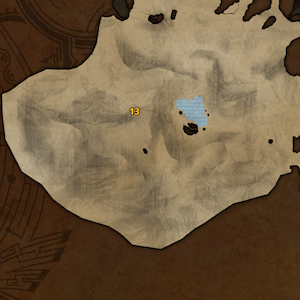
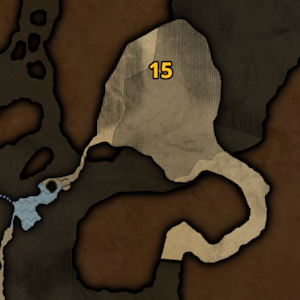
Balahara Locations and Quests
Known Habitats
| Region | Starting Area | Visited Areas | Resting Area |
|---|---|---|---|
 Windward Plains Windward Plains |
|
|
|
Balahara can also appear in the Wounded Hollow. When hunting for Gold Crowns, that locale is a good place to scout and reroll for monster sizes.
Interactive Map and List of Locations
Quest Appearances
| Quest Type | Lvl. | Quest Name |
|---|---|---|
| Assignment Quest | 1★ | Balahara of the Sandsea |
| Optional Quest | 1★ | Sand Sea Surges |
| Optional Quest | 4★ | The Desert Knows Not the Sea |
| Optional Quest | 5★ | A Leviathan's Temper |
Balahara is Available In Windward Plains
After completing the Village of Whispering Winds quest, Balahara will be available and can be found roaming around Windward Plains. Hunting them this way will not turn into a quest until you have finished the A Hunter's Pride quest.
Balahara Weakness
Basic Information
 |
||
| Type | Roar | Wind Pressure |
|---|---|---|
| Leviathan | None | None |
| Tremor | Status Effect | Element |
| None | Waterblight | Water |
| Gold Crown Sizes | ||
|
|
||
Note: Gold Crown Sizes have ranges and may vary between hunters.
Damage Type Weakness
Hitzone Values and Weakness Breakdown
※ Click the tabs to switch between Damage Type and Elemental Damage Hitzone effectiveness.
| Part | |||
|---|---|---|---|
| Head | |||
| Neck | |||
| Torso | |||
| Left Foreleg | |||
| Right Foreleg | |||
| Left Hind Leg | |||
| Right Hind Leg | |||
| Tail | |||
| Overall |
| Part | |||||
|---|---|---|---|---|---|
| Head | |||||
| Neck | |||||
| Torso | |||||
| Left Foreleg | |||||
| Right Foreleg | |||||
| Left Hind Leg | |||||
| Right Hind Leg | |||||
| Tail | |||||
| Overall |
The numbers above showcase damage types' effectiveness against the monster's hitzones. Parts with higher numbers mean the damage type is more effective, with 1 being the lowest and 20 as the highest.
Hitzone DPS Summary
| Sever | Charge Blade Charge Blade is a transforming weapon that stores energy in Sword Mode and delivers an elemental slash in Axe Mode. Dual Blades The Dual Blades that excels at rapid successive attacks and lets you transform into a demon to enhance your attack power. Great Sword The Great Sword uses slow but powerful swings to attack. Gunlance The Gunlance is a weapon that offensive and defensive weapon that uses artillery fire as its main attack. Insect Glaive The Insect Glaive is a weapon that specializes in aerial combat and strengthens itself using monster extracts from hunting insects. Lance The Lance is a weapon that boasts extremely high defensive performance. It can be used to charge and guard against enemy attacks. Long Sword The Long Sword uses quick continuous attacks and allows you to perform a parry slash when avoiding a monster's attack. Switch Axe Switch Axe is a transforming weapon that switches between Axe Mode and Sword Mode. Axe Mode allows you to perform all kinds of attacks while Sword Mode lets you perform high speed attacks. Sword and Shield The Sword and Shield is a versatile weapon with balanced attack and defense. |
|---|---|
| | |
| Blunt | Hammer The Hammer is a weapon that delivers powerful ranged attacks and is especially good at aiming at a monster's head to stun it. Hunting Horn The Hunting Horn is a support weapon that plays a melody that strengthens allies. It is best used in multiplayer. Sword and Shield The Sword and Shield is a versatile weapon with balanced attack and defense. |
|---|---|
| | |
| Shot | Bow The Bow is a weapon that can be used from a distance with a large number of shots and can be used to deal more damage using charged shots or special arrows. Heavy Bowgun Heavy Bowguns can aim for great damage by releasing powerful bullets, and can be equipped with shields for added defense. Light Bowgun The Light Bowgun is long-range weapon with excellent mobility and a variety of agendas using status inflicting ammunition and support ammunition! |
|---|---|
| | |
| Thunder is the best element to use against Balahara. Try to aim for its Tail to deal the most amount of Thunder damage. |
Kinsect Extract From Parts
| Head | Neck | ||
|---|---|---|---|
| Torso | Left Foreleg | ||
| Right Foreleg | Left Hind Leg | ||
| Right Hind Leg | Tail |
Best Kinsects and All Kinsect Trees
Status Ailment and Item Weakness
| Status Ailment | Items | ||
|---|---|---|---|
| |
|
||
| |
|
||
| |
|
||
| |
|
||
| |
|
||
| |
|
||
Breakable Parts
| Breakable |
・Head ・Chest ・Back ・Wings ・Legs ・Tail (Cuttable) |
|---|
Balahara Item Loadout
Recommend Items to Bring
|
|
|
|
|
|
|
|
|
|
|
Screamer Pods are highly recommended when hunting Balahara as it negates its ability to stay underground by bringing it up from the sand and stunning it. Other items such as Pitfall Traps, Shock Traps, and Flash Pods gives an advantage by stopping the nimble leviathan in its tracks.
Before hunting Balahara, make sure to stock up on healing items such as Potions, Mega Potions, and Max Potions. Bring Nulberries as well if your Water Resistance is low, as Balahara can inflict Waterblight.
List of All Items and Materials
How to Beat Balahara
| Balahara Monster Fight Tips |
|---|
|
|
Focus Strike Its Mouth After it Spits Mud
When Balahara spits from its mouth, you can see its mouth become a weak point, signified by the red glow when you use Focus Mode. Use Focus Strike on Balahara's mouth whenever it spits mud. Performing a Focus Strike during this time can topple the monster and give you a damage window.
How to Use Focus Mode and Focus Strike
Dodge to the Side
Most of Balahara's attacks are frontal attacks that only go in one direction, so make sure to dodge to the side to avoid getting inflicted by Waterblight.
Use Screamer Pods When It Submerges
We recommend stocking up on Screamer Pods as these will bring out and stun the Balahara whenever it buries beneath the sand. Use this as much as possible to give you more openings for executing your highest damage combo.
Screamer Pods can be picked up from flying Baunos that can be found throughout the area.
Ride Seikret When It Spawns Quicksand
When Balahara uses its quicksand attack, you can call and ride your Seikret to easily avoid being sucked by the area. This is an alternative in case you have no Sceamer Pods in hand.
Seikret Mount Features and Abilities
Knock Down the Fulagrite Pillar
When Balahara starts climbing a Fulagrite Pillar, aim your Slinger at the pillar to bring it down and cause it to fall, dealing huge damage and knocking down the Balahara.
Once it's knocked down, deal as much damage as you can during this period to eventually defeat the Balahara and complete the hunt.
List of Balahara Moves
Moveset and Openings
| Attack | Description |
|---|---|
| Submerged Leap | Balahara digs and submerges beneath the sand, only to leap out forward after a few seconds and dive into the ground. Run away as starts to dig and stay within mid-range as its initial leap can still hit you. Dodge to the side as it lands. |
| Twisting Thrust | Note: The Tempered version of the monster is shown in the clip. Balahara curves and twists its body a bit, then thrusts forward while spinning using its tail, dealing damage. Roll to the side as soon as it spins as this is a very quick attack. |
| Lunging Bite | Balahara starts opening its mouth to execute a bite that lunges forward. Roll to the side, but avoid rolling backwards or forwards as Balahara can do this attack multiple times. |
| Tail Jab | Balahara twists its tail up before jabbing it towards you. Dodge sideways right before the tail pierces you. |
| Charged Mud Spit | Balahara pulls up its head and stands upright, charging then unleashing a large Mud Spit that hits a wide area. Run away as soon as possible and roll once it fires. Can also be perfectly guarded. |
| Mud Beam | Balahara fires a forward beam of mud for a brief moment, inflicting Waterblight. Roll to the side or guard with your weapon to initiate a Power Clash. |
| Mud Spit | Balahara opens its mouth and does a ranged attack that spits out mud, inflicting Waterblight. Roll to the side as soon as it winds up or keep running around it. |
| Sweeping Bite | Note: The Tempered version of the monster is shown in the clip. Balahara opens its mouth to the side and makes a sweeping bite. Roll away from Balahara or dodge towards the start of the attack. |
| Tail Sweep | Note: The Tempered version of the monster is shown in the clip. Balahara twists its body and sweeps its tail around, knocking foes away. Run or dodge away from Balahara as soon as it readies its tail. |
| Quicksand | Balahara submerges in the sand, creating a quicksand zone where it drags the Hunter to the middle and slows down their movement while Balahara strikes to attack. Avoid this by firing Screamer Pods to the area or riding your Seikret out of the quicksand. |
Balahara Variants
| All Balahara Variants | |
|---|---|
| Tempered | Frenzied |
Tempered Balahara
| Monster | Basic Information |
|---|---|
 Tempered Balahara Tempered Balahara |
Habitat: First Encounter: Unlocked after finishing the Wyvern Sparks and Rose Thorns quest. |
Tempered Balahara can be encountered in a Field Survey in Windward Plains. It will start appearing after finishing the Wyvern Sparks and Rose Thorns quest, making it a high rank hunt.
Tempered Balahara Appearance
Tempered Balahara are stronger and covered in large scars across their bodies which you can damage and open into Tempered Wounds which you can break with a Focus Strike to deal increased damaged and even knock them down to the ground!
Tempered Balahara Rewards
| Difficulty | Possible Rewards |
|---|---|
| 5★ | Hunt Completion Breaking Tempered Wounds |
As a 5★ difficulty monster, hunting Tempered Balahara will reward Damaged Weapon Shards and Hunter Symbol I .
Destroying a Tempered Balahara's tempered wound will also reward Wyverian Bloodstone Shard and Wyverian Bloodstone used for Relic Melding.
There Is No Frenzied Balahara
There are no Frenzied Balaharas. Among all the Monsters in the Forbidden Lands, there are only 5 that can be infected with the Frenzy Virus, and they all reside in the Iceshard Cliffs.
Balahara Drops
Low Rank Materials
| |
| |
| |
| |
The rarest Low Rank Balahara drop is the Balahara Certificate, with an 8% chance to drop after a hunt. As it's only obtainable as a Target Reward, your best bet is to grind Balahara's low rank quests, such as Sand Sea Surges.
High Rank Materials
| |
| |
| |
| |
Balahara's rarest High Rank drop is the Wyvern Gem, with a 3% chance of dropping as a Target Reward. This material can be obtained from multiple monsters, including Quematrice and Rompopolo. The best chance you have getting it from Balahara would be to sever and carve its tail. Carving its tail gives you a 7% chance of obtaining a Wyvern Gem, while carving its body gives you a 5% chance.
Remember to also check Balahara Investigations and look for the rewards. Some quests will have the rarest materials as guaranteed rewards! You can also opt to use Lucky Vouchers and utilize the Lucky Meal or Capture Pro Meal food skill to improve your chances of getting these rare materials overall.
Monster Hunter Wilds Related Guides

All Monsters Guides
Arch-Tempered Monsters
| Arch-Tempered Monster Guides | |
|---|---|
 AT Rey Dau AT Rey Dau |
 AT Uth Duna AT Uth Duna |
 AT Nu Udra AT Nu Udra |
 AT Jin Dahaad AT Jin Dahaad |
 AT Arkveld AT Arkveld |
|
All Large Monsters
 Arkveld
 Rey Dau
 Nu Udra
 Doshaguma
 Chatacabra
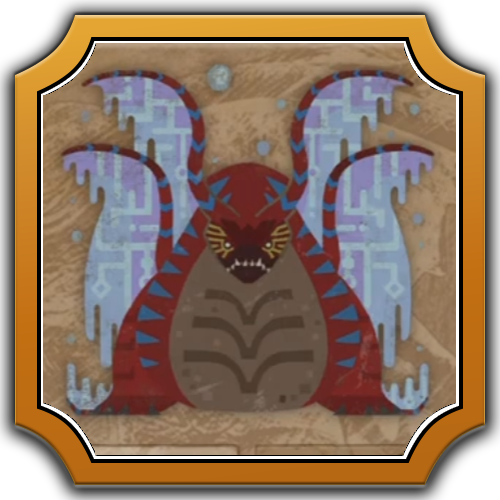 Uth Duna
 Lala Barina
 Quematrice
 Rompopolo
 Ajarakan
 Yian Kut-Ku
 Congalala
 Rathalos
 Gypceros
 Rathian
 Gravios
 Nerscylla
 Gore Magala
 Hirabami
 Mizutsune
 Jin Dahaad
 Blangonga
 Guardian Arkveld
 Guardian Doshaguma
 Guardian Rathalos
 Guardian Ebony Odogaron
 Xu Wu
Xu Wu Zoh Shia
 Guardian Fulgur Anjanath
 Lagiacrus
 Seregios
 Omega Planetes
Comment
Author

Balahara Weakness and Drops
Premium Articles

Rankings
Gaming News


![Monster Hunter Stories 3 Review [First Impressions] | Simply Rejuvenating](https://img.game8.co/4438641/2a31b7702bd70e78ec8efd24661dacda.jpeg/thumb)
Popular Games

Genshin Impact Walkthrough & Guides Wiki
Honkai: Star Rail Walkthrough & Guides Wiki
Umamusume: Pretty Derby Walkthrough & Guides Wiki
Pokemon Pokopia Walkthrough & Guides Wiki
Resident Evil Requiem (RE9) Walkthrough & Guides Wiki
Monster Hunter Wilds Walkthrough & Guides Wiki
Wuthering Waves Walkthrough & Guides Wiki
Arknights: Endfield Walkthrough & Guides Wiki
Pokemon FireRed and LeafGreen (FRLG) Walkthrough & Guides Wiki
Pokemon TCG Pocket (PTCGP) Strategies & Guides Wiki


Recommended Games
Diablo 4: Vessel of Hatred Walkthrough & Guides Wiki
Cyberpunk 2077: Ultimate Edition Walkthrough & Guides Wiki
Fire Emblem Heroes (FEH) Walkthrough & Guides Wiki
Yu-Gi-Oh! Master Duel Walkthrough & Guides Wiki
Super Smash Bros. Ultimate Walkthrough & Guides Wiki
Pokemon Brilliant Diamond and Shining Pearl (BDSP) Walkthrough & Guides Wiki
Elden Ring Shadow of the Erdtree Walkthrough & Guides Wiki
Monster Hunter World Walkthrough & Guides Wiki
The Legend of Zelda: Tears of the Kingdom Walkthrough & Guides Wiki
Persona 3 Reload Walkthrough & Guides Wiki


All rights reserved
©CAPCOM
The copyrights of videos of games used in our content and other intellectual property rights belong to the provider of the game.
The contents we provide on this site were created personally by members of the Game8 editorial department.
We refuse the right to reuse or repost content taken without our permission such as data or images to other sites.