How to Block and Perfect Guard
★ Arkveld Gamma Armor | MH Stories 3 Collab
☆ Version 1.041: Sororal α Armor | Shatterseal
★ How to Unlock Proof of a Hero Quest
☆ Omega Planetes | Savage Omega | Builds vs Omega
★ Armor Set Search updated for Ver 1.041
☆ HR50+ Builds | Tier List | Weapon Guides
Players can guard to reduce damage against attacks in Monster Hunter Wilds, and even negate damage fully with Perfect Guard. Find out how to guard and block, how to perform Perfect Guards, and how to counterattack here!
List of Contents
How to Guard and Block
Press the Block Button With the Weapon Drawn
| PC | |
|---|---|
| PlayStation | |
| Xbox |
| PC | |
|---|---|
| PlayStation | |
| Xbox |
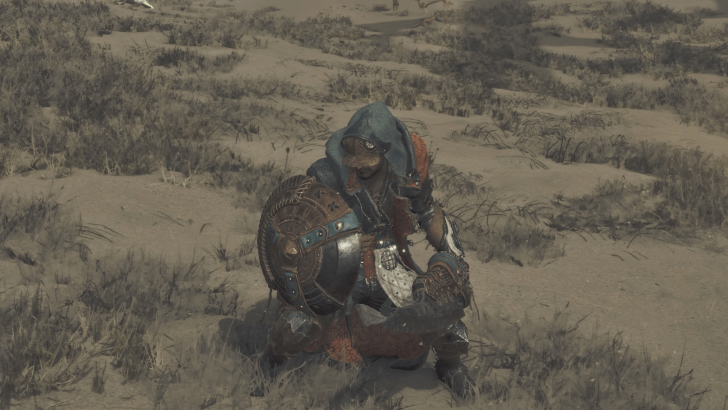
To guard and block attacks, press and hold the Guard button based on what platform you are playing on. Weapons that can guard will maintain a defensive stance for as long as the button is held.
For the Heavy Bowgun specifically, the hunter will Auto-Guard if the player is not firing and is attacked. However, players can also choose to manually guard with the weapon.
Only Certain Weapons can Guard
| All Weapons That Can Guard | ||
|---|---|---|
Not all weapons in Monster Hunter Wilds can guard. Outside of weapons that visibly carry a shield, only a handful of other weapons have the ability to block monster attacks. Above is a list of all weapons that can guard.
Charge Blade has Guard Points in its Moves
The Charge Blade has an exclusive mechanic called Guard Points that are embedded in its attacks. Certain attack animations will bring the weapon's shield in front of the hunter, which counts as a guarding motion, blocking attacks.
Charge Blade Weapon Guide and New Moves
How to Perfect Guard?
Guard Right Before a Monster Attack
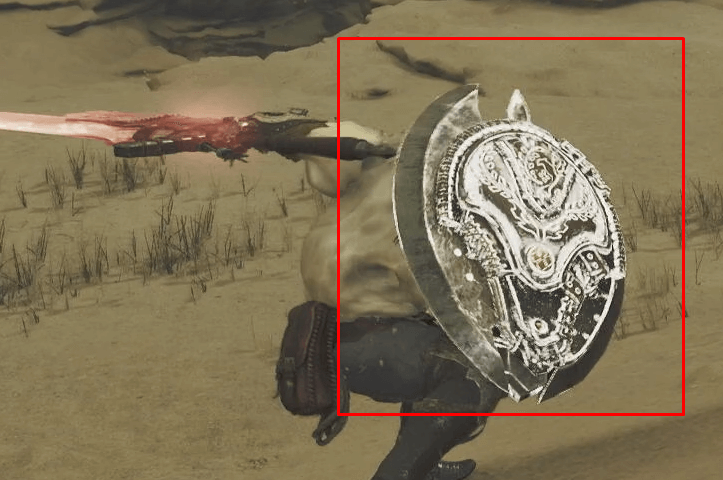
By pressing the block input button right before a monster attack hits, it will be considered a Perfect Block. You will know that you have performed a Perfect Guard when your screen flashes and a sound cue plays.
Perfect Guards will still consume Stamina liike a normal Guard does.
Perfect Guard Negates Damage
Perfect Blocks are different from normal Guards in that it fully negates damage unlike normal guards which only partially reduces damage taken. It also negates the downsides of blocking, like the sharpness decrease on Great Swords.
Triggers the Power Clash Mechanic
Additionally, performing a Perfect Guard against certain monster attacks will trigger the new Power Clash mechanic.
The Power Clash puts the hunter and monster in a brief struggle. Winning the struggle will damage and stagger the monster, opening it to further attacks.
Power Clash has a cooldown, so you will have to wait after performing one to perform another.
You Can Perform Various Actions After a Perfect Guard
Whenever Power Clash is on cooldown, depending on the weapon you have equipped, you can perform a variety of actions after performing a Perfect Guard.
Great Sword
| Action | |
|---|---|
| Charged Slash | |
| Wide Slash | |
| Offset Rising Slash | |
| Action | |
|---|---|
| Charged Slash | |
| Wide Slash | |
| Offset Rising Slash | |
| Action | |
|---|---|
| Charged Slash | |
| Wide Slash | |
| Offset Rising Slash | |
Sword and Shield
| Action | |
|---|---|
| Counter Slash | |
| Lateral Slash | |
| Charged Chop | |
| Shield Attack | |
| Backstep | |
| Action | |
|---|---|
| Counter Slash | |
| Lateral Slash | |
| Charged Chop | |
| Shield Attack | |
| Backstep | |
| Action | |
|---|---|
| Counter Slash | |
| Lateral Slash | |
| Charged Chop | |
| Shield Attack | |
| Backstep | |
Lance
| Action | |
|---|---|
| Return Thrust | |
| Payback Thrust | |
| Follow-Up Dash Attack | |
| Guard Dash | |
| Action | |
|---|---|
| Return Thrust | |
| Payback Thrust | |
| Follow-Up Dash Atttack | |
| Guard Dash | |
| Action | |
|---|---|
| Return Thrust | |
| Payback Thrust | |
| Follow-Up Dash Attack | |
| Guard Dash | |
Gunlance
| Action | |||
|---|---|---|---|
| Overhead Smash | | ||
| Shelling or Charged Shelling | | ||
| Wyvern's Fire | | ||
| Action | |
|---|---|
| Overhead Smash | |
| Charged Shelling | |
| Wyvern's Fire | |
| Action | |
|---|---|
| Overhead Smash | |
| Charged Shelling | |
| Wyvern's Fire | |
Charge Blade
| Action | |
|---|---|
| Savage Axe Slash | |
| Axe: Amped Element Discharge | |
| Action | |
|---|---|
| Savage Axe Slash | |
| Axe: Amped Element Discharge | |
| Action | |
|---|---|
| Savage Axe Slash | |
| Axe: Amped Element Discharge | |
Heavy Bowgun
| Action | |
|---|---|
| Fire or Wyvernheart Ignition | |
| Focus Blast: Wyvern Howl Shot | |
| Reload | |
| Wyverncounter Ignition | If in Ignition Mode |
| Sidestep | |
| Action | |
|---|---|
| Fire or Wyvernheart Ignition | |
| Focus Blast: Wyvern Howl Shot | |
| Reload | |
| Wyverncounter Ignition | If in Ignition Mode |
| Sidestep | |
| Action | |
|---|---|
| Fire or Wyvernheart Ignition | |
| Focus Blast: Wyvern Howl Shot | |
| Reload | |
| Wyverncounter Ignition | If in Ignition Mode |
| Sidestep | |
Monster Hunter Wilds Related Guides
All Game Mechanics Guides
Comment
Author

How to Block and Perfect Guard
Premium Articles

Rankings
- We could not find the message board you were looking for.
Gaming News


![Monster Hunter Stories 3 Review [First Impressions] | Simply Rejuvenating](https://img.game8.co/4438641/2a31b7702bd70e78ec8efd24661dacda.jpeg/thumb)
Popular Games

Genshin Impact Walkthrough & Guides Wiki
Honkai: Star Rail Walkthrough & Guides Wiki
Umamusume: Pretty Derby Walkthrough & Guides Wiki
Pokemon Pokopia Walkthrough & Guides Wiki
Resident Evil Requiem (RE9) Walkthrough & Guides Wiki
Monster Hunter Wilds Walkthrough & Guides Wiki
Wuthering Waves Walkthrough & Guides Wiki
Arknights: Endfield Walkthrough & Guides Wiki
Pokemon FireRed and LeafGreen (FRLG) Walkthrough & Guides Wiki
Pokemon TCG Pocket (PTCGP) Strategies & Guides Wiki


Recommended Games
Diablo 4: Vessel of Hatred Walkthrough & Guides Wiki
Cyberpunk 2077: Ultimate Edition Walkthrough & Guides Wiki
Fire Emblem Heroes (FEH) Walkthrough & Guides Wiki
Yu-Gi-Oh! Master Duel Walkthrough & Guides Wiki
Super Smash Bros. Ultimate Walkthrough & Guides Wiki
Pokemon Brilliant Diamond and Shining Pearl (BDSP) Walkthrough & Guides Wiki
Elden Ring Shadow of the Erdtree Walkthrough & Guides Wiki
Monster Hunter World Walkthrough & Guides Wiki
The Legend of Zelda: Tears of the Kingdom Walkthrough & Guides Wiki
Persona 3 Reload Walkthrough & Guides Wiki


All rights reserved
©CAPCOM
The copyrights of videos of games used in our content and other intellectual property rights belong to the provider of the game.
The contents we provide on this site were created personally by members of the Game8 editorial department.
We refuse the right to reuse or repost content taken without our permission such as data or images to other sites.