What is Critical Distance?
★ Arkveld Gamma Armor | MH Stories 3 Collab
☆ Version 1.041: Sororal α Armor | Shatterseal
★ How to Unlock Proof of a Hero Quest
☆ Omega Planetes | Savage Omega | Builds vs Omega
★ Armor Set Search updated for Ver 1.041
☆ HR50+ Builds | Tier List | Weapon Guides
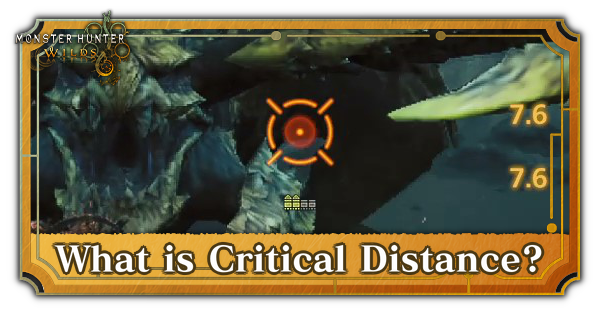
Critical Distance in Monster Hunter Wilds refers to an ammo type or charged attack's optimal range where they can deal the most damage. Read on to learn what Critical Distance is, the Critical Distance for Bowguns and Bows, and the skills related to Critical Distance.
List of Contents
What is Critical Distance?
Optimal Range Indicator for Ranged Weapons
| Ranged Weapons | ||
|---|---|---|
※ Press on the weapon to check out a guide on how to use them!
Critical Distance refers to the optimal range to maximize the damage of Ranged Weapons, allowing you to access their high DPS (Damage Per Second) potential. Depending on the ammo type or amount of time you spend charging your bow, the Critical Distance will change.
With this in mind, always make sure to only spend your ammunition whilst in Critical Distance for efficiency's sake. However, there are niche cases for the Bow, wherein you will want to be up close to the monster so that all your arrows hit for certain moves.
Changes With Certain Modifiers
Modifiers refers to the attachments you can equip on Ranged Weapons to alter their properties. Specific modifiers can increase or decrease the Critical Distance, allowing you to customize the distance to suit your playstyle!
How to Find the Critical Distance for Bowguns
Critical Distance Depends on the Ammo Type
| Ammo Type | Critical Distance |
|---|---|
| Medium | |
| Short | |
| Long | |
| Medium-Long | |
| Fixed Damage | |
| Fixed Damage | |
| Short-Mid |
The Bowguns' Critical Distance changes depending on the ammo type you are using. Pierce Ammo is used from a farther range akin to a sniper, while Spread Ammo lets you play up close like a shotgun.
Additionally, Elemental ammunition has received a change in property wherein it changes depending on the Element. For example, Thunder Ammo now has lightning arcs, while Freezing Ammo breaks into shards that dig deep into monsters.
Bowgun Critical Distance Reticle Indicators
| Distance | Reticle |
|---|---|
| Critical Distance | 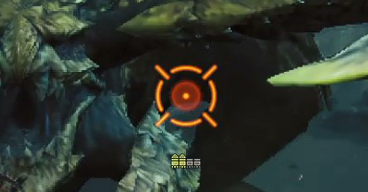 |
| Normal Distance | 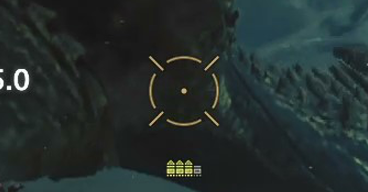 |
| Out of Range | 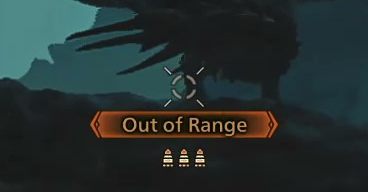 |
| No Target | 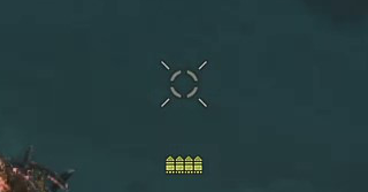 |
Both Bowguns share the same reticle, wherein the additional diagonal lines help the player gauge out the possible deviation and recoil of the bullets.
How to Find the Critical Distance for Bows
Critical Distance Depends on the Charge Type
| Charge | Critical Distance |
|---|---|
| Charged Shot 1 | Short-Mid |
| Charged Shot 2 | Short-Mid |
| Charged Shot 3 | Mid-Long |
| Charged Shot 4 | Mid-Long |
| Dragon Piercer | Short-Mid |
The Bow's Critical Distance will be based on charge levels, meaning you must time your attacks depending on your current position. Naturally, the longer you charge your bow, the farther arrows can fly, resulting in different Critical Distance.
Bow Critical Distance Reticle Indicators
| Distance | Reticle |
|---|---|
| Critical Distance | 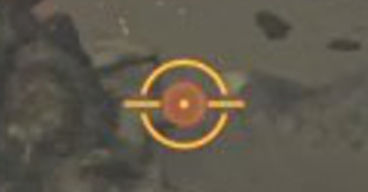 |
| Normal Distance | 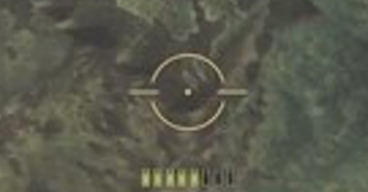 |
| Out of Range | 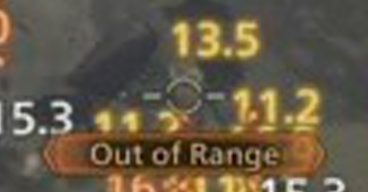 |
| No Target | 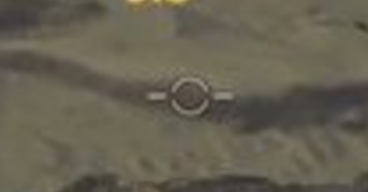 |
The difference that the Bow reticle has is that it is not static like the Bowguns since you can see the amount of charge you have accumulated. This feature is a quality-of-life addition that allows you to quickly assess whether or not you are using the right amount of charge!
Skills Related to Critical Distance
| Skill | Type | Effect |
|---|---|---|
 Ballistics Ballistics
|
Weapon |
Extends the range in which ammo and arrows have maximum power.
Lv. 1: Slightly extends range. Lv. 2: Extends range. Lv. 3: Greatly extends range. |
Monster Hunter Wilds Related Guides
All Game Mechanics Guides
Comment
Author

What is Critical Distance?
Premium Articles

Rankings
Gaming News


![Monster Hunter Stories 3 Review [First Impressions] | Simply Rejuvenating](https://img.game8.co/4438641/2a31b7702bd70e78ec8efd24661dacda.jpeg/thumb)
Popular Games

Genshin Impact Walkthrough & Guides Wiki
Umamusume: Pretty Derby Walkthrough & Guides Wiki
Pokemon Pokopia Walkthrough & Guides Wiki
Honkai: Star Rail Walkthrough & Guides Wiki
Monster Hunter Stories 3: Twisted Reflection Walkthrough & Guides Wiki
Arknights: Endfield Walkthrough & Guides Wiki
Wuthering Waves Walkthrough & Guides Wiki
Zenless Zone Zero Walkthrough & Guides Wiki
Pokemon TCG Pocket (PTCGP) Strategies & Guides Wiki
Monster Hunter Wilds Walkthrough & Guides Wiki


Recommended Games
Diablo 4: Vessel of Hatred Walkthrough & Guides Wiki
Cyberpunk 2077: Ultimate Edition Walkthrough & Guides Wiki
Fire Emblem Heroes (FEH) Walkthrough & Guides Wiki
Yu-Gi-Oh! Master Duel Walkthrough & Guides Wiki
Super Smash Bros. Ultimate Walkthrough & Guides Wiki
Pokemon Brilliant Diamond and Shining Pearl (BDSP) Walkthrough & Guides Wiki
Elden Ring Shadow of the Erdtree Walkthrough & Guides Wiki
Monster Hunter World Walkthrough & Guides Wiki
The Legend of Zelda: Tears of the Kingdom Walkthrough & Guides Wiki
Persona 3 Reload Walkthrough & Guides Wiki


All rights reserved
©CAPCOM
The copyrights of videos of games used in our content and other intellectual property rights belong to the provider of the game.
The contents we provide on this site were created personally by members of the Game8 editorial department.
We refuse the right to reuse or repost content taken without our permission such as data or images to other sites.