Dual Blades Weapon Guide and Best Combos
★ Arkveld Gamma Armor | MH Stories 3 Collab
☆ Version 1.041: Sororal α Armor | Shatterseal
★ How to Unlock Proof of a Hero Quest
☆ Omega Planetes | Savage Omega | Builds vs Omega
★ Armor Set Search updated for Ver 1.041
☆ HR50+ Builds | Tier List | Weapon Guides
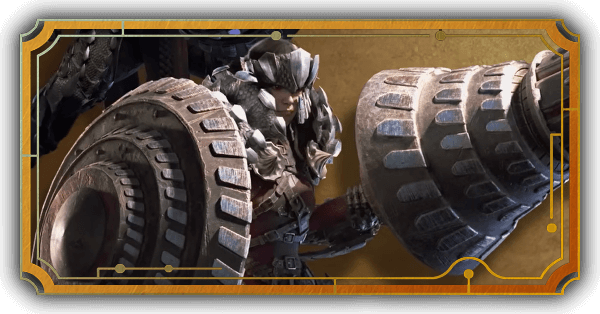
Monster Hunter Wilds' Dual Blades are a rapid attacking weapon that can do multiple hits in a short period of time. See all the new moves for the Dual Blades, its mechanics, controls, best combos, advanced tips, and how good it is!
| Dual Blades Guides | ||
|---|---|---|
| Weapon Guide | Builds | Tree |
List of Contents
Dual Blades Balance Adjustment
Dual Blades Update Ver. 1.021
| Dual Blades Changes |
|---|
|
・(Buff) Adjusted Focus Strike: Turning Tide so that it can now be chained into Turning Tidedrill, a new finisher action that delivers a multi-hit attack to a targeted wound, by pressing △ (PS5) / Y (Xbox) / default Right Click (PC). ・(Buff) Increased the effect duration triggered by a Perfect Evade while in Demon Boost Mode. ・(Buff) Movement speed during Demon Mode has been increased. ・(Buff) The window for a successful Perfect Evade has been extended very slightly. ・(Fixed) Improved the responsiveness of directional changes when using Screw Slicer during Focus Mode. |
The Dual Blades received a couple of updates in Update Ver. 1.021 on August 13, 2025 (UTC). This include an adjustment to its Focus Strike, Perfect Evades, and even Demon Mode.
Dual Blades Mechanics
| List of Dual Blade Mechanics |
|---|
|
|
Use Demon Mode to Access Stronger Moves
Demon Mode is an additional form or stance that Dual Blade users can use to execute stronger and faster moves. This will come at a cost of gradual stamina drain so be sure to turn off this mode by pressing R2 once again to avoid unwanted stamina loss.
Fill Up the Demon Gauge
The core mechanic for Dual Blades is that it uses the Demon Gauge to enable both Demon and Archdemon Modes. To fill up the demon gauge, you must use attacks that do not consume your gauge. That means everything outside of Blade Dance or Demon Flurry (Demon Flurry Rush is a different move).
Once the gauge is filled up, your default state outside of Demon Mode will turn into Archdemon Mode which allows you to weave additional moves exclusive to this stance.
Archdemon Mode and Demon Mode Can Be Used Simultaneously
Despite being 2 different modes, you can use them both on the fly during your Full Blade Flurry combo. This will allow you to use better moves from both modes simultaneously such as the stronger basic combo from Demon Fangs instead of Double Slash, Blade Dance, and Demon Flurry at the same time.
Mounting Stops Your Demon Gauge Reduction
Another thing to note is whenever you mount a monster, your Demon Gauge will stop decreasing for the entire duration you are mounted. This can be useful whenever you need to stall time for your teammates to recover so you can prolong the duration of your Demon/Archdemon Mode effectively.
Use Focus Mode to Aim Attacks
With the new addition of Focus Mode, it is now preferred to use it as much as you can since it can adjust where your attacks are facing even during the combo, allowing you to target specific parts on the go. This also enables your Blade Dance to move closer to where you crosshair is aiming at. We recommend using it when you are full commiting to a combo so you can aim to hit their weakspots and wounds for more damage.
How to Use Focus Mode and Focus Strike
Blade Dance Extensions and Demon Flurry
| Input |
|---|
| Input |
|---|
| Input |
|---|
Note: Triangle + Circle will always continue your chosen string while using R2 will cause you to switch to the other combo string.
The Dual Blades' demon and archdemon mode now have multiple options for a full combo. Instead of relying on a single input for Blade Dance, you can now transition between two sets of combos, mainly Blade Dance I, II, and III, and/or Demon Flurry I and II. Instead of being committed to a full attack animation with Blade Dance, you can now transition this move into either one of the two strings above for a wider array of attack options.
Execute Demon Dodge to Boost Attack
| Input |
|---|
| Input |
|---|
| Input |
|---|
When you perfectly dodge a monster's attack while in Demon Mode, you will perform a Demon Dodge. This will cause your dodges to spiral forward and deal damage, allowing you to enter a powered-up state called Demon Boost Mode which increases your damage for 12 seconds.
Keep in mind that once you enter Demon Boost Mode, all your dodges will become Demon Dodges until you either sheath your weapon or the duration expires.
Dual Blades Controls
Basic Controls
| Action | |
|---|---|
| Double Slash | |
| Lunging Strike | |
| Demon Mode | |
| Action | |
|---|---|
| Double Slash | |
| Lunging Strike | |
| Demon Mode | |
| Action | |
|---|---|
| Double Slash | |
| Lunging Strike | |
| Demon Mode | |
Demon Mode Controls
| Action | |
|---|---|
| Blade Dance | |
| Demon Flurry | During Archdemon Mode |
| Demon Dodge | |
| Action | |
|---|---|
| Blade Dance | |
| Demon Flurry | During Archdemon Mode |
| Demon Dodge | |
| Action | |
|---|---|
| Blade Dance | |
| Demon Flurry | During Archdemon Mode |
| Demon Dodge | |
Best Dual Blade Combos
| List of Dual Blade Combos |
|
|---|
Full Blade Flurry Combo
| Combo Input |
|---|
( |
| Combo Input |
|---|
( |
| Combo Input |
|---|
( |
Your strongest combo burst that you can use against monsters that are vulnerable for an extended period of time. This makes use of both the combos from Blade Dance and Demon Flurry, giving you its highest damaging combo string and a small window of hyper armor while switching between modes.
Take note that this combo starts and ends in Demon Mode so try to keep track of your stamina. Since this is now a 4-stage combo, you can always opt to dodge in between moves so you can adjust your positioning to somewhere more favorable and try to start the full combo again.
Demon Fang into Demon Flurry Rush
| Combo Input |
|---|
| Requires Demon Mode |
| Combo Input |
|---|
| Requires Demon Mode |
| Combo Input |
|---|
| Requires Demon Mode |
A short yet extremely mobile Demon Mode combo without any animation locks. This combo allows you to react and Perfect Dodge between each button input, while still filling up the Demon Gauge efficiently.
We recommend using this combo as often as possible since this lets you reposition while attacking and give you enough time to react with a Perfect Dodge to gain that damage boost. Just make sure to avoid spamming buttons and use the Demon Fang attacks to determine whether you will dodge away or continue attacking as they only have a very short animation lock.
Demon Flurry into Demon Mode
| Combo Input |
|---|
| ( Requires Archdemon Mode activated |
| Combo Input |
|---|
| Requires Archdemon Mode activated |
| Combo Input |
|---|
| ( Requires Archdemon Mode activated |
Your bread-and-butter Archdemon Mode combo for getting into Demon Mode without having to go through the stance animation for it. You end up into Demon Mode easily after performing Blade Dance III, a move with the highest damage and motion value.
We recommend using this combo once you have Archdemon Mode activated since you can go straight to Demon Flurry Rush to recover the spent Demon Gauge, exit out of Demon Mode for stamina, and repeat the combo.
Demon Dodge into Screw Slicer
| Combo Input |
|---|
| Requires Demon/Archdemon Mode |
| Combo Input |
|---|
| Requires Demon/Archdemon Mode |
| Combo Input |
|---|
| Requires Demon/Archdemon Mode |
A high skill-based Demon/Archdemon Mode move with the farthest distance that requires you to initiate a Perfect Dodge in order to perform. Once you have Demon Boost Mode activated from perfect dodging, you can press the normal attack input to execute Screw Slicer, a move similiar to Demon Dodge that deals more damage and has no stamina cost.
We recommend making use of this as much as you can to help you reposition better for hitting weak spots and stop you from attacking in one place too much.
Demon Flurry Rush Combo
| Combo Input |
|---|
| Combo Input |
|---|
| Combo Input |
|---|
The fastest way to fill up your Demon Gauge is by using the Demon Flurry Rush combo in Demon Mode. The range that Demon Flurry Rush can cover is quite far and can practically fill up your Demon Gauge by more than half if you hit all your attacks. Ideally, it is best to spam Demon Flurry Rush only and dodge in between so the monster has a hard time tracking your movements.
Keep in mind that you do not have to commit to the full combo as the second and third moves locks you in place, making you vulnerable to attacks.
Follow up with Blade Dance
| Combo Input |
|---|
| Combo Input |
|---|
| Combo Input |
|---|
The Demon Flurry Rush combo also provides access to transitions into a full Demon Mode or Archdemon Mode combo, allowing you to make use of your recently filled Demon Gauge immediately.
Basic Demon Fang Combo
| Combo Input |
|---|
| Combo Input |
|---|
( |
| Combo Input |
|---|
A quick high-burst combo for the Dual Blades that can help with filling up the Demon Gauge. It can actively be used while in Demon Mode and is a great option to use if you ever have a short window of time to unleash damage.
Try to combo the first two attacks with Demon Flurry Rush so you can reposition easily without sacrificing your damage up time.
Dual Blades Advanced Tips
| List of Dual Blades Advanced Tips |
|---|
|
|
Mix Combos to Fill Up the Demon Gauge
The Dual Blades has a variety of moves that can be linked together from other combos. The most commonly used moves is the Demon Fang into Demon Flurry Rush as this allows you to quickly build up your Demon Gauge while still staying mobile throughout your combo.
Another combo to take note of is the new Demon Flurry moves. Once you have activated your Archdemon Mode, you can start performing Demon Flurry into Demon Mode which lets you end up in Demon Mode again to start recovering all the Demon Gauge you spent.
These are one of the best combos you can perform for the Dual Blades as this provides good amount of damage without any long animations that can lock you in place. It is also worth to noting that although Sixfold Demon Slash and Double Roundslash fill up the Demon Gauge the highest, the time it takes to reach the move has longer animation locks which could make you vulnerable to certain attacks.
Use Focus Strike on Wounds to Recover Stamina and Demon Gauge
| Action |
|---|
Press and Hold |
| Action |
|---|
| Press and Hold |
| Action |
|---|
| Press and Hold |
The Focus Strike: Turning Tide has a long invulnerability window while you are both midair and latched on to the monster which is great for repositioning, avoiding attacks, and destroying wounds. The most important part is that while you are in Demon Mode, hitting a wound with this move will temporarily remove your constant stamina drain but will still fill up the Demon Gauge which is great for maintaining the most important key mechanics of the Dual Blades.
Keep in mind to always use this move once you have opened wounds on the head, body, wings, and tail parts since this can destroy them all in one move.
Dodge Between Combos
The Dual Blades excel at making fast combos with great mobility. Since Blade Dance is no longer a huge commitment, you can opt to dodge and reposition after Blade Dance I, then use Demon Flurry Rush to close the gap of the part you want to hit and try to start Blade Dance again until you need to reposition.
Make sure to avoid spamming buttons and observe the monster's attack patterns before moving on to your next attack as you will always have time to perform a dodge due to your short attack animations.
Use Screw Slicer to Close Gaps
| Action |
|---|
| Enter Demon/Archdemon Mode → Dodge → Requires Demon Boost Mode |
| Action |
|---|
| Enter Demon/Archdemon Mode → Dodge → Requires Demon Boost Mode |
| Action |
|---|
| Enter Demon/Archdemon Mode → Dodge → Requires Demon Boost Mode |
Upon activating Demon Boost Mode after perfectly dodging an attack, you have an option to perform Screw Slicer, a move similiar to Demon Dodge with more damage but without the stamina cost. Use this as much as possible in order to reposition yourself freely without relying too much on stamina for movement.
Switch Between Demon and Archdemon Modes
| Stay in Current Mode | Switch Modes |
|---|---|
| Stay in Current Mode | Switch Modes |
|---|---|
| Stay in Current Mode | Switch Modes |
|---|---|
With the new Blade Dance and Demon Flurry variations, these moves allow the Dual Blades to seamlessly switch between Demon Mode and Archdemon Mode depending on your button input. The Triangle + Circle buttons will prevent you from changing your current mode, while the R2 button will switch your current mode.
We recommend switching to Archdemon Mode whenever your stamina is low as this allows you to weave back into Demon Mode to maintain your Demon Gauge for performing your most powerful moves.
Bring and Equip Stamina Items and Skills
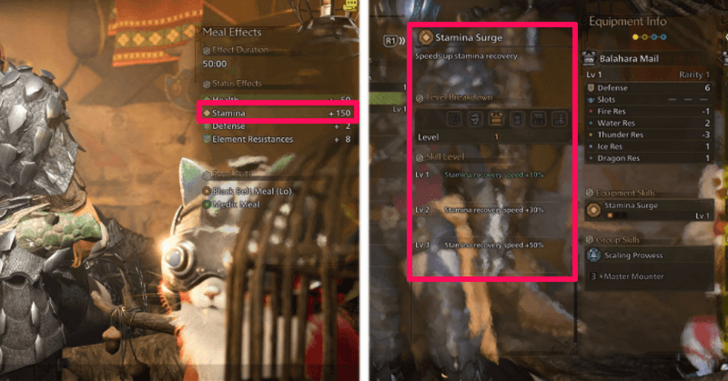
The Dual Blades are incredibly stamina reliant, especially in Demon Mode so try to bring Energy Drinks to keep your stamina up and Well-done Steaks for maintaining your maximum stamina.
Alternatively, skills such as Marathon Runner and Constitution are also capable of helping the Dual Blades manage stamina which in turn, allows you to stay in Demon Mode longer.
How to Restore and Increase Stamina
Equip Sharpness Skills to Manage Sharpness Loss
| Skill | Effect |
|---|---|
| Speed Sharpening | Speeds up weapon sharpening when using a whetstone. |
| Razor Sharp | Grants a chance of no sharpness loss. |
| Master's Touch | Prevents your weapon from losing sharpness during critical hits. |
| Handicraft | Extends the weapon sharpness gauge. However, it will not increase the gauge past its maximum. |
| Protective Polish | Weapon sharpness does not decrease for a set time after sharpening. |
One of the major downsides of Dual Blades is that its Sharpness rapidly depletes with how often it attacks. Make sure to use skills like Speed Sharpening so you can have an easier time sharpening your weapon with a Whetstone.
How Good Are The Dual Blades?
Tier List Ranking
| Weapon Ranking | ||
|---|---|---|
| Damage Type | Entry Barrier | Difficulty to Master |
| Low | ★★★☆☆ | |
| Pros and Cons | ||
|
|
||
Entry Barrier pertains to how easy it is to learn the weapon from scratch, while Difficulty to Master is a rating on how difficult it is to perfectly execute the weapon mechanics.
The Dual Blades is currently ranked as a A Tier weapon since it has one of the best mobility in the game and can deal great elemental damage with the right skills equipped.
This weapon is fairly easy to learn since there are only a few combos to maximize your damage output, but it is difficult enough since it requires you to manage your stamina and Demon Gauge.
Monster Hunter Wilds Related Guides
All Weapon Guides
| All Weapon Tutorials | |||||
|---|---|---|---|---|---|
 Great Sword Great Sword |
 Long Sword Long Sword |
 Sword & Shield Sword & Shield |
|||
 Dual Blades Dual Blades |
 Hammer Hammer |
 Hunting Horn Hunting Horn |
|||
 Lance Lance |
 Gunlance Gunlance |
 Switch Axe Switch Axe |
|||
 Charge Blade Charge Blade |
 Insect Glaive Insect Glaive |
 Light Bowgun Light Bowgun |
|||
 Heavy Bowgun Heavy Bowgun |
 Bow Bow |
||||
All Weapon Trees
| All Weapon Trees | |||||
|---|---|---|---|---|---|
 Great Sword Great Sword |
 Long Sword Long Sword |
 Sword & Shield Sword & Shield |
|||
 Dual Blades Dual Blades |
 Hammer Hammer |
 Hunting Horn Hunting Horn |
|||
 Lance Lance |
 Gunlance Gunlance |
 Switch Axe Switch Axe |
|||
 Charge Blade Charge Blade |
 Insect Glaive Insect Glaive |
 Kinsects Kinsects |
|||
 Light Bowgun Light Bowgun |
 Heavy Bowgun Heavy Bowgun |
 Bow Bow |
|||
Comment
So how do I enter Archdemon Mode exactly? Just being in Demon mode, fill up gauge and it auto switches?
Author

Dual Blades Weapon Guide and Best Combos
Premium Articles

Rankings
Gaming News


![Monster Hunter Stories 3 Review [First Impressions] | Simply Rejuvenating](https://img.game8.co/4438641/2a31b7702bd70e78ec8efd24661dacda.jpeg/thumb)
Popular Games

Genshin Impact Walkthrough & Guides Wiki
Honkai: Star Rail Walkthrough & Guides Wiki
Umamusume: Pretty Derby Walkthrough & Guides Wiki
Pokemon Pokopia Walkthrough & Guides Wiki
Resident Evil Requiem (RE9) Walkthrough & Guides Wiki
Monster Hunter Wilds Walkthrough & Guides Wiki
Wuthering Waves Walkthrough & Guides Wiki
Arknights: Endfield Walkthrough & Guides Wiki
Pokemon FireRed and LeafGreen (FRLG) Walkthrough & Guides Wiki
Pokemon TCG Pocket (PTCGP) Strategies & Guides Wiki


Recommended Games
Diablo 4: Vessel of Hatred Walkthrough & Guides Wiki
Cyberpunk 2077: Ultimate Edition Walkthrough & Guides Wiki
Fire Emblem Heroes (FEH) Walkthrough & Guides Wiki
Yu-Gi-Oh! Master Duel Walkthrough & Guides Wiki
Super Smash Bros. Ultimate Walkthrough & Guides Wiki
Pokemon Brilliant Diamond and Shining Pearl (BDSP) Walkthrough & Guides Wiki
Elden Ring Shadow of the Erdtree Walkthrough & Guides Wiki
Monster Hunter World Walkthrough & Guides Wiki
The Legend of Zelda: Tears of the Kingdom Walkthrough & Guides Wiki
Persona 3 Reload Walkthrough & Guides Wiki


All rights reserved
©CAPCOM
The copyrights of videos of games used in our content and other intellectual property rights belong to the provider of the game.
The contents we provide on this site were created personally by members of the Game8 editorial department.
We refuse the right to reuse or repost content taken without our permission such as data or images to other sites.
Hi! You need to fill up the demon gauge first while in Demon Mode, then you'll automatically activate Archdemon Mode. We've updated our guide to state this too. Hope this helps! :)