Zoh Shia Investigation: How to Spawn and Farm
★ Arkveld Gamma Armor | MH Stories 3 Collab
☆ Version 1.041: Sororal α Armor | Shatterseal
★ How to Unlock Proof of a Hero Quest
☆ Omega Planetes | Savage Omega | Builds vs Omega
★ Armor Set Search updated for Ver 1.041
☆ HR50+ Builds | Tier List | Weapon Guides
Zoh Shia is a Guardian Monster who can be fought at HR 50 of High Rank in Monster Hunter Wilds' Title Update 1. In this guide, you will find information about Zoh Shia, how to unlock it in High Rank, how to fight it again and farm its investigations, how to avoid its AoE attacks, its weakness, drops, moveset, and tips on how to beat it!
| All Related Zoh Shia Articles | ||
|---|---|---|
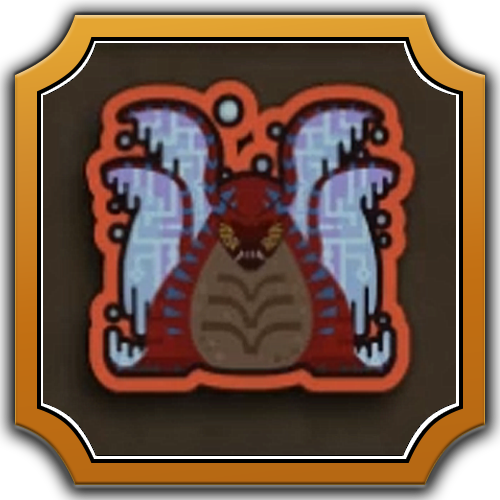
 Zoh Shia Zoh Shia
|
 Weapons Weapons
|
 Armor Sets Armor Sets
|
List of Contents
How to Farm Zoh Shia Investigations
Spawn by Resting in Ruins of Wyveria and Set to Inclemency and Nightime
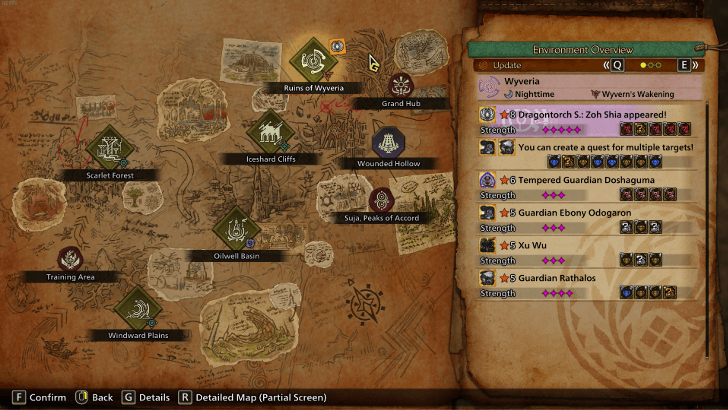
After completing the story missions from Werner and Alma. Zoh Shia investigations will start appearing at the Dragontorch in Ruins of Wyveria, making it possible to fight Zoh Shia again in High Rank. Save these Field Quests as Investigations to repeat them and farm Zoh Shia's materials.
Based on our testing, the easiest Weather/Time pattern for Zoh Shia to appear in was Inclemency and Nighttime, which typically yields a spawn every 2-3 rests. Note that the spawn is based on random chance, so it may take longer – simply keep resting until Zoh Shia appears.
Join Zoh Shia High Rank Hunts From SOS
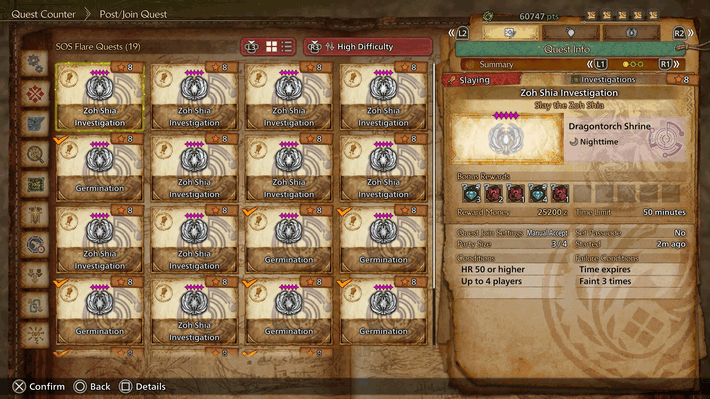
Another way to farm Zoh Shia is by joining SOS, and helping other players hunt Zoh Shia. This allows you to hunt Zoh Shia as often as you like, provided that you can join other players through the SOS feature.
No Optional Mission for Zoh Shia High Rank
As of the release of Title Update 1, there are currently no Zoh Shia High Rank Optional Missions. To face this Monster again after beating it the first time during the course of the Assignment, the only way to fight it again is through spawning it at random on your map.
How to Unlock High Rank Zoh Shia
Complete New Story Mission in Title Update 1
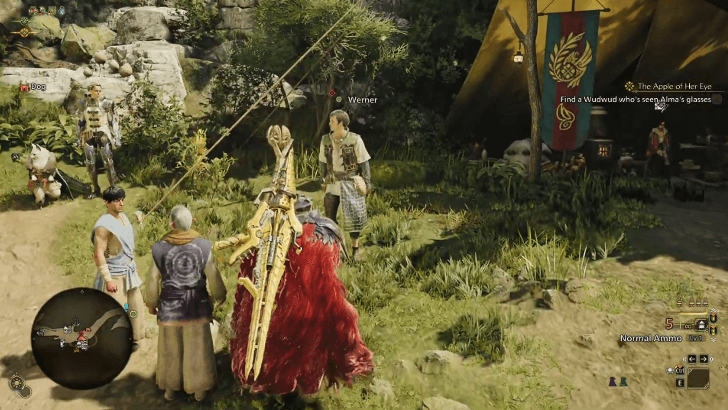
To rematch Zoh Shia, you need to complete the story missions An Unexpected Summons and A First Cry after downloading the Title Update 1 patch. To get access to these story missions, you need to first reach HR 50 and complete Chapter 6-1.
To begin the story mission, head to Suja, Peaks of Accord and talk to Werner.
Title Update 1 Release Date and Monsters
Previously Available as Low Rank Final Boss

Before Title Update 1, Zoh Shia can only be fought as the final boss of Low Rank. After beating it during the quest, it was no longer possible to fight Zoh Shia again, apart from joining SOS quests.
After the new update, Zoh Shia can now be fought in High Rank. Weapons and armor based on it can now be crafted using materials obtained from the monster.
Walkthrough and List of Main Story Chapters
How to Prepare for Zoh Shia Fight
Increase Your Fire Resistance
Raising your Fire Resistance to 20 can help nullify Fireblight from Zoh Shia's attacks.
This is helpful if you are having trouble managing your health while taking damage from being on fire.
Armor with High Fire Resistance
| Armor Set | Stats |
|---|---|
| Nu Udra β Armor Set | ・300 Defense ・25 Fire Res ・0 Thunder Res |
| Ajarakan β Armor Set | ・240 Defense ・15 Fire Res ・5 Thunder Res |
| Rathalos β Armor Set | ・240 Defense ・15 Fire Res ・-10 Thunder Res |
| Guardian Rathalos β Armor Set | ・240 Defense ・15 Fire Res ・-10 Thunder Res |
| Arkveld (Arkvulcan) β Armor Set | ・330 Defense ・10 Fire Res ・-5 Thunder Res |
| Guardian Arkveld β Armor Set | ・330 Defense ・10 Fire Res ・-5 Thunder Res |
The β armor set of Nu Udra gives high Fire Resistance from all the armor pieces, and you can also take advantage of the skills from the set.
Additionally, Arkveld and Guardian Arkveld armor pieces can also be useful due to its high total Defense and armor skills, even if the sets only give a small Fire Resistance boost.
Skills that Give Fire Resistance
| Skill | Effect |
|---|---|
| Fire Resistance |
Lv. 1: Fire Res +6 Lv. 2: Fire Res +12 Lv. 3: Fire Res +20, Defense +10 |
| Defense Boost |
Lv. 4: Defense +5% with +20 bonus, All Elem Res +3 Lv. 5: Defense +8% with +20 bonus, All Elem Res +3 Lv. 6: Defense +8% with +35 bonus, All Elem Res +5 Lv. 7: Defense +10% with +35 bonus, All Elem Res +5 |
| Elemental Absorption |
Lv. 1: While active, slightly increases elemental attack, and resistance to element taken at activation by 4 Lv. 2: While active, moderately increases elemental attack, and resistance to element taken at activation by 6 Lv. 3: While active, increases elemental attack, and resistance to element taken at activation by 8 |
The skills listed above can help increase Fire Resistance. The Fire Resistance skill itself can be easily obtained by using any free decoration slots that you have.
Use Specialty Meal Buffs
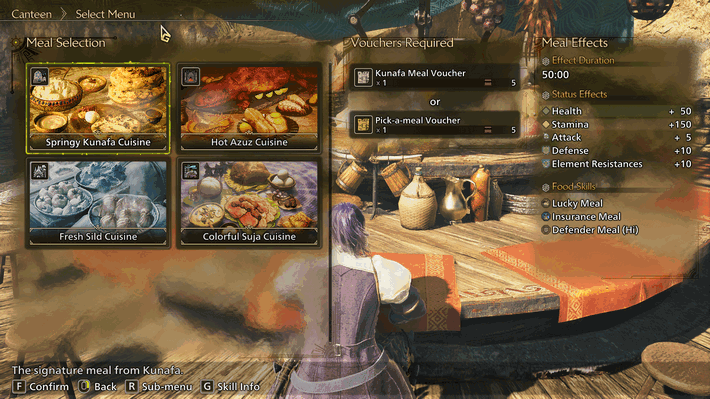
With the introduction of the Gathering Hub Canteen, players can use Pick-a-meal Vouchers or Regional Vouchers to select and eat meals from the different villages.
The guaranteed Meal Buffs that the Specialty Meals provide can aid during Zoh Shia hunts, especially with Insurance Meal, which gives you an extra try if you get carted during the hunt.
Best Specialty Meal Effects
| Meal | Effect |
|---|---|
| All Meals | ・Stamina +50 ・Attack +50 ・Defense +10 ・Elemental Resistances +10 ・Meal Insurance ・2 Food Skills (Random) Effective Duration: 50 Minutes |
| Kunafa | ・Carver Meal ・Insurance Meal ・Tumbler Meal (Hi) |
| Azuz | ・Lucky Meal ・Insurance Meal ・Defender Meal (Hi) |
| Suja Village | ・Exploiter Meal ・Insurance Meal ・Caprice Meal (Hi) |
The specialty meals from Kunafa, Azuz, and Suja all provide exceptional buffs when facing against Zoh Shia, especially since these provide additional rewards from Carver, Lucky, and Exploiter, on top of the Insurance Meal and stat buffs.
We do not recommend the Sild specialty meal, since the meal buff it provides is for capturing, and currently, the only way to hunt Zoh Shia is through Slaying it.
Equip Wind Pressure Resistance
Some of Zoh Shia's moves and phase transitions will stagger you from where you are standing due to the wind from its moves. If you do not want to be affected from these, you can try fitting in armor pieces, decorations, or talismans with the Windproof skill.
How to Avoid Zoh Shia's AoE Attack
Fast Travel to the Tent
An easy way to avoid Zoh Shia's insta-kill AoE attack is simply opening the map and traveling back to the tent.
Once you're back at the tent, you can wait for a minute while Zoh Shia completes its grand attack. Use the time to also stock up on items inside your tent or eat another meal if your Food Skills time out.
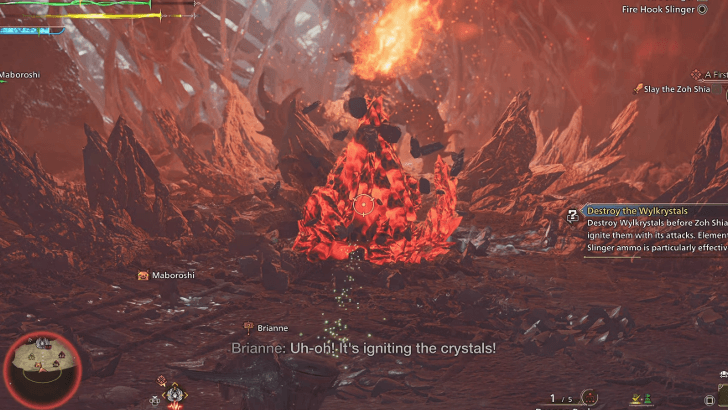
Destory Giant Wylk Crystals with Elemental Slinger Ammo
Another way to avoid the AoE attack is by reducing the area affected by the inferno. Use elemental Slinger ammo to shoot at the giant Wylk cyrstals that appear on the ground to destroy them.
Zoh Shia's AoE attack extends up to where the crystals are, so destroying them will give you free space to move around in.
Run to the Southern Edge of the Area
If you do not have any more elemental Slinger ammo, you can simply run to the far southern edge of the area to avoid the AoE attack.
Run Behind Zoh Shia During Subsequent AoE Attacks
After initially executing its AoE attack, Zoh Shia will be able to randomly use this move anywhere.
When it prepared this attack again, you can simply run around behind Zoh Shia to avoid the move.
How to Beat Zoh Shia
| Zoh Shia Fight Phases | ||
|---|---|---|
| Phase 1 | Phase 2 | Phase 3 |
Phase 1 Guide
| Zoh Shia Phase 1 Tips |
|---|
|
|
Break Off Its Crystals
At the start of the hunt, Zoh Shia will be completely covered in craggy armor, which dampens the damage you deal to it. Focus on breaking off the armor on its head and forelegs as they are the most accessible weak spots.
Additionally, you can't wound parts that are covered with these. Breaking them off gives you access to create and break wounds on Zoh Shia.
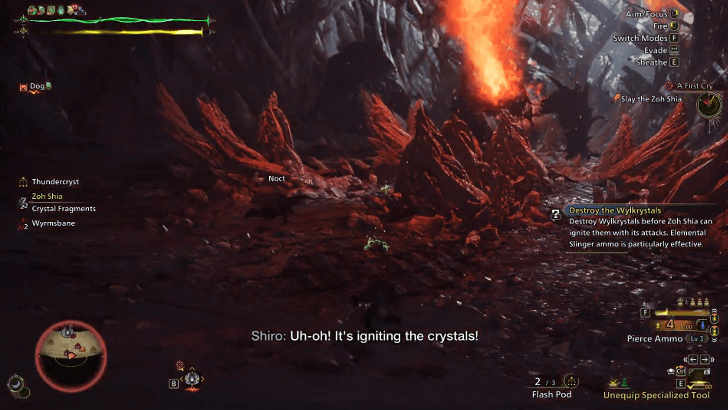
Shoot Elemental Slinger Ammo at Wylk Crystals
Wylk (Wyvern Milk) crystals grow from the ground after Zoh Shia's white-glowing, explosive Wylk attacks. Shooting elemental Slinger ammo at these will make them explode with the same element as the ammo.
You'll find Wyrmsbanes and Thundercrysts around the area. Picking them up gives Dragon Pods and Thunder Pods respectively. Shoot these pods at Wylk crystals near Zoh Shia to deal a good amount of damage. Dragon Pods are more effective, as Zoh Shia is weak to Dragon.
However, it is recommended to not use up all of the available elemental Slinger ammo as you find them, as these can be used to free up space for Zoh Shia's AoE attack later on in the fight.
Use Heavy Pods
Breaking off crystals from Zoh Shia drops Crystal Fragments. Picking these up gives you Heavy Piercing and Slicing Pods. Using your Slinger, you can shoot these at Zoh Shia to deal great damage and break even more crystals.
First AoE Attack Leads to Phase 2
Early on, Zoh Shia will perform its fiery AoE attack near the northern edge of the area. This will transition to the fight's second phase, wherein it will be able to use Fireblight-dealing attacks.
Phase 2 Guide
| Zoh Shia Phase 2 Tips |
|---|
|
|
Focus on Attacking Its Head When Exposed
Dealing enough damage to Zoh Shia will trigger Phase 2 of its fight. During this phase, it'll be able to expose its head out of the protective crystal to deal fire attacks. Take advantage of this to damage and wound its head as that's its greatest weakpoint.
Focus Strike Its Wings After Charged Ground Explosion Attack
During this Phase, Zoh Shia will also expose its wings to deal fire attacks. One of these attacks is a charged fire explosion on the ground. After the attack, Zoh Shia's wings linger on the ground for a while. Focus Strike the wings during this time if it glows red in Focus Mode. Doing so can topple Zoh Shia.
How to Use Focus Mode and Focus Strike
Destroy Giant Wylk Crystals with Elemental Slinger Ammo
Midway into the fight, Zoh Shia flies around and land in a specific position in the area. It will then unleash an area-wide AoE attack that will drain away your health. Right before this attack, Zoh Shia will spawn giant Wylk crystals from the ground. This may trick players into hiding behind the crystals to avoid the AoE attack, but remember that Wylk structures explode and amplify elements. Hiding behind them will cart you.
You can use elemental Slinger ammo to destory these giant crystals, which will also free up a lot of space during Zoh Shia's attack.
Run Away from Range of AoE Attack
You can also opt to run away from the affected area of Zoh Shia's AoE attack, which extends a few meters away from where it uses its attack. Zoh Shia will take some time charging up this attack, so you'll have a few seconds to run away from the area.
When Zoh Shia initally uses its AoE attack, you can run to the southern edge of the area to avoid the attack. On the subsequent times it uses this attack, you can run behind Zoh Shia as it is a safe zone.
If you're far away from a safe zone without any elemental ammo, you can Fast Travel back to camp in a pinch to easily avoid the attack!
Roll Thrice or Use Nulberries to Cure Fireblight
Zoh Shia can inflict Fireblight in this phase. If your Blight Resistance or Fire Resistance is low, you can roll three times or use a Nulberry to cure yourself of Fireblight.
Blight Resistance Skill Effects
Roars with Red Lightning Leads to Phase 3
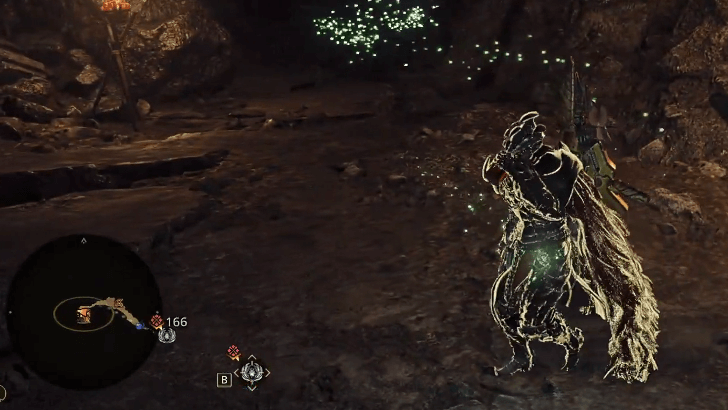
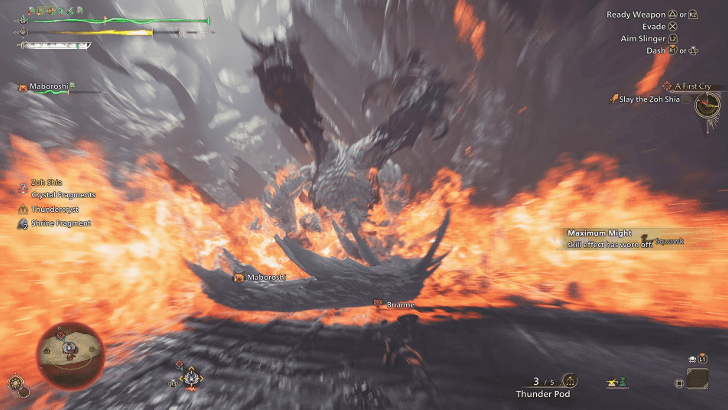
Further on, the craggy armor around Zoh Shia's body will peel off, exposing its obsidian-like body in full.
It will let out a huge roar and summon red lightning around its body, which transitions the fight to the third and final phase. It will then be able to use fire and Thunderblight-dealing attacks from this point.
Phase 3 Guide
| Zoh Shia Phase 3 Tips |
|---|
|
|
Use Dragon Pods to Interrupt Its Strong Attacks
Zoh Shia fully reveals itself in Phase 3 as its health dwindles. In this phase, it can now also use both fire and thunder attacks, making it the most dangerous it can be in this fight.
You can interrupt Zoh Shia's attacks by shooting Dragon Pods at it. You can get this Slinger ammo from Wyrmsbane found around the area. It is advised to do this sparingly, as Zoh Shia may develop an immunity to getting flinched the more Dragon Pods you shoot at it. Save it for when you want to interrupt a devastating attack from this phase!
Drop Shrine Fragments on Zoh Shia
Shrine Fragments are environmental traps situated above Zoh Shia. Lure it beneath these traps before dropping them to knock out Zoh Shia and give you a good damage window. This'll help make this dangerous phase in the hunt shorter.
Use Nulberries to Cure Thunderblight
Besides Fireblight, Zoh Shia can now also inflict Thunderblight in this phase. If your Thunder Resistance and Paralysis Resistance is low, make sure to bring Nulberries to cure Thunderblight.
Zoh Shia Weakness
Basic Information
 |
||
| Type | Roar | Wind Pressure |
|---|---|---|
| Construct | Strong | Dragon |
| Tremor | Status Effect | Element |
| None | Fireblight, Thunderblight | Fire |
Damage Type Weakness
Hitzone Values and Weakness Breakdown
※ Click the tabs to switch between Damage Type and Elemental Damage Hitzone effectiveness.
| Part | |||
|---|---|---|---|
| Head | |||
| Head (Crystalized) | |||
| Neck | |||
| Torso | |||
| Left Foreleg | |||
| Right Foreleg | |||
| Left Wingarm | |||
| Right Wingarm | |||
| L Wingarm (Crystalized) | |||
| R Wingarm (Crystalized) | |||
| Left Hind Leg | |||
| Right Hind Leg | |||
| Tail | |||
| Overall |
| Part | |||||
|---|---|---|---|---|---|
| Head | |||||
| Head (Crystalized) | |||||
| Neck | |||||
| Torso | |||||
| Left Foreleg | |||||
| Right Foreleg | |||||
| Left Wingarm | |||||
| Right Wingarm | |||||
| L Wingarm (Crystalized) | |||||
| R Wingarm (Crystalized) | |||||
| Left Hind Leg | |||||
| Right Hind Leg | |||||
| Tail | |||||
| Overall |
The numbers shown above showcase the effectiveness of damage types against the monster's hitzones. Parts with higher numbers mean the damage type is more effective, with 1 being the lowest and 20 as the highest.
Hitzone DPS Summary
| Sever | Charge Blade Charge Blade is a transforming weapon that stores energy in Sword Mode and delivers an elemental slash in Axe Mode. Dual Blades The Dual Blades that excels at rapid successive attacks and lets you transform into a demon to enhance your attack power. Great Sword The Great Sword uses slow but powerful swings to attack. Gunlance The Gunlance is a weapon that offensive and defensive weapon that uses artillery fire as its main attack. Insect Glaive The Insect Glaive is a weapon that specializes in aerial combat and strengthens itself using monster extracts from hunting insects. Lance The Lance is a weapon that boasts extremely high defensive performance. It can be used to charge and guard against enemy attacks. Long Sword The Long Sword uses quick continuous attacks and allows you to perform a parry slash when avoiding a monster's attack. Switch Axe Switch Axe is a transforming weapon that switches between Axe Mode and Sword Mode. Axe Mode allows you to perform all kinds of attacks while Sword Mode lets you perform high speed attacks. Sword and Shield The Sword and Shield is a versatile weapon with balanced attack and defense. |
|---|---|
| | |
| Blunt | Hammer The Hammer is a weapon that delivers powerful ranged attacks and is especially good at aiming at a monster's head to stun it. Hunting Horn The Hunting Horn is a support weapon that plays a melody that strengthens allies. It is best used in multiplayer. Sword and Shield The Sword and Shield is a versatile weapon with balanced attack and defense. |
|---|---|
| | |
| Shot | Bow The Bow is a weapon that can be used from a distance with a large number of shots and can be used to deal more damage using charged shots or special arrows. Heavy Bowgun Heavy Bowguns can aim for great damage by releasing powerful bullets, and can be equipped with shields for added defense. Light Bowgun The Light Bowgun is long-range weapon with excellent mobility and a variety of agendas using status inflicting ammunition and support ammunition! |
|---|---|
| | |
| Dragon is the best element to use against Zoh Shia. Try to aim for its Head to deal the most amount of Dragon damage. |
Kinsect Extract From Parts
| Head | Head (Crystalized) | ||
|---|---|---|---|
| Neck | Torso | ||
| Left Foreleg | Right Foreleg | ||
| Left Wingarm | Right Wingarm | ||
| L Wingarm (Crsytalized) | R Wingarm (Crsytalized) | ||
| Left Hind Leg | Right Hind Leg | ||
| Tail | - | - |
Insect Glaive Weapon Guide and Best Combos
Status Ailment and Item Weakness
| Status Ailment | Items | ||
|---|---|---|---|
| |
|
||
| |
|
||
| |
|
||
| |
|
||
| |
|
||
| |
|
||
Breakable Parts
| Breakable |
・Head ・Wings ・Foreleg ・Tail (Severable) |
|---|
Zoh Shia Item Loadout
Recommend Items to Bring
|
|
|
|
|
|
|
|
|
|
|
|
Before hunting Zoh Shia, always make sure to stock up on healing items such as Mega Potions, Max Potions, an Ancient Potion, and crafting materials for Mega Potions. For extra survivability, don't forget to equip either the Mending Mantle or Rocksteady Mantle. Depending on your playstyle, either mantles will help greatly in the hunt.
Nulberries are also important during Zoh Shia hunts, as you can easily get Fireblight and Thunderblight during the fight.
List of All Items and Materials
Zoh Shia Attack Patterns
Moveset and Openings
| Attack | Description |
|---|---|
| Arm/Wing Swipe | When you're stationed on the side of Zoh Shia, this can prompt it to do a sweeping attack with its arm. You can telegraph this when you see it bring its arm toward its body. Dodge towards the monster to avoid the sweep. When angered, this attack can be followed up by a similar attack, but instead of its arm, it will use its wing. The wing will leave a trail of explosions in its wake. Similar to before, dodge towards the monster to avoid this. |
| Trailing Ground Explosion | Zoh Shia can plunge its wing to the ground, trailing a line of explosions towards your direction. Dodge sideways as soon as you see its wing come down. |
| Charged Ground Explosion | When you see Zoh Shia's wings glow before it plunges both wings unto the ground, it will unleash a charged ground explosion. Once you see its wings or the ground light up, dodge inwards or outwards to avoid getting hit. On Phase 2 and 3, this attack turns from Wylk to fire. You can Focus Strike the wings after the attack to topple Zoh Shia. |
| Horizontal Ground Explosion | Similiar to the Charged Ground Explosion, Zoh Shia will light up its wings and use it to ignite the ground with explosions, this time in a horizontal manner. Dodge adjacent to this horizontal line once it appears in the ground. |
| Fireball | Once it can use fire attacks, Zoh Shia can shoot fireballs at your direction. You can tell it's coming when you see it in a prone position, charging up fire in its mouth. Dodge or run sideways from this attack. |
| Giant Fireball | When you see Zoh Shia stand on its hindlegs, charging up fire in its mouth, it will shoot a much bigger and more powerful fireball towards you. Start running when you see it charge up, then time your dodge right before the fireball lands to avoid getting damaged by it. |
| Downward Fire Breath | Being near Zoh Shia can prompt it to use its fire breath, aiming it downwards to cover its vicinity. Start running away from it as soon as you see it stand on its hindlegs and aim its head down. |
| Extreme Inferno Breath | After some time in the battle, Zoh Shia will leap into position, spawn giant protruding Wylk crystals from the ground, then unleash an extreme inferno breath that covers the whole area. Stay away from the giant Wylk crystals during this AoE attack. Block or keep dive-evading to survive through the attack. You can also destroy the Wylk crystals with elemental Slinger ammo to reduce the area of the attack. |
| Immediate Extreme Inferno Breath | After initially using Extreme Inferno Breath, Zoh Shia can use this attack from anywhere in the area without going back to the position where it first used this move. You can quickly run behind it as the attack will not reach you there. |
| Charge Attack | When in a prone position, Zoh Shia can initiate a charge attack towards you. You can tell it's about to do it when it rears itself backwards and raises a wing. Run or dodge sideways away from its path. |
| Bouncing Fireballs | This attack's wind up looks similar to its Charged Ground Explosion attack, but you can tell it will bounce fire balls at you if you see scattered patches of fire on the ground. Get out of the way of these patches as this is where the fireballs will bounce to. |
| Trailing Thunder | Once Zoh Shia can use thunder attacks, it will be able to spawn thunder at you sideways. Dodge forward or backward from this attack as soon as you see the faint lightning trail appear. |
Zoh Shia Locations and Quests
Known Habitats
| Region |
|---|
 Ruins of Wyveria Ruins of Wyveria |
Quest Appearances
| Quest Type | Lvl. | Quest Name |
|---|---|---|
| Assignments | 3★ | Guardian Zoh Shia |
| Assignments | 8★ | Germination |
Zoh Shia Drops
Low Rank Materials
| |
| |
| |
| |
Low Rank Zoh Shia mostly drops common Guardian materials that you can farm from other Low Rank Construct monsters. You're unable to farm Low Rank Zoh Shia as its one quest is unrepeatable.
High Rank Materials
| |
| |
| |
| |
Zoh Shia's rarest High Rank drop is the Faux Whitegleam Orb, with a 3% chance of dropping as a Target Reward. Increase your chance of obtaining this by making sure to sever and carve its tail during the hunt. Carving the tail gives you a 7% drop rate, while carving its body gives you a 3% chance.
Remember to also check Zoh Shia Investigations or SOS quests. You can also opt to use Lucky Vouchers and utilize the Lucky Meal or Capture Pro Meal food skill before a hunt to improve your chances of getting these rare materials overall.
Monster Hunter Wilds Related Guides

All Monsters Guides
Arch-Tempered Monsters
| Arch-Tempered Monster Guides | |
|---|---|
 AT Rey Dau AT Rey Dau |
 AT Uth Duna AT Uth Duna |
 AT Nu Udra AT Nu Udra |
 AT Jin Dahaad AT Jin Dahaad |
 AT Arkveld AT Arkveld |
|
All Large Monsters
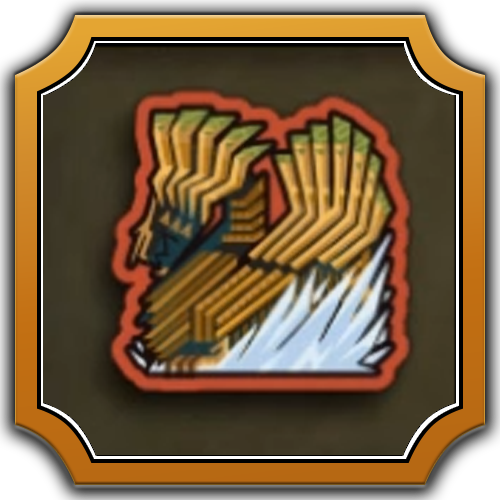
 Arkveld
 Rey Dau
 Nu Udra
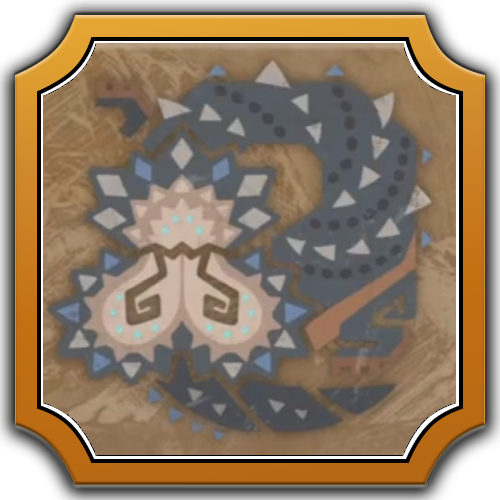 Balahara
 Doshaguma
 Chatacabra
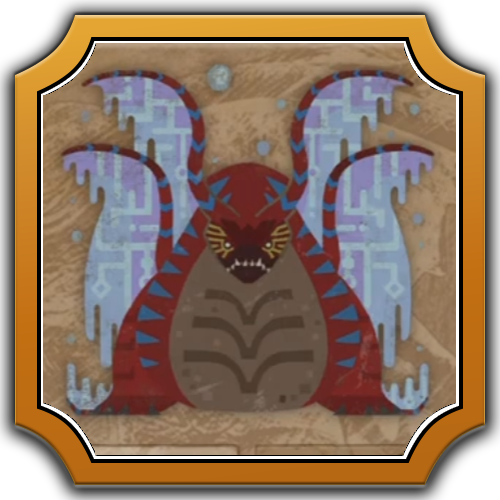 Uth Duna
 Lala Barina
 Quematrice
 Rompopolo
 Ajarakan
 Yian Kut-Ku
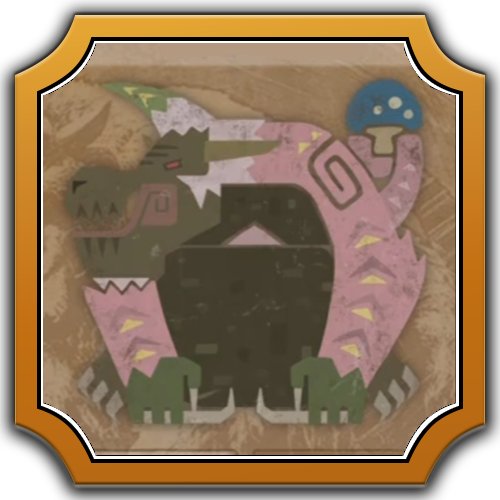 Congalala
 Rathalos
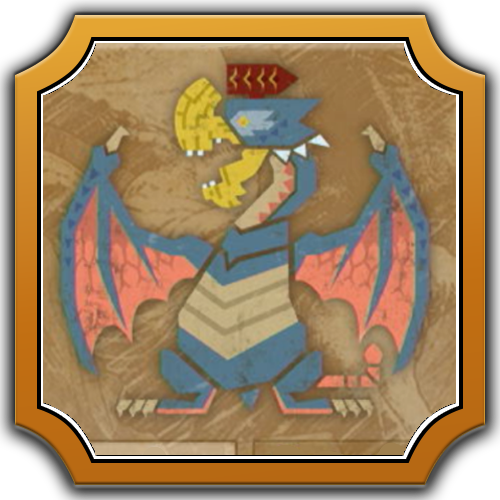 Gypceros
 Rathian
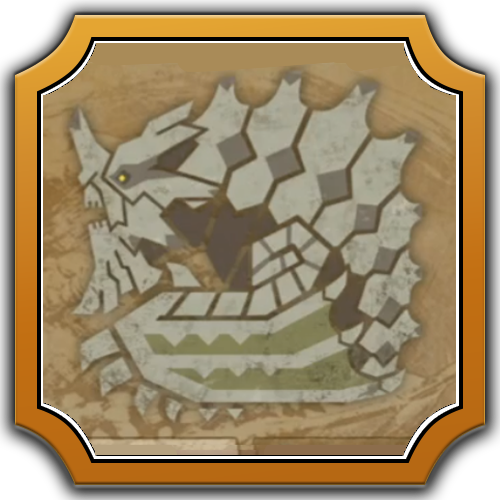 Gravios
 Nerscylla
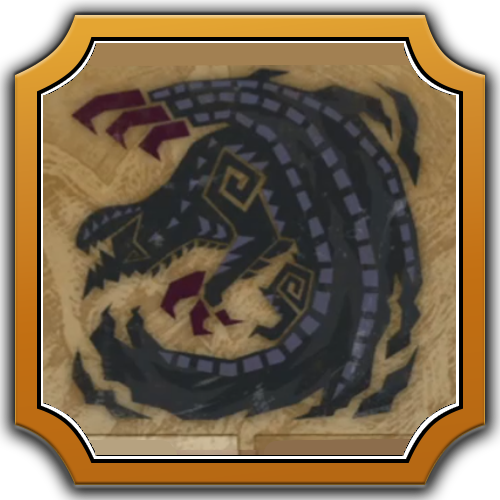 Gore Magala
 Hirabami
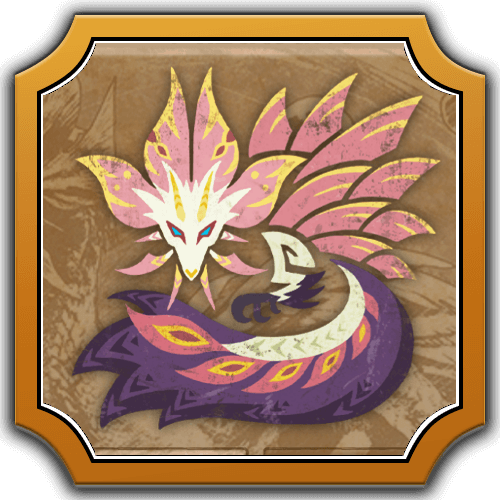 Mizutsune
 Jin Dahaad
 Blangonga
 Guardian Arkveld
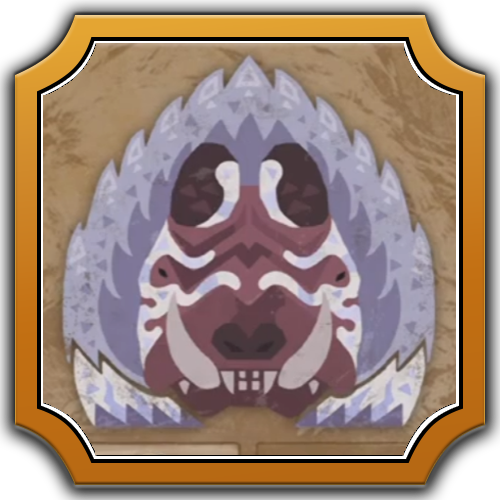 Guardian Doshaguma
 Guardian Rathalos
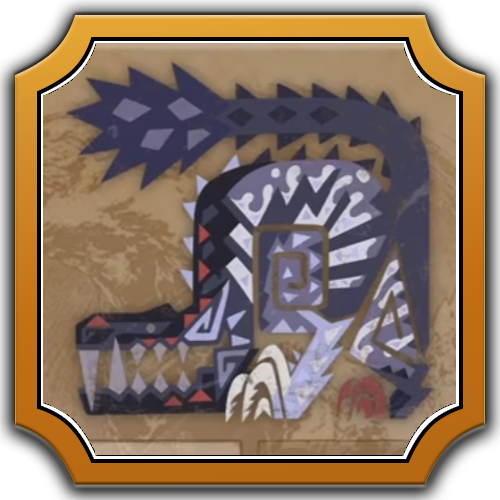 Guardian Ebony Odogaron
 Xu Wu
Xu Wu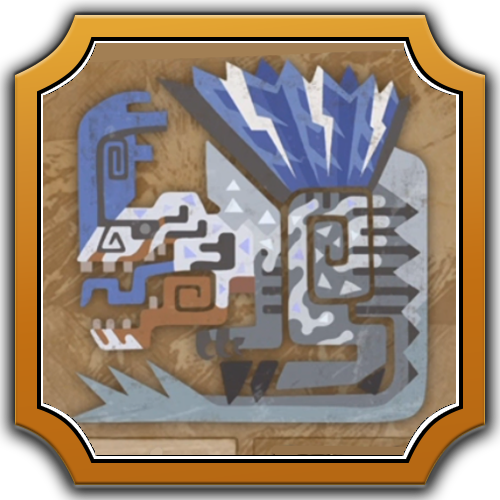 Guardian Fulgur Anjanath
 Lagiacrus
 Seregios
 Omega Planetes
Comment
After the inferno breath zoh shia will charging towards you. So position yourself so that you can drop the boulder to it
Author

Zoh Shia Investigation: How to Spawn and Farm
Premium Articles

Rankings
Gaming News


![Monster Hunter Stories 3 Review [First Impressions] | Simply Rejuvenating](https://img.game8.co/4438641/2a31b7702bd70e78ec8efd24661dacda.jpeg/thumb)
Popular Games

Genshin Impact Walkthrough & Guides Wiki
Honkai: Star Rail Walkthrough & Guides Wiki
Umamusume: Pretty Derby Walkthrough & Guides Wiki
Pokemon Pokopia Walkthrough & Guides Wiki
Resident Evil Requiem (RE9) Walkthrough & Guides Wiki
Monster Hunter Wilds Walkthrough & Guides Wiki
Wuthering Waves Walkthrough & Guides Wiki
Arknights: Endfield Walkthrough & Guides Wiki
Pokemon FireRed and LeafGreen (FRLG) Walkthrough & Guides Wiki
Pokemon TCG Pocket (PTCGP) Strategies & Guides Wiki


Recommended Games
Diablo 4: Vessel of Hatred Walkthrough & Guides Wiki
Cyberpunk 2077: Ultimate Edition Walkthrough & Guides Wiki
Fire Emblem Heroes (FEH) Walkthrough & Guides Wiki
Yu-Gi-Oh! Master Duel Walkthrough & Guides Wiki
Super Smash Bros. Ultimate Walkthrough & Guides Wiki
Pokemon Brilliant Diamond and Shining Pearl (BDSP) Walkthrough & Guides Wiki
Elden Ring Shadow of the Erdtree Walkthrough & Guides Wiki
Monster Hunter World Walkthrough & Guides Wiki
The Legend of Zelda: Tears of the Kingdom Walkthrough & Guides Wiki
Persona 3 Reload Walkthrough & Guides Wiki


All rights reserved
©CAPCOM
The copyrights of videos of games used in our content and other intellectual property rights belong to the provider of the game.
The contents we provide on this site were created personally by members of the Game8 editorial department.
We refuse the right to reuse or repost content taken without our permission such as data or images to other sites.
Crazy good guide, good work