This survey will take about 1 minute.
Your answers will help us to improve our website.
Monster Hunter Wilds
Support Wide-Range Build
★ Arkveld Gamma Armor | MH Stories 3 Collab
☆ Version 1.041: Sororal α Armor | Shatterseal
★ How to Unlock Proof of a Hero Quest
☆ Omega Planetes | Savage Omega | Builds vs Omega
★ Armor Set Search updated for Ver 1.041
☆ HR50+ Builds | Tier List | Weapon Guides
This Support Wide-Range Build can be used by players who want to fill the support role in Monster Hunter Wilds (MH Wilds). See the Support Wide-Range build's best weapons, loadout, and the playstyle for the build.
List of Contents
Support Wide-Range Best Weapons
Lala Acanthopelm Sword and Shield
| Weapon | Rarity | ATK | DEF |
|---|---|---|---|
 Lala Acanthopelm Lala Acanthopelm

|
8 | 280 (200) |
0 |
| Slots | Element | Affinity | |
| ③②① |
|
15% | |
| Skills |
Critical Draw Lv. 2
Critical Status Lv. 1
|
||
| Weapon Decorations |
|---|
The Lala Acanthopelm is chosen for the build as it offers both offense and defense. The weapon's innate skills offer offensive capabilities with Critical Draw level 2 and Critical Status level 1, while the decorations round it up by adding Guard and Paralysis Attack at max level.
Additionally, item usage is quicker when using Sword and Shield since items are available even when your sword is unsheathed.
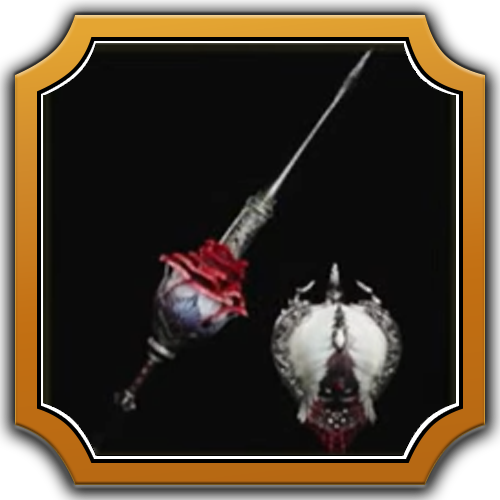
Lala Aviculari Lance
| Weapon | Rarity | ATK | DEF |
|---|---|---|---|
 Lala Aviculari Lala Aviculari

|
8 | 460 (200) |
0 |
| Slots | Element | Affinity | |
| ③②① |
|
15% | |
| Skills |
Critical Draw Lv. 2
Critical Status Lv. 1
|
||
| Weapon Decorations |
|---|
For a similar reason, the Lala Aviculari is chosen for its offensive and defensive capabilites. This Lance shares the same Critical Draw level 2 and Critical Status level 1 that Lala Acanthopelm has, along with its Paralysis status build-up.
While you lose the quick item usage for healing and buffing that the Sword and Shield offers, the Lance offers better protection with the use of its shield. Guard and Paralysis Attack will occupy all the decoration slots to further boost your offensive and defensive potential.
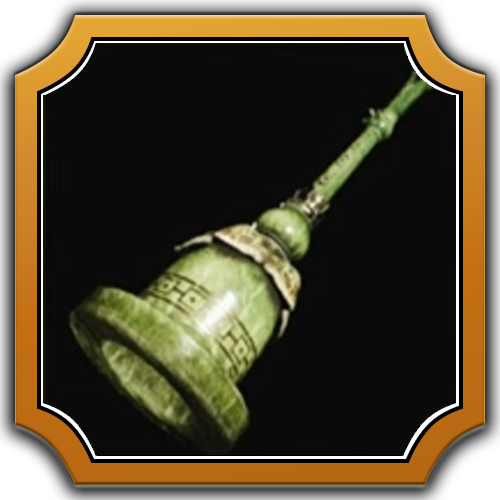
Queen Chordmaker Hunting Horn
| Weapon | Rarity | ATK | DEF |
|---|---|---|---|
 Queen Chordmaker Queen Chordmaker

|
8 | 840 (200) |
0 |
| Slots | Element | Affinity | |
| ③②① |
|
15% | |
| Skills |
Critical Status Lv. 3
Poison Duration Up Lv. 1
|
||
| Melodies |
Self-Improvement
Attack Up (L)
Health Recovery (S)
Recovery Speed (L)
Echo Wave
Melody of Life
|
||
| Echo Wave Type | Blunt | ||
| Echo Bubble | Health Regeneration | ||
| Weapon Decorations |
|
|---|
With its high stagger potential and innate buffing mechanics, the Hunting Horn is one of the best weapons to use when running a support build. The Queen Chordmaker is chosen for its Health Recovery (S), Recovery Speed (L), Melody of Life, and Attack Up (L) melodies.
Having Health Regeneration as its Echo Bubble will assist the player for the build's purpose, while Slugger and Poison Attack will be the chosen decorations to maximize both stagger and status build-up potential.
Support Wide-Range Build Loadout
Armor and Decorations
| Armor | Slots | Skills |
|---|---|---|
|
|
Wide-Range Lv. 1 Wide-Range Lv. 1 Wide-Range Lv. 1 |
Wide-Range Lv. 2
|
|
|
Earplugs Lv. 1 ーー |
Agitator Lv. 2
|
|
|
Earplugs Lv. 1 ーー |
Free Meal Lv. 3
|
|
|
Speed Eating Lv. 1 Speed Eating Lv. 1 ー |
Agitator Lv. 2
|
|
|
Earplugs Lv. 1 Speed Eating Lv. 1 ー |
Agitator Lv. 1
|
| Charm | ||
| Decorations List | ||
| DEF and RES Totals | Defense: 237
|
|
SNS and Lance Skill Summary
| Build Skill List | |||
|---|---|---|---|
| Agitator | 5 | Wide-Range | 5 |
| Guard | 3 | Paralysis Attack | 3 |
| Mushroomancer | 3 | Speed Eating | 3 |
| Free Meal | 3 | Earplugs | 3 |
| Critical Draw | 2 | Critical Status | 1 |
| Group / Set Skills | |||
| War Cry I | Diversion | ||
Hunting Horn Skill Summary
| Build Skill List | |||
|---|---|---|---|
| Agitator | 5 | Wide-Range | 5 |
| Slugger | 3 | Poison Attack | 3 |
| Free Meal | 3 | Mushroomancer | 3 |
| Speed Eating | 3 | Critical Status | 3 |
| Earplugs | 2 | Poison Duration Up | 1 |
| Group / Set Skills | |||
| War Cry I | Diversion | ||
Armor Skills Explanation
While the build focuses on healing and buffing your team with the use of Wide-Range, Mushroomancer, Free Meal, and Speed Eating, this build also features Diversion.
Diversion is a product of the group skill Alluring Pelt. This group skill increases the attention drawn to you when attacking a monster, making you the primary target when on a hunt. This will result in a hunting scenario where the monster will focus on you while your buffed up allies land powerful attacks.
Earplugs at level 2 will be enough as it provides immunity to most monster roars, as only four monsters require level 3 to provide complete roar immunity. War Cry provides an additional raw attack buff to allies that lasts for 3 minutes.
To further maximize this support build, Agitator is maxed out to ensure that offensive contribution is respectable.
Best Mantle
| Mantle | Effect |
|---|---|
|
|
• Rocksteady Mantle can be used once you get the monster's attention. This serves as an additional layer of defense, along with the freedom to attack with your team. |
Best Secondary Weapon
| Weapon & Type | Explanation |
|---|---|
|
(Hunting Horn) |
• The Resounding Galahad is an offense oriented Hunting Horn that cater players who prefer to focus in an all out attack playstyle. • With Diversion slotted into the build, buffing up your team's attack potency ensures that Diversion's effect is maximized. |
Support Wide-Range Build Playstyle
Provide Buffs While Attacking
- Buff up your allies offensively and defensively before starting the hunt. Remember to use the gesture "To Victory!" and the Mushrooms at your disposal! For a complete list of mushroom effects, visit our Mushroomancer Skill Effects page.
- When the hunt starts, proceed with attacking the monster as much as possible to get its attention with the use of Diversion.
- When using a Sword and Shield or a Lance, focus on executing perfect guards to mitigate damage. Perfect guarding may also trigger a Power Clash, which can stagger the monster. Guard will assist in blocking by lessening knockback and stamina consumption.
- Remember to keep an eye on the team's healthbar. With Wide-Range and Mushroomancer active, consuming a Blue Mushroom with Speed Eating will heal them instantly. Additionally, you must re-buff your allies with the use of melodies or items once the buff duration ends. Ally buff icons can be seen above their health bars.
- The timing of mantle usage will entirely depend on the player. Since the monster's attention will be on you, you may use Rocksteady Mantle to survive and escape if needed.
This build aims to support the whole team by providing buffs and heals while the monster targets you. The use of Echo Bubble or Guarding will provide the much needed protection while the monster focuses on you. Additionally, the recommended mantles will further assist you if a risky situation arises.
Recommended Items to Bring
| Item List | |
|---|---|
| Blue Mushroom | Mega Potion |
| Nitroshroom | Might Seed |
| Might Pill | Parashroom |
| Adamant Seed | Adamant Pill |
| Devil's Blight | Toadstool |
| Nulberry | Energy Drink |
| Sushifish | Herbal Medicine |
The items above consist of healing, buffing, and status removal items. Once consumed, Wide-Range will share its effects to allies. To maximize buff usage, head on to our Buffs Explained page to know which buffs stack.
Monster Hunter Wilds Related Guides
List of Builds for Each Weapon
All Weapon Builds in Monster Hunter Wilds
| All Weapon Builds & Guides | |
|---|---|
Low Rank | High Rank |
Low Rank | High Rank |
Low Rank | High Rank |
Low Rank | High Rank |
Low Rank | High Rank |
Low Rank | High Rank |
Low Rank | High Rank |
Low Rank | High Rank |
Low Rank | High Rank |
Low Rank | High Rank |
Low Rank | High Rank |
Low Rank | High Rank |
Low Rank | High Rank |
Low Rank | High Rank |
Non-Meta Builds in Monster Hunter Wilds
| Non-Meta Builds & Guides | |
|---|---|
| Immortal Build | Support Build |
| Best Gathering Sets | How to Make a Good Build |
| Rey Dau Gamma Builds | Uth Duna Gamma Builds |
Author

Support Wide-Range Build
Please participate in our site
improvement survey
03/2026
improvement survey
03/2026
Would you assist in
improving Game8's site?
improving Game8's site?

×
We are listening to our users' valuable opinions and discussing how to act on them.
The information collected through this survey will be used for the purpose of improving our services. In addition, the information will only be disclosed a part of a statistic in a format that will not allow identification of personal information.
Begin Survey
Not Now
×
Please rate each item regarding Game8.co's Advertisements.
Amount of Ads
Very Dissatisfied
Somewhat Dissatisfied
Fine
Somewhat Satisfied
Highly Satisfied
Placement of Ads
Timing of Ad Display
Ad Loading Speed
Safeness of Ads
Content of Ads
×
Please rate each item regarding Game8.co's Quality of Articles.
Amount of information
Very Dissatisfied
Somewhat Dissatisfied
Fine
Somewhat Satisfied
Highly Satisfied
Frequency of updates
Speed of new information
Accuracy of articles
Understandibility of articles
Readability of sentences
×
Please rate each item regarding Game8.co's Usability of the Site.
Ease of finding information
Very Dissatisfied
Somewhat Dissatisfied
Fine
Somewhat Satisfied
Highly Satisfied
Loading Speed
Use of Color
Font Size
Visibility of Images
Easy to Understand Layout
×
Please rate each item regarding Game8.co's Message Boards, Comments.
Ease of Writing
Very Dissatisfied
Somewhat Dissatisfied
Fine
Somewhat Satisfied
Highly Satisfied
Readability
Ease in Finding Information
Comment Quality
Comment Quantity
Admin Response
×
Please rate each item regarding Game8.co's Site's new design.
Please rate our site's new design
Very Dissatisfied
Somewhat Dissatisfied
Fine
Somewhat Satisfied
Highly Satisfied
Do you think that the website's design change makes the site easier to use?
Has the new design made it easier for you to find information on the site?
Has the new design improved the overall visual appeal of the site?
How would you rate your overall satisfaction with the new design of the site?
×
How likely are you to recommend Game8 to someone you know?
Very Unlikely
0
1
2
3
4
5
6
7
8
9
10
Very Likely
If you have other opinions regarding potential improvement to the website, please share them with us. We would appreciate your honest opinion.
Note: This is a free response section, so you can proceed without entering anything.
Note: Please be sure not to enter any kind of personal information into your response.
Note: Please be sure not to enter any kind of personal information into your response.
×
Thank You
×
Thank you for participating in our survey! Your answers will help us to improve the quality of our website and services.
We hope you continue to make use of Game8.
We hope you continue to make use of Game8.
Close
Premium Articles

Rankings
Gaming News


![Everwind Review [Early Access] | The Shaky First Step to A Very Long Journey](https://img.game8.co/4440226/ab079b1153298a042633dd1ef51e878e.png/thumb)

![Monster Hunter Stories 3 Review [First Impressions] | Simply Rejuvenating](https://img.game8.co/4438641/2a31b7702bd70e78ec8efd24661dacda.jpeg/thumb)
Popular Games

Genshin Impact Walkthrough & Guides Wiki
Honkai: Star Rail Walkthrough & Guides Wiki
Umamusume: Pretty Derby Walkthrough & Guides Wiki
Pokemon Pokopia Walkthrough & Guides Wiki
Resident Evil Requiem (RE9) Walkthrough & Guides Wiki
Monster Hunter Wilds Walkthrough & Guides Wiki
Wuthering Waves Walkthrough & Guides Wiki
Arknights: Endfield Walkthrough & Guides Wiki
Pokemon FireRed and LeafGreen (FRLG) Walkthrough & Guides Wiki
Pokemon TCG Pocket (PTCGP) Strategies & Guides Wiki


Recommended Games
Diablo 4: Vessel of Hatred Walkthrough & Guides Wiki
Fire Emblem Heroes (FEH) Walkthrough & Guides Wiki
Yu-Gi-Oh! Master Duel Walkthrough & Guides Wiki
Super Smash Bros. Ultimate Walkthrough & Guides Wiki
Pokemon Brilliant Diamond and Shining Pearl (BDSP) Walkthrough & Guides Wiki
Elden Ring Shadow of the Erdtree Walkthrough & Guides Wiki
Monster Hunter World Walkthrough & Guides Wiki
The Legend of Zelda: Tears of the Kingdom Walkthrough & Guides Wiki
Persona 3 Reload Walkthrough & Guides Wiki
Cyberpunk 2077: Ultimate Edition Walkthrough & Guides Wiki


All rights reserved
©CAPCOM
The copyrights of videos of games used in our content and other intellectual property rights belong to the provider of the game.
The contents we provide on this site were created personally by members of the Game8 editorial department.
We refuse the right to reuse or repost content taken without our permission such as data or images to other sites.
There's an error, blango greaves has two (2 slot) gems. Keep up the good work guys 👍🏼