Material Retrieval Guide: How to Unlock the Farm
★ Arkveld Gamma Armor | MH Stories 3 Collab
☆ Version 1.041: Sororal α Armor | Shatterseal
★ How to Unlock Proof of a Hero Quest
☆ Omega Planetes | Savage Omega | Builds vs Omega
★ Armor Set Search updated for Ver 1.041
☆ HR50+ Builds | Tier List | Weapon Guides
Material Retrieval lets you passively farm items in Monster Hunter Wilds. Learn how to farm materials and know the locations and unlock conditions of all material gatherers here!
List of Contents
How to Unlock the Item Farm
Complete Missions to Unlock Gatherers
Material Retrieval is the item farm mechanic of Monster Hunter Wilds, which is unlocked after completing the side mission Beware the Gypceros. You can get this mission after completing Chapter 4's Lurking Shadows story.
You will first unlock Murtabak as the initial item gatherer, but other NPCs will become available by completing their respective missions.
Best Items for Material Retrieval
Recommended Items
Having Healing Items, Pods, Bombs and Traps could make your hunt easier, which is why it's best to get their ingredients from the Material Retrieval Feature!
| Item | Explanation |
|---|---|
| Recommendation: ★★★ Used for Mega-Potion, First Aid Med+, Catalyst, and Energy Drink |
|
| Recommendation: ★★★ Used for Mega Potions |
|
| Recommendation: ★★★ Used for Deodorant, Catalyst, Immunizer, and Luring Pod |
|
| Recommendation: ★★★ Needed for Flash Pods |
|
| Recommendation: ★★★ Needed for Demondrug and Demon Powders |
|
| Recommendation: ★★★ Needed for Shock Trap |
|
| Recommendation: ★★ Needed for Tranq Bombs |
|
| Recommendation: ★★ Needed for Tranq Bombs |
|
| Recommendation: ★ Needed for Demon Powders and Dust of Life |
|
| Recommendation: ★ Needed for Dust of Life |
Material Gatherer Item List and Locations
| Jump to a Location! | |||||
|---|---|---|---|---|---|
| Windward Plains | Scarlet Forest | Oilwell Basin | |||
| Suja, Peaks of Accord | Ruins of Wyveria | ||||
Murtabak: Windward Plains
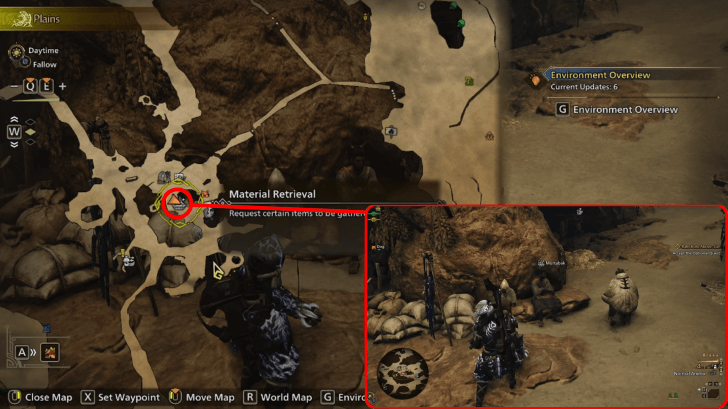
Murtabak can be found resting at the center of Kunafa, Windsong Village in Windward Plains. His services will become available after completing the Side Mission Beware the Gypceros.
Murtabak's Item Gathering List
| Item | Yield On Plenty | Yield On Fallow |
|---|---|---|
|
|

|

|
|
|
|
|
|
|
|

|
|
|
|
|
|
|
|
|
|
|
|
|
|
|

|
|
|
|
|
|
|
|
|
|
| Symbol | Explanation |
|---|---|
| You'd have to be pretty lucky... |
| You won't get much. |
| Should be easy to get. |
| It'll be real easy to get. |
Murtabak's Special Items List
| Special Items | ||
|---|---|---|
|
|
|
|
The Special Items listed above have a chance to appear when taking items from Murtabak.
Plumpeach: Scarlet Forest
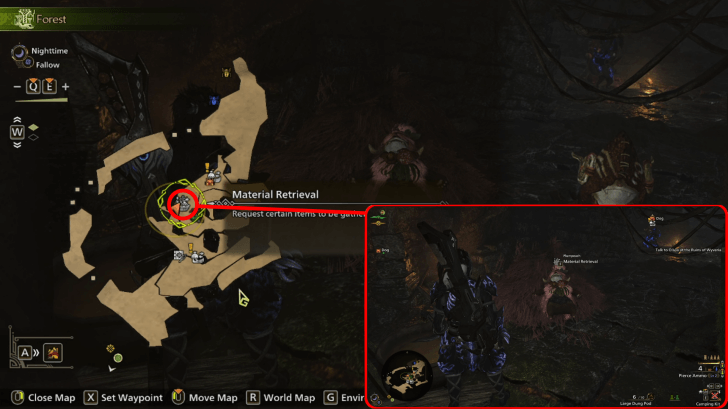
Plumpeach can be found right next to the Wudwud Hideout's Fast Travel point in Scarlet Forest. Make sure to complete the Make Fluffy Dealings Side Mission first to access their gathering services!
Plumpeach's Item Gathering List
| Item | Yield on Fallow | Yield on Plenty |
|---|---|---|
|
|
|
|
|
|
|
|
|
|
|
|
|
|
|
|
|
|
|
|
|
|
|
|
|
|
|
|
|
|
|
|
|
|
|
|
| Symbol | Explanation |
|---|---|
| You'd have to be pretty lucky... |
| You won't get much. |
| Should be easy to get. |
| It'll be real easy to get. |
Plumpeach's Special Items List
| Special Items | ||
|---|---|---|
|
|
|
|
The Special Items listed above have a chance to appear when taking items from Plumpeach.
Sabar: Oilwell Basin
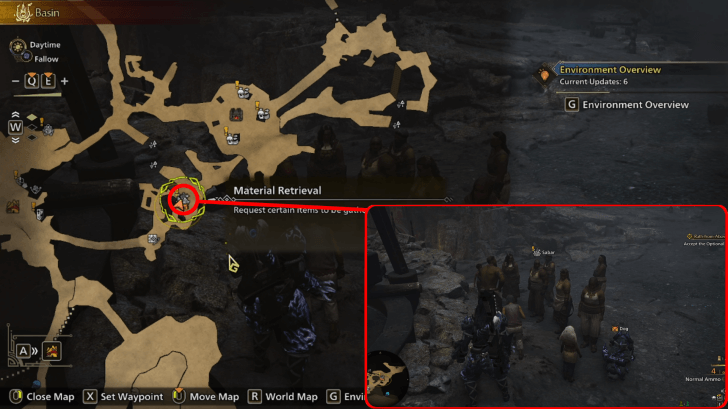
Sabar can be found at Azuz, the Everforge in Oilwell Basin, surrounded by other people southwest from the forge. Complete the Aida's Apprehension Side Mission first in order to enlist his help.
Sabar's Item Gathering List
| Item | Yield On Plenty | Yield On Fallow |
|---|---|---|
|
|
|
|
|
|
|
|
|
|
|
|
|
|
|
|
|
|
|
|
|
|
|
|
|
|
|
|
|
|
|
|
|
|
|
|
| Symbol | Explanation |
|---|---|
| You'd have to be pretty lucky... |
| You won't get much. |
| Should be easy to get. |
| It'll be real easy to get. |
Sabar's Special Items List
| Special Items | ||
|---|---|---|
|
|
|
|
The Special Items listed above have a chance to appear when taking items from Sabar.
Apar: Suja, Peaks of Accord
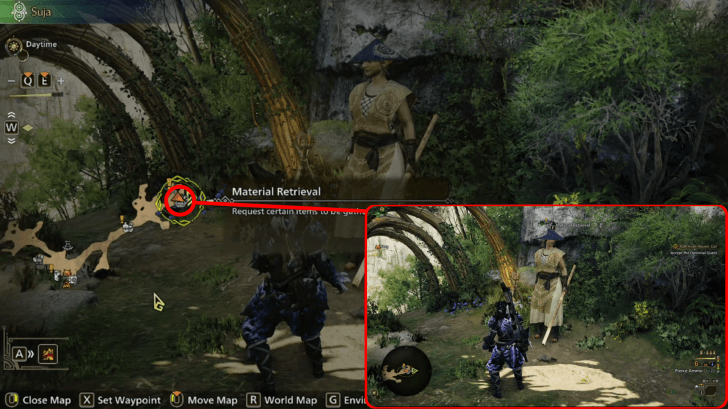
Apar can be found standing northeast of Suja, Peaks of Accord and can be conversed with immediately after completing the Main Mission Lurking Shadows!
Apar's Item Gathering List
| Item | Yield On Plenty | Yield On Fallow | Yield On Inclemency |
|---|---|---|---|
|
|
|
|
|
|
|
|
|
|
|
|
|
|
|
|
|
|
|
|
|
|
|
|
|
|
|
|
|
|
|
|
|
|
|
|
|
|
|
|
|
|
|
|
|
| Symbol | Explanation |
|---|---|
| You'd have to be pretty lucky... |
| You won't get much. |
| Should be easy to get. |
| It'll be real easy to get. |
Apar's Special Items List
| Special Items | ||
|---|---|---|
|
|
|
|
The Special Items listed above have a chance to appear when taking items from Apar.
Rysher: Ruins of Wyveria
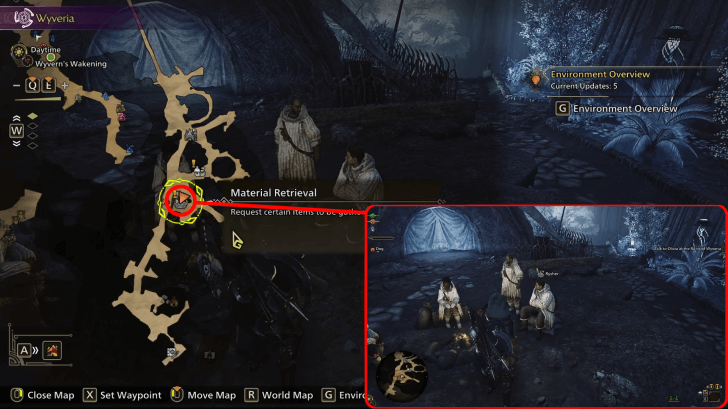
Rysher can be found in Sild, the Keeper's Vigil at Ruins of Wyveria, directly south from the area's Fast Travel point. Apart from completing the Main Mission , make sure to have completed the Side Mission Astonishing Adaptability to enlist their gathering services!
Rysher's Item Gathering List
| Item | Yield on Inclemency | Yield on Fallow | Yield on Plenty |
|---|---|---|---|
|
|
|
|
|
|
|
|
|
|
|
|
|
|
|
|
|
|
|
|
|
|
|
|
|
|
|
|
|
|
|
|
|
|
|
|
|
|
|
|
|
|
|
|
|
|
|
|
|
|
| Symbol | Explanation |
|---|---|
| You'd have to be pretty lucky... |
| You won't get much. |
| Should be easy to get. |
| It'll be real easy to get. |
Rysher's Special Items List
| Special Items | ||
|---|---|---|
|
|
|
|
The Special Items listed above have a chance to appear when taking items from Rysher.
Material Retrieval Guide
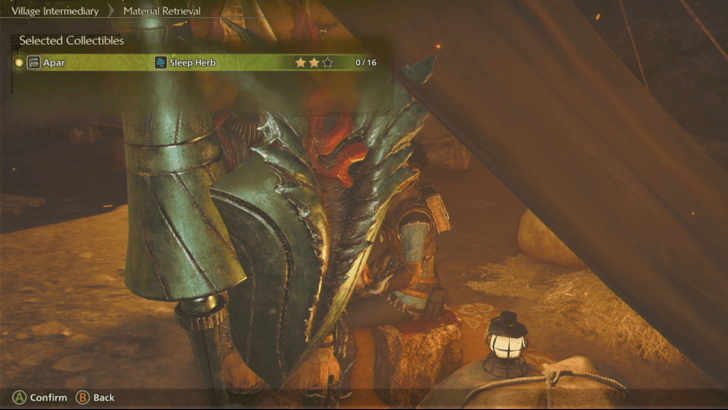
Select Materials to Gather
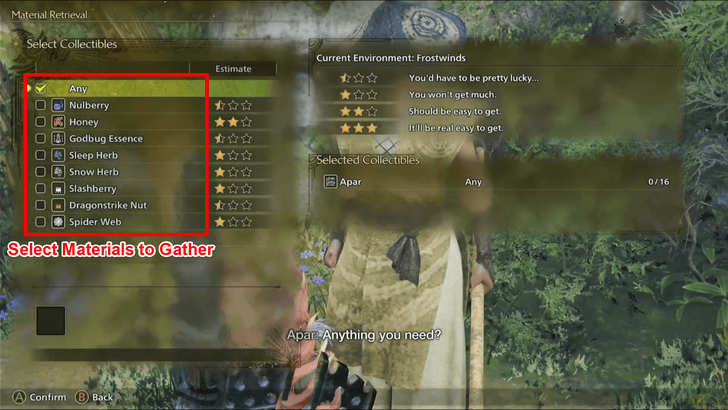
The Material Retrieval system lets you passively farm Crafting Materials that you’d normally gather yourself in the open world. This ensures a steady supply of essential items, making it easier to keep your inventory stocked!
Upon speaking to a Material Gatherer, select "Could you help me gather items?" to open the Material Retrieval screen. Here, you can view all available materials they can collect.
To set gathering targets, check the empty boxes next to the materials you want, or select Any if you have no specific preference.
Regardless of your selection, the gatherer will always make sure to fill up their Pick-Up Box's 16 slots comprised of the materials you choose.
Materials Gathered Have Estimated Quantities
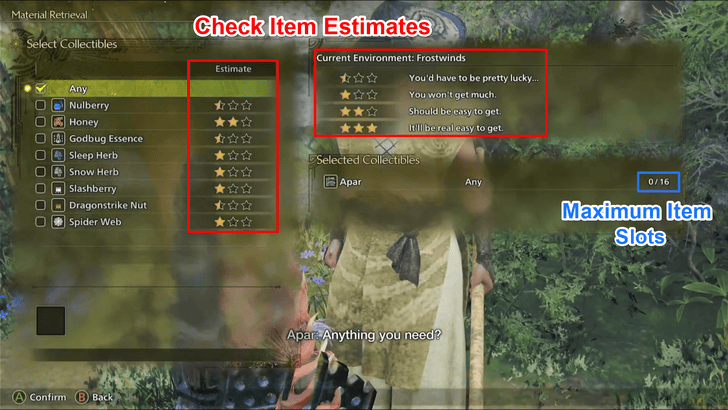
Each material has a fixed estimate, indicating an approximate quantity within the gatherer’s 16-item limit. A higher star rating increases the likelihood of obtaining more of that item compared to those with fewer stars.
Consider this when assigning materials, as a different gatherer may be able to collect the same item for a much higher estimate.
Estimate Changes Due to the Weather
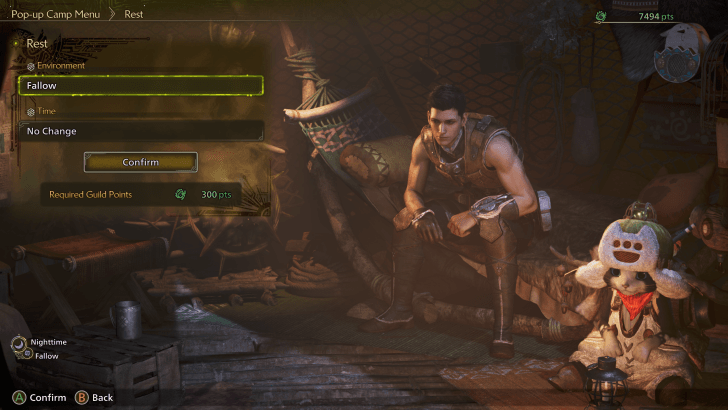
The Gathering Estimates are also affected by the locale's weather. If you want the best estimate for your chosen item, you can change the environment condition into something more favourable for the item.
Wait One In-Game Day to Pick Up Materials
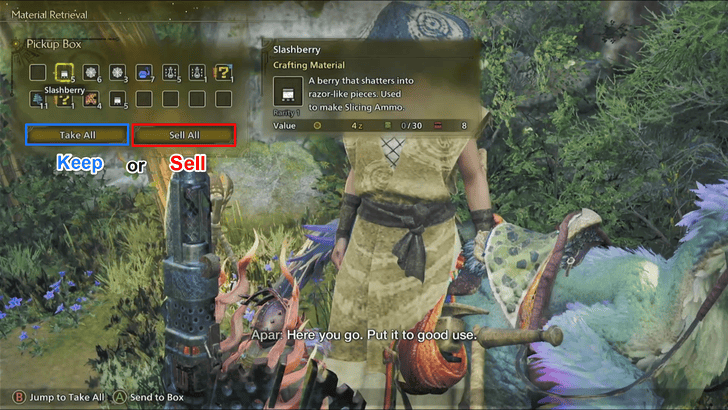
After one in-game day has passed, you may personally return to each gatherer and access their Pick-Up Box. Here, you may choose to either Take All which will auto-deliver all of their gathered items into your Item Box, or Sell All which converts their gathered materials into Zenny!
Gather All Materials From Nata
You can also speak to Nata at your Base Camp anytime to obtain materials from all gatherers at once!
However, you will still have to speak to every gatherer individually to change the type of item they collect.
Monster Hunter Wilds Related Guides
All Game Mechanics Guides
Comment
Author

Material Retrieval Guide: How to Unlock the Farm
Premium Articles

Rankings
- We could not find the message board you were looking for.
Gaming News


![Monster Hunter Stories 3 Review [First Impressions] | Simply Rejuvenating](https://img.game8.co/4438641/2a31b7702bd70e78ec8efd24661dacda.jpeg/thumb)
Popular Games

Genshin Impact Walkthrough & Guides Wiki
Honkai: Star Rail Walkthrough & Guides Wiki
Umamusume: Pretty Derby Walkthrough & Guides Wiki
Pokemon Pokopia Walkthrough & Guides Wiki
Resident Evil Requiem (RE9) Walkthrough & Guides Wiki
Monster Hunter Wilds Walkthrough & Guides Wiki
Wuthering Waves Walkthrough & Guides Wiki
Arknights: Endfield Walkthrough & Guides Wiki
Pokemon FireRed and LeafGreen (FRLG) Walkthrough & Guides Wiki
Pokemon TCG Pocket (PTCGP) Strategies & Guides Wiki


Recommended Games
Diablo 4: Vessel of Hatred Walkthrough & Guides Wiki
Cyberpunk 2077: Ultimate Edition Walkthrough & Guides Wiki
Fire Emblem Heroes (FEH) Walkthrough & Guides Wiki
Yu-Gi-Oh! Master Duel Walkthrough & Guides Wiki
Super Smash Bros. Ultimate Walkthrough & Guides Wiki
Pokemon Brilliant Diamond and Shining Pearl (BDSP) Walkthrough & Guides Wiki
Elden Ring Shadow of the Erdtree Walkthrough & Guides Wiki
Monster Hunter World Walkthrough & Guides Wiki
The Legend of Zelda: Tears of the Kingdom Walkthrough & Guides Wiki
Persona 3 Reload Walkthrough & Guides Wiki


All rights reserved
©CAPCOM
The copyrights of videos of games used in our content and other intellectual property rights belong to the provider of the game.
The contents we provide on this site were created personally by members of the Game8 editorial department.
We refuse the right to reuse or repost content taken without our permission such as data or images to other sites.