This survey will take about 1 minute.
Your answers will help us to improve our website.
Monster Hunter Wilds
Seregios Challenge Quest: Boundless Blades
★ Arkveld Gamma Armor | MH Stories 3 Collab
☆ Version 1.041: Sororal α Armor | Shatterseal
★ How to Unlock Proof of a Hero Quest
☆ Omega Planetes | Savage Omega | Builds vs Omega
★ Armor Set Search updated for Ver 1.041
☆ HR50+ Builds | Tier List | Weapon Guides
This is a guide on the Seregios Challenge Quest, Boundless Blades, for Monster Hunter Wilds. Read on to see a guide on the weapon and armor loadouts for the challenge quest and its rewards here!
How to Get A Rank
| Tips to Get A Rank |
|---|
|
|
Use the Long Sword as Primary
| Best Weapon Set for Solo |
|---|
 Stahlfakt I Stahlfakt I
▼Set C: Long Sword▼ |
The Long Sword is a good counter weapon against Seregios' fast and successive attacks. You can use either Foresight Slash or Iai Spirit Slash to evade and deal damage at the same time.
Long Sword Opening Attack
Use this opening combo to deal damage against Seregios while building up your Spirit Gauge!
Long Sword Weapon Guide and Best Combos
Use Special Sheathe in Advance
Since the armor set that the challenge provides does not have Quick Sheathe, you must use Special Sheathe earlier to properly execute an Iai Spirit Slash. Lessen your attacks and Special Sheathe earlier to ensure that you have enough time!
Wound the Head and Body When Mounted
If you are able to mount Seregios, wound both its head and body. Proceed to destroying the wound on its body while you preserve the head wound to fill or refill your Spirit Gauge.
Mounting at least once in the hunt is recommended as this staggers Seregios and provides you with guaranteed damage.
Seregios Will Hit the Pillar if You Stay on Its Head
If you stay at Seregios' head when you mount it, it will try to shake you off by hitting a pillar. This results in self-inflicted damage and can help you bring it down faster!
Destroy Wounds as Much as Possible
Destroying wounds almost always staggers Seregios, giving you a quick opening to deal uninterrupted damage. Always try to create and destroy wounds to deal more damage!
Seregios' Left Leg Wounds After Successive Leg Swipes
Seregios' left leg will always wound after it attacks with successive leg swipes. Ready your focus strike as this wound disappears after a few seconds!
Hunt Seregios Without Support Hunters
With you as the sole hunter, you can dodge more attacks and build up your Spirit Gauge faster. This leads to more damage as the Red Gauge provides a damage boost to the Long Sword!
How to Unlock Boundless Blades Challenge Quest
Limited Challenge Quest
| Quest Availability |
|---|
| Event ended |
The Boundless Blades is a limited-time event quest that has ended. The quest ran from October 7 until October 21.
Only Playable from HR 31 or Higher
To proceed with the Boundless Blades quest, you'll need to be at least HR 31 to be able to take on the quest at the Grand Hub.
Walkthrough and List of Main Story Chapters
Boundless Blades Challenge Quest Overview
Basic Information
| Monsters | |||
|---|---|---|---|
| Time | 50 mins. | Type | Slaying |
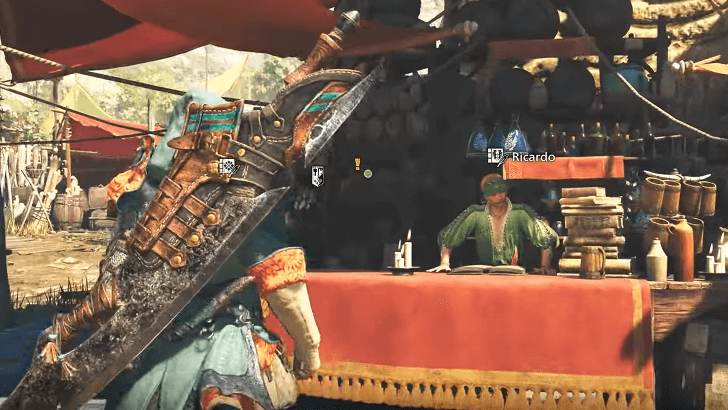
| Client | Ricardo | Reward Money | 19800 |
| Difficulty | H★6 | Region | Wounded Hollow |
| Objective | Slay the Seregios | ||
| Conditions | ・HR 31 or higher | ||
| Failure |
・Time expires ・Faint 9 times |
||
| Available Weapons | |||
| Set A | |||
| Set B | |||
| Set C | |||
Rank Clear Times
| A Rank | 05'00''00 |
|---|---|
| B Rank | 08'00''00 |
| C Rank | 50'00''00 |
Boundless Blades Challenge Quest Equipment
| Weapons and Armor | ||
|---|---|---|
| Set A: Gunlance Heavy Bowgun |
Set B: Hunting Horn Insect Glaive |
Set C: Long Sword Switch Axe |
Set A: Gunlance/Heavy Bowgun
| Weapons | |
|---|---|
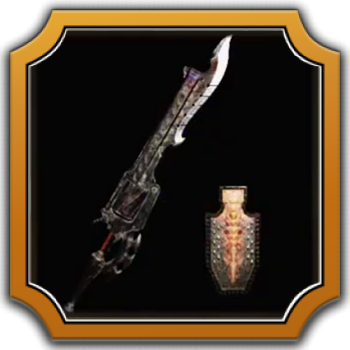 Balahara Exploder IV Balahara Exploder IV
Gunlance |
 Jin Dhaphal I Jin Dhaphal I
Heavy Bowgun |
| Armor | Items / Ammo |
|
・
Potion
x10
・
Mega Potion
x10
・
Ration
x10
・
Max Potion
x2
・
Snow Herb
x20 ・
Wyvern Ammo
x5
・
Sleep Ammo
x12
・
Freeze Ammo
x60
・
Dragon Ammo
x3
| |
| Talisman | Mantle |
| Weapon Skills | |
|
・
Offensive Guard
Lv. 3
・
Water Attack
Lv. 3
・
Guard
Lv. 2
|
・
Ice Attack
Lv. 3
・
Guard
Lv. 3
・
Special Ammo Boost
Lv. 2
|
| Armor Skills | |
|
・
Agitator
Lv. 5
・
Constitution
Lv. 3
・
Coalescence
Lv. 3
・
Evade Window
Lv. 2
・
Evade Extender
Lv. 2
・
Earplugs
Lv. 2
・
Bind Resistance
Lv. 1
・
Adaptability
Lv. 1
・
Shock Absorber
Lv. 1
・
Jin Dahaad's Revolt
(Set Bonus Skill)
・
Mizutsune's Prowess
(Set Bonus Skill)
・
Lord's Fury
(Group Skill)
|
|
Set B: Hunting Horn/Insect Glaive
| Weapons | |
|---|---|
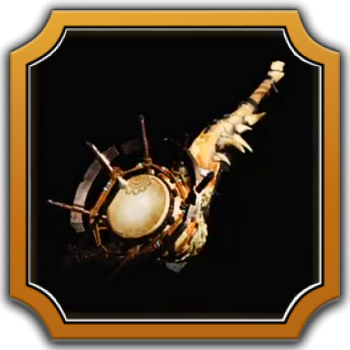 Dosha Farsounder III Dosha Farsounder III
Hunting Horn |
 Barina Perche IV Barina Perche IV
Insect Glaive |
| Armor | Items |
|
・
Potion
x10
・
Mega Potion
x10
・
Ration
x10
・
Max Potion
x2
・
Demondrug
x5
・
Might Seed
x10
・
Adamant Seed
x10
|
|
| Talisman | Mantle |
| Weapon Skills | |
|
・
Slugger
Lv.3
・
Horn Maestro
Lv. 2
|
・
Focus
Lv. 3
・
Critical Draw
Lv. 2
・
Charge Master
Lv. 2
・
Critical Status
Lv. 1
|
| Armor Skills | |
|
・
Wide-Range
Lv. 5
・
Peak Performance
Lv. 4
・
Partbreaker
Lv. 3
・
Constitution
Lv. 2
・
Stun Resistance
Lv. 2
・
Windproof
Lv. 2
・
Burst
Lv. 1
・
Flayer
Lv. 1
・
Stamina Surge
Lv. 1
・
Ambush
Lv. 1
・
Flinch Free
Lv. 1
・
Shock Absorber
Lv. 1
・
Doshaguma's Might
(Set Bonus Skill)
・
Gravios's Protection
(Set Bonus Skill)
|
|
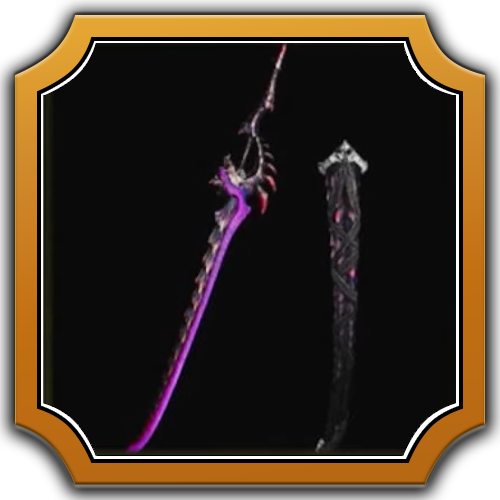
Set C: Long Sword/Switch Axe
| Weapons | |
|---|---|
|
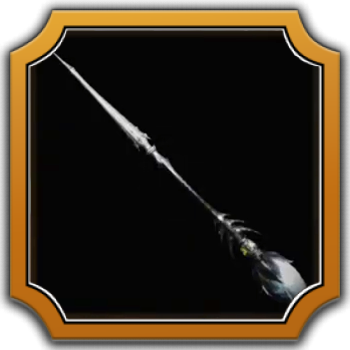
Stahlfakt I
Long Sword |
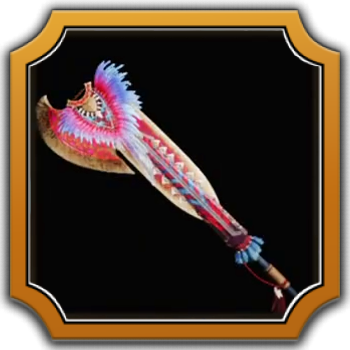 Uth Olacha III Uth Olacha III
Switch Axe |
| Armor | Items |
|
・
Potion
x10
・
Mega Potion
x10
・
Ration
x10
・
Max Potion
x2
・
Flash Pod
x1
|
|
| Talisman | Mantle |
| Weapon Skills | |
|
・
Critical Boost
Lv.3
・
Critical Element
Lv.3
・
Dragon Attack
Lv.2
|
・
Critical Eye
Lv.3
・
Power Prolonger
Lv.2
・
Critical Boost
Lv.2
|
| Armor Skills | |
|
・
Latent Power
Lv. 5
・
Resentment
Lv. 3
・
Maximum Might
Lv. 3
・
Antivirus
Lv. 3
・
Constitution
Lv. 2
・
Bleeding Resistance
Lv. 2
・
Evade Extender
Lv. 1
・
Flinch Free
Lv. 1
・
Shock Absorber
Lv. 1
・
Fulgur Anjanath's Will
(Set Bonus Skill)
・
Gore Magala's Tyranny
(Set Bonus Skill)
|
|
Boundless Blades Challenge Quest Monsters
Seregios Details
Monster Weakness
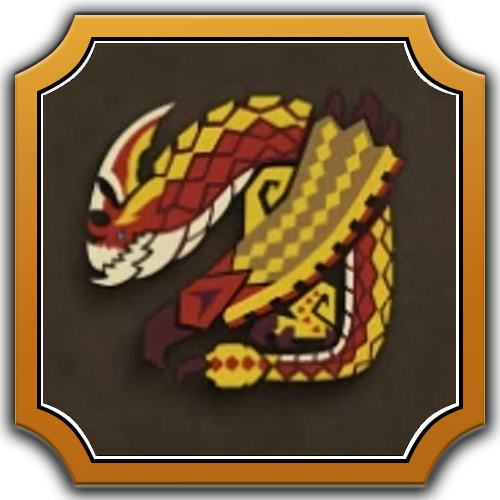 Seregios Seregios
|
||||||||||||||
|
|
|
|
||||||||||||
|
|
|
|
|
|
||||||||||
Boundless Blades Challenge Quest Rewards
Exclusive Seregios Pendants Based on Performance
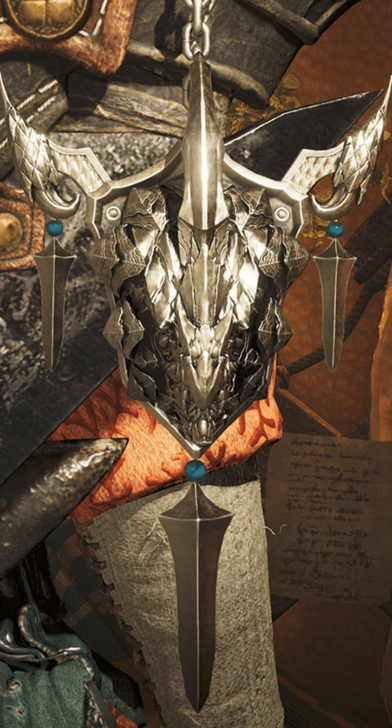
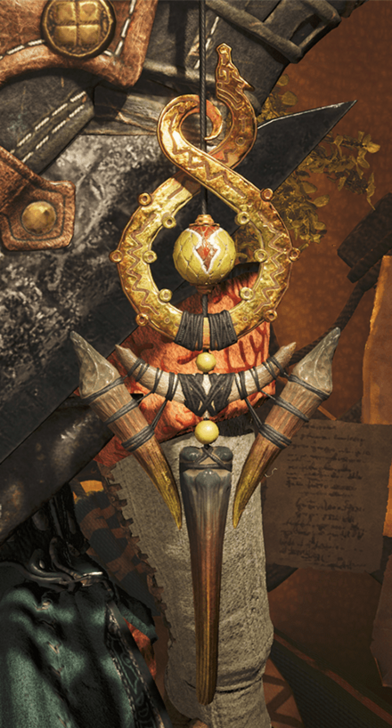 Seregios: Mark of Contest (Participation) |
 Seregios: Mark of Bravery (B Rank) |
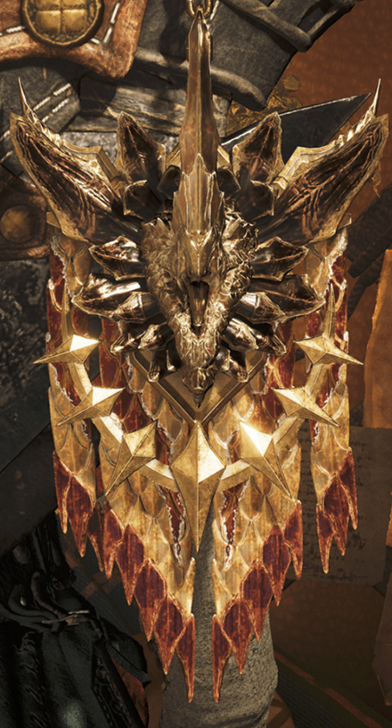 Seregios: Mark of Mastery (A Rank) |
Slay Seregios in this Challenge Quest to earn exclusive Pendants. The design you'll receive depends on your completion time, with all three Pendants awarded for achieving A Rank (05'00''00 or faster). These will be distributed around one to two weeks after the challenge quest ends, so expect to receive these in late October or early November.
Pendants are accessories that can be attached to Weapons and your Seikret.
Quest Rewards
| Rewards |
|---|
Monster Hunter Wilds Related Guides
Quest Guides by Type
 Assignment Quests Assignment Quests |
 Optional Quests Optional Quests |
 Event Quests Event Quests |
 Field Survey History Field Survey History |
 Investigation Quests Investigation Quests |
 Arena Quests Arena Quests |
 Challenge Quests Challenge Quests |
 Free Challenge Quests Free Challenge Quests |
List of Challenge Quests
|
|
|
|
|
|
|
|
Comment
Author

Seregios Challenge Quest: Boundless Blades
Please participate in our site
improvement survey
03/2026
improvement survey
03/2026
Would you assist in
improving Game8's site?
improving Game8's site?

×
We are listening to our users' valuable opinions and discussing how to act on them.
The information collected through this survey will be used for the purpose of improving our services. In addition, the information will only be disclosed a part of a statistic in a format that will not allow identification of personal information.
Begin Survey
Not Now
×
Please rate each item regarding Game8.co's Advertisements.
Amount of Ads
Very Dissatisfied
Somewhat Dissatisfied
Fine
Somewhat Satisfied
Highly Satisfied
Placement of Ads
Timing of Ad Display
Ad Loading Speed
Safeness of Ads
Content of Ads
×
Please rate each item regarding Game8.co's Quality of Articles.
Amount of information
Very Dissatisfied
Somewhat Dissatisfied
Fine
Somewhat Satisfied
Highly Satisfied
Frequency of updates
Speed of new information
Accuracy of articles
Understandibility of articles
Readability of sentences
×
Please rate each item regarding Game8.co's Usability of the Site.
Ease of finding information
Very Dissatisfied
Somewhat Dissatisfied
Fine
Somewhat Satisfied
Highly Satisfied
Loading Speed
Use of Color
Font Size
Visibility of Images
Easy to Understand Layout
×
Please rate each item regarding Game8.co's Message Boards, Comments.
Ease of Writing
Very Dissatisfied
Somewhat Dissatisfied
Fine
Somewhat Satisfied
Highly Satisfied
Readability
Ease in Finding Information
Comment Quality
Comment Quantity
Admin Response
×
Please rate each item regarding Game8.co's Site's new design.
Please rate our site's new design
Very Dissatisfied
Somewhat Dissatisfied
Fine
Somewhat Satisfied
Highly Satisfied
Do you think that the website's design change makes the site easier to use?
Has the new design made it easier for you to find information on the site?
Has the new design improved the overall visual appeal of the site?
How would you rate your overall satisfaction with the new design of the site?
×
How likely are you to recommend Game8 to someone you know?
Very Unlikely
0
1
2
3
4
5
6
7
8
9
10
Very Likely
If you have other opinions regarding potential improvement to the website, please share them with us. We would appreciate your honest opinion.
Note: This is a free response section, so you can proceed without entering anything.
Note: Please be sure not to enter any kind of personal information into your response.
Note: Please be sure not to enter any kind of personal information into your response.
×
Thank You
×
Thank you for participating in our survey! Your answers will help us to improve the quality of our website and services.
We hope you continue to make use of Game8.
We hope you continue to make use of Game8.
Close
Premium Articles

Rankings
Gaming News


Popular Games

Genshin Impact Walkthrough & Guides Wiki
Honkai: Star Rail Walkthrough & Guides Wiki
Umamusume: Pretty Derby Walkthrough & Guides Wiki
Pokemon Pokopia Walkthrough & Guides Wiki
Resident Evil Requiem (RE9) Walkthrough & Guides Wiki
Monster Hunter Wilds Walkthrough & Guides Wiki
Wuthering Waves Walkthrough & Guides Wiki
Arknights: Endfield Walkthrough & Guides Wiki
Pokemon FireRed and LeafGreen (FRLG) Walkthrough & Guides Wiki
Pokemon TCG Pocket (PTCGP) Strategies & Guides Wiki


Recommended Games
Diablo 4: Vessel of Hatred Walkthrough & Guides Wiki
Fire Emblem Heroes (FEH) Walkthrough & Guides Wiki
Yu-Gi-Oh! Master Duel Walkthrough & Guides Wiki
Super Smash Bros. Ultimate Walkthrough & Guides Wiki
Pokemon Brilliant Diamond and Shining Pearl (BDSP) Walkthrough & Guides Wiki
Elden Ring Shadow of the Erdtree Walkthrough & Guides Wiki
Monster Hunter World Walkthrough & Guides Wiki
The Legend of Zelda: Tears of the Kingdom Walkthrough & Guides Wiki
Persona 3 Reload Walkthrough & Guides Wiki
Cyberpunk 2077: Ultimate Edition Walkthrough & Guides Wiki


All rights reserved
©CAPCOM
The copyrights of videos of games used in our content and other intellectual property rights belong to the provider of the game.
The contents we provide on this site were created personally by members of the Game8 editorial department.
We refuse the right to reuse or repost content taken without our permission such as data or images to other sites.