A Strange Story in Konda Quest Guide
✉ Send your thoughts in our Genshin 6.4 Patch Survey!
★ Exclusive: Dive back in time with the Meta History
◆ Hot: Version 6.4, Luna 5 Codes
◆ Builds: Varka, Flins, Skirk, Escoffier
◆ Events: Travelers' Tales, He Who Caught the Wind
◆ Future: Linnea, Version 6.5 Luna VI
A Strange Story in Konda is the first quest under the Sacred Sakura Cleansing Ritual quest chain in the Narukami Island for Genshin Impact 2.0. See how to unlock the World Quest, its walkthrough, and the complete rewards here in this guide!
| Sakura Cleansing Ritual Quests | |||||
|---|---|---|---|---|---|
| Strange Story in Konda | Sacrificial Offering | ||||
| Cleansing Defilement | Tanuki-Bayashi | Yougou Cleansing | |||
List of Contents
How to Unlock A Strange Story in Konda
Complete the Prerequisite Quests
To unlock A Strange Story in Konda, you must have first completed Ritou Escape Plan of the Archon Quest Chapter 2, Act 1. Once done, talk to Hanachirusato in Konda Village to unlock both the Sacred Sakura Cleansing Ritual and A Strange Story in Konda quests.
Archon Quest Chapter 2: Act 1 Quest Guide
A Strange Story in Konda Walkthrough
Use the Power of Electro
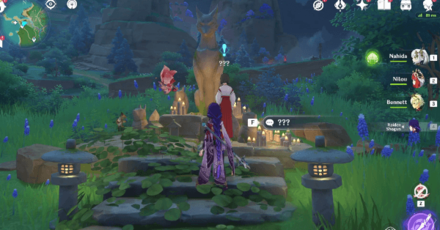
Approach the unnamed Shrine Maiden standing by the Kitsune Statues north of Konda Village. Afterwards, use the power of Electro on the Sky Kitsune Statue and obtain the ward.
Go to Konda Village
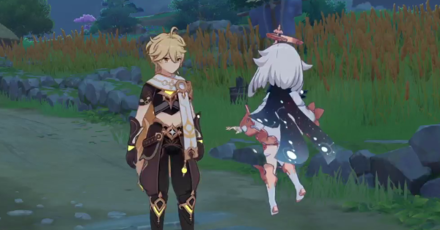
At Hanachirusato's request, go to Konda Village and ask the locals for information to know more about the barrier surrounding the village.
How to Ask the Locals for Information
| Local | Location & Information |
|---|---|
| Futaba | 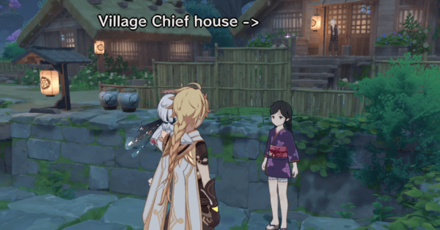 Futaba is located a couple of steps away from the village entrance. She's standing by the gully, nearby the Village Chief's house. Futaba will tell you about a strange noise and floating bags in the village gully. |
| Takeru | 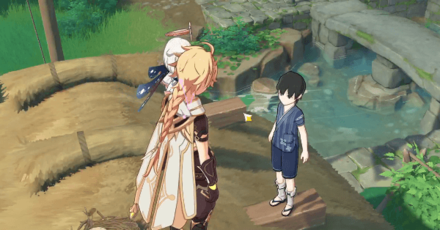 Takeru is on the roof of the house beside Tejima. It's on the other side of the road from Konda Densuke's house. He will tell you about the broken cart at the entrance of the valley. |
| Saimon Eri | 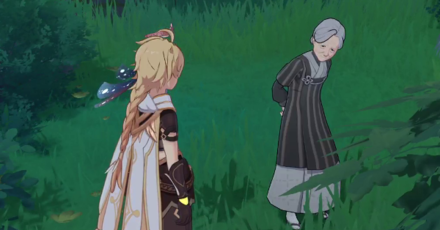 Saimon Eri is the old woman sitting by the tomato orchard, a few paces away from the Teleport Waypoint in Konda Village. She'll tell you about the mora scattered inside the dry well behind the village chief's house. |
| Konda Densuke | 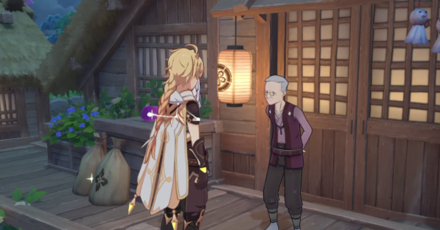 You can optionally talk to Konda Densuke in the middle of this objective, but the next objective that asks you to talk to him will no longer appear, if you do so prematurely. |
You can immediately look for the clues as soon as you obtain them from the locals.
Ask the Locals for Information Guide
Ask the Konda Village Chief
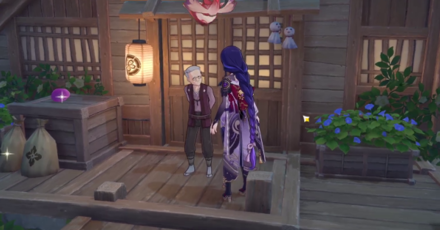
If you haven't talked to Konda Densuke during the previous objective, trace your steps back to Futaba's location and head over to the chief's house by crossing the small bridge over the gully, and talk to him.
Look for Clues
After speaking to one local, you have the option to check out their clues based on the hint they provided when you have first spoken to any of them. Alternatively, you can talk to all the locals first before checking out their hints and looking for the clues.
How to Look for the Clues
| Local | Location & Information |
|---|---|
| Cargo Bag Fished Out from Water | From Futaba's location, press forward until you see a small bridge. Make a sharp left from this bridge and walk against the direction of the river stream, until you see a broken-down pile of woods. Obtain the cargo bag sitting atop it. |
| Ragged List of Goods | Walk over to the village entrance until you see the hilichurl mob standing by the broken cart. Simply defeat them then obtain the ragged list of goods from the cart. |
| Purse by the Dried-Up Well | Simply walk around the village chief's house until you spot the dried-up well. The purse is placed just behind it, inside an empty, half-buried wooden pail. |
Cut a Deal With the Village Chief
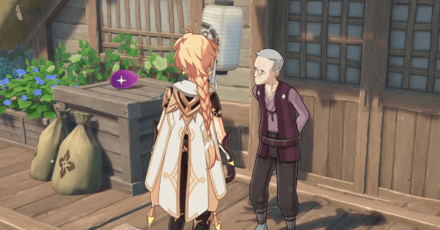
After obtaining all the clues, bring them over to Konda Densuke then cut a deal with the village chief. He will give in eventually, and tell you about his diary he placed on his roof.
Look for the Chief's Diary

The diary is placed inside the nest of a bird. It tells of a broken house across the gully on the east side of the village in which the key to the well is hidden.
Head Over to the Area in the Notebook
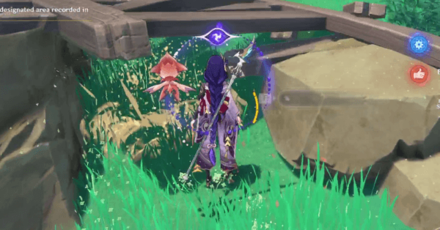
Go to the east side of the village until you spot a mob of Nobushis gathering around the broken house. Defeat them to obtain the old key.
Descend Into the Well
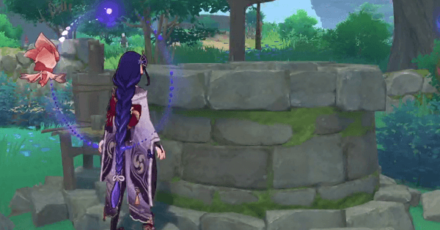
Go back to Konda Desuke's house in Konda Village, and descend into the well. Use the old key you obtained from the broken house in east side of the village.
How to Explore the Bottom of the Well
| Objectives | |
|---|---|
| 1 | Get the Exquisite Chest a few steps away the ladder you just descended from. Then, head towards the Electro boulder and apply Pyro to make it explode. |
| 2 | Head through the passageway, until you see a small cavern with a number of wooden ledges, an Electro Seelie, and a Thunder Sakura Bough. You can follow the Seelie for a common chest and quick guide towards a small opening blocked by crates to get the Electroculus. Or, you can summon the Electrogranum from the Sakura Bough to pass through the Electro barrier at the bottom. |
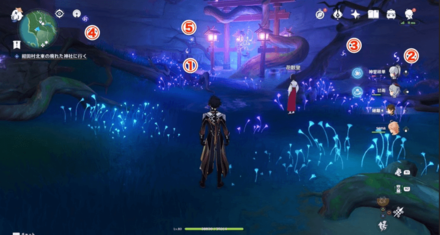
| 3 | Once inside the underbelly chamber, place the ward on the empty lantern in front of the Shrine Gate. This will activate the Konda Village Shrine Puzzle. Solving the puzzle will summon an Ochimusha, an enemy patterned from the Kairagi. |
How to Solve the Konda Village Shrine Puzzle
| Konda Village Shrine Puzzle Guide | ||
|---|---|---|
 Click here for the original image |
||
| Notch Symbol |
Assigned No. |
Instructions |
| ② | Go the eastern notch to adjust. | |
| ③ | Go to the northeast notch to adjust. | |
| ⑤ | Go to the northwest notch near the back of the guide symbol! | |
| ④ | Go the far west notch to adjust the order. | |
| ① | Head back to main notch and press ''Pray''! | |
The main notch will always have the ① symbol when you activate it through the "Pray" button!
Talk to Hanachirusato

After defeating the Ochimusha, talk to Hanachirusato. She'll tell you of the next location of the barrier you need to cleanse.
A Strange Story in Konda Information
Sub-Quest of Sacred Sakura Cleansing Ritual
A Strange Story in Konda is a subquest of the quest, Sacred Sakura Cleansing Ritual where the Traveler cleansed the roots of the Sacred Sakura, with the help of the Hanachirusato.
A Strange Story in Konda is the first part of the Sacred Sakura Cleansing Ritual world quest chain.
Sacred Sakura Cleansing Ritual Quest Guide
A Strange Story in Konda Rewards
Total Quest Rewards
| Total Quest Rewards |
 Primogem x40 |
 Mora x20,000 |
 Adventure EXP x350 |
|---|---|---|
Genshin Impact Related Guides

Other Sacred Sakura Cleansing Ritual Quest Guides
| Sacred Sakura Cleansing Ritual World Quest Guides | ||
|---|---|---|
| A Strange Story in Konda | Sacrificial Offering | Cleansing Defilement |
| Tanuki-Bayashi in the Forest | Yougou Cleansing | |
Comment
Weird that the first step in this quest chain appeared with a few days time limit in my journal, as if it were an event quest. But as soon as I did the first dialog, the time limit disappeared.
Author
A Strange Story in Konda Quest Guide
improvement survey
03/2026
improving Game8's site?

Your answers will help us to improve our website.
Note: Please be sure not to enter any kind of personal information into your response.

We hope you continue to make use of Game8.
Rankings
Gaming News
Popular Games

Genshin Impact Walkthrough & Guides Wiki

Honkai: Star Rail Walkthrough & Guides Wiki

Umamusume: Pretty Derby Walkthrough & Guides Wiki

Pokemon Pokopia Walkthrough & Guides Wiki

Resident Evil Requiem (RE9) Walkthrough & Guides Wiki

Monster Hunter Wilds Walkthrough & Guides Wiki

Wuthering Waves Walkthrough & Guides Wiki

Arknights: Endfield Walkthrough & Guides Wiki

Pokemon FireRed and LeafGreen (FRLG) Walkthrough & Guides Wiki

Pokemon TCG Pocket (PTCGP) Strategies & Guides Wiki
Recommended Games

Diablo 4: Vessel of Hatred Walkthrough & Guides Wiki

Fire Emblem Heroes (FEH) Walkthrough & Guides Wiki

Yu-Gi-Oh! Master Duel Walkthrough & Guides Wiki

Super Smash Bros. Ultimate Walkthrough & Guides Wiki

Pokemon Brilliant Diamond and Shining Pearl (BDSP) Walkthrough & Guides Wiki

Elden Ring Shadow of the Erdtree Walkthrough & Guides Wiki

Monster Hunter World Walkthrough & Guides Wiki

The Legend of Zelda: Tears of the Kingdom Walkthrough & Guides Wiki

Persona 3 Reload Walkthrough & Guides Wiki

Cyberpunk 2077: Ultimate Edition Walkthrough & Guides Wiki
All rights reserved
Copyright© 2012-2024 HoYoverse — COGNOSPHERE. All Rights Reserved.
The copyrights of videos of games used in our content and other intellectual property rights belong to the provider of the game.
The contents we provide on this site were created personally by members of the Game8 editorial department.
We refuse the right to reuse or repost content taken without our permission such as data or images to other sites.


![Monster Hunter Stories 3 Review [First Impressions] | Simply Rejuvenating](https://img.game8.co/4438641/2a31b7702bd70e78ec8efd24661dacda.jpeg/thumb)


thank you so much for making this page and helping me out! i always gravitate towards these pages when im playing grindy games like genshin and wiz101, this quest was hard but im glad i got a weapon for xingqiu! <33