This survey will take about 1 minute.
Your answers will help us to improve our website.
Genshin Impact
How to Use Electrograna | Inazuma Electrogranum Guide
✉ Send your thoughts in our Genshin 6.4 Patch Survey!
★ Exclusive: Dive back in time with the Meta History
◆ Hot: Version 6.4, Luna 5 Codes
◆ Builds: Varka, Flins, Skirk, Escoffier
◆ Events: Travelers' Tales, He Who Caught the Wind
◆ Future: Linnea, Version 6.5 Luna VI

The Electrogranum is an Inazuma feature in Version 2.0 of Genshin Impact. Learn how to summon Electrograna, what it's used for, and other information in this guide!
List of Contents
What is the Electrogranum?

The Inazuma Region's Grana
Electrograna are the Inazuma variant of Mondstadt's Anemograna and Liyue's Geograna. You can use them to solve Inazuma puzzles, improve your exploration experience, or defend yourself against harmful Inazuma features!
View Inazuma Map Guide
How to Summon Electrograna
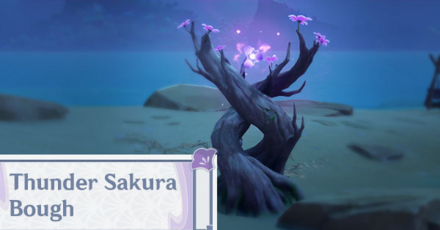
Use the Thunder Sakura Bough
Summon an Electrogranum Spirit by interacting with the Thunder Sakura Bough. Thunder Sakura Boughs are found in islands all over Inazuma!
Note that Electrograna will disappear after a period of time, so use them quickly!
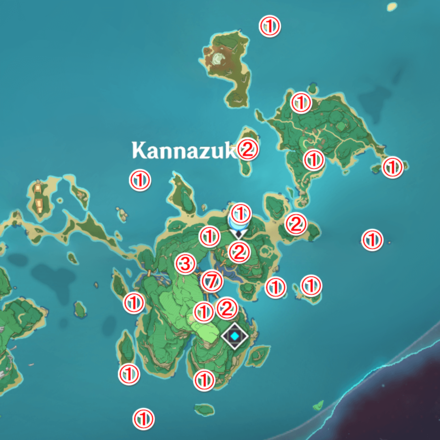
Where to find Thunder Sakura Boughs
All Thunder Sakura Bough Locations
| All Thunder Sakura Bough Locations | |
|---|---|
 |
 |
 |
 |
 |
 |
Note that the numbers above indicate how many Thunder Sakura Boughs are in a specific area. These maps also doesn't mark the ones that appear as part of puzzles, time trials, challenges, and quests!
How to Level Up Electrograna
Use the Sacred Sakura Tree

To strengthen your Electrograna, you have to raise your Sacred Sakura's Favor Level! Offer Electro Sigils to the Sakura Tree to increase your Electrogranum level and gain valuable rewards!
How to Increase Sacred Sakura's Favor
Electrogranum Rewards per Level
| Lvl | Electrogranum Upgrades |
|---|---|
| 1 | At Sacred Sakura Level 0 • Can use Thunder Spheres • Thunder Barrier Pass: Lvl. 1 • Electro DMG Protection: 6 strikes • Electrogranum Duration: 15s |
| 2 | At Sacred Sakura Level 3 • Electro Characters with an Energy level of 50 or below will gain passive Energy Recharge |
| 3 | At Sacred Sakura Level 7 • Electrogranum Duration: ↑20s |
| 4 | At Sacred Sakura Level 10 • Electro Characters on the field who deal DMG will trigger Electrogranum Electro Bolts once every 6s |
| 5 | At Sacred Sakura Level 13 • Electro DMG Protection: ↑8 strikes |
| 6 | At Sacred Sakura Level 17 • Thunder Barrier Pass: ↑Lvl. 2 |
| 7 | At Sacred Sakura Level 20 • Electro Bolts CD is decreased to 4s |
| 8 | At Sacred Sakura Level 23 • Electrogranum Duration: ↑25s |
| 9 | At Sacred Sakura Level 27 • Electro Bolts will deal 20% more damage for each Electro Character in your party |
| 10 | At Sacred Sakura Level 30 • Every 3 Electro Bolts will cause the next Electro Bolt to deal AoE Lightning DMG near your Character |
| 11 | At Sacred Sakura Level 33 • Electro DMG Protection: ↑10 strikes |
| 12 | At Sacred Sakura Level 37 • Thunder Barrier Pass: ↑Lvl. 3 |
| 13 | At Sacred Sakura Level 40 • Electro Bolts will deal 30% more damage for each Electro Character in your party |
| 14 | At Sacred Sakura Level 43 • Electrogranum Duration: ↑30s |
| 15 | At Sacred Sakura Level 47 AoE Lightning Blasts are now triggered after 2 Electro Bolts only |
How to Use Electrograna
All Electrogranum Uses
| Ways to Use Electrograna | |
|---|---|
| Thunder Sphere | Thunder Barrier |
| Balethunder | Lightning Probe |
| Relay Stone Substitute | |
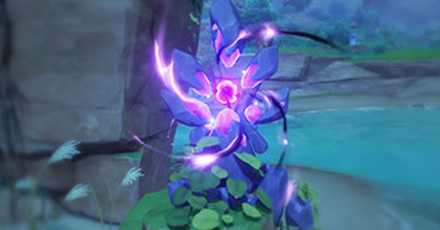
Used on Thunder Spheres

Summon an Electrogranum and approach Thunder Spheres to move quickly towards the direction of the Thunder Sphere. This is a great feature for exploration, and possibly Inazuma time trials!
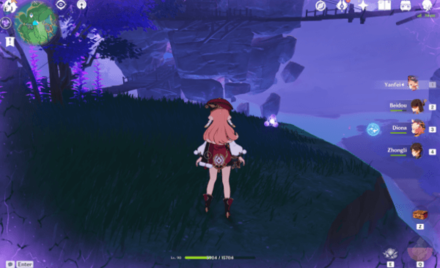
| Icon | Icon Information |
|---|---|
 |
This icon appears on the lower part of your screen when in the range of a Thunder Sphere. |
Used on Thunder Barriers

The Thunder Barrier is an impassable obstacle found in Inazuma, and is similar to the Wind Barriers found in Mondstadt. The only way to get through a Thunder Barrier is by having an Electrogranum!
Thunder Barrier Strength Levels
| Thunder Barrier Levels | ||
|---|---|---|
 Level 1 Level 1 |
 Level 2 Level 2 |
 Level 3 Level 3 |
The stronger a Thunder Barrier is, the stronger your Electrogranum should be! If you can't pass the stronger Thunder Barriers, then you'll need to raise your Electrograna level.
Defense against Thunderstones
Some Thunder Barriers contain Thunderstones within them that deal continuous damage to players within the barrier. Having an Electrograna can temporarily supress the Thunderstone so you don't take damage!
Used for Balethunder
Some areas in Inazuma are affected by high Electro concentrations that gradually drain your HP. This effect is called Balethunder and is similar to the Sheer Cold effect in Dragonspine. Players can use Electrograna to avoid taking damage from Balethunder!
Used to Solve Lightning Probe Puzzles

Lightning Probes point towards creatures, items and characters affected by Electro. You can use an Electrogranum to steer the Lightning Probe where you need it to point towards.
View Lightning Probe Puzzle Guide
Relay Stone Substitutes

The new Electro Mechanism works similarly to a circuit. You can use Electrogranum as a substitute for Relay Stones to complete the circuit in Electro Stone Puzzles.
View Electro Stone Puzzle Guide
Genshin Impact Related Guides

Map Guides for Teyvat Nations
| List of Region Map Guides | |
|---|---|
 Mondstadt Map Guide Mondstadt Map Guide
|
 Liyue Map Guide Liyue Map Guide |
 Inazuma Map Guide Inazuma Map Guide |
 Sumeru Map Guide Sumeru Map Guide |
 Fontaine Map Guide Fontaine Map Guide |
 Natlan Map Guide Natlan Map Guide |
 Nod-Krai Map Guide Nod-Krai Map Guide |
|
Map Guides for Other Areas
| List of Map Guides | |
|---|---|
 Enkanomiya Enkanomiya |
 Golden Archipelago Golden Archipelago |
 Dragonspine Dragonspine |
 The Chasm The Chasm |
 Sumeru Rainforest Sumeru Rainforest |
 Sumeru Desert Sumeru Desert |
 Veluriyam Mirage Veluriyam Mirage |
 Chenyu Vale Chenyu Vale |
 Simulanka Simulanka |
 Sacred City of Tollan Sacred City of Tollan |
 Easybreeze Holiday Resort Easybreeze Holiday Resort |
|
Oculi Location Guides
| Teyvat Oculus Guides | |||
|---|---|---|---|
 All Oculi All Oculi |
 Anemoculus Anemoculus |
 Geoculus Geoculus |
 Electroculus Electroculus |
 Dendroculus Dendroculus |
 Hydroculus Hydroculus |
 Pyroculus Pyroculus |
 Lunoculus Lunoculus |
Other Oculus Map Guides
| Dendroculus Guides | |
|---|---|
| Rainforest Dendroculus | All Desert Dendroculus |
| Hadramaveth Dendroculus | Girdle of the Sands Dendroculus |
Comment
Author

How to Use Electrograna | Inazuma Electrogranum Guide
Please participate in our site
improvement survey
03/2026
improvement survey
03/2026
Would you assist in
improving Game8's site?
improving Game8's site?

×
We are listening to our users' valuable opinions and discussing how to act on them.
The information collected through this survey will be used for the purpose of improving our services. In addition, the information will only be disclosed a part of a statistic in a format that will not allow identification of personal information.
Begin Survey
Not Now
×
Please rate each item regarding Game8.co's Advertisements.
Amount of Ads
Very Dissatisfied
Somewhat Dissatisfied
Fine
Somewhat Satisfied
Highly Satisfied
Placement of Ads
Timing of Ad Display
Ad Loading Speed
Safeness of Ads
Content of Ads
×
Please rate each item regarding Game8.co's Quality of Articles.
Amount of information
Very Dissatisfied
Somewhat Dissatisfied
Fine
Somewhat Satisfied
Highly Satisfied
Frequency of updates
Speed of new information
Accuracy of articles
Understandibility of articles
Readability of sentences
×
Please rate each item regarding Game8.co's Usability of the Site.
Ease of finding information
Very Dissatisfied
Somewhat Dissatisfied
Fine
Somewhat Satisfied
Highly Satisfied
Loading Speed
Use of Color
Font Size
Visibility of Images
Easy to Understand Layout
×
Please rate each item regarding Game8.co's Message Boards, Comments.
Ease of Writing
Very Dissatisfied
Somewhat Dissatisfied
Fine
Somewhat Satisfied
Highly Satisfied
Readability
Ease in Finding Information
Comment Quality
Comment Quantity
Admin Response
×
Please rate each item regarding Game8.co's Site's new design.
Please rate our site's new design
Very Dissatisfied
Somewhat Dissatisfied
Fine
Somewhat Satisfied
Highly Satisfied
Do you think that the website's design change makes the site easier to use?
Has the new design made it easier for you to find information on the site?
Has the new design improved the overall visual appeal of the site?
How would you rate your overall satisfaction with the new design of the site?
×
How likely are you to recommend Game8 to someone you know?
Very Unlikely
0
1
2
3
4
5
6
7
8
9
10
Very Likely
If you have other opinions regarding potential improvement to the website, please share them with us. We would appreciate your honest opinion.
Note: This is a free response section, so you can proceed without entering anything.
Note: Please be sure not to enter any kind of personal information into your response.
Note: Please be sure not to enter any kind of personal information into your response.
×
Thank You
×
Thank you for participating in our survey! Your answers will help us to improve the quality of our website and services.
We hope you continue to make use of Game8.
We hope you continue to make use of Game8.
Close


Rankings
Gaming News


Popular Games

Genshin Impact Walkthrough & Guides Wiki
Honkai: Star Rail Walkthrough & Guides Wiki
Umamusume: Pretty Derby Walkthrough & Guides Wiki
Pokemon Pokopia Walkthrough & Guides Wiki
Resident Evil Requiem (RE9) Walkthrough & Guides Wiki
Monster Hunter Wilds Walkthrough & Guides Wiki
Wuthering Waves Walkthrough & Guides Wiki
Arknights: Endfield Walkthrough & Guides Wiki
Pokemon FireRed and LeafGreen (FRLG) Walkthrough & Guides Wiki
Pokemon TCG Pocket (PTCGP) Strategies & Guides Wiki


Recommended Games
Diablo 4: Vessel of Hatred Walkthrough & Guides Wiki
Fire Emblem Heroes (FEH) Walkthrough & Guides Wiki
Yu-Gi-Oh! Master Duel Walkthrough & Guides Wiki
Super Smash Bros. Ultimate Walkthrough & Guides Wiki
Pokemon Brilliant Diamond and Shining Pearl (BDSP) Walkthrough & Guides Wiki
Elden Ring Shadow of the Erdtree Walkthrough & Guides Wiki
Monster Hunter World Walkthrough & Guides Wiki
The Legend of Zelda: Tears of the Kingdom Walkthrough & Guides Wiki
Persona 3 Reload Walkthrough & Guides Wiki
Cyberpunk 2077: Ultimate Edition Walkthrough & Guides Wiki


All rights reserved
Copyright© 2012-2024 HoYoverse — COGNOSPHERE. All Rights Reserved.
The copyrights of videos of games used in our content and other intellectual property rights belong to the provider of the game.
The contents we provide on this site were created personally by members of the Game8 editorial department.
We refuse the right to reuse or repost content taken without our permission such as data or images to other sites.