Mizutsune Challenge Quest: Fleeting Bubbles
★ Arkveld Gamma Armor | MH Stories 3 Collab
☆ Version 1.041: Sororal α Armor | Shatterseal
★ How to Unlock Proof of a Hero Quest
☆ Omega Planetes | Savage Omega | Builds vs Omega
★ Armor Set Search updated for Ver 1.041
☆ HR50+ Builds | Tier List | Weapon Guides
This is a complete guide on the Mizutsune Challenge Quest, Fleeting Bubbles, for Monster Hunter Wilds. Read on to see the full guide on how to beat Mizutsune in the Arena, how to get A Rank, armor and weapon loadouts, and so much more!
How to Get A Rank
| Tips to Get A Rank |
|---|
|
|
Use the Gunlance as Primary
| Best Weapon Set for Solo |
|---|
 Ajara Gunpike II Ajara Gunpike II
▼Set B: Gunlance▼ |
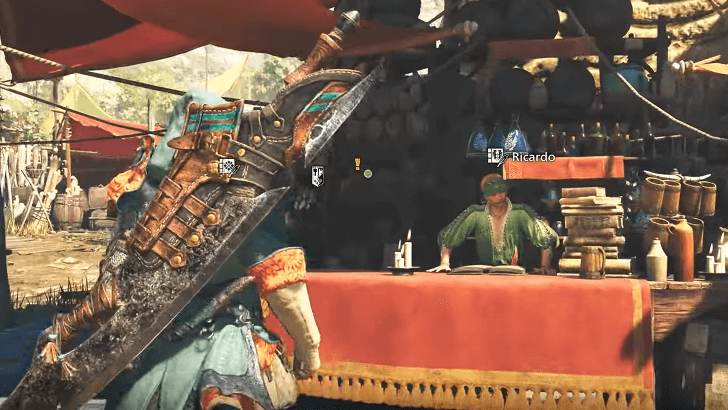
If you're aiming for an easy A Rank against the Mizutsune, we recommend using the Gunlance. This weapon allows you to deal massive damage to Mizutsune thanks to its Wide Shelling, while still keeping you safe from its attacks thanks to the Gunlance's shield. The set has Ambush, which boosts your attack after doing a sneak attack on Mizutsune.
Use Charged Shelling to Charge Wyvern's Fire
Charged Shelling not only deals a lot of damage, but also quickly charges your Wyvern's Fire. Shooting six total Charged Shells is enough to charge one shot of Wyvern's Fire, so take advantage of this and shoot Wyvern's Fire often.
Perform Wyrmstake Full Blast When Able
Whenever Mizutsune goes down, take advantage of it and deal massive damage with a Multi Wyrmstake Full Blast. If you have Wyvern's Fire charges, use those as well as the wind-up animation is shortened after a Multi Wyrmstake Full Blast.
Apply Buffs Before The Fight
Before the fight officially begins, drink the Demondrug so that you get the Attack Power buff. This will give you enough of an Attack Power boost that lasts for 30 minutes, giving you a damage boost for the entire fight.
Additionally, eating the Well-Done Steak that comes with Set B helps you gain max Health and Stamina, which will help in the fight. It also activates Protein Fiend I, which gives a bonus of 15 attack for 2 minutes.
You can do all of these while riding your Seikret to save time as you can move quickly while consuming buff items.
Use Evasion Mantle During the Early Stages
The Set B preset includes an Evasion Mantle, which can be used during the early stages of the fight to boost your offensive potential. When activated, it allows you to perform a Perfect Dodge.
If timed correctly, this grants a 1.2x increase to Attack Power for 10 seconds, giving you a strong edge in combat. Additionally, as the Set B armor contains Adrenaline Rush, you also get +20 Raw Attack Power for 30 seconds.
Focus Strike When Able
Whenever Mizutsune gets Wounds, make sure to perform a Focus Strikes as it deals a lot of damage while also interrupting Mizutsune's attacks.
A Weak Point Appears After Charged Water Blast
Additionally, a weak point appears in Mizutsune's mouth after it performs its Charged Water Blast, which you can immediately Focus Strike to stagger it.
How to Use Focus Mode and Focus Strike
Take Advantage of Your Shield
The Gunlance's large shield is able to easily block Mizutsune's attacks, including its water beam. You can take advantage of this by blocking Mizutsune's attacks and attacking right after. This is especially useful against Mizutsune's water beam, as blocking the initial attack *makes you immune to the rest of the attack.
Additionally, performing a Perfect Guard not only activates the Gunlance's Offensive Guard, but also allows you to shoot a sped up Wyvern's Fire. This does, however, leave you open for attack while charging, so make sure you are safe before committing.
How to Block and Perfect Guard
Avoid Bringing a Support Hunter
If you're not doing the Mizutsune challenge quest with a friend, try to do it solo without a support hunter. This means the monster's HP won't scale higher, and you'll always have the monster's attention, making it more predictable.
How to Unlock Fleeting Bubbles Challenge Quest
Limited Challenge Quest
| Fleeting Bubbles Challenge Quest Availability |
|---|
| Event Quest ended |
The Fleeting Bubbles Challenge Quest launched on July 8, 2025, and was available for 14 days until July 22, 2025 4:59 PM PT.
Only Playable from HR 21 or Higher
The Fleeting Bubbles quest is accessible to players who have reached at least HR 21.
Walkthrough and List of Main Story Chapters
Fleeting Bubbles Challenge Quest Overview
Basic Information
| Monsters | |||
|---|---|---|---|
| Time | 50 mins. | Type | Slaying |
| Client | Ricardo | Reward Money | 19080 |
| Difficulty | H★5 | Region | Wounded Hollow |
| Objective | Slay the Mizutsune | ||
| Conditions | ・HR 21 or higher | ||
| Failure |
・Time expires ・Faint 9 times |
||
| Available Weapons | |||
| Set A | |||
| Set B | |||
| Set C | |||
Rank Clear Times
| A Rank | 04'30''00 |
|---|---|
| B Rank | 08'00''00 |
| C Rank | 50'00''00 |
Fleeting Bubbles Challenge Quest Equipment
| Weapons and Armor | ||
|---|---|---|
| Set A: Sword and Shield Charge Blade |
Set B: Dual Blades Gunlance |
Set C: Hammer Light Bowgun |
Set A: Sword and Shield/Charge Blade
| Weapons | |
|---|---|
 Hana no Nagoriwo I Hana no Nagoriwo I
Great Sword |
 Axelion Blade I Axelion Blade I
Charge Blade |
| Armor | Items |
|
・
Potion
x10
・
Mega Potion
x10
・
Ration
x10
・
Max Potion
x2
・
Shock Trap
x1
・
Nulberry
x10 |
|
| Talisman | Mantle |
| Decorations | |
|
・
Tenderizer Jewel【3】
x2
・
Furor Jewel【2】
x3
|
|
Set B: Dual Blades/Gunlance
| Weapons | |
|---|---|
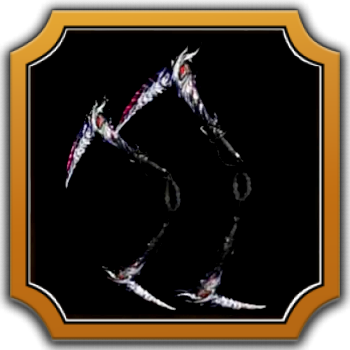 Chthonian Kusarigamas II Chthonian Kusarigamas II
Dual Blades |
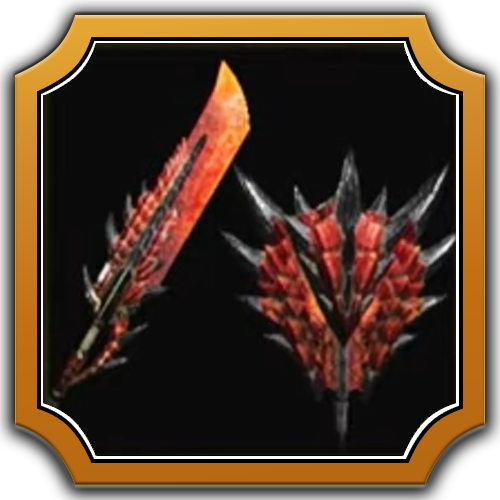
Ajara Gunpike II
Gunlance |
| Armor | Items |
|
・
Potion
x10
・
Mega Potion
x10
・
Ration
x10
・
Well-done Steak
x5
・
Max Potion
x2
・
Demondrug
x5
・
Adamant Seed
x10
・
Nulberry
x10
・
Cleanser
x10
・
Whetfish Fin+
x5 |
|
| Talisman | Mantle |
| Decorations | |
|
・
Sharp Jewel【1】
x2
・
Gobbler Jewel【1】
x3
・
Sprinter Jewel【1】
x2
・
Refresh Jewel【2】
x2
|
|
Set C: Hammer/Light Bowgun
| Weapons | |
|---|---|
 Rompo Wrecker II Rompo Wrecker II
Hammer |
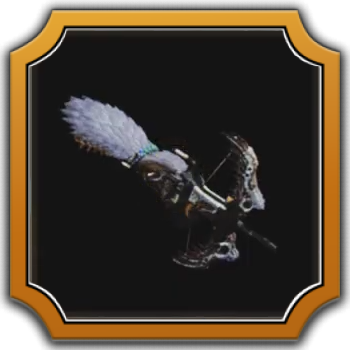 Felling Fulgur I Felling Fulgur I
Light Bowgun |
| Armor | Items |
|
・
Potion
x10
・
Mega Potion
x10
・
Ration
x10
・
Max Potion
x2
・
Demon Powder
x3
・
Mega Barrel Bomb
x2
・
Nulberry
x10
・
Cleanser
x10
・Poison Knife x5
・
Thunderbug Capacitor
x5 |
|
| Talisman | Mantle |
| Decorations | Bowgun Ammo |
|
・
Protection Jewel【1】
x2
・
Phoenix Jewel【2】
x2 |
・
Normal Ammo
∞
・
Pierce Ammo
∞
・
Spread Ammo
∞
・
x12
・
Thunder Ammo
x60 |
Fleeting Bubbles Challenge Quest Monsters
Mizutsune Weakness
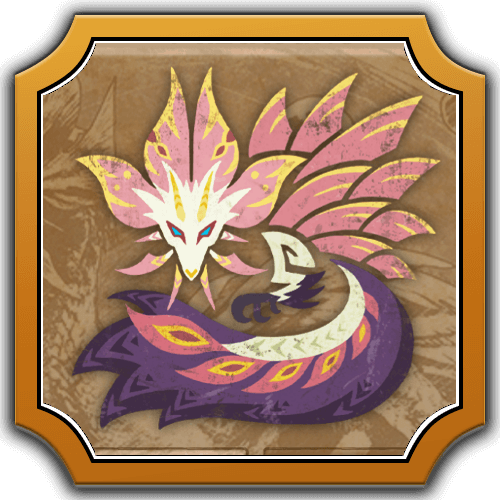 Mizutsune Mizutsune
|
||||||||||||||
|
|
|
|
||||||||||||
|
|
|
|
|
|
||||||||||
Mizutsune has a weakness to Thunder and Dragon elements. Its head takes the most amount of damage from Blunt, Sever, and Shot damage types.
How to Unlock Mizutsune: Weakness and Drops
Fleeting Bubbles Challenge Quest Rewards
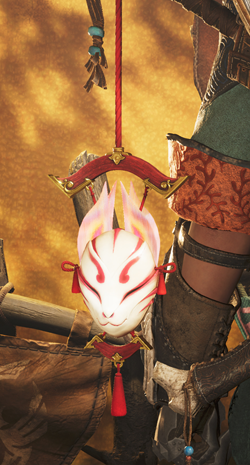
Exclusive Mizutsune Pendants Based on Performance
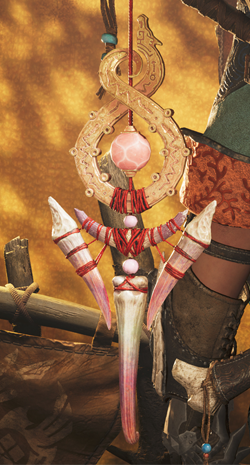 Mizutsune: Mark of Contest (Participation) |
 Mizutsune: Mark of Bravery (B Rank) |
 Mizutsune: Mark of Mastery (A Rank) |
Slay Mizutsune in this Challenge Quest to earn exclusive Pendants. The design you'll receive depends on your completion time, with all three Pendants awarded for achieving A Rank (04'30''00 or faster). These will be distributed around one to two weeks after the challenge quest ends, so expect to receive these in late July or early August.
Pendants are accessories that can be attached to Weapons and your Seikret.
Monster Hunter Wilds Related Guides
Quest Guides by Type
 Assignment Quests Assignment Quests |
 Optional Quests Optional Quests |
 Event Quests Event Quests |
 Field Survey History Field Survey History |
 Investigation Quests Investigation Quests |
 Arena Quests Arena Quests |
 Challenge Quests Challenge Quests |
 Free Challenge Quests Free Challenge Quests |
List of Challenge Quests
|
|
|
|
|
|
Unpierceable and Unstoppable | Boundless Blades |
Comment
Author

Mizutsune Challenge Quest: Fleeting Bubbles
Premium Articles

Rankings
- We could not find the message board you were looking for.
Gaming News

![Death Stranding 2: On The Beach Review [PC] | A Port That Delivers](https://img.game8.co/4447392/15310a0c9aa1b6843bb713b2ea216930.jpeg/show)

![Death Stranding 2: On The Beach Review [PC] | A Port That Delivers](https://img.game8.co/4447392/15310a0c9aa1b6843bb713b2ea216930.jpeg/thumb)

Popular Games

Genshin Impact Walkthrough & Guides Wiki
Umamusume: Pretty Derby Walkthrough & Guides Wiki
Crimson Desert Walkthrough & Guides Wiki
Monster Hunter Stories 3: Twisted Reflection Walkthrough & Guides Wiki
Honkai: Star Rail Walkthrough & Guides Wiki
Pokemon Pokopia Walkthrough & Guides Wiki
The Seven Deadly Sins: Origin Walkthrough & Guides Wiki
Wuthering Waves Walkthrough & Guides Wiki
Zenless Zone Zero Walkthrough & Guides Wiki
Arknights: Endfield Walkthrough & Guides Wiki


Recommended Games
Fire Emblem Heroes (FEH) Walkthrough & Guides Wiki
Diablo 4: Vessel of Hatred Walkthrough & Guides Wiki
Cyberpunk 2077: Ultimate Edition Walkthrough & Guides Wiki
Yu-Gi-Oh! Master Duel Walkthrough & Guides Wiki
Super Smash Bros. Ultimate Walkthrough & Guides Wiki
Pokemon Brilliant Diamond and Shining Pearl (BDSP) Walkthrough & Guides Wiki
Elden Ring Shadow of the Erdtree Walkthrough & Guides Wiki
Monster Hunter World Walkthrough & Guides Wiki
The Legend of Zelda: Tears of the Kingdom Walkthrough & Guides Wiki
Persona 3 Reload Walkthrough & Guides Wiki


All rights reserved
©CAPCOM
The copyrights of videos of games used in our content and other intellectual property rights belong to the provider of the game.
The contents we provide on this site were created personally by members of the Game8 editorial department.
We refuse the right to reuse or repost content taken without our permission such as data or images to other sites.