All Bazelgeuse Weapons | Monster Hunter Rise
★ All Title Updates now available for ALL PLATFORMS!
┗ Title Update 4 | Title Update 5 | Bonus Update
┗ Check out all our Best Builds For Every Weapon!
┗ TU4 Monsters: Velkhana | Risen C.G. Valstrax
┗ TU5 Monsters: Amatsu | Risen Shagaru Magala
┗ Bonus Update Monster: Primordial Malzeno
This is a list of all the weapons that can be made with materials obtained from Bazelgeuse in Monster Hunter Rise (MH Rise). Each weapon's stats, slots, sharpness, and more are shown here.
| All Bazelgeuse Related Articles | ||
|---|---|---|
 Bazelgeuse Guide Bazelgeuse Guide
|
 Bazelgeuse Weapons Bazelgeuse Weapons
|
 Bazelgeuse Armor Bazelgeuse Armor
|
List of Contents
List of Bazelgeuse Weapons
Bazelgeuse Long Sword Tree
| Weapon | Slots | ATK | DEF |
|---|---|---|---|
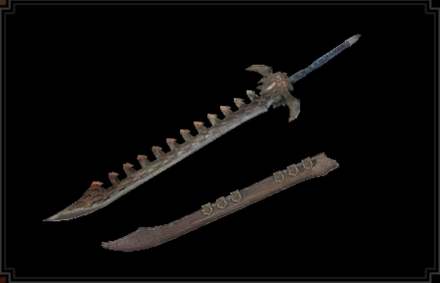 Rookslayer Saber I Rookslayer Saber I

|
①ーー | 200 | - |
| Affinity | Element/Status | ||
| -10% | |||
| Rampage Skills |
Defense Boost I Blast Boost II Brutal Strike |
||
| Weapon | Slots | ATK | DEF |
|---|---|---|---|
 Rookslayer Saber II Rookslayer Saber II

|
①ーー | 210 | - |
| Affinity | Element/Status | ||
| -10% | |||
| Rampage Skills |
Defense Boost I Blast Boost II Brutal Strike |
||
| Weapon | Slots | ATK | DEF |
|---|---|---|---|
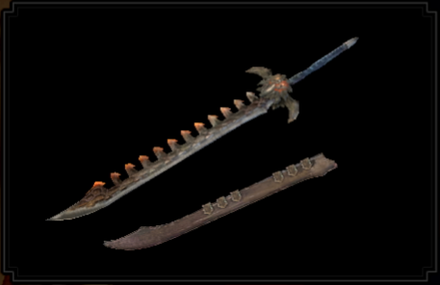 Bazel Varga Rookslayer Bazel Varga Rookslayer

|
①ーー | 220 | - |
| Affinity | Element/Status | ||
| -10% | |||
| Rampage Skills |
Defense Boost II Blast Boost III Brutal Strike |
||
| Weapon | Slots | ATK | DEF |
|---|---|---|---|
 Bazel Jarre Blazer Bazel Jarre Blazer

|
①ーー | 330 | 0 |
| Affinity | Element/Status | ||
| -10% | |||
| Rampage Slot | ③ | ||
Bazelgeuse Dual Blades Tree
| Weapon | Slots | ATK | DEF |
|---|---|---|---|
 Rookslayer Handaxes I Rookslayer Handaxes I

|
①ーー | 190 | - |
| Affinity | Element/Status | ||
| -10% | |||
| Rampage Skills |
Defense Boost I Blast Boost II Brutal Strike |
||
| Weapon | Slots | ATK | DEF |
|---|---|---|---|
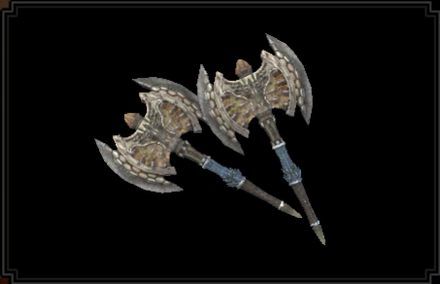 Rookslayer Handaxes II Rookslayer Handaxes II

|
①ーー | 200 | - |
| Affinity | Element/Status | ||
| -10% | |||
| Rampage Skills |
Defense Boost I Blast Boost II Brutal Strike |
||
| Weapon | Slots | ATK | DEF |
|---|---|---|---|
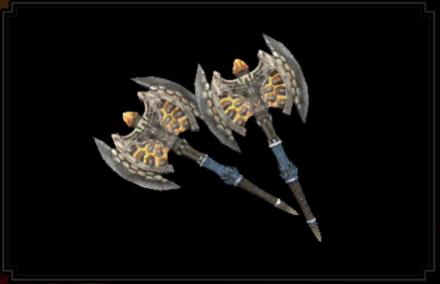 Bazelhawk Rookslayer Bazelhawk Rookslayer

|
①ーー | 210 | - |
| Affinity | Element/Status | ||
| -10% | |||
| Rampage Skills |
Defense Boost II Blast Boost III Brutal Strike |
||
| Weapon | Slots | ATK | DEF |
|---|---|---|---|
 Bazelhound Rookslayer Bazelhound Rookslayer

|
①ーー | 330 | 0 |
| Affinity | Element/Status | ||
| -10% | |||
| Rampage Slot | ② | ||
Bazelgeuse Hunting Horn Tree
| Weapon | Slots | ATK | DEF | |
|---|---|---|---|---|
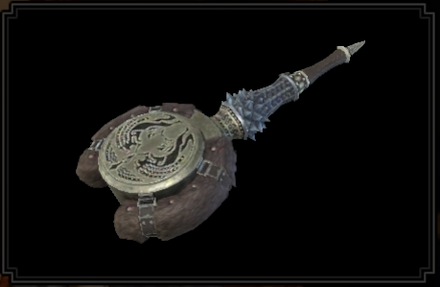 Rookslayer Drum I Rookslayer Drum I

|
ーーー | 190 | - | |
| Affinity | Element/Status | |||
| -10% | ||||
| Rampage Skills |
Defense Boost I Blast Boost II Maximum Volume |
|||
Earplugs (S) Attack Up Health Recovery (L) |
||||
| Weapon | Slots | ATK | DEF | |
|---|---|---|---|---|
 Rookslayer Drum II Rookslayer Drum II

|
ーーー | 200 | - | |
| Affinity | Element/Status | |||
| -10% | ||||
| Rampage Skills |
Defense Boost I Blast Boost II Maximum Volume |
|||
Earplugs (S) Attack Up Health Recovery (L) |
||||
| Weapon | Slots | ATK | DEF | |
|---|---|---|---|---|
 Bazelreid Rookslayer Bazelreid Rookslayer

|
ーーー | 220 | - | |
| Affinity | Element/Status | |||
| -10% | ||||
Earplugs (S) Attack Up Health Recovery (L) |
||||
| Weapon | Slots | ATK | DEF | |
|---|---|---|---|---|
 Baselsium Rookslayer Baselsium Rookslayer

|
ーーー | 310 | 0 | |
| Affinity | Element/Status | |||
| -10% | ||||
| Rampage Slot | ② | |||
Earplugs (S) Attack Up Health Recovery (L) |
||||
Bazelgeuse Lance Tree
| Weapon | Slots | ATK | DEF |
|---|---|---|---|
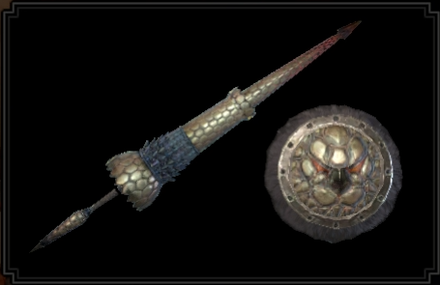 Rookslayer Lance I Rookslayer Lance I

|
①ーー | 200 | - |
| Affinity | Element/Status | ||
| -10% | |||
| Rampage Skills |
Defense Boost I Blast Boost II Brutal Strike |
||
| Weapon | Slots | ATK | DEF |
|---|---|---|---|
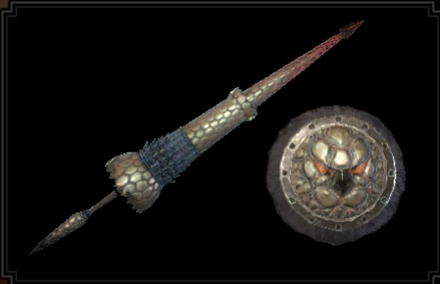 Rookslayer Lance II Rookslayer Lance II

|
①ーー | 210 | - |
| Affinity | Element/Status | ||
| -10% | |||
| Rampage Skills |
Defense Boost I Blast Boost II Brutal Strike |
||
| Weapon | Slots | ATK | DEF |
|---|---|---|---|
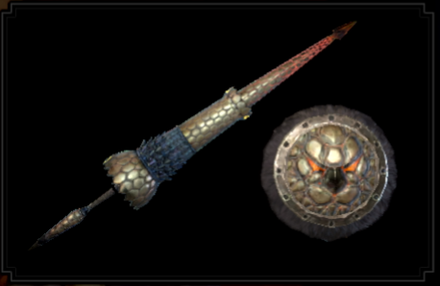 Bazel Myniad Lance Bazel Myniad Lance

|
①ーー | 220 | - |
| Affinity | Element/Status | ||
| -10% | |||
| Rampage Skills |
Defense Boost II Blast Boost III Brutal Strike |
||
| Weapon | Slots | ATK | DEF |
|---|---|---|---|
 Bazel Myniad Queentaker Bazel Myniad Queentaker

|
①ーー | 330 | 0 |
| Affinity | Element/Status | ||
| -10% | |||
| Rampage Slot | ② | ||
Bazelgeuse Gunlance Tree
| Weapon | Slots | ATK | DEF | |
|---|---|---|---|---|
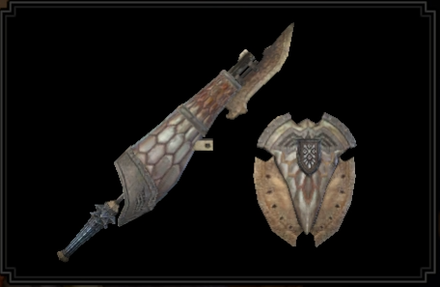 Bazel Buster I Bazel Buster I

|
ーーー | 190 | - | |
| Affinity | Element/Status | |||
| -10% | ||||
| Rampage Skills |
Defense Boost I Blast Boost II Wyrmstake Boost |
|||
| Shelling Type | Wide Lv2 | |||
| Weapon | Slots | ATK | DEF | |
|---|---|---|---|---|
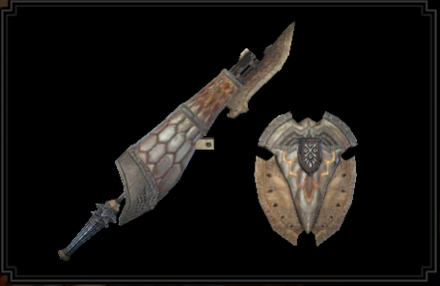 Bazel Buster II Bazel Buster II

|
ーーー | 210 | - | |
| Affinity | Element/Status | |||
| -10% | ||||
| Rampage Skills |
Defense Boost I Blast Boost II Wyrmstake Boost |
|||
| Shelling Type | Wide Lv3 | |||
| Weapon | Slots | ATK | DEF | |
|---|---|---|---|---|
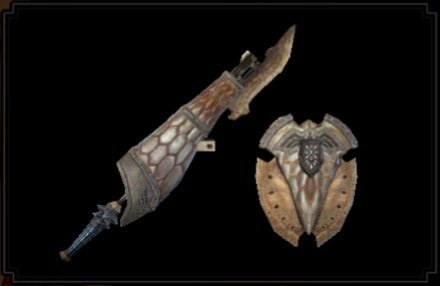 Bazel Destroyer Bazel Destroyer

|
ーーー | 220 | - | |
| Affinity | Element/Status | |||
| -10% | ||||
| Rampage Skills |
Defense Boost II Blast Boost III Brutal Strike |
|||
| Shelling Type | Wide Lv4 | |||
| Weapon | Slots | ATK | DEF | |
|---|---|---|---|---|
 Bazel Kingtopper Bazel Kingtopper

|
②①ー | 330 | 0 | |
| Affinity | Element/Status | |||
| -10% | ||||
| Rampage Slot | ③ | |||
| Shelling Type | Wide Lv7 | |||
Bazelgeuse Switch Axe Tree
| Weapon | Slots | ATK | DEF | |
|---|---|---|---|---|
 Rookslayer Axe I Rookslayer Axe I

|
①ーー | 200 | - | |
| Affinity | Element/Status | |||
| -15% | ||||
| Rampage Skills |
Defense Boost I Blast Boost II Brutal Strike |
|||
| Phial Type | Power | |||
| Weapon | Slots | ATK | DEF | |
|---|---|---|---|---|
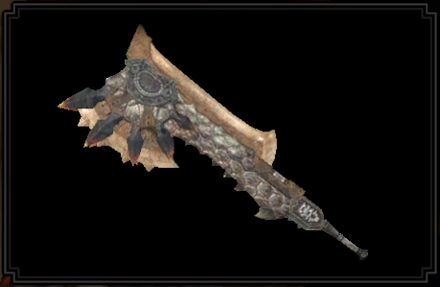 Rookslayer Axe II Rookslayer Axe II

|
①ーー | 210 | - | |
| Affinity | Element/Status | |||
| -15% | ||||
| Rampage Skills |
Defense Boost I Blast Boost II Brutal Strike |
|||
| Phial Type | Power | |||
| Weapon | Slots | ATK | DEF | |
|---|---|---|---|---|
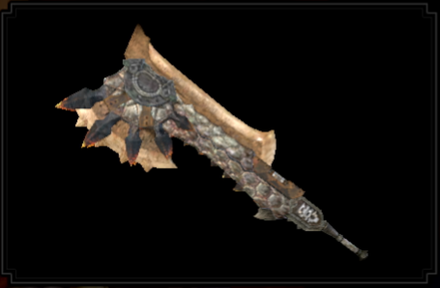 Bazelrush Rookslayer Bazelrush Rookslayer

|
①ーー | 220 | - | |
| Affinity | Element/Status | |||
| -15% | ||||
| Rampage Skills |
Defense Boost II Blast Boost III Brutal Strike |
|||
| Phial Type | Power | |||
| Weapon | Slots | ATK | DEF | |
|---|---|---|---|---|
 Bazelava Rookslayer Bazelava Rookslayer

|
①ーー | 350 | 0 | |
| Affinity | Element/Status | |||
| -15% | ||||
| Rampage Slot | ③ | |||
| Phial Type | Power | |||
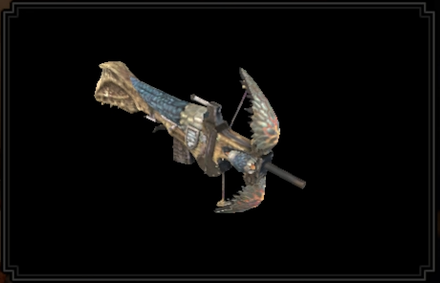
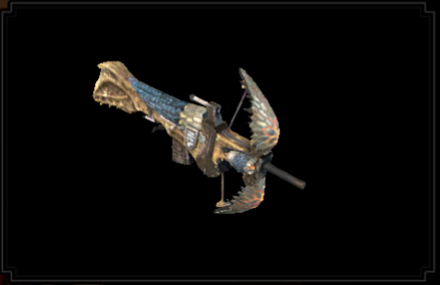
Bazelgeuse Light Bowgun Tree
| Weapon Stats and Info | |||
|---|---|---|---|
| Rarity | Attack | Affinity | |
| 6 | 190 | -10% | |
| Slots | Def. | Deviation | |
| ①①ー | - | R Mild | |
| Recoil / Reload | Some / Slow | ||
| Special Ammo | Wyvernblast | ||
| Cluster Bomb Type | Arc Shot | ||
| Rampage Skills | |||
| Defense Boost I Shrapnel Effect I Brutal Strike |
|||
| Ammo | Capacity|Recoil|Reload |
|---|---|
| Normal Ammo 1 | 1 | Low | Fast |
| Normal Ammo 2 | 1 | Low | Fast |
| Normal Ammo 3 | 3 | Low | Slow |
| Pierce Ammo 1 | 1 | Low | Slow |
| Pierce Ammo 2 | 3 | Average | Slow |
| Pierce Ammo 3 | 2 | Average | Slow |
| Sticky Ammo 1 | 2 | Average | Slow |
| Sticky Ammo 2 | 2 | High | Slowest |
| Sticky Ammo 3 | 1 | High | Slowest |
| Cluster Bomb 2 | 2 | Very High | Slowest |
| Poison Ammo 2 | 4 | Very High | Slowest |
| Paralysis 2 | 3 | Very High | Slowest |
| Exhaust Ammo 1 | 5 | Average | Slow |
| Exhaust Ammo 2 | 4 | High | Slowest |
| Flaming Ammo | 5 | Low | Slow |
| Thunder Ammo | 5 | Low | Slow |
| Dragon Ammo | 1 | High | Slowest |
| Demon Ammo | 1 | Low | Slowest |
| Tranq Ammo | 2 | Low | Fast |
| Weapon Stats and Info | |||
|---|---|---|---|
| Rarity | Attack | Affinity | |
| 6 | 200 | -10% | |
| Slots | Def. | Deviation | |
| ①①ー | - | R Mild | |
| Recoil / Reload | Some / Slow | ||
| Special Ammo | Wyvernblast | ||
| Cluster Bomb Type | Arc Shot | ||
| Rampage Skills | |||
| Defense Boost I Shrapnel Effect I Brutal Strike |
|||
| Ammo | Capacity|Recoil|Reload |
|---|---|
| Normal Ammo 1 | 1 | Low | Fast |
| Normal Ammo 2 | 1 | Low | Fast |
| Normal Ammo 3 | 4 | Low | Slow |
| Pierce Ammo 1 | 1 | Low | Slow |
| Pierce Ammo 2 | 4 | Average | Slow |
| Pierce Ammo 3 | 3 | Average | Slow |
| Sticky Ammo 1 | 3 | Average | Slow |
| Sticky Ammo 2 | 2 | High | Slowest |
| Sticky Ammo 3 | 1 | High | Slowest |
| Cluster Bomb 2 | 2 | Very High | Slowest |
| Poison Ammo 2 | 5 | Very High | Slowest |
| Paralysis 2 | 3 | Very High | Slowest |
| Exhaust Ammo 1 | 5 | Average | Slow |
| Exhaust Ammo 2 | 4 | High | Slowest |
| Flaming Ammo | 6 | Low | Slow |
| Thunder Ammo | 6 | Low | Slow |
| Dragon Ammo | 1 | High | Slowest |
| Demon Ammo | 1 | Low | Slowest |
| Tranq Ammo | 2 | Low | Fast |
| Weapon Stats and Info | |||
|---|---|---|---|
| Rarity | Attack | Affinity | |
| 7 | 210 | -10% | |
| Slots | Def. | Deviation | |
| ①①ー | - | R Mild | |
| Recoil / Reload | Some / Slow | ||
| Special Ammo | Wyvernblast | ||
| Cluster Bomb Type | Arc Shot | ||
| Rampage Skills | |||
| Defense Boost II Shrapnel Effect II Brutal Strike |
|||
| Ammo | Capacity|Recoil|Reload |
|---|---|
| Normal Ammo 1 | 1 | Low | Fast |
| Normal Ammo 2 | 1 | Low | Fast |
| Normal Ammo 3 | 5 | Low | Slow |
| Pierce Ammo 1 | 1 | Low | Slow |
| Pierce Ammo 2 | 5 | Average | Slow |
| Pierce Ammo 3 | 4 | Average | Slow |
| Sticky Ammo 1 | 3 | Average | Slow |
| Sticky Ammo 2 | 2 | High | Slowest |
| Sticky Ammo 3 | 1 | High | Slowest |
| Cluster Bomb 2 | 2 | Very High | Slowest |
| Poison Ammo 2 | 5 | Very High | Slowest |
| Paralysis 2 | 4 | Very High | Slowest |
| Exhaust Ammo 1 | 6 | Average | Slow |
| Exhaust Ammo 2 | 5 | High | Slowest |
| Flaming Ammo | 7 | Low | Slow |
| Thunder Ammo | 7 | Low | Slow |
| Dragon Ammo | 2 | High | Slowest |
| Piercing Fire Ammo | 1 | Low | Slow |
| Piercing Thunder Ammo | 1 | Low | Slow |
| Demon Ammo | 1 | Low | Slowest |
| Tranq Ammo | 2 | Low | Fast |
| Weapon Stats and Info | |||
|---|---|---|---|
| Rarity | Attack | Affinity | |
| 10 | 350 | -10% | |
| Slots | Def. | Deviation | |
| ①①ー | 0 | R Mild | |
| Recoil / Reload | Some / Slow | ||
| Special Ammo | Wyvernblast | ||
| Cluster Bomb Type | Arc Shot | ||
| Rampage Slot | ③ | ||
| Ammo | Capacity|Recoil|Reload |
|---|---|
| Normal Ammo 1 | 1 | Low | Fast |
| Normal Ammo 2 | 1 | Low | Fast |
| Normal Ammo 3 | 7 | Low | Slow |
| Pierce Ammo 1 | 1 | Low | Slow |
| Pierce Ammo 2 | 5 | Average | Slow |
| Pierce Ammo 3 | 4 | Average | Slow |
| Shrapnel Ammo 1 | 1 | Low | Fast |
| Shrapnel Ammo 2 | 1 | Low | Slow |
| Shrapnel Ammo 3 | 1 | Average | Slow |
| Sticky Ammo 1 | 3 | Average | Slow |
| Sticky Ammo 2 | 2 | High | Slowest |
| Sticky Ammo 3 | 2 | High | Slowest |
| Cluster Bomb 2 | 2 | Very High | Slowest |
| Poison Ammo 2 | 5 | Very High | Slowest |
| Paralysis 2 | 4 | Very High | Slowest |
| Exhaust Ammo 1 | 6 | Average | Slow |
| Exhaust Ammo 2 | 5 | High | Slowest |
| Flaming Ammo | 7 | Low | Slow |
| Thunder Ammo | 7 | Low | Slow |
| Dragon Ammo | 2 | High | Slowest |
| Piercing Fire Ammo | 1 | Low | Slow |
| Piercing Thunder Ammo | 1 | Low | Slow |
| Demon Ammo | 1 | Low | Slow |
| Tranq Ammo | 2 | Low | Fast |
Monster Hunter Rise Related Links
| All Bazelgeuse Related Articles | ||
|---|---|---|
 Bazelgeuse Guide Bazelgeuse Guide
|
 Bazelgeuse Weapons Bazelgeuse Weapons
|
 Bazelgeuse Armor Bazelgeuse Armor
|

All Weapons and How to Use Them
Sunbreak Monster Weapons
Base Game Monster Weapons
Small Monster Weapons
 Bnahabra Bnahabra |
 Bullfango Bullfango |
 Hornetaur Hornetaur |
 Jaggi Jaggi |
 Remobra Remobra |
 Rhenoplos Rhenoplos |
 Uroktor Uroktor |
 Vespoid Vespoid |
Comment
Author
All Bazelgeuse Weapons | Monster Hunter Rise
improvement survey
03/2026
improving Game8's site?

Your answers will help us to improve our website.
Note: Please be sure not to enter any kind of personal information into your response.

We hope you continue to make use of Game8.
Rankings
- We could not find the message board you were looking for.
Gaming News
Popular Games

Genshin Impact Walkthrough & Guides Wiki

Honkai: Star Rail Walkthrough & Guides Wiki

Umamusume: Pretty Derby Walkthrough & Guides Wiki

Pokemon Pokopia Walkthrough & Guides Wiki

Resident Evil Requiem (RE9) Walkthrough & Guides Wiki

Monster Hunter Wilds Walkthrough & Guides Wiki

Wuthering Waves Walkthrough & Guides Wiki

Arknights: Endfield Walkthrough & Guides Wiki

Pokemon FireRed and LeafGreen (FRLG) Walkthrough & Guides Wiki

Pokemon TCG Pocket (PTCGP) Strategies & Guides Wiki
Recommended Games

Diablo 4: Vessel of Hatred Walkthrough & Guides Wiki

Fire Emblem Heroes (FEH) Walkthrough & Guides Wiki

Yu-Gi-Oh! Master Duel Walkthrough & Guides Wiki

Super Smash Bros. Ultimate Walkthrough & Guides Wiki

Pokemon Brilliant Diamond and Shining Pearl (BDSP) Walkthrough & Guides Wiki

Elden Ring Shadow of the Erdtree Walkthrough & Guides Wiki

Monster Hunter World Walkthrough & Guides Wiki

The Legend of Zelda: Tears of the Kingdom Walkthrough & Guides Wiki

Persona 3 Reload Walkthrough & Guides Wiki

Cyberpunk 2077: Ultimate Edition Walkthrough & Guides Wiki
All rights reserved
©CAPCOM CO., LTD. ALL RIGHTS RESERVED.
The copyrights of videos of games used in our content and other intellectual property rights belong to the provider of the game.
The contents we provide on this site were created personally by members of the Game8 editorial department.
We refuse the right to reuse or repost content taken without our permission such as data or images to other sites.

 Amatsu
 Astalos
 Aurora Somnacanth
 Chaotic Gore Magala
 Daimyo Hermitaur
 Flaming Espinas
 Garangolm
 Gold Rathian
 Gore Magala
 Lucent Nargacuga
 Malzeno
 Primordial Malzeno
 Seething Bazelgeuse
 Silver Rathalos
 Violet Mizutsune
 Aknosom
 Almudron
 Anjanath
 Arzuros
 Barioth
 Barroth
 Basarios
 Bishaten
 Chameleos
 Crimson Glow Valstrax
 Diablos
 Goss Harag
 Great Baggi
 Great Izuchi
 Great Wroggi
 Jyuratodus
 Khezu
Khezu Kulu-Ya-Ku
 Kushala Daora
 Lagombi
 Magnamalo
 Mizutsune
 Nargacuga
 Pukei-Pukei
 Rajang
 Rakna-Kadaki
 Rathalos
 Rathian
 Royal Ludroth
 Somnacanth
 Teostra
 Tetranadon
 Thunder Serpent Narwa
 Tigrex
 Tobi-Kadachi
 Volvidon
 Wind Serpent Ibushi
 Zinogre


