Lotus Bowgun Forging and Upgrade Materials | Monster Hunter Rise
★ All Title Updates now available for ALL PLATFORMS!
┗ Title Update 4 | Title Update 5 | Bonus Update
┗ Check out all our Best Builds For Every Weapon!
┗ TU4 Monsters: Velkhana | Risen C.G. Valstrax
┗ TU5 Monsters: Amatsu | Risen Shagaru Magala
┗ Bonus Update Monster: Primordial Malzeno
This page is about the Lotus Bowgun (Light Bowgun), a weapon found in Monster Hunter Rise (MH Rise). All stats, as well as crafting materials and its full weapon tree can be found here.
List of Contents
Lotus Bowgun Stats and General Info
Lotus Bowgun I
| Weapon Stats and Info | |||
|---|---|---|---|
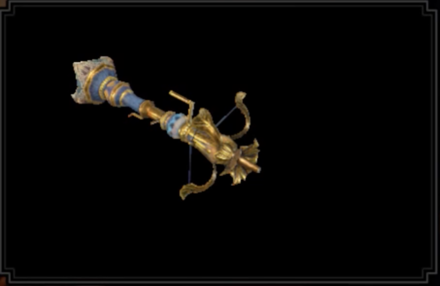 Lotus Bowgun I Lotus Bowgun I |
Rarity | Attack | Affinity |
| 2 | 100 | 0% | |
| Slots | Def. | Deviation | |
| ーーー | - | R Mild | |
| Recoil / Reload | Some / Below Avg. | ||
| Special Ammo | Wyvernblast | ||
| Cluster Bomb Type | Arc Shot | ||
| Rampage Skills | |||
| Attack Boost I Shrapnel Effect I Silkbind Boost |
|||
| Ammo | Capacity|Recoil|Reload | Shot Type |
|---|---|---|
| Normal Ammo 1 | 4|Low|Fastest | MS |
| Normal Ammo 2 | 2|Low|Fast | MS, RF |
| Normal Ammo 3 | 3|Low|Fast | MS |
| Pierce Ammo 1 | 4|Low|Fast | MS, MR |
| Pierce Ammo 2 | 4|Average|Slow | - |
| Pierce Ammo 3 | 3|Average|Slow | - |
| Spread Ammo 1 | 3|Low|Fast | MS, MR |
| Spread Ammo 2 | 3|Low|Fast | MS |
| Spread Ammo 3 | 2|Average|Slow | - |
| Sticky Ammo 1 | 1|Average|Slow | MS, MR, AR |
| Cluster Bomb 1 | 3|High|Slowest | - |
| Poison Ammo 1 | 3|High|Slow | MS, MR, RF |
| Poison Ammo 2 | 3|Very High|Slowest | MS |
| Paralysis 1 | 2|High|Slow | MS, MR, RF |
| Paralysis 2 | 1|Very High|Slowest | MS, MR, AR |
| Recover Ammo 1 | 3|Low|Fast | - |
| Piercing Thunder Ammo | 2|Low|Slow | - |
| Piercing Ice Ammo | 2|Low|Slow | - |
| Piercing Dragon Ammo | 1|Very High|Slowest | MS, AR |
| Armor Ammo | 1|Low|Slow | MS, MR, AR |
| Tranq Ammo | 2|Low|Fast | MS, MR |
MS - Moving Shot, MR - Moving Reload, AR - Single Fire Auto Reload, RF - Rapid Fire
Lotus Bowgun II
| Weapon Stats and Info | |||
|---|---|---|---|
 Lotus Bowgun II Lotus Bowgun II |
Rarity | Attack | Affinity |
| 5 | 170 | 0% | |
| Slots | Def. | Deviation | |
| ③ーー | - | R Mild | |
| Recoil / Reload | Some / Below Avg. | ||
| Special Ammo | Wyvernblast | ||
| Cluster Bomb Type | Arc Shot | ||
| Rampage Skills | |||
| Attack Boost II Spread Effect I Silkbind Boost |
|||
| Ammo | Capacity|Recoil|Reload | Shot Type |
|---|---|---|
| Normal Ammo 1 | 5|Low|Fastest | MS |
| Normal Ammo 2 | 3|Low|Fast | MS, RF |
| Normal Ammo 3 | 4|Low|Fast | MS |
| Pierce Ammo 1 | 5|Low|Fast | MS, MR |
| Pierce Ammo 2 | 5|Average|Slow | - |
| Pierce Ammo 3 | 3|Average|Slow | - |
| Spread Ammo 1 | 4|Low|Fast | MS, MR |
| Spread Ammo 2 | 4|Low|Fast | MS |
| Spread Ammo 3 | 2|Average|Slow | - |
| Sticky Ammo 1 | 1|Average|Slow | MS, MR, AR |
| Cluster Bomb 1 | 3|High|Slowest | - |
| Poison Ammo 1 | 4|High|Slow | MS, MR, RF |
| Poison Ammo 2 | 3|Very High|Slowest | MS |
| Paralysis 1 | 2|High|Slow | MS, MR, RF |
| Paralysis 2 | 1|Very High|Slowest | MS, MR, AR |
| Recover Ammo 1 | 4|Low|Fast | - |
| Piercing Thunder Ammo | 2|Low|Slow | - |
| Piercing Ice Ammo | 2|Low|Slow | - |
| Piercing Dragon Ammo | 1|Very High|Slowest | MS, AR |
| Armor Ammo | 1|Low|Slow | MS, MR, AR |
| Tranq Ammo | 2|Low|Fast | MS, MR |
MS - Moving Shot, MR - Moving Reload, AR - Single Fire Auto Reload, RF - Rapid Fire
Great Lotus Bowgun
| Weapon Stats and Info | |||
|---|---|---|---|
 Great Lotus Bowgun Great Lotus Bowgun |
Rarity | Attack | Affinity |
| 5 | 180 | 0% | |
| Slots | Def. | Deviation | |
| ③ーー | - | R Mild | |
| Recoil / Reload | Some / Below Avg. | ||
| Special Ammo | Wyvernblast | ||
| Cluster Bomb Type | Arc Shot | ||
| Rampage Skills | |||
| Attack Boost II Spread Effect II Silkbind Boost |
|||
| Ammo | Capacity|Recoil|Reload | Shot Type |
|---|---|---|
| Normal Ammo 1 | 6|Low|Fastest | MS |
| Normal Ammo 2 | 3|Low|Fast | MS, RF |
| Normal Ammo 3 | 4|Low|Fast | MS |
| Pierce Ammo 1 | 6|Low|Fast | MS, MR |
| Pierce Ammo 2 | 5|Average|Slow | - |
| Pierce Ammo 3 | 3|Average|Slow | - |
| Spread Ammo 1 | 5|Low|Fast | MS, MR |
| Spread Ammo 2 | 4|Low|Fast | MS |
| Spread Ammo 3 | 2|Average|Slow | - |
| Sticky Ammo 1 | 1|Average|Slow | MS, MR, AR |
| Cluster Bomb 1 | 3|High|Slowest | - |
| Poison Ammo 1 | 5|High|Slow | MS, MR, RF |
| Poison Ammo 2 | 3|Very High|Slowest | MS |
| Paralysis 1 | 2|High|Slow | MS, MR, RF |
| Paralysis 2 | 1|Very High|Slowest | MS, MR, AR |
| Recover Ammo 1 | 4|Low|Fast | - |
| Piercing Thunder Ammo | 2|Low|Slow | - |
| Piercing Ice Ammo | 3|Low|Slow | - |
| Piercing Dragon Ammo | 1|Very High|Slowest | MS, AR |
| Armor Ammo | 1|Low|Slow | MS, MR, AR |
| Tranq Ammo | 2|Low|Fast | MS, MR |
MS - Moving Shot, MR - Moving Reload, AR - Single Fire Auto Reload, RF - Rapid Fire
Redeemer's Lotus
| Weapon Stats and Info | |||
|---|---|---|---|
 Redeemer's Lotus Redeemer's Lotus |
Rarity | Attack | Affinity |
| 8 | 270 | 0% | |
| Slots | Def. | Deviation | |
| ③ーー | 0 | R Mild | |
| Recoil / Reload | Some / Below Avg. | ||
| Special Ammo | Wyvernblast | ||
| Cluster Bomb Type | Arc Shot | ||
| Rampage Slot | ② | ||
| Ammo | Capacity|Recoil|Reload | Shot Type |
|---|---|---|
| Normal Ammo 1 | 6 | Low | Fastest | MS |
| Normal Ammo 2 | 4 | Low | Fast | MS, RF |
| Normal Ammo 3 | 4 | Low | Fast | MS |
| Pierce Ammo 1 | 6 | Low | Fast | MS, MR |
| Pierce Ammo 2 | 5 | Average | Slow | - |
| Pierce Ammo 3 | 3 | Average | Slow | - |
| Spread Ammo 1 | 5 | Low | Fast | MS, MR |
| Spread Ammo 2 | 4 | Low | Fast | MS |
| Spread Ammo 3 | 3 | Average | Slow | - |
| Shrapnel Ammo 1 | 8 | Low | Fast | - |
| Shrapnel Ammo 2 | 8 | Low | Fast | - |
| Shrapnel Ammo 3 | 7 | Average | Slow | - |
| Sticky Ammo 1 | 1 | Average | Slow | MS, MR, AR |
| Cluster Bomb 1 | 3 | High | Slowest | - |
| Poison Ammo 1 | 5 | High | Slow | MS, MR, RF |
| Poison Ammo 2 | 3 | Very High | Slowest | MS |
| Paralysis 1 | 2 | High | Slow | MS, MR, RF |
| Paralysis 2 | 1 | Very High | Slowest | MS, MR, AR |
| Recover Ammo 1 | 4 | Low | Fast | - |
| Piercing Thunder Ammo | 2 | Low | Slow | - |
| Piercing Ice Ammo | 3 | Low | Slow | - |
| Piercing Dragon Ammo | 1 | Very High | Slowest | MS, AR |
| Armor Ammo | 1 | Low | Slow | MS, MR, AR |
| Tranq Ammo | 2 | Low | Fast | MS, MR |
MS - Moving Shot, MR - Moving Reload, AR - Single Fire Auto Reload, RF - Rapid Fire
Redeemer's Lotus+
| Weapon Stats and Info | |||
|---|---|---|---|
 Redeemer's Lotus+ Redeemer's Lotus+ |
Rarity | Attack | Affinity |
| 8 | 290 | 0% | |
| Slots | Def. | Deviation | |
| ③ーー | 0 | R Mild | |
| Recoil / Reload | Some / Below Avg. | ||
| Special Ammo | Wyvernblast | ||
| Cluster Bomb Type | Arc Shot | ||
| Rampage Slot | ② | ||
| Ammo | Capacity|Recoil|Reload | Shot Type |
|---|---|---|
| Normal Ammo 1 | 6 | Low | Fastest | MS |
| Normal Ammo 2 | 5 | Low | Fast | MS, RF |
| Normal Ammo 3 | 5 | Low | Fast | MS |
| Pierce Ammo 1 | 6 | Low | Fast | MS, MR |
| Pierce Ammo 2 | 5 | Average | Slow | - |
| Pierce Ammo 3 | 4 | Average | Slow | - |
| Spread Ammo 1 | 5 | Low | Fast | MS, MR |
| Spread Ammo 2 | 4 | Low | Fast | MS |
| Spread Ammo 3 | 4 | Average | Slow | - |
| Shrapnel Ammo 1 | 8 | Low | Fast | - |
| Shrapnel Ammo 2 | 8 | Low | Fast | - |
| Shrapnel Ammo 3 | 7 | Average | Slow | - |
| Sticky Ammo 1 | 1 | Average | Slow | MS, MR, AR |
| Cluster Bomb 1 | 3 | High | Slowest | MS, MR, RF |
| Poison Ammo 1 | 5 | High | Slow | MS |
| Poison Ammo 2 | 3 | Very High | Slowest | MS, MR, RF |
| Paralysis 1 | 2 | High | Slow | MS, MR, RF |
| Paralysis 2 | 1 | Very High | Slowest | MS, MR, AR |
| Recover Ammo 1 | 4 | Low | Fast | - |
| Piercing Thunder Ammo | 2 | Low | Slow | - |
| Piercing Ice Ammo | 3 | Low | Slow | - |
| Piercing Dragon Ammo | 1 | Very High | Slowest | MS, AR |
| Armor Ammo | 1 | Low | Slow | MS, MR, AR |
| Tranq Ammo | 2 | Low | Fast | MS, MR |
MS - Moving Shot, MR - Moving Reload, AR - Single Fire Auto Reload, RF - Rapid Fire
Lord Redeemer's Iron
| Weapon Stats and Info | |||
|---|---|---|---|
 Lord Redeemer's Iron Lord Redeemer's Iron |
Rarity | Attack | Affinity |
| 10 | 320 | 0% | |
| Slots | Def. | Deviation | |
| ③ーー | 0 | R Mild | |
| Recoil / Reload | Some / Below Avg. | ||
| Special Ammo | Wyvernblast | ||
| Cluster Bomb Type | Arc Shot | ||
| Rampage Slot | ② | ||
| Qurious Augments | |||
| Ammo | Capacity|Recoil|Reload | Shot Type |
|---|---|---|
| Normal Ammo 1 | 6 | Low | Fastest | MS |
| Normal Ammo 2 | 5 | Low | Fast | MS, RF |
| Normal Ammo 3 | 5 | Low | Fast | MS |
| Pierce Ammo 1 | 6 | Low | Fast | MS, MR |
| Pierce Ammo 2 | 5 | Average | Slow | - |
| Pierce Ammo 3 | 4 | Average | Slow | - |
| Spread Ammo 1 | 5 | Low | Fast | MS, MR |
| Spread Ammo 2 | 4 | Low | Fast | MS |
| Spread Ammo 3 | 4 | Average | Slow | - |
| Shrapnel Ammo 1 | 8 | Low | Fast | - |
| Shrapnel Ammo 2 | 8 | Low | Fast | - |
| Shrapnel Ammo 3 | 7 | Average | Slow | - |
| Sticky Ammo 1 | 1 | Average | Slow | MS, MR, AR |
| Cluster Bomb 1 | 3 | High | Slowest | - |
| Poison Ammo 1 | 5 | High | Slow | MS, MR, RF |
| Poison Ammo 2 | 3 | Very High | Slowest | MS |
| Paralysis 1 | 3 | High | Slow | MS, MR, RF |
| Paralysis 2 | 1 | Very High | Slowest | MS, MR, AR |
| Recover Ammo 1 | 4 | Low | Fast | - |
| Piercing Thunder Ammo | 2 | Low | Slow | - |
| Piercing Ice Ammo | 3 | Low | Slow | - |
| Piercing Dragon Ammo | 1 | Very High | Slowest | MS, AR |
| Armor Ammo | 1 | Low | Slow | MS, MR, AR |
| Tranq Ammo | 2 | Low | Fast | MS, MR |
MS - Moving Shot, MR - Moving Reload, AR - Single Fire Auto Reload, RF - Rapid Fire
Lotus Bowgun Forging and Upgrade Materials
Lotus Bowgun Required Materials
| Weapon Name | Materials |
|---|---|
 Lotus Bowgun I Lotus Bowgun I |
Forging Materials
Upgrade Materials
|
 Lotus Bowgun II Lotus Bowgun II |
Forging Materials
Upgrade Only
Upgrade Materials
|
 Great Lotus Bowgun Great Lotus Bowgun |
Forging Materials
Upgrade Only
Upgrade Materials
|
 Redeemer's Lotus Redeemer's Lotus |
Forging Materials
Upgrade Only
Upgrade Materials
|
 Redeemer's Lotus+ Redeemer's Lotus+ |
Forging Materials
Upgrade Only
Upgrade Materials
|
 Lord Redeemer's Iron Lord Redeemer's Iron |
Forging Materials
Upgrade Only
Upgrade Materials
|
Lotus Bowgun Layered Weapons
| Layered Weapons | ||
|---|---|---|
 Great Lotus Bowgun Great Lotus Bowgun
|
||
Lotus Bowgun Weapon Tree
|
┃┣Kamura L. Bowgun IV
┃┃┗Kamura L. Bowgun V
┃┃ ┗Kamura Ninja L. Bowgun
┃┃ ┗Kamura Warrior Crossbow
┃┃ ┣Kamura Warrior Crossbow+
┃┃ ┃┗Fine Kamura Crossbow
┃┃ ┗Duke's Arquebus
┃┃ ┗Vigil Kugel
┃┃ ┃ ┗Kaus Borealis's Asterism
┃┃ ┗Carmin Lantern
┃┃ ┗Carmin Lantern+
┃┃ ┗Luci Da Lavater
┃┗Lotus Bowgun I
┃ ┗Lotus Bowgun II
┃ ┗Great Lotus Bowgun
┃ ┣Redeemer's Lotus
┃ ┃┗Redeemer's Lotus+
┃ ┃ ┗Lord Redeemer's Iron
┃ ┗Glory Lotus Bowgun
┃ ┗Glory Lotus Bowgun+
┃ ┗Savior's Lotus
┣Khezu Syringe I
┃┗Khezu Syringe II
┃ ┗Khezu Syringe III
┃ ┗Khezu Hypo
┃ ┗Khezu Hypo+
┃ ┗Hypodermic Miracle
┃ ┗Hypodermic Miracle+
┃┗Shotgun (Viper) III
┃ ┗Bullet Rain (Viper)
┃ ┗Bullet Rain (Viper)+
┃ ┗Bullet Storm (Viper)
┗Barro Barrel I
┗Barro Barrel II
┣Barro Blaster
┃┗Barro Blaster+
┃ ┗Barrozooka
┃ ┗Barrozooka+
|
Monster Hunter Rise (MH Rise) Related Links

| Weapon Type Guides | ||
|---|---|---|
 Weapons and Weapon Types Weapons and Weapon Types |
 Weapon Type Tier List Weapon Type Tier List |
 Builds for Each Weapon Type Builds for Each Weapon Type |
Melee Weapon Guides
| Melee Weapons | ||
|---|---|---|
Guide | Weapon Tree |
Guide | Weapon Tree |
Guide | Weapon Tree |
Guide | Weapon Tree |
Guide | Weapon Tree |
Guide | Weapon Tree |
Guide | Weapon Tree |
Guide | Weapon Tree | Melodies |
Guide | Weapon Tree |
Guide | Weapon Tree |
Guide | Weapon Tree | Kinsects |
|
Ranged Weapon Guides
| Ranged Weapons | ||
|---|---|---|
Guide | Weapon Tree |
Guide | Weapon Tree |
Guide | Weapon Tree |
Comment
Author
Lotus Bowgun Forging and Upgrade Materials | Monster Hunter Rise
improvement survey
03/2026
improving Game8's site?

Your answers will help us to improve our website.
Note: Please be sure not to enter any kind of personal information into your response.

We hope you continue to make use of Game8.
Rankings
- We could not find the message board you were looking for.
Gaming News
Popular Games

Genshin Impact Walkthrough & Guides Wiki

Honkai: Star Rail Walkthrough & Guides Wiki

Umamusume: Pretty Derby Walkthrough & Guides Wiki

Pokemon Pokopia Walkthrough & Guides Wiki

Resident Evil Requiem (RE9) Walkthrough & Guides Wiki

Monster Hunter Wilds Walkthrough & Guides Wiki

Wuthering Waves Walkthrough & Guides Wiki

Arknights: Endfield Walkthrough & Guides Wiki

Pokemon FireRed and LeafGreen (FRLG) Walkthrough & Guides Wiki

Pokemon TCG Pocket (PTCGP) Strategies & Guides Wiki
Recommended Games

Diablo 4: Vessel of Hatred Walkthrough & Guides Wiki

Fire Emblem Heroes (FEH) Walkthrough & Guides Wiki

Yu-Gi-Oh! Master Duel Walkthrough & Guides Wiki

Super Smash Bros. Ultimate Walkthrough & Guides Wiki

Pokemon Brilliant Diamond and Shining Pearl (BDSP) Walkthrough & Guides Wiki

Elden Ring Shadow of the Erdtree Walkthrough & Guides Wiki

Monster Hunter World Walkthrough & Guides Wiki

The Legend of Zelda: Tears of the Kingdom Walkthrough & Guides Wiki

Persona 3 Reload Walkthrough & Guides Wiki

Cyberpunk 2077: Ultimate Edition Walkthrough & Guides Wiki
All rights reserved
©CAPCOM CO., LTD. ALL RIGHTS RESERVED.
The copyrights of videos of games used in our content and other intellectual property rights belong to the provider of the game.
The contents we provide on this site were created personally by members of the Game8 editorial department.
We refuse the right to reuse or repost content taken without our permission such as data or images to other sites.


![Monster Hunter Stories 3 Review [First Impressions] | Simply Rejuvenating](https://img.game8.co/4438641/2a31b7702bd70e78ec8efd24661dacda.jpeg/thumb)


