As the Khvarena's Light Shows: Nirodha Quest Guide
✉ Send your thoughts in our Genshin 6.4 Patch Survey!
★ Exclusive: Dive back in time with the Meta History
◆ Hot: Version 6.4, Luna 5 Codes
◆ Builds: Varka, Flins, Skirk, Escoffier
◆ Events: Travelers' Tales, He Who Caught the Wind
◆ Future: Linnea, Version 6.5 Luna VI
As the Khvarena's Light Shows: Nirodha is the seventh quest under the Khvarena of Good and Evil quest chain in the Girdle of the Desert for Genshin Impact 3.6. See how to unlock and how to complete the world quest in this guide!
| Khvarena of Good and Evil Quest Guides | ||
|---|---|---|
| The Splendorous Sky That Day | Asipattravana Itihasa | Awakening's Real Sound |
| As the Khvarena's Light Shows | Khvarena's Light Shows: Samudaya | Khvarena's Light Shows: Dukkha |
| Khvarena's Light Shows: Nirodha | The Hymn of Tir Yazad | |
List of Contents
How to Unlock As the Khvarena's Light Shows: Nirodha
Progress Through As the Khvarena's Light Shows
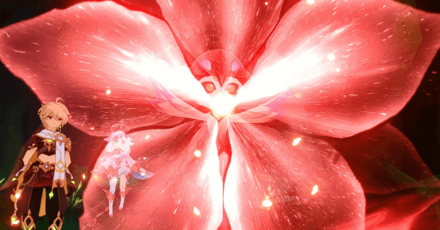
As the Khvarena's Light Shows: Nirodha can be unlocked by progressing through the As the Khvarena's Light Shows quest.
You'll get the As the Khvarena's Light Shows: Nirodha quest after talking to Nasejuna about the the locations of the remaining Great Songs of Khvarena.
As the Khvarena's Light Shows Quest Guide
As the Khvarena's Light Shows: Nirodha Quest Walkthrough
Obtain the Great Song of Khvarena from the Ruins
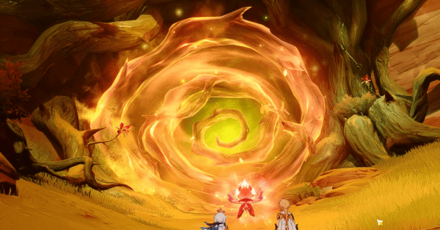
Go to the ruins in Asipattravana Swamp using the Teleport Waypoint, north of Tunigi Hollow, then jump off the cliff and glide down to arrive at the ruin's entrance. A massive Mysterious Amrita Seal is blocking it, which Sorush will automatically dispel.
Go to the Entrance of the Underground Ruins
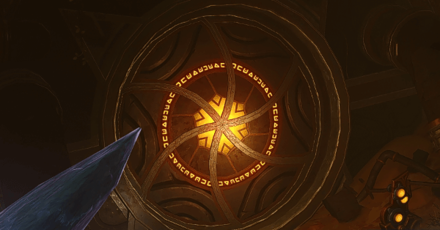
Once the seal is gone, head inside until you've come face-to-face with the Ruins' gate that looks similar to a Ruin Guard's core.
Open the Ruins' Gate
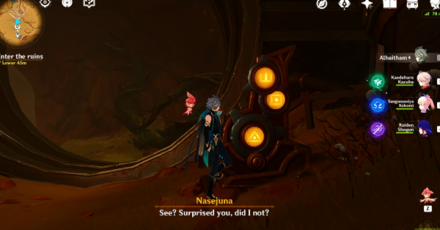
Use the Rune Mechanism by rotating the device to change the cipher on it. The clue lies in Rene's Investigation Notes, which says to "Turn the gears such that all three types of runes are displayed. Ensure that the square rune is connected to the triangular rune at the bottom without changing said triangle."
How to Open the Ruins' Gate
- Rotate the Upper Level once.
- Rotate the Middle Level twice.
- Retain the Lower Level.
How to Open the Ruins' Gate Full Guide
Enter the Ruins
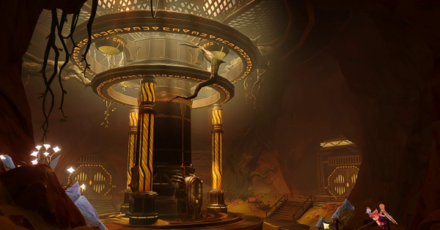
Once you're inside, Nasejuna will tell you that the Great Song of Khvarena lies at the deepest part of the facility. But first, you need to find an Azosite, a condensed Energy Block used to power-up the control unit.
Find Energy Block
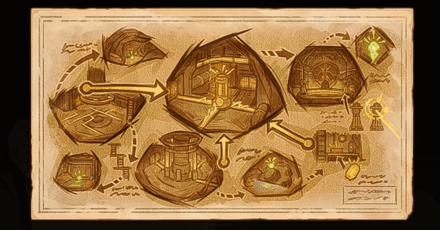
You can Find the Energy Block located at the rightmost wing of the facility behind a shut door. This can be easy to overlook, so simply climb up the stairs in front of Nasejuna then make a sharp turn to your left.
How to Find the Energy Block
| Objectives | |
|---|---|
| 1 | Climb the stairs in front of Nasejuna then turn left. Press forward until the door behind you shuts. |
| 2 | Continue forward until you spot a closed door to your left, and a pathway to your right with few monsters enclosed in Gray Crystals along the way. |
| 3 | Head towards the monsters and enter the tunnel behind them until you see the Power of Khvarena resting on top of a huge gear. |
| 4 | The Power of Khvarena will dispel the Gray Crystals, freeing the monsters trapped within. Defeat the enemy mobs then continue guiding the Power of Khvarena towards the closed door. |
| 5 | Use the Power of Khvarena to remove the Gray Crystal coating the switch then, open the door. |
| 6 | Head inside, and get the Energy Block sitting by the crate. |
Return to the Control Center
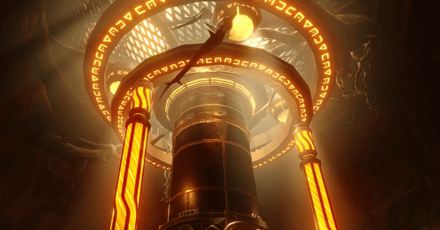
After obtaining the Mysterious Energy Block, follow the Power of Khvarena back to the Control Center. You'll encounter a door locked behind a Rune Mechanism. Solving it will unlock the door. You'll also encounter two Ruin Guards along the way!
Once the Ruin Guards have been dealt with, continue guiding the Power of Khvarena towards the door just above the stairs. The switch will originally be coated with Gray Crystals, but will eventually be dispelled by the Power.
How to Unlock the Door
- Rotate the Upper Level once.
- Rotate the Middle Level once.
- Rotate the Lower Level twice.
Go Where the Power Relays Are
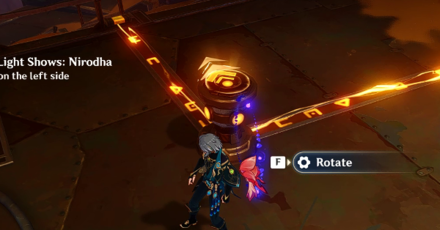
After noticing that the Control Unit isn't working properly, go to the control center where the power relays may be found. You'll see a single mixer inside whose arrows is facing left. Rotate it once to introduce the flow of power to the left side of the facility.
Investigate the Door on the Left Side
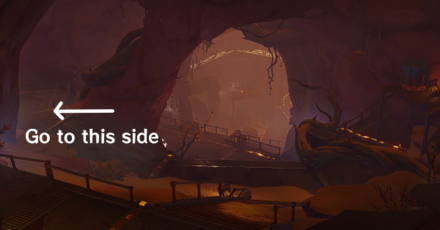
Once the mixer is correctly rotated, head straight to the door on your left. The flight of stairs to your right has a locked door which can only be opened once the circuits are connected in the left side of the facility.
Connect the Circuits
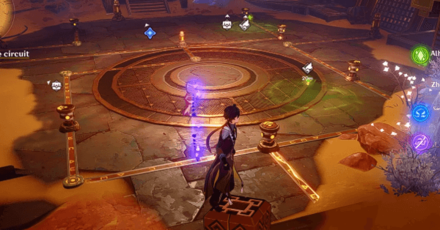
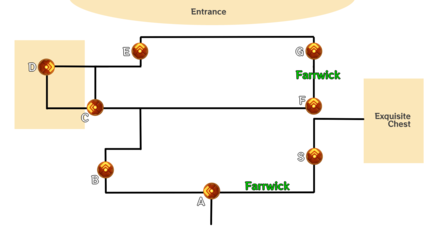
As you continue forward, you'll spot a room with four mixers covered in Gray Crystals to the left. You'll have to collect the Farrwicks scattered across the room to dissipate the Gray Crystals. Then, to connect the circuits, use the mixers to correct the flow of power.
How to Collect the Farrwicks
| Objectives | |
|---|---|
| 1 | 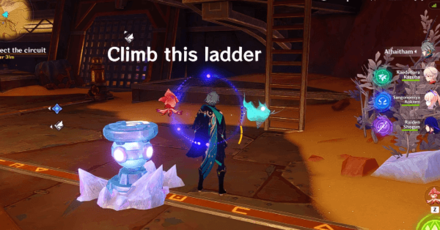 The First Farrwick is located above the ledge above you, on the left side of the room. Simply use the ladder on your far-left, the one with the Seelie hovering right beside it. You'll have to climb three ladders to reach the Farrwick. |
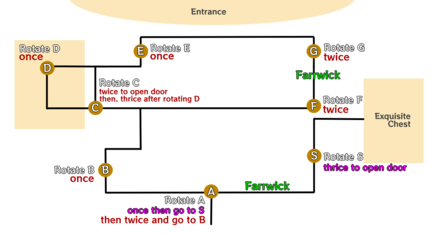
| 2 | 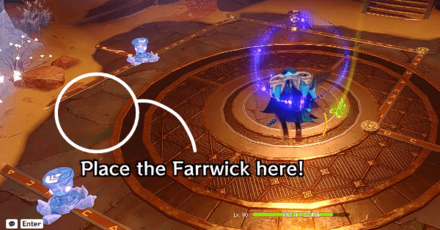 As soon as you spot the Farrwick, grab it and go back to the room below. Place the Farrwick between the two mixers near the ladder you climbed up first. Or, you can also refer to the Circuit Overview below; place it between Mixer A and Mixer S. |
| 3 | 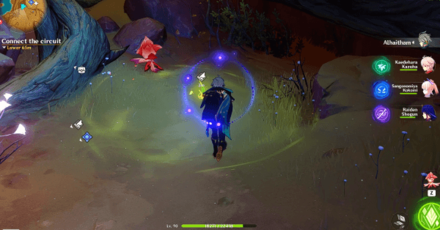 To get the other Farrwick, go to the right side of the room and spot the Seelie. Simply follow it towards the end of the tunnel until you see the Farrwick. Grab it head back once more to the circuit room. |
| 4 | 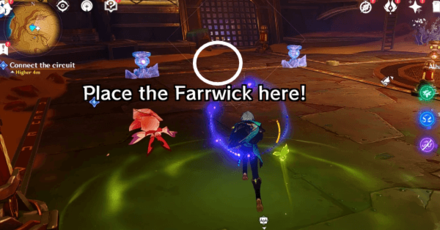 Place the Farrwick between the two mixers that are still covered with Gray Crystals. Or, you can also refer to the Circuit Overview below; place it between Mixer G and Mixer F. |
How to Connect the Circuit
| Circuit Overview | |
|---|---|
 Click here to view the original image Click here to view the original image |
|
| A | Rotate Mixer A a total of three times. You have the option of rotating it thrice without stopping, or you can rotate it once, then rotate S thrice, get the Exquisite Chest behind the trap door, then back to Mixer A and rotating it two times. |
| B | Then, head over to Mixer B and rotate it once. |
| C | Next, go to Mixer C and rotate it two times to open the trap door beside it. This will give you access to Mixer D. |
| D | Head inside the door and rotate Mixer D once then go back to Mixer C and rotate it three times. |
| E | Afterwards, go to Mixer E and rotate it once. |
| F | Then, walk over to Mixer F and rotate it two times. |
| G | Lastly, go to Mixer G and rotate two times. |
Connect the Circuit Final Cheat Sheet
| Circuit Overview Cheat Sheet | |
|---|---|
 Click here to view the original image |
Rotated your mixers ahead before reading our guide? We got you! Take a look at this cheat sheet to know the final direction of each mixer to connect the circuits!
Go Investigate the Proving Ground

After you've connected the circuit, retrace your steps and go back to the very first mixer you've encountered. From there, descend the flight of stairs and walk towards the door where Nasejuna is waiting for you.
Enter the Proving Ground
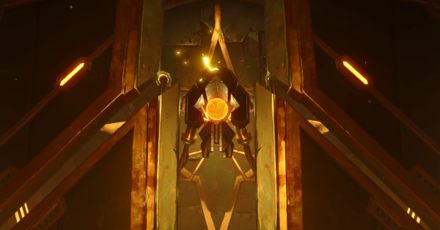
Enter the proving ground and head towards the platform in the center. There you'll see two Khvarena Barriers and a strange device. Examining the strange device will activate the Giant Golem and summon the Ruin Cannon.
Activate the Ruin Cannon
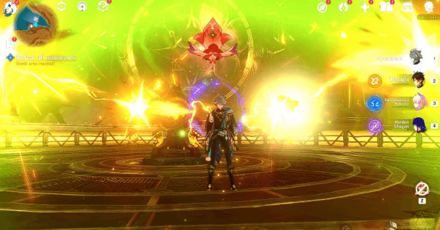
Activating the Ruin Cannon will summon three mechanisms that will attack your character with a laser beam. Use Sorush's power to activate the Khvarena Barriers from the laser attacks, or block them out by hiding behind the Ruin Cannon.
Defeat all Opponents

As an additional part of the proving ground's defense mechanism, you'll also have to defeat the enemies to proceed!
Proving Ground Enemies
| Enemies | |
|---|---|
| Wave #1 | |
| Wave #2 | |
| Wave #3 |
Use the Ruin Cannon to Destroy the Golem's Core
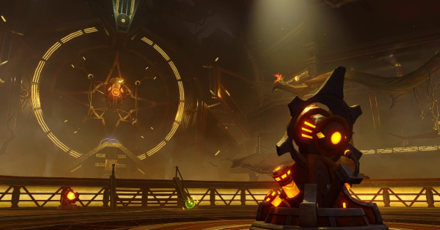
After defeating the enemies and defending using the Khvarena Barriers, use the Ruin Cannon to destroy the Golem's Core.
How to Destroy the Golem's Core
| Objectives | |
|---|---|
| 1 | Stand behind the Ruin Cannon and press Activate. This will bring up the Ruin Cannon interface. |
| 2 | Position the Ruin Cannon's crosshair and align it with the Golem's Core then immediately fire. |
| 3 | The Golem's Core will sometimes a barrier to protect itself from your attacks. Quickly target the three cores to deactivate it. Take note of your speed as the cores replenish! |
Examine the Opened Device
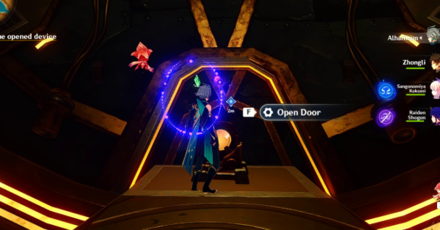
After defeating the Giant Golem, walk towards the switch just below it and open the door. Keep walking forward, until you spot the Luxurious Chest. Remember to open it as soon as you see it so you don't have to go back!
Obtain the Great Song of Khvarena
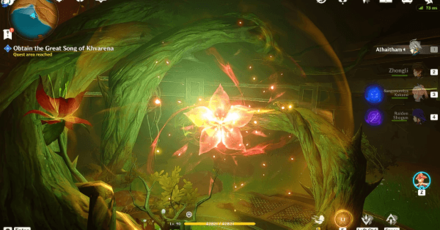
Take a sharp turn to your right from the Luxurious Chest and jump down the ledge. Then, use Sorush's skill to obtain the Great Song of Khavarena!
As the Khvarena's Light Shows: Nirodha Information
Sub-Quest of As the Khvarena's Light Shows

As the Khvarena's Light Shows: Nirodha is a subquest of the quest, As the Khvarena's Light Shows, where you're tasked to obtain a Great Song of Khvarena!
As the Khvarena's Light Shows is the fourth part of the Khvarena of Good and Evil world quest chain.
Khvarena of Good and Evil World Quest Chain
Quest Release Date
| Genshin Impact Version 3.6 | |
|---|---|
 |
|
| Release Date | April 12, 2023 |
The Khvarena of Good and Evil World Quest quest chain was released in Version 3.6 which went live on April 12, 2023! Check out everything in the 3.6 update here:
Version 3.6 Release Date and Patch Notes
As the Khvarena's Light Shows: Nirodha Rewards
Total Quest Rewards
| Quest Rewards | ||
|---|---|---|
|
|
|
|
|
|
||
Genshin Impact Related Guides

Other Khvarena of Good and Evil Quest Guides
| Khvarena of Good and Evil World Quest Guides | ||
|---|---|---|
| The Splendorous Sky That Day | Asipattravana Itihasa | Awakening's Real Sound |
| As the Khvarena's Light Shows | As the Khvarena's Light Shows: Samudaya | As the Khvarena's Light Shows: Dukkha |
| As the Khvarena's Light Shows: Nirodha | The Hymn of Tir Yazad | |
Comment
Author
As the Khvarena's Light Shows: Nirodha Quest Guide
improvement survey
03/2026
improving Game8's site?

Your answers will help us to improve our website.
Note: Please be sure not to enter any kind of personal information into your response.

We hope you continue to make use of Game8.
Rankings
- We could not find the message board you were looking for.
Gaming News
Popular Games

Genshin Impact Walkthrough & Guides Wiki

Honkai: Star Rail Walkthrough & Guides Wiki

Umamusume: Pretty Derby Walkthrough & Guides Wiki

Pokemon Pokopia Walkthrough & Guides Wiki

Resident Evil Requiem (RE9) Walkthrough & Guides Wiki

Monster Hunter Wilds Walkthrough & Guides Wiki

Wuthering Waves Walkthrough & Guides Wiki

Arknights: Endfield Walkthrough & Guides Wiki

Pokemon FireRed and LeafGreen (FRLG) Walkthrough & Guides Wiki

Pokemon TCG Pocket (PTCGP) Strategies & Guides Wiki
Recommended Games

Diablo 4: Vessel of Hatred Walkthrough & Guides Wiki

Fire Emblem Heroes (FEH) Walkthrough & Guides Wiki

Yu-Gi-Oh! Master Duel Walkthrough & Guides Wiki

Super Smash Bros. Ultimate Walkthrough & Guides Wiki

Pokemon Brilliant Diamond and Shining Pearl (BDSP) Walkthrough & Guides Wiki

Elden Ring Shadow of the Erdtree Walkthrough & Guides Wiki

Monster Hunter World Walkthrough & Guides Wiki

The Legend of Zelda: Tears of the Kingdom Walkthrough & Guides Wiki

Persona 3 Reload Walkthrough & Guides Wiki

Cyberpunk 2077: Ultimate Edition Walkthrough & Guides Wiki
All rights reserved
Copyright© 2012-2024 HoYoverse — COGNOSPHERE. All Rights Reserved.
The copyrights of videos of games used in our content and other intellectual property rights belong to the provider of the game.
The contents we provide on this site were created personally by members of the Game8 editorial department.
We refuse the right to reuse or repost content taken without our permission such as data or images to other sites.


