This survey will take about 1 minute.
Your answers will help us to improve our website.
Genshin Impact
The Hymn of Tir Yazad Quest Guide
✉ Send your thoughts in our Genshin 6.4 Patch Survey!
★ Exclusive: Dive back in time with the Meta History
◆ Hot: Version 6.4, Luna 5 Codes
◆ Builds: Varka, Flins, Skirk, Escoffier
◆ Events: Travelers' Tales, He Who Caught the Wind
◆ Future: Linnea, Version 6.5 Luna VI
The Hymn of Tir Yazad is a sub quest of the Khvarena of Good and Evil quest chain in the Girdle of the Desert for Genshin Impact 3.6. See how to unlock and how to complete the world quest in this guide!
List of Contents
How to Unlock the Hymn of Tir Yazad Quest

Upon completing the previous quest, As the Khvarena's Light Shows, you automatically unlock the Hymn of Tir Yazad quest, which is the final part of the Khvarena of Good and Evil chain.
As the Khvarena's Light Shows Quest Guide
The Hymn of Tir Yazad Quest Guide
Go to the Vourukasha Oasis
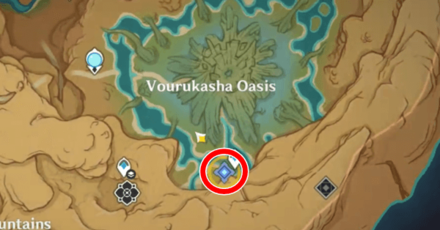
After defeating Nasejuna and his Abyss Herald friend, return to Vourukasha Oasis where Zurvan was stationed before. Teleporting to that waypoint immediately plays a cutscene! Talk to Zurvan afterwards, who finally gives you the task on extinguishing the Sign of Apaosha.
Go to the Tunigi Hollow
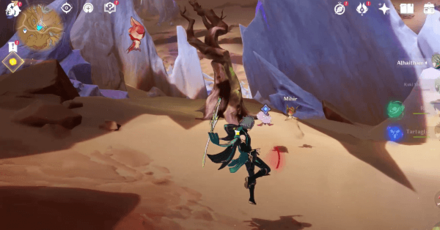
Head to Tunigi Hollow, where the humungous spiral Gray Crystals have formed. Go to the southwestern crystal, and approach Mihir and Rashnu by a trunk.
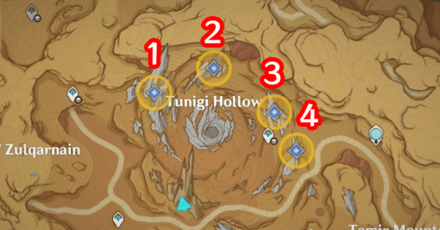
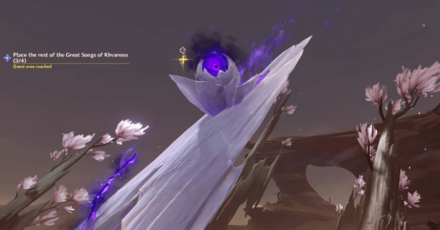
Place the rest of the Great Songs of Khvarena (0/4)
| Go to a section here! | |||
|---|---|---|---|
| 1 | 2 | 3 | 4 |
Placing the Great Song of Khvarena purifies the Gray Crystal-infested trunks of Tunigi Hollow, now you must also do the same for the four remaining crystals!
Great Song of Khvarena Trunk 1 Walkthrough
This trunk is corroded, so you must destroy the source of corruption found on the ledge of the Gray Crystal. To get to the source, here's how:
| 1 | Use Sorush to open up the Ruebright Bloom platform, which is a floating green bulb floating above you. |
|---|---|
| 2 | 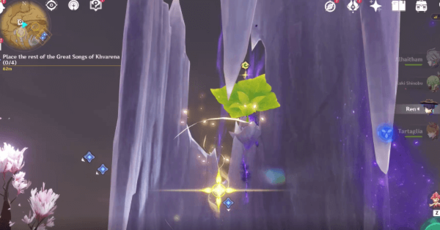 Look up north and you should find a Four-Leaf Sigil. Attach yourself to the Four-Leaf Sigil, then to the Ruebright Bloom platform until you get to the source of corruption. |
| 3 | 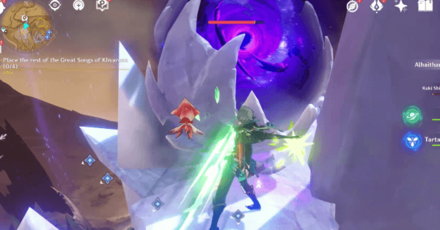 Destroy the source of corruption with any attacks. |
| 4 | 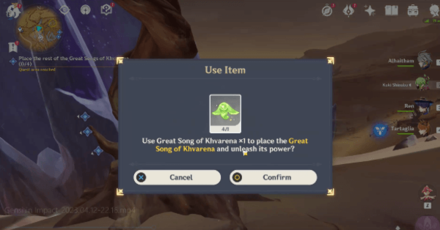 Offer the Great Song of Khvarena to the trunk. |
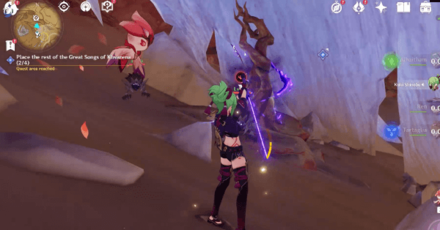
Great Song of Khvarena Trunk 2 Walkthrough

For this trunk, you only need to defeat the three Hilichurls to remove the corruption. Afterwards you can place the Great Song of Khvarena!
Great Song of Khvarena Trunk 3 Walkthrough
Like the second trunk, you will only have to defeat the small Rifthounds to remove the corruption, allowing you to give the Great Song immediately.
Great Song of Khvarena Trunk 4 Walkthrough
For the last trunk, look up behind the Gray Crystals and simply hoist yourself up with the Four-Leaf Sigils to the source of the corruption, which is found on a ledge above. Destroy it with any attacks, and you should be able to give the Great Song of Khvarena!
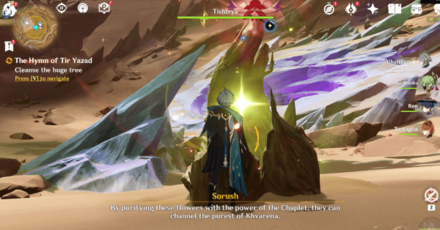
Purifying the Huge Trees
Once you have given all Great Songs of Khvarena, talk to Mihir to start the next sets of trials. In this trial, you will have to defend Sorush as she tries to cleanse the Tishtrya branches!
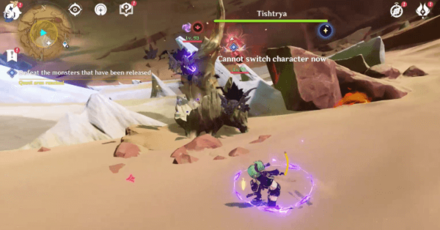
Some of the branches will spawn waves of enemies, so prepare your best team comp and a healer! You will also need Geo and Electro to take care of the Rifthounds, and Hydro and Cryo to take care of the Abyss Mages.
Do not stray too far or the trial will end, and you will have to start all over again!
Best Team Comp | Party Building Guide
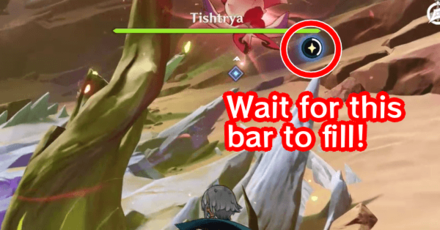
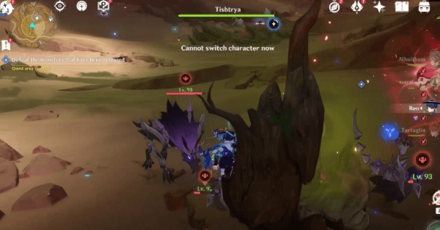
Cleanse the first Huge Tree
For this part, you must simply wait for Sorush to cleanse the huge tree until the bar beneath the Tishtrya's HP goes to full.
Cleanse the second Huge Tree
Follow Sorush until you get to the northwestern tree. Starting the trial will spawn unending waves of the following enemies until you complete the cleansing:
|
|
|
Cleanse the third Huge Tree
Follow Sorush until you get to the final southwestern tree. Starting the trial will spawn unending waves of the following enemies:
|
|
|
|
Talk to Mihir and Rashnu
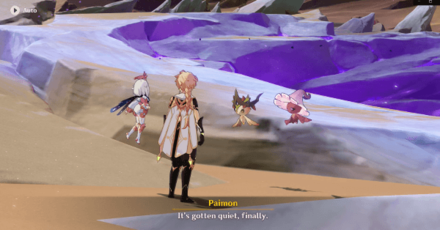
Completing the trials cleanses the hole in Tunigi Hollow, completing purifying this part of the map! Talk to Mihir and Rashnu afterwards to complete part one of the Hymn of Tir Yazad quest.
Pass through the path in the depths
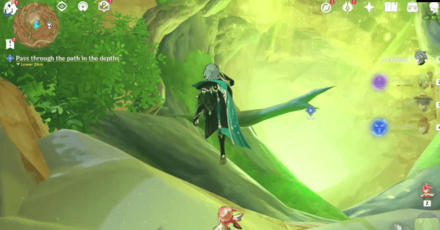
Jump in the purified hole of the Tunigi Hollow, which teleports you to the top of the large tree stump of the Vourukasha's Oasis. This starts the second part of the quest.
Note: There should also be a Dendroculus floating above the hole!
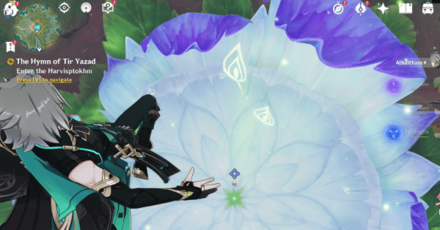
Enter the Harvisptokhm
 |
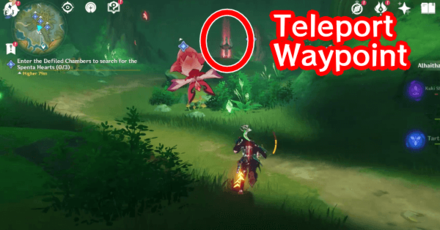 |
After a brief cutscene, you will be entering the Harvisptokhm, the final area of this quest chain! Don't forget to open the Teleport Waypoint outside the flower bulb!
Enter the Defiled Chambers to search for the Spenta Hearts (0/3)
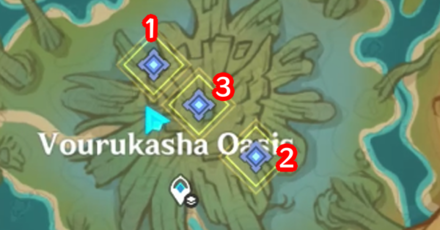
| Go to a section here! | ||
|---|---|---|
| 1 | 2 | 3 |
In this section, you will have to purify the ”portals” around the Harvisptokhm with the help of the Khvarena seelies to enter the Defiled Chambers.
Make sure to have a healer and your best DPS in your party beforehand!
Defiled Chamber 1 Walkthrough
This is the Defiled Chamber guide for the northwestern area. We recommended doing this as your first chamber.
| 1 | Go up the ledges by using the Four-Leaf Sigils to the northwestern chamber. Use Sorush to open up the Lightcall path, allowing you to walk up the defiled portal. |
|---|---|
| 2 | 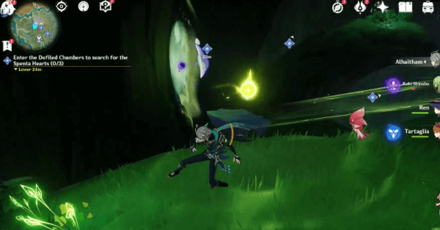 On the left side of the chamber, you should see a Khvarena on a ledge. Hoist yourself to the Khvarena with the Four-Leaf Sigil, and touch the Khvarena. The Khvarena will then cleanse the portal, allowing you access to the first Defiled Chamber! |
| 3 | 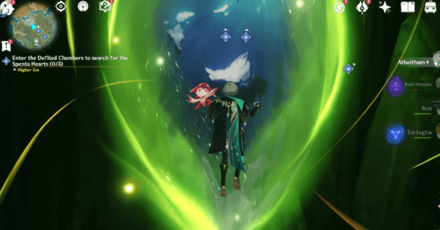 Enter the Defiled Chamber. Simply touch the portal to be transported to a peculiar dimension. |
| 4.1 | 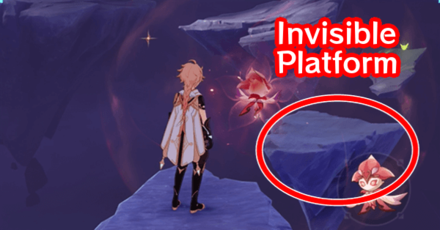 In this chamber, use Sorush to see the invisible moving floating stone in front of you! Holding her interact skill can cause her to stop in place. Make sure to remove the purple attacking Defiled Beacon beforehand with Sorush's ability! |
| 4.2 | An alternate way of getting through the first gap is by transporting the Special Four-Leaf Sigil, which is hidden underneath the rock beside the Khvarena fairy, with Sorush's ability. This is an easy way for you to skip waiting for the moving floating stone! |
| 5 | 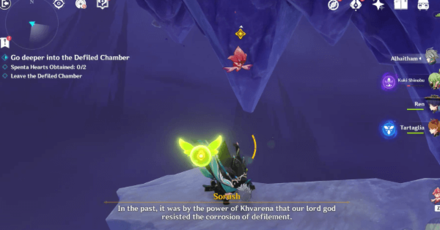 Once on the other side, touch the Khvarena fairy and follow it. Use the Special Four-Leaf Sigil afterwards to get back to the main platform. |
| 6 | 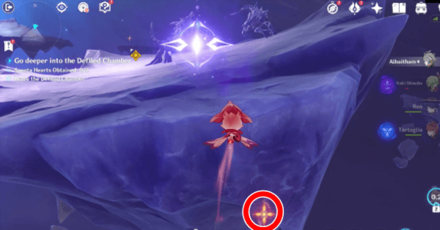 Another Special Four-Leaf Sigil can be seen on the second ledge, above the Defiled Beacon. Remove the Defiled Beacon with Sorush's ability, then transport the Special Four-Leaf Sigil up so you can get to the other side! |
| 7 | 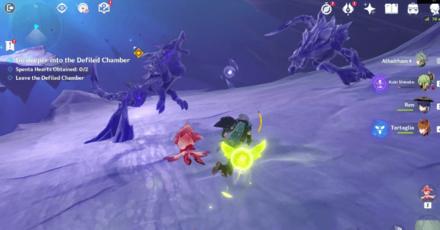 Keep following the Khvarena until it purifies the Gray Crystals encasing the Rifthounds. Defeat them so that the Khvarena can continue its path. |
| 8 | 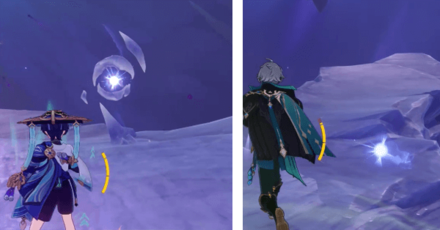 Once the Khvarena reaches the peculiar stony orb, it will reveal the Spenta Heart, which is a floating and glowing white orb. Pick this up to get the first Spenta Heart in this chamber. |
| 9 | Get to the other side with the Special Four-Leaf Sigil, then transport it with Sorush so you can get to the next platform. |
| 10 | 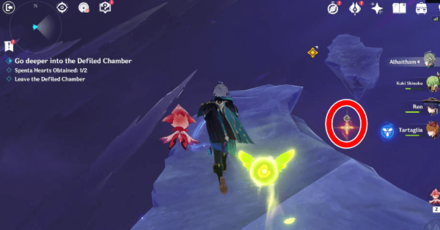 Touch the next Khvarena. Afterwards, walk to the ledge until you find the Special Four-Leaf Sigil hidden beneath the little floating rock. |
| 11 |  After you get to the next platform, you should see the second Spenta Heart! Simply wait for the Khvarena until it becomes obtainable for you. |
| 12 | 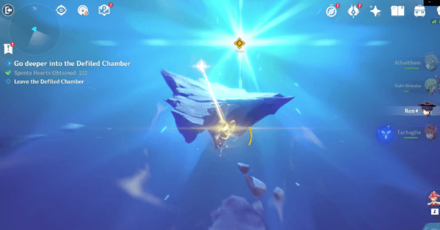 Continue following the great light with the Four-Leaf Sigils until it transports you back to the Harvisptokhm! |
Defiled Chamber 2 Walkthrough
This is the Defiled Chamber guide for the southeastern area. This continues from Defiled Chamber 1.
| 1 | 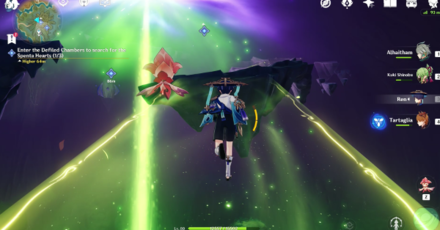 After returning to the Harvisptokhm, walk up the path ahead by creating Lightcall paths until you get to the next chamber area. |
|---|---|
| 2 | 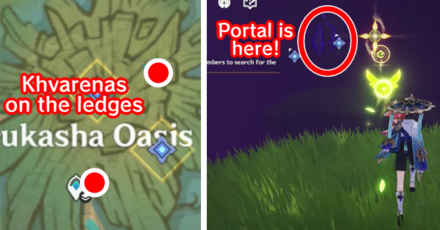 This time, you will need two Khvarena to open up the second portal. The Khvarenas are on the second ledges on the left and right sides of the chamber. |
| 3 |  Enter the Defiled Chamber once the two Khvarena reaches the portal. |
| 4 | 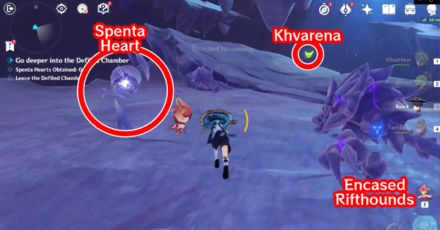 This chamber is a simple combat dimension. Use the Khvarena in front of you, which will rotate around the platform and revive the Rifthounds. Defeat them to unlock the first Spenta Heart! |
| 5 | 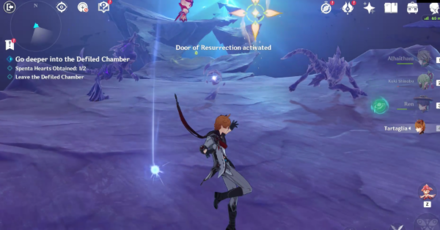 Go up and around the platforms with the Four-Leaf Sigils and defeat the second set of Rifthounds with the Khvarena. |
| 6 | 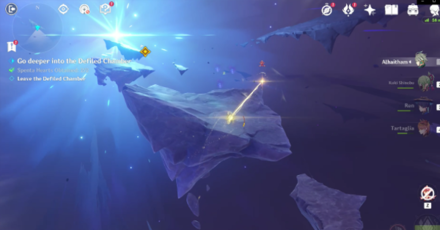 Make your way to the exit. Sorush will light your way and proect you from Defiled Beacons. Wait for Sorush to create Four-Leaf Sigils for you, like a true friend she is! |
Defiled Chamber 3 Walkthrough
This is the Defiled Chamber guide for the central portal at the top-most area. This continues from Defiled Chamber 2.
| 1 | 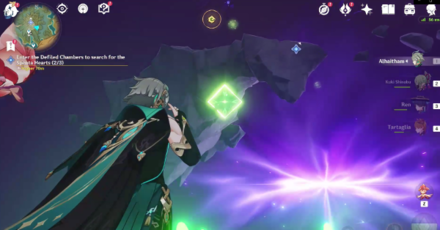 Once you're back in the main area, look up and hoist yourself up the Four-Leaf Sigil. Continue following these sigils until you see the floating green Lightcall orbs and the Khvarena. |
|---|---|
| 2 | 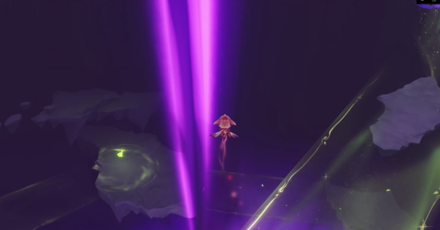 Before touching the Khvarena, use Sorush to open up all Lightcall paths that goes up to the portal. Make sure to remove the purple Defiled Beacons as well! |
| 3 | 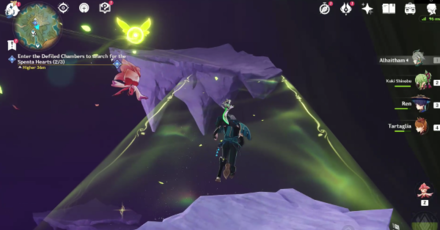 After opening up the path, touch the Khvarena and make your way to the Defiled Chamber. |
| 4 | 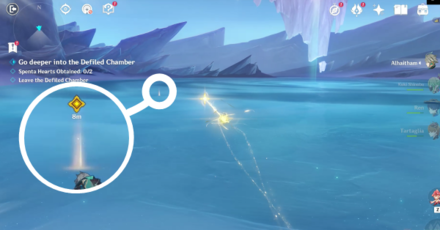 In this expansive Defiled Chamber, you will see Four-Leaf Sigils. Simply follow the Sigils until you find a peculiar glowing light near the middle of the frozen lake. Interact with it to transport yourself to another area. |
| 5 |  This area is a maze with no map. Luckily, you can use Sorush to fly up and see your surroundings in birds-eye view! To start, immediately go left. You should see a Khvarena and the path to the first Spenta Heart. |
| 6 | 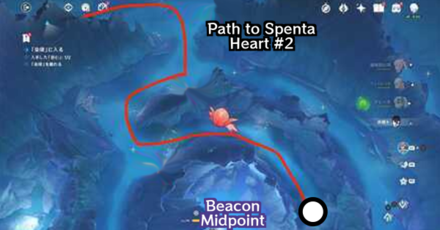 The second Spenta Heart is around the beacon midpoint, which is indicated by a purplish pillar in the sky. Use Sorush to fly up in the air and follow the path indicated above with the central area as the midpoint. |
| 7 | 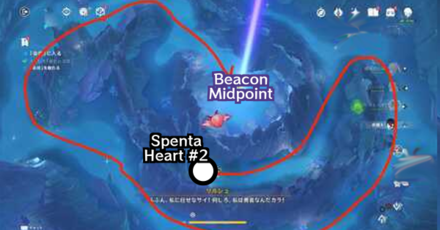 From the second Spenta Heart location, make your way to the midpoint by following the beacon to leave this dimension. You now have completed all Defiled Chambers! |
Go to Gaokerena
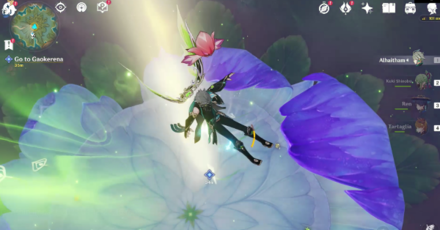
Once you're back to the Harvisptokhm, drop down from above to the Gaokerena, where a brief cutscene will play.
Note: Prepare your best team with a healer as you will be entering a combat gauntlet! Dendro, Electro, Hydro, and Geo characters should be enough to target the resistances of the enemies listed below!
Defend the Flower of Sanctity
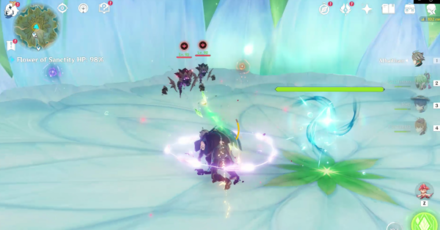
After your preparations, awaken the middle orb to start the gauntlet. In this trial, you will need to protect the Flower of Sanctity from the onslaught of attacks, which means aggro between the enemies and you must be maintained.
The challenge will end once all waves of enemies have been defeated.
Enemies in the Flower of Sanctity trial
|
|
|
|
|
|
|
|
|
|
|
Talk to Zurvan
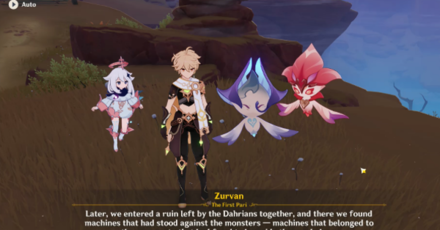
You have finally cleansed and extinguished the Sign of Apaosha, creating a beatiful landscape of the Realm of Farakhkfert! A finale cutscene with Zurvan will play, thereby ending the quest chain and unlocking the Lightcall Resonance quest.
Talk to Kathernye
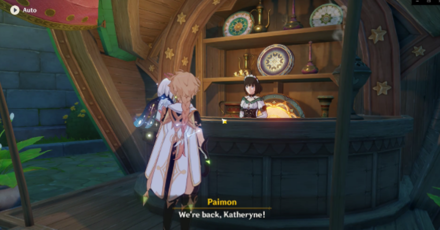
Although the quest is over, don't forget to collect your reward from Katheryne in Sumeru City!
The Hymn of Tir Yazad Rewards
Part 1 Quest Rewards
| Quest Rewards | ||
|---|---|---|
|
|
|
|
|
|
||
Part 2 Quest Rewards
| Quest Rewards | ||
|---|---|---|
|
|
|
|
|
|
||
Genshin Impact Related Guides

Other Khvarena of Good and Evil Quest Guides
| Khvarena of Good and Evil World Quest Guides | ||
|---|---|---|
| The Splendorous Sky That Day | Asipattravana Itihasa | Awakening's Real Sound |
| As the Khvarena's Light Shows | As the Khvarena's Light Shows: Samudaya | As the Khvarena's Light Shows: Dukkha |
| As the Khvarena's Light Shows: Nirodha | The Hymn of Tir Yazad | |
Comment
Author

The Hymn of Tir Yazad Quest Guide
Please participate in our site
improvement survey
03/2026
improvement survey
03/2026
Would you assist in
improving Game8's site?
improving Game8's site?

×
We are listening to our users' valuable opinions and discussing how to act on them.
The information collected through this survey will be used for the purpose of improving our services. In addition, the information will only be disclosed a part of a statistic in a format that will not allow identification of personal information.
Begin Survey
Not Now
×
Please rate each item regarding Game8.co's Advertisements.
Amount of Ads
Very Dissatisfied
Somewhat Dissatisfied
Fine
Somewhat Satisfied
Highly Satisfied
Placement of Ads
Timing of Ad Display
Ad Loading Speed
Safeness of Ads
Content of Ads
×
Please rate each item regarding Game8.co's Quality of Articles.
Amount of information
Very Dissatisfied
Somewhat Dissatisfied
Fine
Somewhat Satisfied
Highly Satisfied
Frequency of updates
Speed of new information
Accuracy of articles
Understandibility of articles
Readability of sentences
×
Please rate each item regarding Game8.co's Usability of the Site.
Ease of finding information
Very Dissatisfied
Somewhat Dissatisfied
Fine
Somewhat Satisfied
Highly Satisfied
Loading Speed
Use of Color
Font Size
Visibility of Images
Easy to Understand Layout
×
Please rate each item regarding Game8.co's Message Boards, Comments.
Ease of Writing
Very Dissatisfied
Somewhat Dissatisfied
Fine
Somewhat Satisfied
Highly Satisfied
Readability
Ease in Finding Information
Comment Quality
Comment Quantity
Admin Response
×
Please rate each item regarding Game8.co's Site's new design.
Please rate our site's new design
Very Dissatisfied
Somewhat Dissatisfied
Fine
Somewhat Satisfied
Highly Satisfied
Do you think that the website's design change makes the site easier to use?
Has the new design made it easier for you to find information on the site?
Has the new design improved the overall visual appeal of the site?
How would you rate your overall satisfaction with the new design of the site?
×
How likely are you to recommend Game8 to someone you know?
Very Unlikely
0
1
2
3
4
5
6
7
8
9
10
Very Likely
If you have other opinions regarding potential improvement to the website, please share them with us. We would appreciate your honest opinion.
Note: This is a free response section, so you can proceed without entering anything.
Note: Please be sure not to enter any kind of personal information into your response.
Note: Please be sure not to enter any kind of personal information into your response.
×
Thank You
×
Thank you for participating in our survey! Your answers will help us to improve the quality of our website and services.
We hope you continue to make use of Game8.
We hope you continue to make use of Game8.
Close


Rankings
- We could not find the message board you were looking for.
Gaming News


Popular Games

Genshin Impact Walkthrough & Guides Wiki
Honkai: Star Rail Walkthrough & Guides Wiki
Umamusume: Pretty Derby Walkthrough & Guides Wiki
Pokemon Pokopia Walkthrough & Guides Wiki
Resident Evil Requiem (RE9) Walkthrough & Guides Wiki
Monster Hunter Wilds Walkthrough & Guides Wiki
Wuthering Waves Walkthrough & Guides Wiki
Arknights: Endfield Walkthrough & Guides Wiki
Pokemon FireRed and LeafGreen (FRLG) Walkthrough & Guides Wiki
Pokemon TCG Pocket (PTCGP) Strategies & Guides Wiki


Recommended Games
Diablo 4: Vessel of Hatred Walkthrough & Guides Wiki
Fire Emblem Heroes (FEH) Walkthrough & Guides Wiki
Yu-Gi-Oh! Master Duel Walkthrough & Guides Wiki
Super Smash Bros. Ultimate Walkthrough & Guides Wiki
Pokemon Brilliant Diamond and Shining Pearl (BDSP) Walkthrough & Guides Wiki
Elden Ring Shadow of the Erdtree Walkthrough & Guides Wiki
Monster Hunter World Walkthrough & Guides Wiki
The Legend of Zelda: Tears of the Kingdom Walkthrough & Guides Wiki
Persona 3 Reload Walkthrough & Guides Wiki
Cyberpunk 2077: Ultimate Edition Walkthrough & Guides Wiki


All rights reserved
Copyright© 2012-2024 HoYoverse — COGNOSPHERE. All Rights Reserved.
The copyrights of videos of games used in our content and other intellectual property rights belong to the provider of the game.
The contents we provide on this site were created personally by members of the Game8 editorial department.
We refuse the right to reuse or repost content taken without our permission such as data or images to other sites.