Afratu's Dilemma World Quest Guide
✉ Send your thoughts in our Genshin 6.4 Patch Survey!
★ Exclusive: Dive back in time with the Meta History
◆ Hot: Version 6.4, Luna 5 Codes
◆ Builds: Varka, Flins, Skirk, Escoffier
◆ Events: Travelers' Tales, He Who Caught the Wind
◆ Future: Linnea, Version 6.5 Luna VI
Afratu's Dilemma is a World Quest in Sumeru for Genshin Impact Version 3.1. See how to unlock the quest, walkthrough, and rewards, info and release date in this guide!
How to Unlock Afratu's Dilemma
Go Near Valley of Dahri
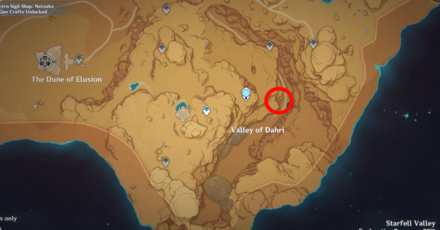
The Afruta's Dilemma automatically unlocks once you get close to the Valley of Dahri in the Desert area of Sumeru. Talk to Afruta on the side of the road below the cliffs to start the quest.
Sumeru Desert Map Guide
Afratu's Dilemma Quest Walkthrough
Afratu's Dilemma Quest Objectives
- Destroy the Rock to get inside the Ruin Golem
- Follow the path
- Go up and continue following the path
- Head to the Control Room and destroy all Suda's Flows
- Enter the Cockpit and Turn off Autonomous Attacking
- Destroy the Flashing Rocks using the Golem
- Report back to Afruta
Destroy the Rock to Get Inside the Ruin Golem

To get inside the Ruin Golem, you have to bait the Golem to shoot at the rocks on the quest marker. Try not to stay on the rock for too long, or you might get caught up in the attack.
Follow the Path
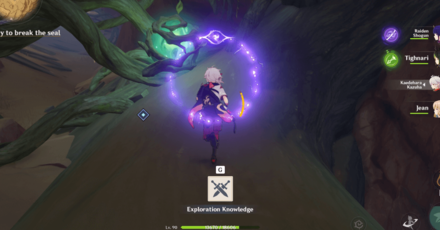
Follow the path and continue exploring up inside to get to the Ruin Golem control room. There are Suda's Flows (green orb and vines) blocking the way, and you can remove them by simply attacking.
There will also be a hilichurl camp on the way. You can choose to fight them to get a chest or proceed to the next objective.
Go Up and Continue Following the Path

You will encounter more Suda's Flows and Ruin Guards as you get closer to the control room. It's better to fight them so they won't cause any problems once you get into the control room.
There is also a waypoint on the way. You can activate it so you can get back here whenever you want!
Head to the Control Room and Destroy All Suda's Flows
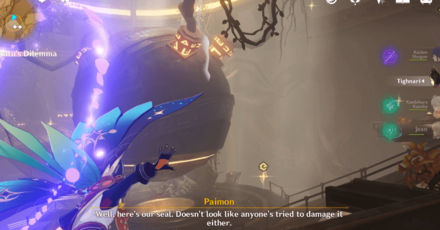
There are three areas in the control room infested with Suda's Flows, and you can find one on each floor. Destroy them all to unlock the Ruin Golem's cockpit.
How to Break Suda's Flow in Afratu's Dilemma Quest
How to Destroy the First Suda's Flow
| First Suda's Flow | |
|---|---|
| 1 | 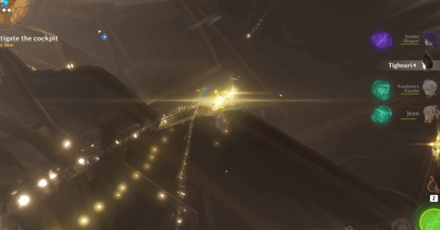 Use the Four-Leaf Sigil to get to the highest floor. |
| 2 |  Destroy a Suda's Flow on the door to unlock the room filled with more Suda's Flow. |
| 3 | 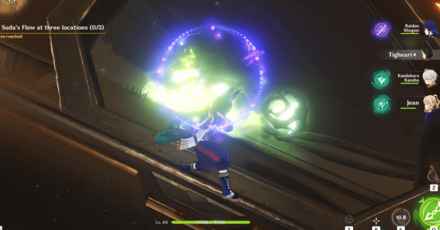 Pop everything off and move on to the next set of Suda's Flow. |
How to Destroy the Second Suda's Flow
| Second Suda's Flow | |
|---|---|
| 1 | 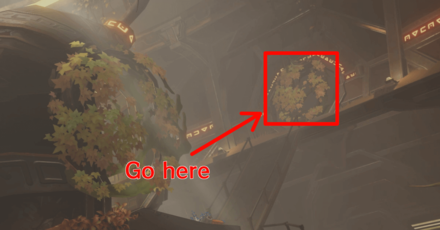 Get to the room that was shown in the cutscene. |
| 2 |  Destroy all other Suda's Flows inside and head to the next set of Suda's Flow after. |
How to Destroy the Third Suda's Flow
| Third Suda's Flow | |
|---|---|
| 1 | 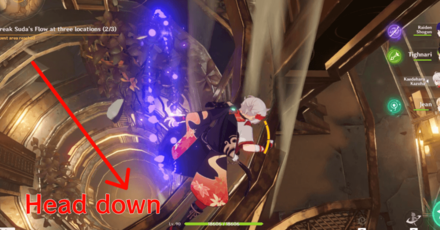 Proceed to the lowest floor through the hole in the middle of the control room. |
| 2 |  Destroy all of the Suda's Flow on that floor, but beware of the enemies that will spawn. |
| 3 |  Use the air current to head back up once done. |
Enter the Cockpit
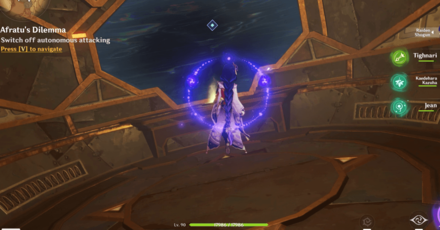
Use the Four-Leaf Sigils again to climb your way up to the cockpit. Go inside and switch off the Golem's autonomous attacking.
Destroy the Flashing Rocks using the Golem

Test out the Golem once done removing its auto function. Use it on the flashing rocks on the screen and then leave the control to get to the next and final objective.
Report Back to Afratu
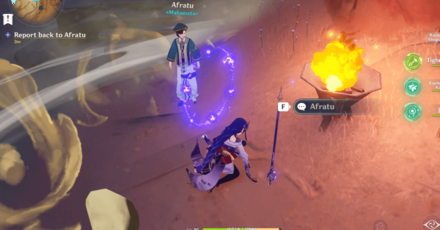
Return to Afratu to report what happened, and the quest will automatically end after talking to him.
Afratu's Dilemma Quest Details and Release Date
Afratu's Dilemma Release Date
| Genshin Impact Version 3.1 | |
|---|---|
 |
|
| Release Date | September 28, 2022 |
Released in Version 3.1
Afratu's Dilemma was released in Version 3.1, which went live on September 28, 2022! Check out all new content in the latest update here:
Version 3.1 Release Date & Patch Notes
Afratu's Dilemma Rewards
Total Quest Rewards
| Quest Rewards | ||
|---|---|---|
|
|
|
|
|
|
|
|
Genshin Impact Related Guides

Guides to Sumeru Areas
| Sumeru Area Guides | |
|---|---|
 Rainforest Area Rainforest Area |
 Desert Area Desert Area |
Guide to Desert Regions
| Sumeru Desert Guides | ||
|---|---|---|
 The Great Red Sand The Great Red Sand |
 Desert of Hadramaveth Desert of Hadramaveth |
 Girdle of the Sands Girdle of the Sands |
Guides to Important Sumeru Features
| Notable Sumeru Guides | |
|---|---|
| Dendroculus | Craftable Weapons |
| Tree of Dreams | Commission Unlock |
| Reputation | Shrine of Depths |
| Remarkable Chests | Chest Locations |
The Great Red Sand World Quests
| Desert Quest Chains | |
|---|---|
| Golden Slumber | Old Notes and New Friends |
| The Exile | A Gifted Rose |
| Golden Slumber Quest Guides | |
| Lost in the Sands | An Introduction to Indoor Archaeology |
| The Secret of Al-Ahmar | Dreams Beneath the Searing Sand |
| Old Notes and New Friends Quest Guides | |
| Dual Evidence | Soheil's Wish |
| Invisible Barrier | Hidden Mercenaries |
| Desert's Remembrance | |
| The Exile Quest Guides | |
| The Exile: Blooming | The Exile: Sprouting |
| A Gifted Rose Quest Guides | |
| A Gifted Rose: Prickly as Thorns | A Gifted Rose: Long Day Ahead |
| A Gifted Rose: Can Stones Bloom | A Gifted Rose: Ballad of Days Gone By |
| A Gifted Rose: Some People Never Fade Away | Golden Rose Seeds |
| Desert World Quests | |
| Afratu's Dilemma | Blooming Sands |
| Join the Eremites and Embrace a Wonderful New Life! | |
The Great Red Sand Puzzles and Features
Enemies in the The Great Red Sand
| Enemy and Boss Guides | |
|---|---|
 Algorithm of Semi-Intransient Matrix Algorithm of Semi-Intransient Matrix |
 Primal Constructs Primal Constructs |
 Eremite Stone Enchanter Eremite Stone Enchanter |
 Eremite Galehunter Eremite Galehunter |
Living Creatures in the The Great Red Sand
Wildlife in the The Great Red Sand
| Wildlife in the The Great Red Sand | ||
|---|---|---|
 Desert Sumpter Beast Desert Sumpter Beast |
 Scorpion Scorpion |
 Red Vulture Red Vulture |
 Scarab Scarab |
 Quicksand Unagi Quicksand Unagi |
 Desert Fox Desert Fox |
Items in the The Great Red Sand
| Items found in the The Great Red Sand | |
|---|---|
 Ajilenakh Nut Ajilenakh Nut |
 Henna Berry Henna Berry |
All Interactive Map Guides

Author
Afratu's Dilemma World Quest Guide
improvement survey
03/2026
improving Game8's site?

Your answers will help us to improve our website.
Note: Please be sure not to enter any kind of personal information into your response.

We hope you continue to make use of Game8.
Rankings
Gaming News
Popular Games

Genshin Impact Walkthrough & Guides Wiki

Honkai: Star Rail Walkthrough & Guides Wiki

Umamusume: Pretty Derby Walkthrough & Guides Wiki

Pokemon Pokopia Walkthrough & Guides Wiki

Resident Evil Requiem (RE9) Walkthrough & Guides Wiki

Monster Hunter Wilds Walkthrough & Guides Wiki

Wuthering Waves Walkthrough & Guides Wiki

Arknights: Endfield Walkthrough & Guides Wiki

Pokemon FireRed and LeafGreen (FRLG) Walkthrough & Guides Wiki

Pokemon TCG Pocket (PTCGP) Strategies & Guides Wiki
Recommended Games

Diablo 4: Vessel of Hatred Walkthrough & Guides Wiki

Fire Emblem Heroes (FEH) Walkthrough & Guides Wiki

Yu-Gi-Oh! Master Duel Walkthrough & Guides Wiki

Super Smash Bros. Ultimate Walkthrough & Guides Wiki

Pokemon Brilliant Diamond and Shining Pearl (BDSP) Walkthrough & Guides Wiki

Elden Ring Shadow of the Erdtree Walkthrough & Guides Wiki

Monster Hunter World Walkthrough & Guides Wiki

The Legend of Zelda: Tears of the Kingdom Walkthrough & Guides Wiki

Persona 3 Reload Walkthrough & Guides Wiki

Cyberpunk 2077: Ultimate Edition Walkthrough & Guides Wiki
All rights reserved
Copyright© 2012-2024 HoYoverse — COGNOSPHERE. All Rights Reserved.
The copyrights of videos of games used in our content and other intellectual property rights belong to the provider of the game.
The contents we provide on this site were created personally by members of the Game8 editorial department.
We refuse the right to reuse or repost content taken without our permission such as data or images to other sites.
 Desert Mirages
 Night Murals
 Invisible Walls
 How to Increase Clearance
 Primal Obelisks
 Sacred Seal Locations
 Replicator Keystones
 Forged Primal Lights
 Primal Embers and Torches
 Primal Beam Transmissions
 Plinth of the Secret Rites
 Verity Cells
 Primal Sandglass
 Obscuring Cell
 Large Fan Blade
 The Mausoleum of King Deshret
 The Dune of Magma
 The Dune of Elusion
 The Dune of Carouses
 Abdju Road
 Opet Hall
 Duat Hall
 Sekhem Hall
 Place of Rebirth
 Place of Breath
 Place of Swallowing
 Great Hall of Truths
 Aaru's Shut
 Khemenu Temple
 Shrine of Depths


I hope you can use the ruin golem again after the quest is finish. Imagine if there was an archon quest where all the ruin golems work again and start attacking sumeru💀